As planned, I played my second game on the same 2' x 2' board as before, with only a few tweaks to the terrain to reflect as slightly less populous town. I had pondered on using the excellent Rebels & Patriots rules, but in the end plumped for Black Powder II as I was more au fait with them due to recent games, plus I wanted to see how they worked at this smaller scale engagement level.
The scenario was again a fairly simple meeting engagement, but with the added objective of seizing Herr Weissbrot and his beer, with Abdul the Abulbul Emir tussling with Count Ivan Skavinsky Skavar for possession of the beverages. Those of a certain age will remember this 'classic' Whitbread advert which was the inspiration for the scenario.
As previously, I would be using the Glory Hallelujah! supplement tweaks to the rules, as well as allowing each unit to roll for movement etc as if it had its own commander. I wasn't sure how it would work but have seen it used before on other Blogs, so worth giving it a shot!
Enough waffle from me and onto the game, with the captions telling the story.
 |
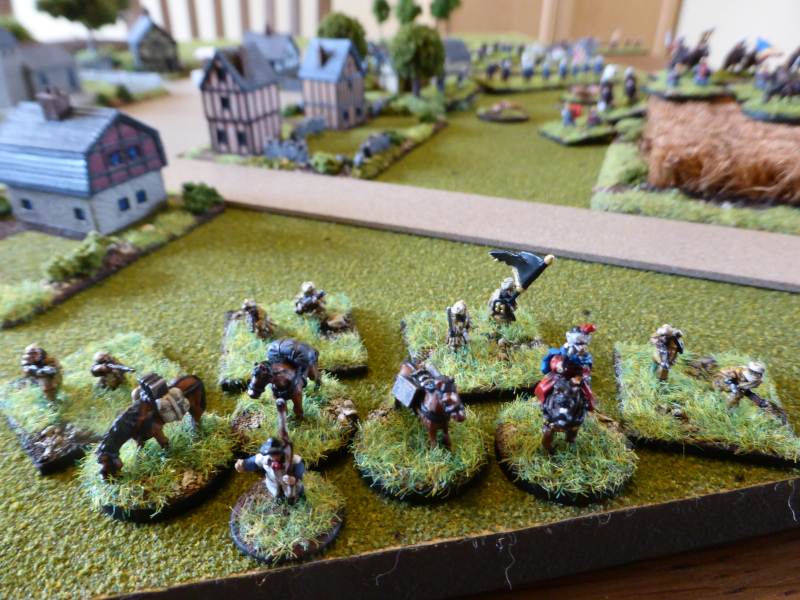
| An overview of the board, with the Count approaching from the South, the Emir from the North. |
 |
| Herr Weissbrot and his beverages outside the church, possibly trying to replace the communion wine with one of his fine ales? |
 |
| Mounted infantry on the Count's left. |
 |
| The main force in the centre led by the Count. |
 |
| An awful shot of the Light Infantry on the right (apologies). |
 |
| The Emir leads from the centre too. |
 |
| Mounted infantry on the Emir's right. |
 |
| The end of Turn 1. The Emir won the initiative and moved quickly into Heimsdorf, but one of his infantry units failed to move onto the board. For the Count his Light Infantry failed to move and an infantry unit blundered into the orchard. No shooting at all as both sides had moved too far. |
 |
| Both sides Mounted Infantry dismounted and faced each other across the duck pond. |
 |
| The Count's troops advance carefully towards Heimsdorf. |
 |
| The Emir emerges onto the town square as the Light Infantry, supported by artillery, take up positions overlooking the square. |
 |
| The end of Turn 2. The Emir's failed infantry unit moved onto the board to support the dismounted infantry by the duckpond. Elsewhere commands were failed and the shooting was rather poor. For the Count he continued to push his troops forward into Heimsdorf and the dismounted infantry caused disorder on their opposite numbers. |
 |
| The actions hots up across the duck pond, whose inhabitants seem blissfully unaware of the danger they are in. |
 |
| The Count's Line Infantry close on the church but fail to hit the Emir's gun to their fore. |
 |
| The Light Infantry skirmish with the Emir's troops. |
 |
| The end of Turn 3. The Emir's Line Infantry occupy the churchyard and suggest nicely to Herr Weissbrot that he had better come with them in the interests of his own safety. Who was he to refuse such an offer? The Count's dismounted infantry having taken a few hits and disorder amde a disorderly retreat to safety past the orchard. At least he was able to cause some hits and disorder on the Emir's troops who had just taken 'possession' of Herr Weissbrot and his goods. |
 |
| The Count's dismounted infantry make a retreat. |
 |
| Line Infantry have taken their place. |
 |
| The Emir's troops come under fire from two sides and are close to becoming shaken as well as being disordered. |
 |
| The end of Turn 4. Some good shooting by the Emir's troops is countered by some good morale saves, but at least some disorder is caused. In return the Counts' troops give as good as they got. Both sides took advantage of some disorderly retreats, leaving Herr Weissbrot on his lonesome as the battle rages around the town square. |
 |
| The dismounted infantry ready for action once again. |
 |
| Another of the Count's infantry units makes a disorderly retreat to preserve themselves for round two. |
 |
| The Emir's artillery is close to breaking and Herr Wiessbrot doesn't know where to turn. |
 |
| The end of Turn 5. The Emir's Light Infantry cross the town square and 'escort to safety' Herr Weissbrot and his baggage train. His dismounted infantry make a disorderly retreat too, again to preserve themselves for more action. Seeing his quarry escaping, the Count orders a desperate last Hurrah! by his troops, which sees the dismounted infantry mount up and charge into their opposite numbers. The Emir's artillery is driven off leaving the square empty of troops. |
 |
| The Count's troops control the square but the enemy is escaping with the baggage train of Herr Weissbrot. |
 |
| Neither side can gain an advantage at the duck pond. The ducks carry on as if nothing untoward is happening. |
 |
| As the mounted infantry charge in in what should be a one sided contest, the Emir's troops somehow survive and continue to fight toe to hoof with the enemy. |
 |
| The Emir and his 'prize' make off escorted by the Light Infantry. |
 |
| The end of Turn 6. The Emir escapes off the board with Herr Wiessbrot and his goods, but the Count desperately tries to salvage something from the battle by inflicting losses on the enemy. Yet again the dsimounted infantry against all the odds hang on to the bitter end, leaving the Emir to claim a victory, one that has luckily only cost him the loss of an artillery unit. |
 |
| The Count's troops rejoin the battle too late to have any impact. |
 |
| The stalemate continues at the duck pond. |
 |
| The Count's Light Infantry try to inlict casualties as the Emir's troops withdraw. |
 |
| How the Emir's dismounted infantry managed to hang on is beyond the ken of man! |
 |
| The victorious Emir and a rather worried Herr Weissbrot. |
End of Game
If only the Count's mounted infantry had been able to sweep away their opponents and make another charge, things might have turned out differently, but they didn't.
Post Game Thoughts
A fun game and quite a quick one, maybe lasting just over an hour or so. I'm glad I chose BPII for the game as it has given me much to mull over for this smaller scale action. What did I think of the game overall? As always a few thoughts:
- It was good to have Herr Wiessbrot as an objective for the game, rather than a control the town sort of one. Having to seize him and escort him off I thought would be a bit harder than it was, but the Emir got the upper hand early which allowed him to get first shot at nabbing the prize.
- I was fairly liberal with movement for the Line Infantry and upon reflection, I would go with the GH! option of allowing any Line Infantry to change into skirmish order during the game, which feels right for this sort of action.
- Both sides shooting was pretty ineffective and due to the terrain and small board, it was hard to bring numbers to bear to gain fire ascendancy as one can in a larger game. Also both sides wisely used the Disorderly Retreat option to preserve troops and to allow fresh ones to take their places.
- I still do not know how the Emir's Dismounted Infantry, who were Shaken and Disordered, survived being charged by Mounted Infantry. The former were hitting on 6's, the latter on 3's, so a combination of very good Morale Saves and then Break Test die rolls kept them in the game and to be honest allowed the Emir an easy exit off the board.
- It would be good to replay this sort of action again, contrasting R&P with BPII, but that's for another time and another scenario.
What Next?
Well time travelling again and the next outing will once again be set in Heimsdorf, but in 1744 and using the ever excellent Honours of War rules. The table will once again be tweaked to reflect a slightly smaller town (or should we call it a village?) and with a bit more of an open feel to give space for troosp to manouevre. I have plans for a game after that, but more on that anon.
My Japanese WWII order is on the post so if I'm lucky, I will receive that by the weekend, which I'm looking forward to. Then it will be a case of deciding do I start upon these or push on with painting my 19thC imagiNations troops? Knowing me it will be a mix of both plus some terrain building too. Lots to keep me out of trouble for sure.
So until next time stay safe and keep healthy!