Tuesday 30 November 2021

One Hour Wargames - Scenario 9: Double Delaying Action

After the recent fun game with Post of Honour, I thought it high time to get Honours of War back onto the table as well as working my way through the One Hour Wargames book scenarios. Next in line was Scenario 9 which was inspired by the Battle of Wavre in 1815. I was in two minds as to whether to play this or not to be honest, for a variety of reasons, which I'll address in my post game thoughts. However I decided to give it a go and used the random force generation system from Thomas' Wargaming 19thC Europe. The forces generated were as follows, using the Austrian National Characteristics, with all commanders Dependable:

Red
6 x Line Infantry
1 x Skirmishers
1 x Cavalry
2 x Artillery
Objective
Exit 50% of force off North table edge on the road by game end.

Blue
5 x Infantry
2 x Skirmishers
1 x Cavalry
2 x Artillery
Objective
Control the town and exit 4 units of the North table edge via the road, and/or prevent Red from exiting 50% of its force as per the above.

The Game
With everything set up the day before, it was just a case of finding a spare few hours to play the scenario, which is easier said than done these days! I'll let the photos do the talking and annotate them as required.

An overview of the table, looking North, with Red defending to the North of the river and Blue beginning to arrive from the Southern table edge.

The town garrisoned by an infantry brigade, with the Blue line and light infantry ready to enter the table.

The main Blue force, lead by light infantry, ready to move across the bridge.

Two Red infantry brigades deployed, with skirmishers in the woods to their right.

The end of Turn 1. The Blue troops move forward, with the light infantry crossing the bridge and deploying into line, as well as closing in on the town. The Red infantry and cavalry begin to withdraw as per the 'objective orders'.

Blue light infantry come under fire from the town.

The end of Turn 2. The Blue brigades on the left get a double move and move smartly across the bridge, but come under fire from the woods and the Red artillery. The Red infantry and cavalry continue to pull back and the brigade defending by the wood move their line slightly to form a better defensive position.

Red light infantry in the woods and artillery cause more hits on the Blue troops.

The Blue light infantry take more hits from the town which causes them to be less effective at firing (3 hits blue die).

The end of Turn 3. As the Blue troops advance on the left, the continuing weight of fire sees one infantry unit routed (red die top left) and the light infantry in front of the woods moving to a blue die. In front of the town, the light infantry are forced to retreat due to loss of morale. Again the Red infantry and cavalry continue to retreat to the North.

The light infantry are forced back and need to reform before returning to the fray. At least they have managed to cause the Red infantry in the town to move to a blue die.

The Blue troops struggle to make headway, not helped by the early loss of an infantry unit.

The end of Turn 4. The Blue infantry slowly moved across the bridge, but lost their light infantry to shooting from the woods. In front of the town the Blue infantry moved to blue die as well. For Red, the cavalry moved off the table with an infantry brigade close to doing so too.

The light infantry (red die) rout and another infantry unit take hits as they deploy into line.

The end of Turn 5. Across the board the Blue troops moved as best they could, whilst the Red infantry moved closer to the Northern board edge. Both sides have very little shooting and what there was was not too effective.

The Blue infantry in front of the town begin to dress their lines to bring more firepower to bear.

The end of Turn 6. The Red infantry brigade by the woods began to pull back as per their 'objective orders', whilst the artillery and light infantry covered their move. The Blue troops moved up towards the town and across the bridge as best they could. However more very effective fire from the woods say the loss of another line infantry unit for Blue.

More deadly fire from the woods sees the loss of an infantry unit.

The end of Turn 7. The Red infantry continued to pull back, but their artillery unit by the woods was forced to retreat having taken 4 hits and needed to reform. The Blue troops tried t move into position to pursue the Red infantry. Once again, the shooting was generally ineffective.

The Blue troops are making little headway against the town defenders.

The town defenders have moved one infantry unit to cover the retreat and threat from the Blue infantry across the river.

The Blue infantry, cavalry and artillery struggle to deploy.

The end of Turn 8. As Red continue to withdraw, the light infantry in the woods are caught by Blue artillery fire and are forced back to reform. The Blue troops get a double move and managed to charge into the reforming Red artillery , routing them in the process.

The Red light infantry about to retreat to reform.

The reforming Red artillery caught by the Blue infantry and routed.

The troops in the town hold on and pose a threat to the Blue right flank across the river.

The end of Turn 9. The Red troops continued to pull back and maintain a defensive line as best they could. However the Blue troops kept up pressure across the board, with a Red infantry unit being forced retreat and reform whilst in the town an infantry unit routed owing to some accurate Blue shooting.

The Red troops lose an infantry unit in the town.

The Red troops have an infantry unit near the windmill that will be forced to retreat and reform.

The end of Turn 10. The Blue troops maintain pressure and move their light infantry into the town, but on their left flank by the hill, the reformed Red light infantry have appeared and are a significant threat.

The Blue light infantry move into the town and the Red infantry withdraw to form a defensive position across the road out of town.

The Blue left wing suddenly under threat.

The end of Turn 11. The Red troops continue to contest the town, but manage to move their artillery and another infantry unit off the table. The remaining Red infantry keep the Blue troops in position, but one is forced back to reform, taking it closer to being able to exit the table.

The shooting in the town fails to do any damage.

The Blue infantry have to about face to meet the threat from the Red light infantry.

The reforming Red infantry.


End of the Game
At this point the Red force had exited over 50% of their troops and still contested the town, whilst the Blue force realistically couldn't prevent any more Red troops from exiting the table. The Red troops in the town surrendered and were granted the Honours of War.

The Red force had only suffered one infantry unit routed and one surrendered, whilst the Blue force had lost two infantry and one light infantry units routed. Therefore I decided that the Red force had managed a win as they had achieved their objectives and take far fewer losses than Blue.

Post Game Thoughts
First and foremost it was great to be playing 'Honours of War' again and everything came back to me and flowed well, with little recourse to the rulebook, which was great. Also it was nice to get the mdf figures out again, but more on this later. So as mentioned at the start, I had my reservations about this scenario, so without further ado some post game thoughts in no particular order:

  • Whilst the scenario might work well for the OHW rules as written, when translating the scenario for other rulesets, problems occur IMHO. Given the deployment options to Red and the units they have to exit off the table, they can simply deploy most of their forces by the hill and behind the woods, which means that for most of the game the Blue troops will be trying to get close enough to them to engage in combat. A token force in the town, backed by artillery, could hold on long enough to delay Blue and/or tie down a significant portion of his force. So in essence to my mind it is virtually impossible for Blue to achieve their objectives and win the game.
  • With reference to the above, I chose to deploy Red as if they were defending the crossings and then suddenly received orders to withdraw, to make more of a game of it. It helped but it still didn't feel like a fun scenario to play. In truth i didn't enjoy it, which is unusual.
  • Crossing rivers by fords or bridges in the face of an opposing force is always tricky, even with a numerical advantage. With equal forces it is much, much harder. I reckon the attacker needs about a 2:1 advantage to make a game of it.
  • I could have deployed my artillery better, either to fire across the river to support the crossing or by the town to shoot the troops onto the objective. Using horse artillery in say the Napoleonic or ACW era might make a difference, but in the SYW with its general lack of mobility, getting a good position early on would have helped.
  • The Red light infantry in the woods really helped the Red cause, as they KO'd tow units of Blue infantry, which severely hampered their ability to take the fight to the Red troops.
  • Both sides cavalry had little to do, other than for Red to ride off into the sunset or for Blue to struggle to find room to deploy. Again maybe in a Napoleonic game or ACW using them as mounted infantry might have made a difference.
  • I made the cover in the town 'light' as otherwise it would have been a nigh on impossible task for the Blue troops to take it, given the assets at their disposal.
  • I went for a distinctly 'old school' look to the game, due to a lack of time for something more 'visually pleasing' but also because I like the simple, clean look of 'old school' games.
  • Making the Attackers Prussian and the possible advantages of command and movement that this confers on them might have helped, but I wanted to keep things simple for a first game back with HoW. However I think it a good option for future games to go with this and the Austrians as Defenders.
  • As with the above, I avoided rolling for commanders this game as I didn't want any 'Dithering' results to unduly affect the game.

So there we have it. Certainly not the best game of late but it certainly helped clarify a few things in my mind as to what makes for a good game, whether balanced or not. I think this scenario could work well with some tweaks as outlined above, but maybe something to revisit sometime in the future.

Moving on I have ordered some more reinforcements from Walt at Commission Figurines, so that I can field Light and Heavy Cavalry, as well as some Grenadiers who will count as Superior Infantry. Originally these figures were meant to be a stop gap to allow me to play games until such time as I'd be able to paint up 'proper' armies for a conflict. However I have grown to love these, hence the extras just ordered.

A recent reply on Jon Freitag's excellent Blog about 'Generational Capacity' has got me to a thinking since I read it. It has given me plenty to ponder over and may even generate its own post in the future. In the meantime I'm not sure what will grace the table next, but until then, given the recent news re: the Omicron variant, stay safe and keep healthy!

Friday 26 November 2021

A Little Light Reading

I've always loved reading books for as long as I can remember, so it comes as no surprise to my family that for presents, I invariably turn to books as my first choice. I'm also at that age when really I have everything that I need and my lead mountain is already something that could appear on Ordnance Survey maps! 

So I thought I share some of the latest books that have been added to my to read pile, most are presents, but some came via an amazon voucher for some research work I did or simply because I wanted them and they were superb value.


Earlier in the year I bought 'Beneath the Lily Banner, the War of the Three Kings' by Barry Hilton for use with my League of Augsburg figures, that are sadly still in their bags. Not knowing much about the period, especially the war in Ireland, this book stood out as the perfect introduction to the conflict. So far it has been a fascinating read and I've been struck by how small many of the engagements were, with 20 infantry here, 30 dragoons there; perfect for some 'The Pikemen's Lament' sized games.

Apart from the obligatory history at school, the Russian Revolution is something that I only the basics of, augmented by the excellent Osprey books. This is a real weighty tome and will take quite some time to read, but he's a great writer and I'm sure I'll enjoy it and certainly be more knowledgeable by the end.

Over the past few years, I've taken a real interest in the Sicily campaign as it has so much to offer the wargamer. This book has been on my list for sometime and I've enjoyed the author's other works. Not sure when this will get read, but it must be near the top to be honest.

Having read some excellent ACW books by Stephen W Sears and 'Battle Cry of Freedom' by McPherson last year, I'm keen to broaden my knowledge of this conflict that I'm growing to love. So this book by Paddy Griffith has become a must have for my library. I'm really looking forward to what he reveals about the conflict.

Max Hastings is one of my favourite authors. I know not all people like him, saying he doesn't bring original research to the table, but by God he tells a good story and keeps you firmly interested from the first page. I saw this book reviewed on the Balkan Gamers Blog and again, the whole 'Secret War' is barely known by myself other than the oft spoken of Enigma machine, Bletchley Park etc. I'm certainly going to learn an awful lot I'm sure.

The War of the Roses. Well apart from the bare basics, I know very, very little. I'm hoping this will help me get to grips with all the toing and froing that went on. I'm also hoping it will give me some ideas for my ImagiNations wargames armies for the medieval period.

At only £5, this was too good to pass over on Amazon. A cursory glance has piqued my interest and Graham always has something of interest to offer in his rules. Whilst not solo friendly, I'm sure I can make them work. Time to dig out my wooden blocks and gridded board to give them a try.

Some of the prices for certain Osprey books are a tad crazy, but this came via the amazon voucher and wasn't too badly priced. The last book to complete my Russian Civil war collection, for now at least. If 'Trebian' publishes his work in progress RCW rules, then I'm sure this will get referred to a lot. In the meantime, a quick flick through will have to suffice.

Rather like Sicily 1943, the Balkans 1940 - '41 has become an area of interest to me over the years. There aren't that many English language sources for the wargamer or general historian, so this second book was eagerly snapped up as a 'surprise' birthday present.

Last but by no means least is this great Operation Sealion book, put together and published by John Curry, who lives not too far from me. I would dare to say a 'must have' for wargamers that fancy trying out this eternally fascinating (for the British it seems) 'what if?' This is a book that will be referred to many times in the future I'm sure and the rules contained therein, could easily be tweaked for other seaborne invasions, with a bit of thought. Sicily 1943 anyone?

I hope some of the books might have piqued your interest and as is obvious, they all did mine. Now as with so many things, finding time to read them is the issue. At least at this time of year, with little to do in the garden and variable weather, I try to sit down for half an hour or so each morning to read a chapter or two. Not a bad way to start the day.

On other matters, I've painted up some more cavalry for my mdf 'Wooden Top Wars' armies and have a scenario already prepped and ready to go over the weekend. I plan to try the same scenario with a variety of rulesets, subject to being allowed to leave the game set up on the dining table. Oh the travails of being a wargamer!

So until next time, stay safe and keep healthy.


Monday 22 November 2021

The Battle of Chotusitz 1742

A month or so ago Keith mooted the idea of putting on one of his 'Big Games' at his local village hall. Fortunately he had enough interest from his gaming chums and so yesterday we all descended upon Northleach for the game. Things were more or less ready when we arrived due to Keith's sterling efforts and so after the usual chatting and catching up, we were ready to go.

Details of the historical battle can be found on the brilliant Obscure Battles Blog and Keith had given each side some scenario specific information. Paul and I took on the part of the Austrian commanders with Adam and Jon their Prussian opponents. Keith would be the umpire and help out with any rules queries, given that we were using his 'Post of Honour' rules.

Looking at the deployment of our troops and the fact that Frederick the Great would be arriving later on in the battle, we decided upon demonstrating against Chotusitz, with our main effort going into pushing back the Prussian right flank and dominating the centre ground. Once this was achieved we would then attempt to take Chotusitz from two sides. Well that was our plan, but how did it work out? A brief summation will have to suffice as I didn't take any notes, but did grab some photos during the game which should help aid the following narrative. 

Paul took command of the left flank, myself the right and we sort of shared the centre. The Austrian cavalry moved aggressively forward on the left and in a few Turns had driven off the Prussian cavalry leaving them in near total control. In the centre some Austrian Hussars overran a deployed cannon, leaving the Austrian infantry with an advantage in firepower, which they made the most of. On the right both sides cavalry were hesitant, not wanting to commit themselves too early. The Prussian cavalry on their left flank moved through the town of Chotusitz towards their centre, given that the Austrian cavalry were in the process of taking control. As this was happening, the troops in and around Chotusitz were exchanging fire, with the Austrians certainly getting the better of it. Then suddenly the Prussian troops in Chotusitz broke to a man due to a wave of 'failed morale' as most were already close to breaking.

Suddenly the game took on a whole new complexion, as this loss of troops forced the Prussians to begin pulling back until they could make contact with Frederick the Great who had only just appeared on the table. However the Austrian cavalry on the left flank forced the Prussian columns to form line so as not to be caught out by a sudden charge. This slowed the Prussian troops arrival to a crawl, allowing the Austrians to take control of Chotusitz unopposed as well as the centre of the table. With no realistic prospect of the Prussians being able to meet up and with the Austrians moving into position astride a low range of hills in two lines, Frederick wisely decided to call it a day and move back to where he had come from.

Some photos of the action with captions as appropriate:

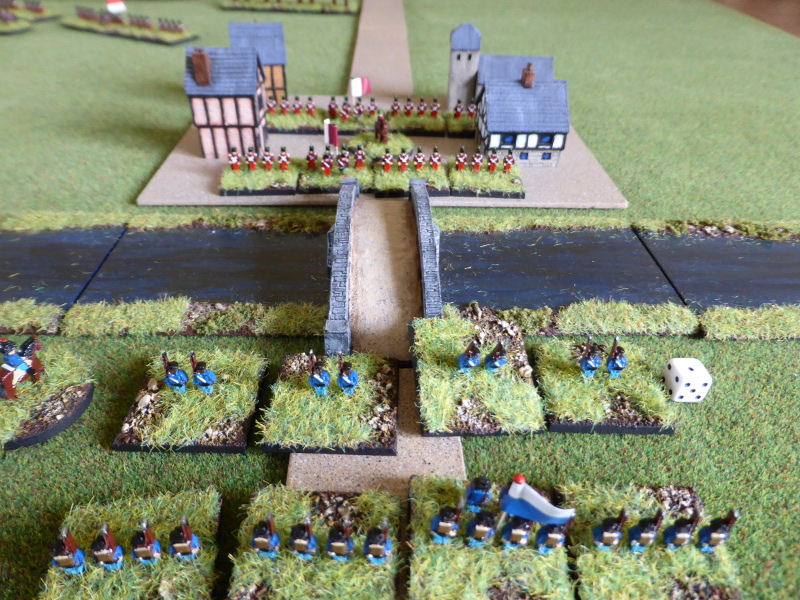
The Austrian right flank in front of Chotusitz. Prinz Leopold and the Prussians have been surprised as the whole Austrian army hove's into view.

A view from the Austrian left flank, where they have a slight advantage in cavalry.

A view from the Prussian right flank, with their cavalry just in front of a marsh, which counted as impassable terrain. You really can see how few troops there are facing the might of Austria.

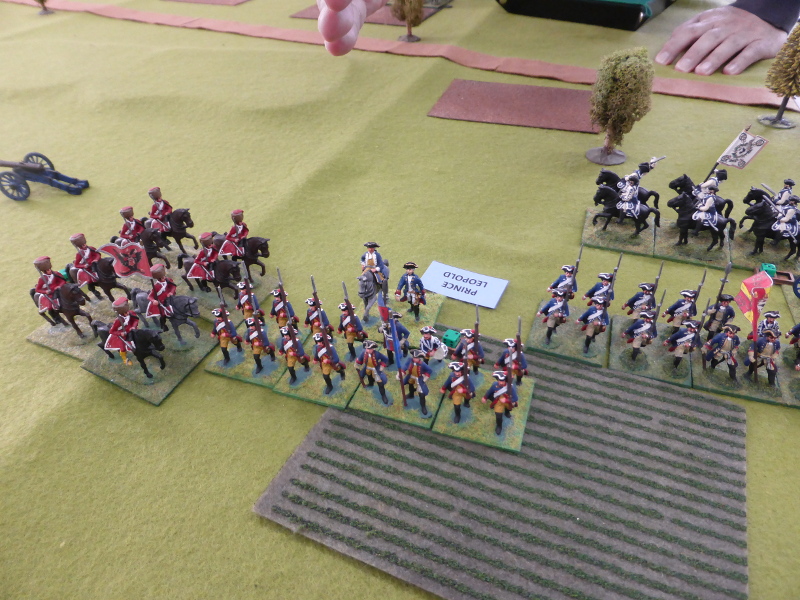
A close up of the Prussian cavalry. It was good to see Keith's figures out again en masse.

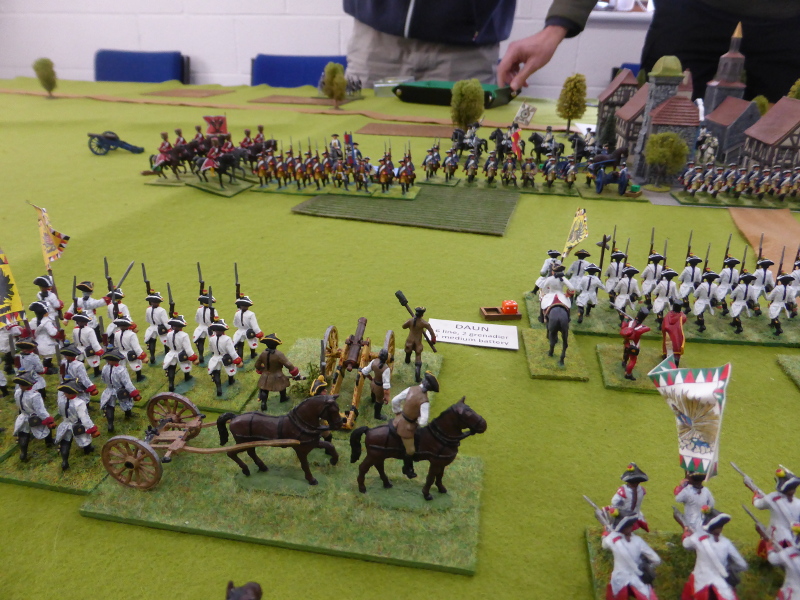
The Austrian artillery and infantry ready to attack.

The Prussians having suddenly been caught out have deployed in front of Chotusitz. You can see the Prussian cavalry reserves at the top right, that would move through the town towards the centre. The Prussian Hussars top left failed to move much all game despite Adam's best efforts.

Adam ponders the Prussian's options as the cavalry battle on the Austrian left is in full swing. The Austrian infantry are moving towards the centre too as the Prussian cavalry move through Chotusitz.

Keith is checking some move distances as Jon looks on pensively as the Prussians are under pressure.

The Austrian cavalry has been pushed back but the second line holds, but elsewhere they are getting the better of the Prussian cavalry.

Another close up of Keith's lovely figures and the useful markers each side had. 

A view from the Prussian right flank. You can see how open their centre is and the Austrians are doing their level best to take it.

The Austrian right begins to move forward.

The Austrian Hussars, having just overran the Prussian gun (top left), charge into the Prussian infantry, who do manage to change facing to receive the charge, driving off the Hussars in the process.

The Austrian 'target rich environment' as Keith succinctly put it!

Suddenly the situation changes as the Prussians flee from Chotusitz and the Prussian cavalry on the Austrian left wing has been driven off. Frederick the Great arrives not a moment too soon (top right table edge).

The Austrians can't believe their eyes!

Jon ponders the dire Prussian position, as the Austrian cavalry by the marsh and road force the arriving Prussian troops into line.

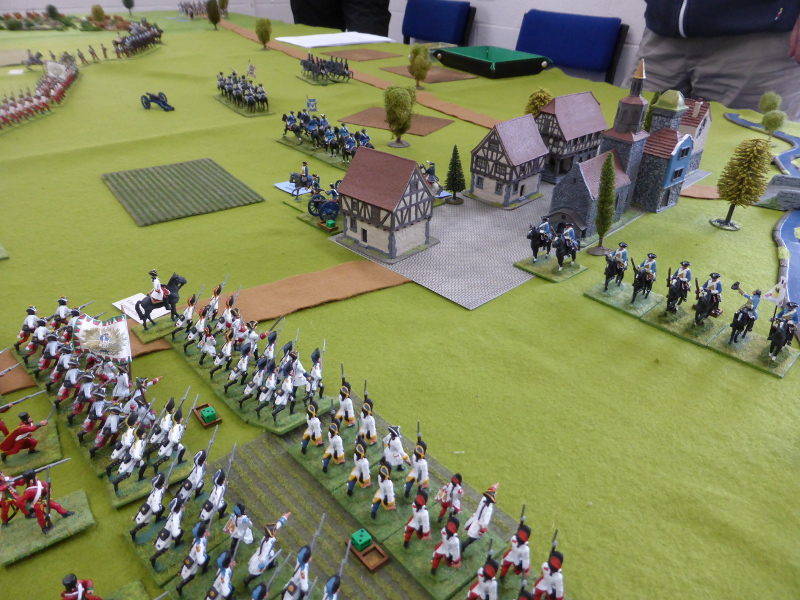
As the Prussians pull back from Chotusitz, the Austrians move in to take control and the troops move towards the centre to face the new threat from frederick the Great.

The Grenadiers lead the advance.

The Austrians move onto the low hills and begin to form two lines. The Austrian artillery follows.

Prinz Leopold is captured by the Austrian Pandours!

The Prussian's arrive but are unable to alter the course of the battle.

A view from the Prussian right. With no space to deploy and Austrian cavalry ready to pounce, they have little option but to turn around and go back home.

Frederick the 'Might Have Been Great' captured by Austrian cavalry!


Post Game Thoughts
First and foremost we had such a great game and it was good to be playing against and with friends again. It's only when you get back to some FtF games that you realise how much you've missed it and also how much part of the whole wargaming experience it is. Thanks to Keith for sorting everything out and naturally to Adam, Paul and Jon for being such great chaps to play with. So as always, some thoughts from our post game wash-up as we packed things away:

  • I'd forgotten how visually superb a large battle is. The table was 10' x 6' and so gave ample space with room on the flanks for both sides to be deployed. This is not something that most UK gamers can do in their own homes, so it's good that Keith has a very good and modern village hall a stone's throw away with rooms that can be rented for a very reasonable rate. 
  • I must admit that I do love the SYW and Linear Warfare in general. There's something about two lines of infantry with cavalry on the flanks that just appeals to me. Add in Keith's lovely figures and I was pretty much in gaming seventh heaven!
  • The Dice Gods were certainly on the Austrian side on our game, which is not normally the case for me, so it made a nice and rather unusual change. When I say on our side, pretty much every set of shooting I was causing 2-3 hits and receiving 1-2 in return. This happened all game! Of course weighted dice had a small part to play in this...😉.
  • Paul did a sterling job with the Austrian cavalry that pretty much single handedly stopped Frederick and the Prussians from being able to enter the table quickly enough to alter the outcome of the game. Poor Adam tried his best to halt the Austrian juggernaut but 'twas not to be.
  • Keith came up with some nice scenario details, such as Prinz Leopold having to retreat and try and make contact with Frederick once he had lost a certain number of points, whether that be troops or objectives. This was a nice touch as as he said, otherwise there's not much incentive for the Austrians to attack. The fact that the retreat happened out of the blue really hampered the Prussian cause.
  • We agreed that Prinz Leopold would probably have been wiser to have moved some of his infantry back into Chotusitz and conducted a defence in depth as it were. Of course hindsight is a wonderful thing and normally, the Prussians deployed as they were would have given as good as they got and held up the Austrians for sometime and inflicted casualties too.
  • Frederick's narrow deployment area would normally have been OK, but with the Austrian cavalry having been so dominant, they could not debouche from the road, being hemmed in by the marsh and the board edge. another option might be to allow some troops to come on via the long table edge to replicate the fact that Frederick knew battle had been joined and so had started to deploy 'off table'.
  • We all agreed it was a great scenario and one that would bear repeated playing, given how one sided it suddenly turned out to be. Maybe something for another game?
  • Having Keith as the umpire and 'living rulebook' allowed all of us to concentrate on the game, our tactics and objectives. The QRS was more than adequate for 90% of the time and having played 'Shadow of the Eagles' the mechanics were very familiar.
  • With the 'capture' of Freddy and Leo, we pondered on how differently history might have turned out and how as wargamers we would have been denied the SYW, The Austro-Prussian and the Franco-Prussian Wars!
So there we have it. A fun game played in the right spirit with plenty of friendly banter going to and fro all day, what more could you ask for, other than a Prussian win if you were Adam and Jon!

This game has given me the incentive to get some small SYW games onto the table, either with my mdf figures or wooden blocks. Not perfect but they fill a gap until such time that I'm able to get two sides painted. They're sitting in boxes in the attic, so the onus is on me to pull my fingers out! So until next time stay safe and keep healthy.