Chris Pringle, author of BBB's, recommended we take a look at Kurudere, an early battle in the Crimea, as we had planned to dip our toes into this conflict as mentioned last week. It certainly looked interesting, so Dave did his usual excellent job on the bathtubbing front, to give us a manageable mid-week evening game.
In the rulebook the scenario has an option to go for a day attack, rather than the historical night march, which led to the Turks being somewhat divided, allowing the Russians to defeat them in detail. As I chose to play the Turks, I thought that this would give a more challenging game and possibly give me a fighting chance. Afterall, to quote from the book; "The Turkish players get to enjoy the challenge of commanding a truy bad army; passive, fragile and leaderless."
So my plan was to mask any attacks from the hills on my right flank, whilst concentrating on pushing through in the centre and on the left. I was hoping that my 2:1 superiority in infantry would offset their pretty poor quality, simply allowing me to overwhelm the Russians with numbers. As Stalin said later; "Quantity has its own quality."
This was going to be a battle that required some careful planning, so once again I didn't make any notes. So without further ado...
 |
| An overview of the battlefield, with hills to the North. The Turks are on the right hand table edge with the Russians deployed in and around the various objectives. |
 |
| As there were quite a few troops to fit onto the table and to help speed them along, most Turkish troops were deployed in column of march. Cavalry was placed upon the flanks, with the artillery spread across the front to provide as much support as possible. |
 |
| The view from the Russian positions. Note that the felt area denotes a lower part of the battlefield, with attendent cover advantages etc. |
 |
| Amazingly the Turks got off to a flier, with pretty much all of their troops advancing, which surprised both of us. |
 |
| As the infantry moved forward, the artillery deployed to help provide fire support and shoot them onto their objectives. |
 |
| Some of the Turkish cavalry advanced forward to try and threaten the Russian flank and the vulnerable field hospital on their table edge. |
 |
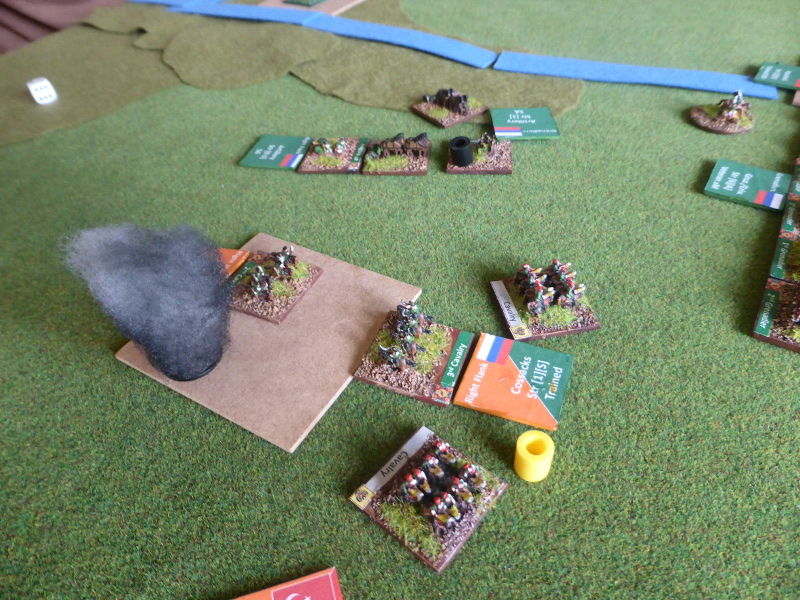
| The Russian Cossacks moved forward to contain the threat and initiated close assault. |
 |
| In the ensuing combat, the Turks lost a unit of cavalry. |
 |
| This allowed the Russians to exploit and join the other combat. |
 |
| This second combat saw the Turkish cavalry pushed back 3". |
 |
| Towards the end of Turn 1, the Russians have reacted to the Turkish advance. However a large part of their right flank failed to move, giving the Turks a chance to possibly take advantage of this the next Turn. On the left, the Russians had moved down from the hill to try and halt the Turkish right flank. |
 |
| The Turkish line, with some troops still lagging behind. |
 |
| Things develop nicely in Turn 2 for the Turks, with their cavalry on the left flank advancing forward to try and catch the Russian cavalry and guns by surprise. The centre advanced and the right flank moved to counter the Russian threat. |
 |
| The Turkish cavalry advance. |
 |
| The Turkish infantry advance as the guns continue to fire in support. |
 |
| The Russian Cossacks look vulnerable as the Turkish infantry moves to their flank, supported by artillery. |
 |
| An overview at the end of the Turkish Turn 2. |
 |
| The Turkish infantry advance in depth due to lack of space to do so in line. |
 |
| The Turks right flank moves to attack the Cossacks. |
 |
| The Cossacks are destroyed. |
 |
| The way is open to the hill should the Turks wish to advance towards it. |
 |
| More Turkish cavalry take the fight to the Russians. |
 |
| The Russian cavalry are quickly desposed of. |
 |
| The Turkish cavalry decide to exploit and attack the Russian infantry. |
 |
| Unsurprisingly they are repulsed and forced back. |
 |
| The Turkish cavalry on the left flank fare less well as they are attacked from the front and rear. |
 |
| Leading to them being destroyed. |
 |
| The Turks continue their relentless advance. |
 |
| The Turkish infantry try and line up to assault towards the objectives, again supported by their artillery. |
 |
| The view from the Russian right flank. |
 |
| The Russian infantry move into line and start to advance down off the hill. |
 |
| As they do so, the cavalry once again clashes in front of them. |
 |
| The Turkish cavalry are triumphant. |
 |
| Once again they choose to exploit, but this time frontally charging the Russians. |
 |
| The rash charge sees them destroyed. |
 |
| As the Turks form up for the assault, the Russian cavalry moves to threaten the Turkish left flank. |
 |
| The infantry fire upon each other, with the Turkish infantry unable to move up into support their front line. |
 |
| The best Turkish troops ready for the assault. |
 |
| The battle is getting slightly fragmented. |
 |
| The Turkish infantry take fire as they move in, with their artillery unable to support, as the rear unit has been forced back by the Russian cavalry charge in their flank. |
 |
| The Turkish infantry in depth face the Russian assault. |
 |
| The supporting infantry on the flank are hit by Russian artillery. |
 |
| When the smoke clears there is nothing left of them. |
 |
| The Russians are disrupted as they come in. |
 |
| In the assault, the Turks win, leading to the loss of a Russian infantry base, which causes them to become spent. |
 |
| The Russians are forced back 9", but the Turks are low on ammo. |
 |
| As the Turkish assaults go in, they are forced back in various ways. However their right wing is secure, which might allow them to try and turn the flank of the Russian centre. |
 |
| The Turks face cavalry and artillery to their flanks, which is not good. |
 |
| The Turkish left flank in a good position. |
 |
| The end of Turn 6 sees the Turks pushed back with losses due to combined fire and some poor command rolls. |
 |
| The Turkish infantry out flanked and out gunned. |
 |
| The Turkish right flank try to move to support the centre. |
 |
| The Turkish positions at the end of turn 6. |
End of the Game
At this point we called time, as it was obvious that the Turks would struggle to gain the 3 objectives with the 2 Turns left in the game. Both sides were in a bit of a state, with most units being battered and bruised. Looking at things we decided that it was a marginal Turkish victory, given that they had given the Russians a tough old fight, the quality of troops to hand and the fact that they had no leader. So some Turkish Delight was the order of the day...
Post Game Thoughts
Well that was one hell of a game and the closest one we've had for quite some time. Initially looking at the open terrain, we didn't think it would be much of a challenge. Oh how wrong we were! It was intense, with the advantage going to the Turks, then back to the Russians only to end up almost even. So as always, some post game thoughts;
- Essentially the game felt very Napoleonic, even though it was the Crimea. i've never gamed this conflict but am now keen to explore it further. Luckily there are some more BBB scenarios availalble.
- Having plenty of cavalry and room to deploy them was great fun for both of us. I certainly could have been a bit more wise with the use of mine, but they did slow down the Russians early on, which had been part of my plan.
- Considering Chris' quote at the start, the Turks did themselves proud for most of the game. Having a numerical superiority helped giving them some staying power and the ability to mass for the attack. They did have some truly awful troops, but using them wisely in combination with their better ones worked.
- I had a plan before the game and stuck to it, which certainly helped me, as i knew what I wanted to do. I don't always remember to have a think about things in advance, but it certainly helps when you do so.
- I remembered to make sure my artillery were to the fore to provide support to the advance. Whatever the period, this in one of those golden rules to remember. It was only when they were masked due to retreating troops did their effectiveness diminish. I must point out that over I think three turns they failed to finish off one single unit of Russian Cossacks. I became somewhat obssessed in seeing their demise!
- Dave's Russians in one Turn had some truly terrible shooting die, rolling 3's or 4's when anything higher would have casued real problems for my Turks. However the following Turn he rectified this and his flanking fire put pay to any chance of Turkish victory.
- This was a great scenario and the option of a day deployment certainly made for a good game. So much so that we are going to use this for our game at the Cotswold Wargaming Day on 1st September. I'm going to make a full size bespoke board, so we get that extra room for manouevre as well as a full compliment of units. The plan is to run the hostorical scenario in the morning and the optional one in the afternoon. More updates will follow.
We now have a bit of a lull on the gaming front, with the holiday season in full swing. I hope to get some solo games in, once the heat of the past few days has dissipated. Not sure what yet but I'm not short of options. So until next time...