The British, having broken through the Italian defences, are pushing on quickly towards Porrazitto, which lies not far from the objective of Catania. The Italians have rushed some troops into the area, this time supported by advanced elements of the German 1st Fallschimjager heavy weapons battalion. They have not had time to prepare any defences nor have any artillery support available.
OOB
Essentially we have the same British force as the last game, namely an infantry Battalion with some armoured support and off table artillery and air support.
For the Axis, we have a reduced strength Italian Infantry Battalion, but importantly supported by the Fallschirmjager and their mortars and machine guns.
Scenario Details
This is pretty much a straight forward Scenario 6: Exploitation scenario. The only thing to note is that the terrain to the South East of the bottom road and stream is classed as Difficult Terrain, thus incurring a -1CV to command rolls. The rocky outcrop is impassable to all vehicles and AFVs.
Deployment
The Axis troops focussed on holding the two small BUAs, with troops also on the right flank to try and prevent flank attacks. Importantly the Fallschirmjager posted an MG unit on the rocky outcrop to give commanding views of most of the table, which allowed them to sport for the mortar units.
Given the tricky terrain on their right flank, the British deployed mainy in the centre and on their left flank.
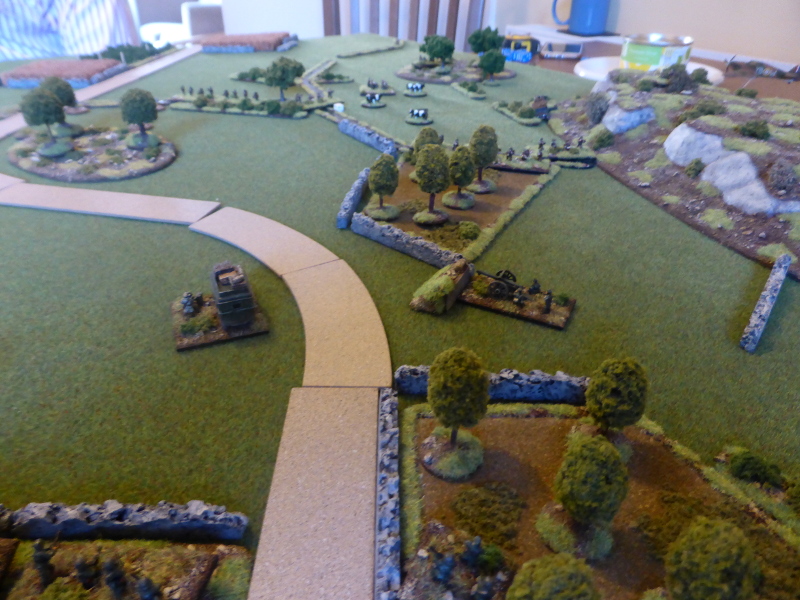
 |
| An overview of the table. |
 |
| The Falschirmjager MG unit with its commanding views. |
 |
| The Axis centre and right flank. |
 |
| The Axis left flank. |
Turn 1
The British got off to a bad start, with a Blunder on their first command roll, which resulted in the loss of an MG unit even before they'd arrived on the table! The armour then failed to show up, but at least the right flank arrived and advanced as far as they could. The FAO, FAC and Recce all arrived at the end of the Turn.
In response, the Axis right flank pushed forward to counter the threat of the British FAO or FAC advancing too far ahead and exposing themselves to Close Assault. The Axis left flank then came into play (CV9) and succeeded in calling down 4 turns of mortar fire on the exposed British infantry, resulting in the loss of 2 Infantry units, 1 MG unit and 3 other units suppressed! Well that's what happens when you have good troops ably supported. I did feel somewhat embarrassed as Dave's first Turn was about as bad as it can get.
 |
| The end of Turn 1. |
 |
| The results of the Axis mortar fire; not pretty. |
 |
| The Axis right flank pushes forward. |
 |
| The Fallschirmjager MG unit still has a great view of the enemy. |
Turn 2
The British FAC managed to call in his Air Support, with the Hurricane really taking it to 'Jerry', with 4 unit suppressed as a result of his strafing. The left flank and armour both arrived, with a Sherman being suppressed by Op Fire.
Once again the mortars caused a loss of another infantry unit, with others still being suppressed. The Axis ATGs duelled with the Shermans, with them taking a hit apiece. The Axis appeared to be having the better of the opening Turns, in no small part due to the Fallschirmjager mortars.
 |
| The Hurricane's strafing run. |
 |
| The end of Turn 2. |
 |
| The British armour taking cover behind a wall as they exchange fire with the ATGs. |
 |
| The British right flank once again receives unwelcome attention from the Boche. |
Turn 3
The FAC once again manages to call in his Air support, only to see it driven off by AA fire. The FAO does better, with his artillery suppressing 4 units. It could have been worse, but the saves from the stone buildings in the BUA really helped the Axis troops. The British left flank played a blinder and made 3 moves, including a Double 1. This could potentially Turn the game in their favour. Unfortunately the Shermans failed their command roll and the CO couldn't get through either.
The Axis had a bad Turn, as the Fallschirmjager failed their command roll. the right flank then Blundered, leaving the CI at -2CV for this Turn and the next. Unsurpisingly he was unable to command the mortars. Could this be the turning point?
 |
| The end of Turn 3. |
 |
| The FAO's artillery failed to cause any suppression. |
 |
| The British left flank has pushed up and is threatening the Axis troops in the orchard. |
Turn 4
A quiet Turn for the British, as their right flank manages to advance one move, being careful of the waiting Axis troops in and around the BUA. The FAC called in the Hurricane, but this deviated so much that it strafed open country. The FAO had better luck, with the artillery strike destroying an MG unit. The left flank failed its command roll, but the CO managed to get through and they close assaulted the Axis troops in the orchard, seeing them off after two turns of Close Assault.
The Axis right flank openend up on the Sherman, which managed to make its save, otherwise it was a gonner. In response, the British armour destroyed the offending ATG. The Fallcshirmjager HQ made his command roll, which was a Double 1. this lead to the mortars once again raining down death and destruction, with 4 Infantry units gone and the 6pdr ATG suppressed. The tide had once again turned in favour of the Axis.
The Axis right flank openend up on the Sherman, which managed to make its save, otherwise it was a gonner. In response, the British armour destroyed the offending ATG. The Fallcshirmjager HQ made his command roll, which was a Double 1. this lead to the mortars once again raining down death and destruction, with 4 Infantry units gone and the 6pdr ATG suppressed. The tide had once again turned in favour of the Axis.
 |
| The end of Turn 4. |
 |
| A knocked out Sherman can be seen smoking in the distance. |
 |
| The British armour stuck in front of Porrazitto and lacking infantry support. |
 |
| The Axis troops still firmly in control of Porrazitto. |
Turn 5
With the right flank gone, it was left to the British left flank to prosecute the attack, which was becoming increasingly difficult to achieve. As they advanced, the armour attempted to retreat, only to see another Sherman knocked out. The FAC failed to get through but the FAO and his artillery managed to destroy the Axis Pak 40. However, the British had reached their breakpoint and with no realistic opportunity of achieving their goal, we decided to call it a day.
 |
| The end of Turn 5 and the game. |
 |
| The Axis troops firmly in command of the battlefield. |
 |
| The 'Tommy Cookers' in the distance. |
 |
| The British left flank unable to make any headway without incurring significant losses. |
Post Game Thoughts.
Well the Fallschirmjager certainly made a huge difference in this game. The British also got off to a poor start and from Turn 1 were never reaaly able to recover, although their left flank in Turn 3 caused me some jitters! So as always, some thoughts on the game, the rules etc;
- The three German mortars and one Infantry Gun certainly won the game for the Axis, no shadow of a doubt. In fact the only other units that fired were the ATGs. They are devastating and its painful to be on the receiving end, as I know from previous games. But then historically they were very, very effective. Having a unit on the rocky outcrop allowed me to call down fire almost at will on the exposed British. In BKCIV, even troops next to Linear Terrain can now be seen, which made it even harder for the British. I think going forward I may revert to BKCII and units cannot be seen from High Ground when in contact with Linear Terrain, unless they move or shoot.
- Having a good CV of 9 again really helped, as I could do so much more compared to previous games with only 8's.
- The Terrain certainly favoured the Defenders this game, with the BUA buildings being made of stone, meant that the units inside could only be hit on 6's and had a 4+ Save. This did make a big difference, especially when under artillery fire as normally I would have had lots of units suppressed or even gone.
- Hindsight is a wonderful thing but the use of smoke could have really helped the British. Simply put we forgot this, but hopefully we will remember for future games.
- Post game we chatted about how effective the German mortars were compared to the British artillery. The Germans rolled 9 dice and didn't deviate whereas the British only rolled 6, but had to deviate, which is not much but can make a difference. Sometimes the template can favour artillery over mortars, but experience shows that German mortars are more deadly unless you take 2-3 25pdr Batteries. If you do this then you can swing the game too far in favour of the British. Game balance is a tricky thing that's for sure.
This game brought a natural end to our campaign. We could have carried on but then you get into the rather attritional games of well dug-in units with field defences against large amounts of artillery which are, in my experience, rather dull affairs.
We not have a break of a few weeks due to family stuff and holidays, but hope to resume in June with the Battle of Wavre using Bloody Big Battles as the ruleset. It's a while since we've played these but they are a great set of rules. In the meantime I will be trying to carry on basing and painting units as well as scratch building terrain, which I really enjoy. So until next time...