Monday 27 December 2021

Xmas Presents 2021

As is the norm, once again this year I ordered some 'surprise' presents for myself so that I can have something to unwrap on Xmas day. I'm of an age where realistically I have everything I need, so I tend to buy a few bits'n'bobs for my wargaming, be it books, figures or terrain. This year I treated myself to a range of pieces from Commission Figurines, where I get my mdf figures from, Leven Miniatures whom I've used for a few years now and whose buildings have featured in many an AAR and new for this year, from Battlescale, whose sculpting I've admired via their Facebook page.

All the items arrived in plenty of time and were very well wrapped and delivered in sturdy cardboard boxes, which is nice to see, as you always worry about items being damaged in transit, especially at this time of year. All the pieces will have a variety of uses, from the late 17thC all the way up to WWII, but all will form the core of various BUA plans I have for my games.


An mdf building based upon one in Potsdamer Platz, Berlin 1945. As the main facades are identical, I added some more damage to break up the symmetry as well as adding some card paving and rubble to the base. The PzIV is from Pendraken and 10mm, whilst the mdf figures are on 25mm/1" bases and are around 8mm high, to help give an idea of size.

The other main elevation. I added some plaster to the end walls to help with the distressed and damaged look and will probably add some posters too for a bit of period flavour. A really nice kit that is easy to put together and modify if required due to it being made of 2mm mdf.

A small inline castle tower that will be used mainly as part of a fortified manor, but could easily be part of a small motte and bailey structure.

Another Leven Miniatures tower, this time a standalone one, but with some supporting defensive walls etc. The plan is for this to be used in Ireland in the 1690's but can be used with the following too.

A Leven Miniatures main gateway front elevation. This will form the main entrance to a medieval BUA, with scratch built walls added to it as I see fit. The above tower works really nicely with this one.

The rear elevation.

A Russian hamlet set from Battlescale, that will work from medieval times right up to Operation Barbarossa and beyond. Some of the buildings will be modified slightly to give great variety and all based up individually, to give the feel of a spread out collective farm etc.


I'm very pleased with my 'surprise' presents and hope to make a start on some of my plans before the end of the year. Finding the space to leave stuff out is a bit tricky at present but you never know. To give you and idea of what I'm hoping to achieve, the following photo is from Jon Bleasdale's superb Blog and shows how good 6mm games and terrain can be:

This is a set from Total battle Miniatures and I think you'll agree that Jon has done a superb job in bringing this to life. Truly inspirational stuff!

So until next time stay safe and keep healthy!


End of Year Review 2021

A Common talking point amongst friends and family in the build up to Xmas this year has where has the year gone and what did we actually do? Common consent seems to be not a lot given the rather obvious fact that we have all been living in the shadow of Covid and the on/off lockdown situation (As I type we are waiting to hear if there will be any new restrictions in England, such as those that have come into force in the parts of the UK). Added to this as a family we have only really felt able to go out once our son, who is classed as clinically extremely vulnerable, was finally freed from having to self isolate as much as possible in late Summer. 

So with the above in mind and the chaos of Xmas out of the way for another year, it feels a good time to take stock of my wargaming year and possibly consider what passes for plans on my part for 2022. 

Rules Bought
Neil Thomas' Wargaming: An Introduction
Beneath the Lily Banners 3rd Edition 
For Whom The Die Rolls
Shadow of the Eagles 
Spartans & Successors 

Quite a quiet year for me on the purchases front, given that last year I made the conscious decision to focus on a few core rulesets and this is still the case. So why more rules you might not unreasonably ask? Well the Beneath the Lily Banners I'd been pondering for sometime for use with a planned project based around the 1690's or thereabouts and the Glorious Revolution. I was swayed by seeing some of the nice AAR's of games by Keith & Co down New Zealand way earlier in the year. The book is a joy to own and has lots of eye candy, period flavour and interesting rules. I've yet to give them a try but I hope to do so in 2022.

Shadow of the Eagles was a freebie from Keith Flint, the author and a good friend and gaming chum of mine. I like his approach to rules and game play so was very happy to receive these and help scratch that niggling Napoleonic itch. The rules work really well, are easy to pick up and most importantly give a good game with a nice Napoleonic feel, without oodles of detail, tables etc to make the mind ache. More games are planned once I've painted some more of my mdf figures, which are on the table waiting for me to find a free moment in the kitchen to get started.

Wargaming Books Bought
The War of King Monmouth by Ralph Mitchard
The Williamite Wars by John Childs 
Osprey WWII Balkans War by Pier Battistelli
Report on Foreign Manouevres in 1912 
Thunder on the Danube Vol 1 by John H Gill
Operation Bagration by Steven Zaloga
Kursk by Lloyd Clark
Sicily '43 by James Holland
The Winter War by William Trotter
Battle Tactics of Napoleon and his Enemies by Brent Nosworthy
Osprey Russian Civil War Armies
Osprey Russian Red Armour
A People's Tragedy by Orlando Figes
Operation Sealion by Paddy Griffith & John Curry
Battle tactics of the Civil War by Paddy Griffith
The Secret War by Max Hastings
The Hollow Crown by Dan Jones

A positive pot pourri of books and periods at first glance, but there is some method in my madness! Many were bought to flesh out my interest in the early WWII period, such as The Winter War which covers the Russo-Finnish War of 1939. The Russian Civil War is a period I know little about but am keen to learn more, with some possible games in the future. If nothing else it will provide more ideas for my AVBCW games. Not all have been read but the ones I have read have been excellent and I have high hopes for the remainder.

Miniatures Bought
Red Eagles Miniatures WWI plane
Commission Figurines ACW MDF figures
Soviet WWII reinforcements mainly AFV's
WWII Norwegians (using WWI Austrians as proxies)
WWI Russian Civil War figures
6mm WWII Aircraft
Medieval bits'n'bobs
AVBCW bits'n'bobs
WWII Italian artillery
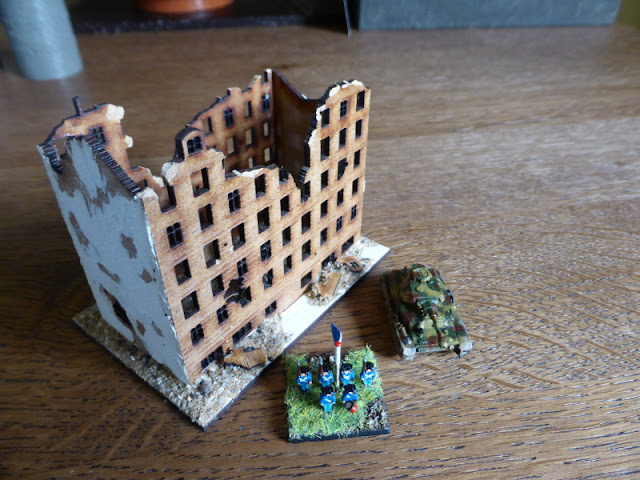
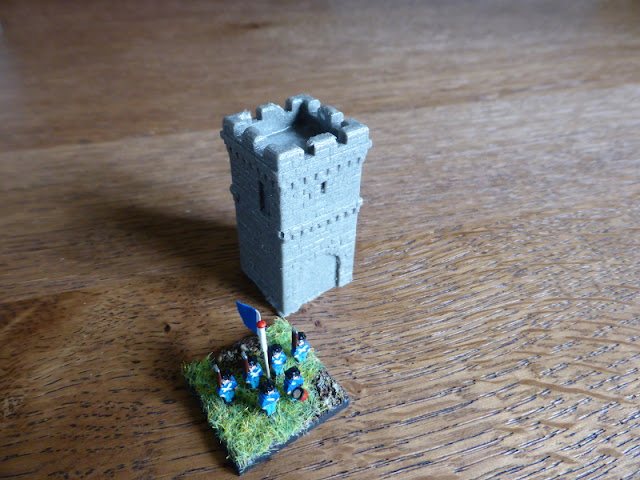
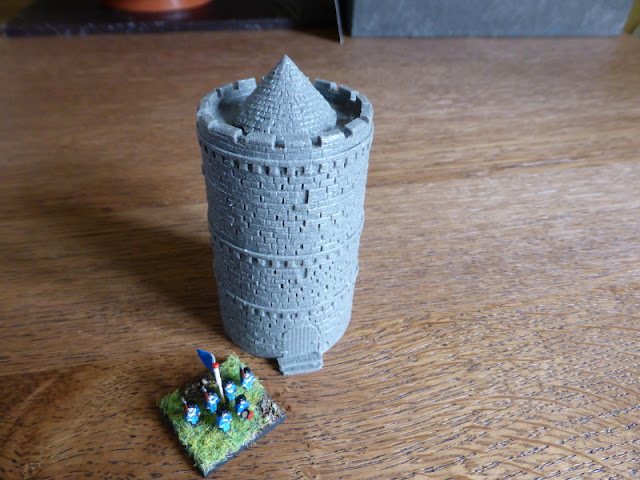
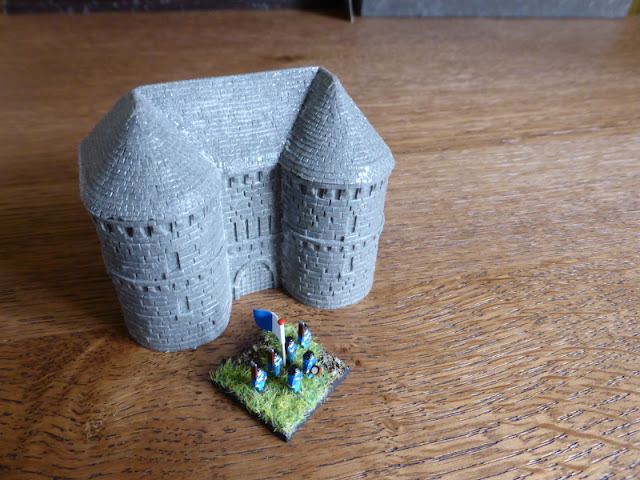
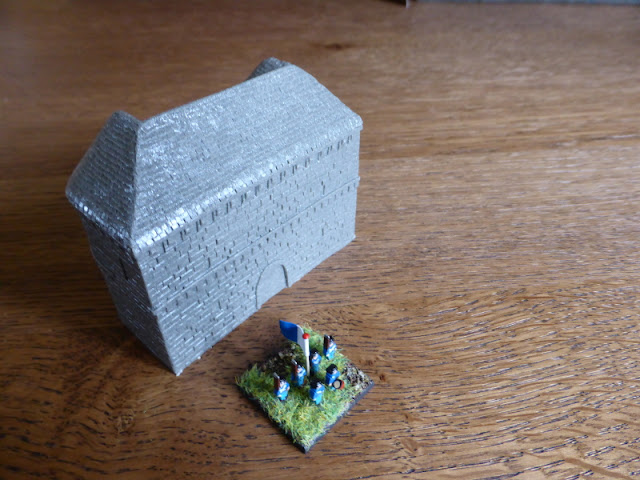
Leven Miniatures Castle Components
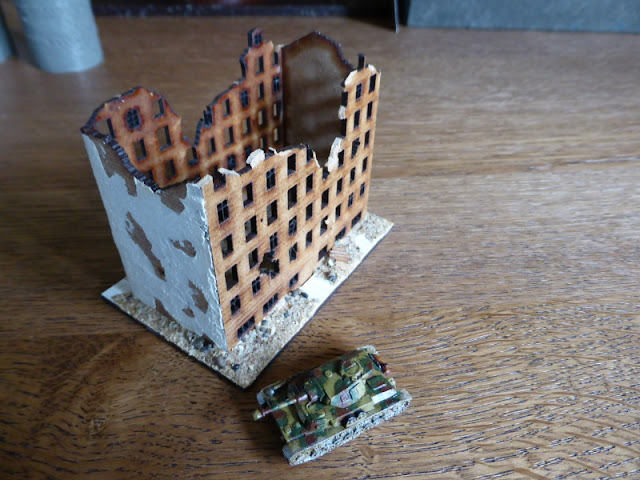
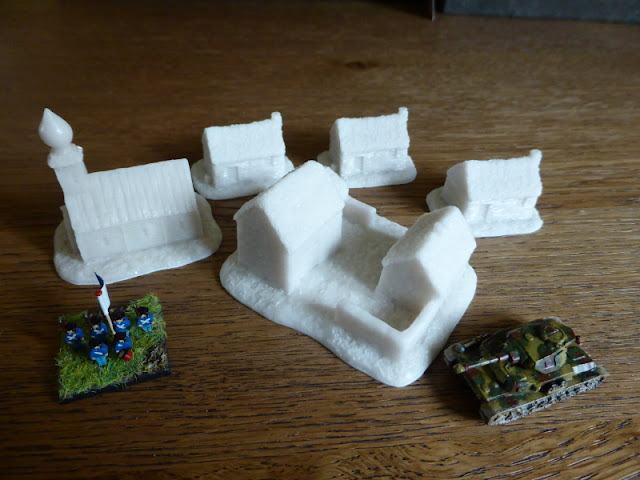
Battlescale Russian Village Set

Not much really this year, with mainly small purchases to flesh out existing forces or simply the "ooh that would be nice to have!" Frankly I have more than enough miniatures already sitting in the attic as it is and next year I aim to have a good cull, so that I can focus on key areas of interest and not get distracted from these. More on this in another post I think...

Miniatures Painted
Pz I's, Pz II's, Pz III's, Pz IV's and command tanks
SCW/AVBCW command bases and vehicles
19thC Europe ImagiNations figures
Medieval figures
Commission Figurines MDF figures

With another year of virtually no FtF gaming, there has been little impetus for me to get much painting done. I did have a couple of concentrated spells, where I completed a load of early WWII German armour, as well as my mdf figures for my generic early 19thC ImagiNations forces. I found motivation hard for most of the year, which might have been helped by a dedicated painting area. Alongside this I also have the distraction of other hobbies, such as gardening and woodworking, both of which I prefer to do when the weathers nice. I think there is also a hangover from my days as a modelmaker when painting seems too much like my old job, when I want and need a break from this. When the muse is upon me I do enjoy the process, but not as much as in the past. Maybe a combination of being a house husband, full time carer and the Covid issue also play a factor in my reluctance to paint at times?
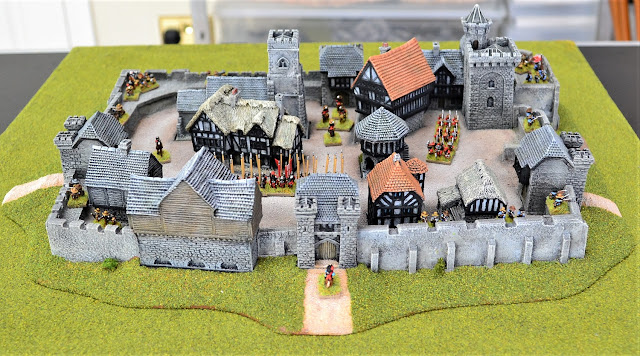
 
Terrain Made
Aircraft hanger - scratch built
Stone Circle
Walled Field

In contrast to painting, I do love scratch building terrain as it takes me back to those articles in the Airifx magazines and guides that used to inspire me as a child. I enjoyed the aircraft hanger made this year and haven't made much else as I have most of the terrain I need. However I do have some projects planned for next year, mainly making more detailed BUA's for a variety of games, hence some of the recent purchases from Leven Miniatures and Battlescale. I hope to provide more updates on this in the near future.

Projects
BKCII campaign
OHW Scenarios 
Lion Rampant 
Honours of War
ECW & LoA games

On the whole I managed to get in a couple of campaigns, one played by PBEM and the other a narrative one played solo. Both were fun, with the former, set during the SCW, taking a lot more time and effort compared to previous ones set during the 18thC. Honours of War made it to the table quite a bit, often linked to playing through the One Hour Wargames Scenarios. By and large these have been fun but some have worked better than others. Moving forward I will think more about the forces involved, victory conditions etc to try and improve the gaming experience. Still these are a great resource and I will continue to use them. The ECW & LoA games never got off the ground, despite having planned to give Beneath the Lily Banners a run out earlier in the year.

Games Played
The Portable Wargame Pike & Shot - 1
BKCII - 7
Pike & Shotte - 2
Honours of War - 6
Rebels & Patriots - 3
Shadow of the Eagles - 5
Post of Honour - 1

A very stop start year on the gaming front, but even so, at least I managed to get in a game about every two weeks. The vast majority were solo, with some PBEM and thankfully three FtF ones which were a real pleasure after so long away from friends. I fully expect solo to continue to dominate for the early part next year and then we will have to wait and see as to whether FtF gaming becomes a realistic prospect once again. One can but hope.
 
Wargames Shows Attended
CWD
Partizan

After over two years of no wargames shows, it was great to be able to attend a few, both within the space of a few weeks. The Cotswold Wargames Day was the first and as in previous years, a great day out with other gamers in a nice and relaxed atmosphere, with a good variety of games on show. Many have commented that it feels more like a club all dayer rather than a show and is frankly the better for it IMHO. The other was Partizan which I had never been to before, but was a lovely show with stunning games on display. I could have gone to other shows later in the year but with Covid cases going through the roof where I lived, I though it wiser to stay at home and wait for another year.

End of Year Thoughts
Needless to say 2021 has once again been a funny old year due to Covid and the impact it's had on our all lives in various shapes and forms. At least our wonderful hobby has for the most part been able to carry on, whether via solo games, PBEM or Virtual Gaming, with wargames shows returning in force towards the tail end of the year. Alongside these Blogging has once again shown how useful a tool it is to keep us all in touch with the various projects, games and shows from all over the World. It has really been a boon during these difficult times.

Personally there was little change in 2021 compared to 2020, other than the fact that finally I was able to meet up with friends for some FtF games as well as attend a few shows. It's only when you miss something that you realise how important it is to you. Whilst solo games are good, you really can't beat gaming with good friends and all that goes with it. 

Looking Forward to 2022
I've never been one for New Year's resolutions, but I though I'd jot down some plans and ideas I have for next year, subject to Covid of course:

  • Carry on Blogging. I know this appears to be less popular than before, with Facebook and Vlogging supposedly taking over, but personally I much prefer the whole Blog thing, as it just works for me on many levels. As others have mentioned on their Blogs, it would be nicer if more people left comments, but I'm grateful for those regulars that do as your support is greatly appreciated.
  • Campaigns. I tend to find narrative campaigns much more satisfying than one off games as they give a much richer experience IMHO. I plan to run some across various periods, both solo and hopefully by PBEM again.
  • The Lead Mountain. I had planned to reduce this in early 2020, but then put it on hold when Covid hit. Given the current ongoing uncertainty, I'm going to look to sell stuff online, rather than at shows, so that I can focus on core periods and not spread myself too thinly.
  • Rulebook Library. Rather like the lead mountain, the plan was to offload rules that I know I will never use, leaving me with core rules that I know and love. Again this will have to be done online at present rather than at shows.
  • Painting. My initial aim is to finish my two mdf forces so that I can play a variety of games with them. This will allow me to then paint other forces as and when time and the mood takes me.
  • Wargames Shows. All being well I hope to attend more next year than I would normally do. This is completely out of my control and decisions will have to be made closer to the time. Fingers crossed for this though!
  • FtF Gaming. I really hope that this can resume but am not getting my hopes up too much at present.
  • Terrain. I want to make some modular terrain to add more detail for my BUA's, that will also allow them to be used across a variety of periods. I have plenty of ideas, so it's really a case of putting them into action.

It will be interesting to see what, if any, of the above I achieve next year. Obviously Covid will have a big part to play in many of my 'plans', but one can but hope that things will ease off and we can get back to some semblance of normality. So it just remains to thank all of you who have stopped by in the past year and left comments, which are greatly appreciated! 

Thursday 23 December 2021

Merry Xmas!

As Xmas Eve dawns here in Bristol, I just wanted to take a moment to wish all of those of you who follow my Blog, a very Merry Xmas and a Happy New Year! Suffice to say it has been another difficult year for all of us and so I truly hope that you are able to celebrate with your nearest and dearest in some shape or form tomorrow. Let's hope 2022 is a better year on so many levels!


Wednesday 8 December 2021

Making A Stone Circle

This week after a few recent games and whilst awaiting an order of mdf figures, I fancied making some more terrain. If I'm honest this is one of my favourite parts of the hobby, as I just love making stuff, much more so than painting figures. As quite a few people have commented on how much they like my terrain, I thought I'd start a series of posts as to how I go about making it.

So to start with I went for something quite simple and also it's something I've been meaning to make for a good few years, namely a stone circle. Nothing too fancy and an easy was to show how I go about the whole process. I will go into more detail in other posts, but to start with I'll just focus on the basics.

The following photos will take you through the process from start to finish, with notes alongside. So without further ado:

Pretty much all of my terrain is based on either 2mm mdf or 3mm hardboard. For this project I used the latter as they were offcuts from some DIY at home. The stones were collected from the garden where a previous owner had laid a gravel drive. The tools you see are the basics I used but will be covered at a later date. I decided upon a 4 1'2" diameter circle as it was a reasonable size but not too big, which can be a problem once on the table. I chose some stones that were similar size and texture so they had a cohesive look to them. I pondered as to whether to use 5, 6 or 7 stones, but ended up with 6. 

I arranged the stones so that they all looked like they were pointing into the centre. Little details like this make a big difference IMHO as to how a piece looks. Maybe it's my design background but I like to get this right before anything is glued down. You can also see that the edges of the hardboard where shaped and sanded so as to have a gently slope to an edge, which helps blend the piece when on the table. 

With all the arrangement sorted, it was then a case of fixing the stones in position. For small pieces like this I find that fine surface polyfilla works well, but you could use hot glue, epoxy adhesive, contact adhesive, No More Nails etc. Just make sure that you wash the stones beforehand to remove any dirt and grime and that they are thoroughly dry. Then leave the piece to thoroughly dry, normally overnight at this time of year.

With the polyfilla fully dry, it was a case of adding the grit to the base. I use diluted builders pva for this as it's much cheaper than the better quality pva wood glue, but does just a good job for this sort of work. I dilute it slightly with water, so it's more like single cream. I just find this works for me. For the grit, I've used sieved builders sand to get the big stones out and keep it in a box so that it stays really dry. This is the same grit that I use on my figure bases and other terrain, so it matches, which to me is important.

When the piece is dry, again normally overnight at this time of years, I then tap off and brush off any loose material, of which there is plenty and am left with this. Don't worry if the grit has missed bits as it will all be hidden later on.

I then give the stones a diluted coat of black paint. Nothing fancy but it provides a good even colour for later on.

The base is then painted to a simliar dark brown colour that I use on my figure bases. This I mixed up by adding some black and red to a small colour matching pot from a DIY store until I got a colour that was close enough. If you were doing a lot then it would be worth getting a small tin mixed up to order. Again leave this to dry thoroughly, again overnight normally.

With the base completely dry, I then dry brush various areas in the same colours I use for the bases of my infantry. I have no set plan for this but just look at how the grit has stuck and work from there. Keep turning the piece around to get a good view from all sides as the light can throw up some areas for highlighting that you might have missed.

With the base done, I then drybrush the stones with various shades of grey, personally preferring a blue grey rather than a warm grey, as I think it stands out more when on the table. This is where having similar stone textures makes a difference as if you had say slate and sandstone pieces, they would look very different when painted and to my eyes 'wrong'. I wet brush the first coat to get a good even coat, but still leaving some black areas showing. I then drybrush a highlight on top of this, focusing on the high points of the stones which enhances their shape.

With all the painting done, it's then a case of flocking. Initially I was going to add a variety of different textures, but when painted, I decided to keep it simple and go with simple flock. Again this is my standard flock that I use on all my bases and terrain. Again this helps give a unified look to the whole table which, to me, is important. I use diluted pva as before and keep adding flock on as I go round, to help prevent a big build up off glue which can cause problems. I then leaves this to dry overnight.

When I'm sure the glue had dried, it is simply a case of turning the piece over and knocking off all the excess flock. Job done!


I hope this has proved a useful guide as to how I go about making my terrain. In total this took two days to do as I was able to speed up the drying processes over the radiators. In Summer things dry considerably more quickly, by leaving them on a windowsill in the sun etc. I reckon taking out the drying times, the actual making time was 2-3 hours, with the painting and flocking taking up the most time. I often spend quite a bit of time thinking about how I want the piece to look, which can be longer than the actual process itself! But for me this is important as then I know I will be happy with the finished result.

I aim to do some more posts soon and I have other items ready to go and more ideas too. Really I should paint figures but I'm in the terrain making mood at present. So until next time stay safe and keep healthy.


Monday 6 December 2021

OHW Scenario 10 - Late Arrivals

A few days ago I decided to have another game with my mdf figures and once again turned to the OHW scenarios, this time using Scenario 10: Late arrivals. This is broadly inspired by the 1866 Battle of Gitschin, where the challenge is for the Attackers to penetrate a bottleneck before they can bring their numbers to bear, whilst for the Defenders their troops arrive in a piecemeal fashion. Basic details and OOB follow:

Scenario Details
The Red Player deploys 4 units on table at the start of the game. On Turn 5 another 4 units arrive via the Southern table edge, then same again on Turn 10.

The Blue player has all of his units available at the start of the game and arrive via column of march on the road at the Northern table edge.

The Objective is to be in control of the town at the end of the game.

Both sides would use the National Characteristics from the HoW rulebook, as well as rolling to determine the quality of their Brigade Commanders. I had planned on using the weather table on p38, but frankly I forgot until mid-game!

Prussian (Blue) Attacker
6 x Infantry (1 x Superior)
2 x Light Infantry
2 x Cavalry
2 x Artillery

Austrian (Red) Defender
6 x Infantry (1 x Superior)
1 x Light Infantry
2 x Cavalry
3 x Artillery

The Game
As before, I will allow the annotated photos to cover how the game unfolded. Apologies for some of the out of focus photos, but my arm was having a shaky day plus I was trying to keep my shadow out of the image as the game was played at night.

An overview of the table, with North to the top.

The Austrian vanguard deployed, with the Prussians ready to arrive via the road at the top of the photo. As luck would have it, the Prussians had a Dithering Commander, but fortunately he was supported by the Dependable C-in-C. The Austrian Commander on table was Dependable.

The end of Turn 1. The Prussians advanced and began to deploy into line upon sighting the enemy. The Austrians held their positions and the artillery opened up, causing a hit on the Prussian infantry in line.

The end of Turn 2. The Prussians managed to get a double move and so quickly closed with the Austrian position. Both sides exchanged fire, with the Prussian Light Infantry moving to 3 hits (blue die). 

The end of Turn 3. The next wave of Prussians arrived with a Dashing Commander who made a double move towards the Austrian right flank and their Light Infantry. The Dithering Commander once again managed a double move, courtesy of some encouraging words from his C-in-C. The Prussian Light Infantry pulled back to reform and the Prussian Line Infantry unleashed a devastating volley that caused the Austrian Line Infantry to rout and the Artillery to move to a Blue die. The Austrian return fire was less than effective in comparison.

A view of the Austrian line that was under extreme pressure, with the loss of its Line Infantry (Red die).

The end of Turn 4. As the Austrians pulled back, the Prussians advanced to keep up the pressure, managing to rout the limbered Austrian Artillery on the road. 

The Prussians push on but are struggling to form a cohesive line.

The end of Turn 5. As Austrian reinforcements began to arrive, led by the Grenadiers but rather like the Prussians, commanded by a Dithering Brigadier who was lucky to have his C-in-C in tow too. The Prussians moved forward where possible to keep up the pressure as their Cavalry moved swiftly onto the table.

The Austrians march on, flags flying, led by their Grenadiers.

The end of Turn 6. The next wave of Prussians were available, but once again had a Dithering Commander who failed to move onto the table! Elsewhere the Prussians pushed on and caused the Austrian Light Infantry to rout off the table. The Austrians could do little other than begin to deploy into line in front of the town. Once again there was little shooting, which was largely ineffective, other than against the Austrian Light Infantry.

The Austrian Cavalry look on as their Prussian counterparts approach.

The Prussian refused right flank. the Austrian Light Infantry unsurprisingly succumb to the massed fire from the Prussians arrayed against them.

The Austrians slowly deploy.

The end of Turn 7. As both sides advanced and formed line, there was little shooting as most units were out of range. On the Prussian right flank the Cavalry charged the Austrians who bravely countercharged and in a furious melee, both sides were forced to retreat and reform, having taken 4 hits a piece.

The Austrian Cavalry look on as they reform, as do the Prussian Cavalry in the distance.

Both sides dress their lines.

A view from the Prussian third wave as they march down the road towards the town and the battle.

The Austrians have left one Line Infantry unit in the town as a precaution to provide a good fall back position should it be required.

The end of Turn 8. Both sides Cavalry failed to move and so stood there looking at each other, whilst the Prussian right wing again managed a double move and so began to try to turn the Austrian flank. Both sides Grenadiers exchanged murderous fire that saw both having to retreat to reform. the same was true of the Austrian Line Infantry unit caught by enfilading fire.

Both side have units that need to retreat to reform, with the Austrians coming of the worse.

The positions after both sides have made their fall back moves.

The end of Turn 9. Once again both sides Cavalry played long distance Mexican stand off, as the Prussian Line Infantry pushed forward where practicable. Pressure was kept up on the Austrian Grenadiers who managed to avoid more damaging fire despite having Light Infantry to their right flank. However the reforming Austrian Line Infantry were not so lucky and more fire caused them to rout of the table. 

The end of Turn 10. The Cavalry continued to try and outstare each other, whilst the Prussians closed in on the town. Austrian hopes were high that more reinforcements would arrive but Fate intervened in the form of yet another Dithering Commander who failed to move onto the table! Combined fire saw the Austrian Grenadiers rout as the Prussian Line Infantry took hits from the town, leaving two units on Blue dice.

Stares do not battles win!

The Austrian put up a spirited defence off the town, causing the Prussians to think twice about an early coup de main attempt.

A view of the Austrian positions, awaiting their promised reinforcements


End of the Game
At this point with the Prussians needing a Turn or two to get into position to assault the town, which would give the Austrians time to bring up their reinforcements, I decided to finish the game. Even though the Prussians had taken no casualties, it would be a bloody battle to try and take the town, one in which they would in most likelihood take significant casualties in the attempt. Time would also have run out, so I called the game a marginal win for the Prussians.

Post Game Thoughts
Another interesting game from the OHW scenarios and one which I had reservations about once again, but still it provided an interesting challenge and was very quick and easy to set up and play. With time not always on one's side, these sort of games are very appealing and have great merit as a result. But as always, some thoughts on the game in no particular order:
  • The Austrians could have just sat in the town from Turn 1 and awaited the Prussians to arrive, which would have probably taken at least 5 Turns. This would be rather dull and given the battle the scenario is based upon, I chose to deploy the Austrians across the bottleneck between the woods and the impassable rocky terrain.
  • I think the scenario would work better with the town further forward, so that the Austrians have to defend their lines of communication, which would give Prussians another objective rather than a straight forward assault on a BUA. Playing down a slightly longer, narrower table would have helped this, but of course hindsight is a wonderful thing!
  • Using the Prussian National Characteristics for the first time was enlightening, because boy do they move and manoeuvre more quickly than the Austrians, something that frankly I'm not used to as generally I play the Austrians.
  • Cavalry was of little use in this scenario, unless combined with the scenario tweak above re: LoC.
  • Both sides have more than their fare share of Dithering Commanders, but even so, the Prussians managed to get an inordinate number of double moves due to having the Dependable C-in-C to hand.
  • Alongside the Prussian speed a movement, they managed to get the Fire Initiative for most, if not all, of the game. This really kept the Austrians on the back foot from about Turn 2 onwards.
  • For this game I upped the unit count to 12 per side, again using the random OOB generator from the Wargaming 19thC Europe book. I think this gives a better number of units for a game and allows things to even out some of the vagaries of dice rolls etc.
  • I wished I had used the Weather Table as planned, just to see what, if any, impact it had on the game. Next time all being well if I remember that is!

So there we have it. I think I'll take a break from the OHW scenarios for a while as I want to try something else on the gaming front, but not sure yet what that might be. I'm awaiting some more mdf figures that have yet to arrive, that when they do, will jump to the front of the painting queue. My plan is to have two reasonable sized forces so that I can play some 'classic' SYW games, with cavalry on both flanks and some reserves. I'm not quite there yet with the figures I have.

Hopefully more updates in some shape or form soon but until then, stay safe and keep healthy!


Tuesday 30 November 2021

One Hour Wargames - Scenario 9: Double Delaying Action

After the recent fun game with Post of Honour, I thought it high time to get Honours of War back onto the table as well as working my way through the One Hour Wargames book scenarios. Next in line was Scenario 9 which was inspired by the Battle of Wavre in 1815. I was in two minds as to whether to play this or not to be honest, for a variety of reasons, which I'll address in my post game thoughts. However I decided to give it a go and used the random force generation system from Thomas' Wargaming 19thC Europe. The forces generated were as follows, using the Austrian National Characteristics, with all commanders Dependable:

Red
6 x Line Infantry
1 x Skirmishers
1 x Cavalry
2 x Artillery
Objective
Exit 50% of force off North table edge on the road by game end.

Blue
5 x Infantry
2 x Skirmishers
1 x Cavalry
2 x Artillery
Objective
Control the town and exit 4 units of the North table edge via the road, and/or prevent Red from exiting 50% of its force as per the above.

The Game
With everything set up the day before, it was just a case of finding a spare few hours to play the scenario, which is easier said than done these days! I'll let the photos do the talking and annotate them as required.

An overview of the table, looking North, with Red defending to the North of the river and Blue beginning to arrive from the Southern table edge.

The town garrisoned by an infantry brigade, with the Blue line and light infantry ready to enter the table.

The main Blue force, lead by light infantry, ready to move across the bridge.

Two Red infantry brigades deployed, with skirmishers in the woods to their right.

The end of Turn 1. The Blue troops move forward, with the light infantry crossing the bridge and deploying into line, as well as closing in on the town. The Red infantry and cavalry begin to withdraw as per the 'objective orders'.

Blue light infantry come under fire from the town.

The end of Turn 2. The Blue brigades on the left get a double move and move smartly across the bridge, but come under fire from the woods and the Red artillery. The Red infantry and cavalry continue to pull back and the brigade defending by the wood move their line slightly to form a better defensive position.

Red light infantry in the woods and artillery cause more hits on the Blue troops.

The Blue light infantry take more hits from the town which causes them to be less effective at firing (3 hits blue die).

The end of Turn 3. As the Blue troops advance on the left, the continuing weight of fire sees one infantry unit routed (red die top left) and the light infantry in front of the woods moving to a blue die. In front of the town, the light infantry are forced to retreat due to loss of morale. Again the Red infantry and cavalry continue to retreat to the North.

The light infantry are forced back and need to reform before returning to the fray. At least they have managed to cause the Red infantry in the town to move to a blue die.

The Blue troops struggle to make headway, not helped by the early loss of an infantry unit.

The end of Turn 4. The Blue infantry slowly moved across the bridge, but lost their light infantry to shooting from the woods. In front of the town the Blue infantry moved to blue die as well. For Red, the cavalry moved off the table with an infantry brigade close to doing so too.

The light infantry (red die) rout and another infantry unit take hits as they deploy into line.

The end of Turn 5. Across the board the Blue troops moved as best they could, whilst the Red infantry moved closer to the Northern board edge. Both sides have very little shooting and what there was was not too effective.

The Blue infantry in front of the town begin to dress their lines to bring more firepower to bear.

The end of Turn 6. The Red infantry brigade by the woods began to pull back as per their 'objective orders', whilst the artillery and light infantry covered their move. The Blue troops moved up towards the town and across the bridge as best they could. However more very effective fire from the woods say the loss of another line infantry unit for Blue.

More deadly fire from the woods sees the loss of an infantry unit.

The end of Turn 7. The Red infantry continued to pull back, but their artillery unit by the woods was forced to retreat having taken 4 hits and needed to reform. The Blue troops tried t move into position to pursue the Red infantry. Once again, the shooting was generally ineffective.

The Blue troops are making little headway against the town defenders.

The town defenders have moved one infantry unit to cover the retreat and threat from the Blue infantry across the river.

The Blue infantry, cavalry and artillery struggle to deploy.

The end of Turn 8. As Red continue to withdraw, the light infantry in the woods are caught by Blue artillery fire and are forced back to reform. The Blue troops get a double move and managed to charge into the reforming Red artillery , routing them in the process.

The Red light infantry about to retreat to reform.

The reforming Red artillery caught by the Blue infantry and routed.

The troops in the town hold on and pose a threat to the Blue right flank across the river.

The end of Turn 9. The Red troops continued to pull back and maintain a defensive line as best they could. However the Blue troops kept up pressure across the board, with a Red infantry unit being forced retreat and reform whilst in the town an infantry unit routed owing to some accurate Blue shooting.

The Red troops lose an infantry unit in the town.

The Red troops have an infantry unit near the windmill that will be forced to retreat and reform.

The end of Turn 10. The Blue troops maintain pressure and move their light infantry into the town, but on their left flank by the hill, the reformed Red light infantry have appeared and are a significant threat.

The Blue light infantry move into the town and the Red infantry withdraw to form a defensive position across the road out of town.

The Blue left wing suddenly under threat.

The end of Turn 11. The Red troops continue to contest the town, but manage to move their artillery and another infantry unit off the table. The remaining Red infantry keep the Blue troops in position, but one is forced back to reform, taking it closer to being able to exit the table.

The shooting in the town fails to do any damage.

The Blue infantry have to about face to meet the threat from the Red light infantry.

The reforming Red infantry.


End of the Game
At this point the Red force had exited over 50% of their troops and still contested the town, whilst the Blue force realistically couldn't prevent any more Red troops from exiting the table. The Red troops in the town surrendered and were granted the Honours of War.

The Red force had only suffered one infantry unit routed and one surrendered, whilst the Blue force had lost two infantry and one light infantry units routed. Therefore I decided that the Red force had managed a win as they had achieved their objectives and take far fewer losses than Blue.

Post Game Thoughts
First and foremost it was great to be playing 'Honours of War' again and everything came back to me and flowed well, with little recourse to the rulebook, which was great. Also it was nice to get the mdf figures out again, but more on this later. So as mentioned at the start, I had my reservations about this scenario, so without further ado some post game thoughts in no particular order:

  • Whilst the scenario might work well for the OHW rules as written, when translating the scenario for other rulesets, problems occur IMHO. Given the deployment options to Red and the units they have to exit off the table, they can simply deploy most of their forces by the hill and behind the woods, which means that for most of the game the Blue troops will be trying to get close enough to them to engage in combat. A token force in the town, backed by artillery, could hold on long enough to delay Blue and/or tie down a significant portion of his force. So in essence to my mind it is virtually impossible for Blue to achieve their objectives and win the game.
  • With reference to the above, I chose to deploy Red as if they were defending the crossings and then suddenly received orders to withdraw, to make more of a game of it. It helped but it still didn't feel like a fun scenario to play. In truth i didn't enjoy it, which is unusual.
  • Crossing rivers by fords or bridges in the face of an opposing force is always tricky, even with a numerical advantage. With equal forces it is much, much harder. I reckon the attacker needs about a 2:1 advantage to make a game of it.
  • I could have deployed my artillery better, either to fire across the river to support the crossing or by the town to shoot the troops onto the objective. Using horse artillery in say the Napoleonic or ACW era might make a difference, but in the SYW with its general lack of mobility, getting a good position early on would have helped.
  • The Red light infantry in the woods really helped the Red cause, as they KO'd tow units of Blue infantry, which severely hampered their ability to take the fight to the Red troops.
  • Both sides cavalry had little to do, other than for Red to ride off into the sunset or for Blue to struggle to find room to deploy. Again maybe in a Napoleonic game or ACW using them as mounted infantry might have made a difference.
  • I made the cover in the town 'light' as otherwise it would have been a nigh on impossible task for the Blue troops to take it, given the assets at their disposal.
  • I went for a distinctly 'old school' look to the game, due to a lack of time for something more 'visually pleasing' but also because I like the simple, clean look of 'old school' games.
  • Making the Attackers Prussian and the possible advantages of command and movement that this confers on them might have helped, but I wanted to keep things simple for a first game back with HoW. However I think it a good option for future games to go with this and the Austrians as Defenders.
  • As with the above, I avoided rolling for commanders this game as I didn't want any 'Dithering' results to unduly affect the game.

So there we have it. Certainly not the best game of late but it certainly helped clarify a few things in my mind as to what makes for a good game, whether balanced or not. I think this scenario could work well with some tweaks as outlined above, but maybe something to revisit sometime in the future.

Moving on I have ordered some more reinforcements from Walt at Commission Figurines, so that I can field Light and Heavy Cavalry, as well as some Grenadiers who will count as Superior Infantry. Originally these figures were meant to be a stop gap to allow me to play games until such time as I'd be able to paint up 'proper' armies for a conflict. However I have grown to love these, hence the extras just ordered.

A recent reply on Jon Freitag's excellent Blog about 'Generational Capacity' has got me to a thinking since I read it. It has given me plenty to ponder over and may even generate its own post in the future. In the meantime I'm not sure what will grace the table next, but until then, given the recent news re: the Omicron variant, stay safe and keep healthy!