For the second game in my mini-campaign, the Italians had retreated to some hastily prepared defensive positions, defending an important crossing over the Rubicon river. Re-inforcements were somewhat limited as they hadn't had time to move up in support, due to the rather short battle of the day before. However a Semovente 47/32 SPG and a L3/35 armed with a Solothurn AT rifle had made it to the front line. Some air support was promised in the form of a CR-42 dive bomber, but wasn't gauranteed.
The British too were struggling to get support forward, only managing a Company of infantry and lone Sherman troop. However a battery of 25 pdr's was on call to provide potentially much needed close support.
Scenario Details
The British too were struggling to get support forward, only managing a Company of infantry and lone Sherman troop. However a battery of 25 pdr's was on call to provide potentially much needed close support.
Scenario Details
- The river can only be crossed by AFV's and soft skins at the bridge or the ford to the left of it.
- Infantry can cross the river as per the BKC rules.
- The Roman ruins count as dug-in from direct fire, hitting on 6's, but hitting on 5+ from indirect fire.
- The L3/35's and Semovente 47/32 have the Low Profile rule as per BKCIV.
- The Ground Attack Aircraft uses the template as per BKCIV.
- The British artillery uses the optional reduced template size to reflect the smaller nature of the area covered.
- The Italians start on table anywhere on their side of the river.
- The British start off table using Mobile Deployment.
- The Italian 47mm ATG carried one hit over from the last game to represent the fact that they were nearly destroyed and so were not at full fighting potential.
Table Layout
The river ran roughly across the middle of the table, with hills to the edges, to give the idea of a valley. The terrain was once again covered by stone walled areas, but with more farmed land this time. By the bridge was an old Roman ruin and a small farmhouse.
Turn 1
The British made a considered advance, knowing that in all likelyhood the bridge would be fiercely contested. The Recce units supported by the Carrier borne infantry pushed forward on the right flank, whilst the Sherman with supporting infantry moved out on the left. The CO failed to appear but the FAO moved onto the hill, ready to call in his artillery if required.
The Italians, with no real targets and in a good position, held fast and only moved the Semovente 47/32 into the maize, ready to attack the British Recce units.
Turn 2
The British Recce units spot the Italian SPG and open fire on it in the Initiative phase, brewing it up straight away! The infantry in the carriers dismounted and moved forward to the edge of the vineyard, covering the bridge. The FAO spotted the Italian AA truck and called in an artillery strike which unsurprisingly destroyed it. The left flank failed to move and the CO arrived, ordering forward the Crusader AA tank, which took hits as it hove into view, but was not knocked out. The towed 6pdr ATG moved up and deployed covering the bridge as an MG unit moved to support the infantry in the vineyard. A good Turn for the Brits.
The loss of the Semovente 47/32 was a blow to the Italian cause, but they were not about to give up just yet. Again with limited targets and wanting to remain out of sight, the only action was the infantry calling in the mortar on the Crusader AA tank, knocking it out with rather accurate and effective fire.
Turn 3
The British Recce armour planned to move onto the bridge to help foce a crossing, but failed their command roll and the carrier infantry maintained their watch on the bridge. The Sherman and supporting infantry moved forward and immediately came under fire from the dug-in Italian ATG. The Sherman made its saves and returned fire on the ATG and was joined by the FAO who once again called in his artillery, with the Italian ATG only just surviving the barrage of fire. Once again the CO failed his command roll.
With infantry in view on the wheatfield, the Italian infantry with mortar support opened fire, suppressing some and forcing them back. The L3/35's joined in but failed to hit anything. Not a bad Turn for the Italians but their lack of AT capability was becoming a cuase for concern.
Turn 4
The British FAO was once again on the ball and his artillery finished off the Italian 47mm ATG by the ford and suppressed the supporting infantry unit. The way was rather open for a British advance, but a Blunder saw the Sherman and supporting infantry make a full move forward. This led to the Sherman assaulting the Italian infantry in the roman ruins who, despite being suppressed, managed to win the fight , sending the Sherman back suppressed. Who would have thought!
On the British right flank, not fancying the advance over open ground, they started to move towards the ford, but came under fire, nearly losing an infantry unit. In the ensuing firefight they barely managed to inflict any hits on the Italians behind the well built stone walls.
With things getting rather desperate for the Italians, the CO managed to get through to his air support and 'Super' Mario appeared from over the hills and made his attack run. Dodging the AA fire that came his way, he managed to cause hits and suppression on the British infantry before flying off for a well earned Cappucino! Inspired by this the other Italian units opened fire, forcing suppressed units back with one being destroyed by the Fall Back rule. Not to be outdone, the L3/35's joined in the fun, suppressing infantry and even managing to brew the Sherman up!!! Who would have thought it possible?
The river ran roughly across the middle of the table, with hills to the edges, to give the idea of a valley. The terrain was once again covered by stone walled areas, but with more farmed land this time. By the bridge was an old Roman ruin and a small farmhouse.
 | |
| An overview of the table, with the Italians to the North of the river. |
 |
| The lone approach road, with a rogue camera strap in shot! |
 |
| The main Italian defensive position, with bomb craters from a failed German attack to destroy the bridge. |
 |
| The mighty Solothurn armed L3/35 waits in the orchard to ambush an AFVs that cross the ford. |
 |
| 'Super' Mario and his CR-42 dive bomber. |
 |
| The Semovente 47/32 awaits the British attack (I don't have one so a 'counts as' had to used. Oh the shame of it!) |
Turn 1
The British made a considered advance, knowing that in all likelyhood the bridge would be fiercely contested. The Recce units supported by the Carrier borne infantry pushed forward on the right flank, whilst the Sherman with supporting infantry moved out on the left. The CO failed to appear but the FAO moved onto the hill, ready to call in his artillery if required.
The Italians, with no real targets and in a good position, held fast and only moved the Semovente 47/32 into the maize, ready to attack the British Recce units.
 |
| The end of Turn 1. |
 |
| The Honeys and armoured cars with the carriers in support. |
 |
| The Sherman leads the infantry towards the ford. |
 |
| The Semovente 47/32 ready to attack the British. |
Turn 2
The British Recce units spot the Italian SPG and open fire on it in the Initiative phase, brewing it up straight away! The infantry in the carriers dismounted and moved forward to the edge of the vineyard, covering the bridge. The FAO spotted the Italian AA truck and called in an artillery strike which unsurprisingly destroyed it. The left flank failed to move and the CO arrived, ordering forward the Crusader AA tank, which took hits as it hove into view, but was not knocked out. The towed 6pdr ATG moved up and deployed covering the bridge as an MG unit moved to support the infantry in the vineyard. A good Turn for the Brits.
The loss of the Semovente 47/32 was a blow to the Italian cause, but they were not about to give up just yet. Again with limited targets and wanting to remain out of sight, the only action was the infantry calling in the mortar on the Crusader AA tank, knocking it out with rather accurate and effective fire.
 |
| The end of Turn 2. |
 |
| The FAO on the hill takes in the view as the action begins to unfold. |
 |
| The British right flank in a good position by the bridge, but have open terrain in front of them. |
 |
| Both sides AA units have been brewed up. |
 |
| The Semovente 47/32 an early casualty. |
Turn 3
The British Recce armour planned to move onto the bridge to help foce a crossing, but failed their command roll and the carrier infantry maintained their watch on the bridge. The Sherman and supporting infantry moved forward and immediately came under fire from the dug-in Italian ATG. The Sherman made its saves and returned fire on the ATG and was joined by the FAO who once again called in his artillery, with the Italian ATG only just surviving the barrage of fire. Once again the CO failed his command roll.
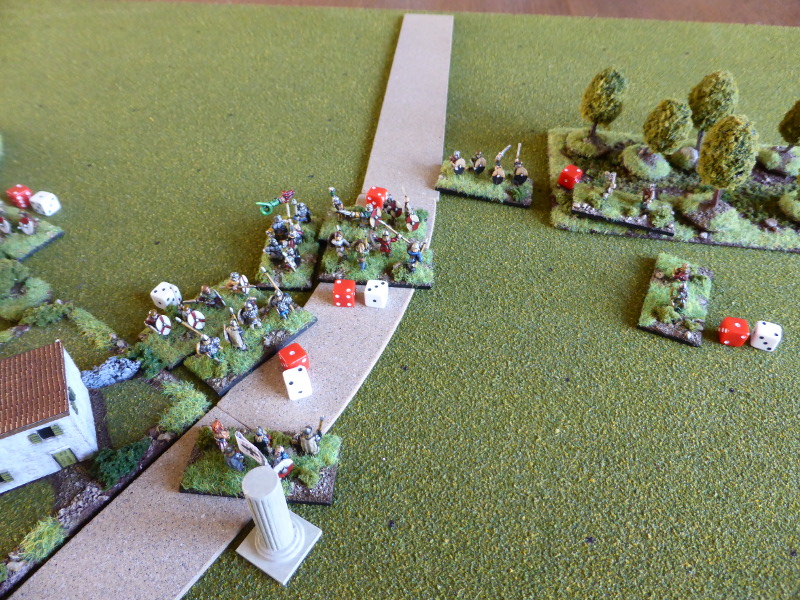
With infantry in view on the wheatfield, the Italian infantry with mortar support opened fire, suppressing some and forcing them back. The L3/35's joined in but failed to hit anything. Not a bad Turn for the Italians but their lack of AT capability was becoming a cuase for concern.
 |
| The end of Turn 3. |
 |
| The British left flank has come under fire. |
 |
| The Italian 47mm ATG only just survives, but is suppressed. It is the only unit with any realistic chance of halting the Sherman and other British armour. |
 |
| The stalled British right flank. |
Turn 4
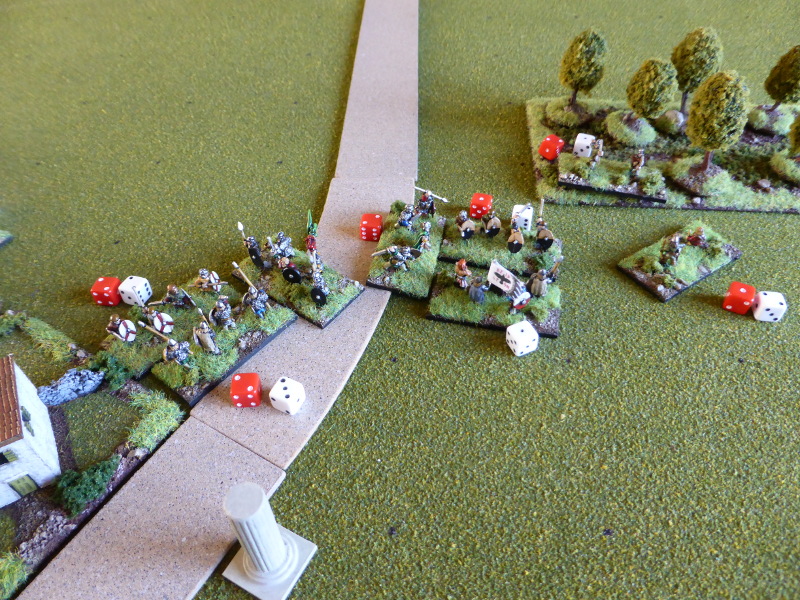
The British FAO was once again on the ball and his artillery finished off the Italian 47mm ATG by the ford and suppressed the supporting infantry unit. The way was rather open for a British advance, but a Blunder saw the Sherman and supporting infantry make a full move forward. This led to the Sherman assaulting the Italian infantry in the roman ruins who, despite being suppressed, managed to win the fight , sending the Sherman back suppressed. Who would have thought!
On the British right flank, not fancying the advance over open ground, they started to move towards the ford, but came under fire, nearly losing an infantry unit. In the ensuing firefight they barely managed to inflict any hits on the Italians behind the well built stone walls.
With things getting rather desperate for the Italians, the CO managed to get through to his air support and 'Super' Mario appeared from over the hills and made his attack run. Dodging the AA fire that came his way, he managed to cause hits and suppression on the British infantry before flying off for a well earned Cappucino! Inspired by this the other Italian units opened fire, forcing suppressed units back with one being destroyed by the Fall Back rule. Not to be outdone, the L3/35's joined in the fun, suppressing infantry and even managing to brew the Sherman up!!! Who would have thought it possible?
 |
| 'Super' Mario makes his attack run... |
 |
| ...with lots of infantry in view... |
 |
| ...his attack is very effective! |
 |
| The end of Turn 4. |
 |
| The British right flank comes under sustained and effective fire. |
 |
| The Sherman brews up as its supporting infantry have been forced back. |
 |
| The way over the bridge and ford is seemingly too difficult. |
 |
| A view of the British front line from an Italian point of view. |
End of Game
At this point, with the British having received a very bloody nose, I called the game, with the British retreating and awaiting more artillery and armoured support before attempting to take the crossing again. They just didn't have enough troops or luck to bounce the Rubicon. The Italians aware of what was likely to come their way, quietly withdrew and made their way back to San Pietro, where preparations were well under way to make a good defensive position.
Post Game Thoughts
Well that was fun and what a turn around for the Italians! I thought this was going to be another tough game for them, especially with the early loss of the Semovente 47/32. It just shows you how wrong you can be. So as always some post-game thoughts in no particular order:
- The game lasted for nigh on two hours but provided plenty of action once again on a 2' x 2' table.
- The Italian air support really helped turn things around for their side. It might have been different if the Crusader AA tank was still operational, but it's always nice when small units like this make a big difference.
- The stone walls and Roman ruins reallt helped the Italian cause, making it hard for the Brits, but this felt right given the accounts I've read of the fighting in Italy.
- The L3/35 taking out the Sherman was definitely the highlight of the game for me. I have a soft spot for these tankettes and try to include them where possible. Generally they don't do much but when they do, it great to see.
- The BKCIV rules of Low Profile and the Ground Attack template are great additions to the game and feel right and not contrived.
- The small optional artillery template also felt right given the limited artillery support and the size of the table.
- Halting the action when I did felt right in terms of the campaign setting. I could have carried on and probably won a Pyrrhic for the Brits as a one off game, but as mentioned before, playing a campaign makes you think in dare I say it a more realistic way.
So now the Italians have stalled the British advance, they have more time to prepare their defensive positions as well as bring up more support in and around San Pietro. The British have been disabused of any notion that this will be an easy campaign and so are having to prepare for a full on attack with as much support as they can muster to take San Pietro. I have some ideas for the final game, but will take a few days off to think them through. So until next time and stay safe and healthy...