One of the pleasures of having a small wargames library (well one bookshelf to be exact) is that you can simply pick up a book at random and seek inspiration for a game. This was the case a few weeks ago, when I was leafing through my copy of 'Scenarios for Wargames'. Breakout: Scenario 10 caught my eye as something a bit different for a planned BKCII game. It occurred to me it would translate nicely into a Normandy type game and, after flicking through some of my books, the Falaise pocket seemed a natural choice.
The Osprey Campaign book, 'Falaise 1944, Death of an Army' gave me plenty of options. In the end I settled upon the breakout by the 3rd Fallschirmjager Division across the river Dives at Magny, with the 4th Canadian Armoured Division attempting to stop them. So with the background 'fluff' sorted, I spent sometime pondering on forces for both sides (more of which later) and settled upon the following:
Canadian OOB
1 x CO
2 x HQ
1 x FAO
1 x FAC
9 x Infantry
1 x MG
1 x 3" Mortar
1 x 6pdr ATG + tow
3 x Shermans
1 x Sherman Firefly
2 x Churchills 75mm
3 x Artillery units
1 x Typhoon
German OOB
1 x CO
2 x HQ
6 x Fallschirmjager
2 x MG
1 x 75mm Mortar
2 x PzIVs
1 x Stug III
1 x Tiger I
Scenario 7: Pursuit
Details would be as per the scenario in the BKCII rulebook, but broadly speaking the Fallschirmjager had 10 Turns in which to get as many units off the table as possible. The Canadians simply had to destroy as many as possible.
Some additional rules were used as follows:
- Canadian infantry can ride on tanks.
- The Canadians are mixed battlegroups, based around each of the 3 command units.
- Random deployment for the Canadians based upon a D6 roll, with the table divided into 6 equal sections. If a number already rolled comes up again, re-roll this, unless the unit is an FAO or FAC.
Deployment
The terrain was laid out as per the 'Scenarios for Wargames' book, but with plenty of Bocage to aid the Fallshirmjagers and potentially slow down the Canadians.
 |
| The Fallshirmjager are deployed in and around the town of Magny, on the right hand side of the table. The Canadians random deployment resulted in the CO being on the South side of the table and East of the river Dives, whilst the rest of the Canadians were on the north side. This split could make command and control difficult. |
 |
| Some Fallchirmjager in the orchards on the outskirts of Magny, with the armoured support in the cntre by the road. |
 |
| The Fallschirmjager right flank hiding behind some Bocage. |
 |
| The CO and his battlegroup, including the FAO. |
 |
| The FAC. |
 |
| The Sherman battlegroup. |
 |
| The Churchills battlegroup. |
 |
| The Typhoon air support, hoping to make greater impact than its last outing. |
Turn 1
The Canadians got off to an absolute flyer, with the Shermans battlegroup rolling a Double one, allowing them to advance towards the road to try and create a blocking position. the Churchills were not to be out done, and also rolled a Double one, which allowed them to advance to the edge of the Bocage and destroy one Fallschirmjager unit. Fortunately for the Fallschirmjager, the CO failed his command roll and the FAO and FAC simply advance onto the table at the end of the Turn.
Given that they had come under immediate fire, the Fallschirmjager made initiative moves away from the enemy were possible and other advanced as best they could down the road.
 |
| The result of the Churchills battlegroups advance, which saw the loss of one Fallschirmjager unit. |
 |
| An overview of things at the end of Turn 1. |
 |
| The Sherman battlegroup and its tank riders have made good progress in terms of getting into position to block the road. |
 |
| The Fallschirmjager move out of the orchard, with their armour in support. |
 |
| Seeking cover in the cornfield from the Churchills battlegroup. |
Turn 2
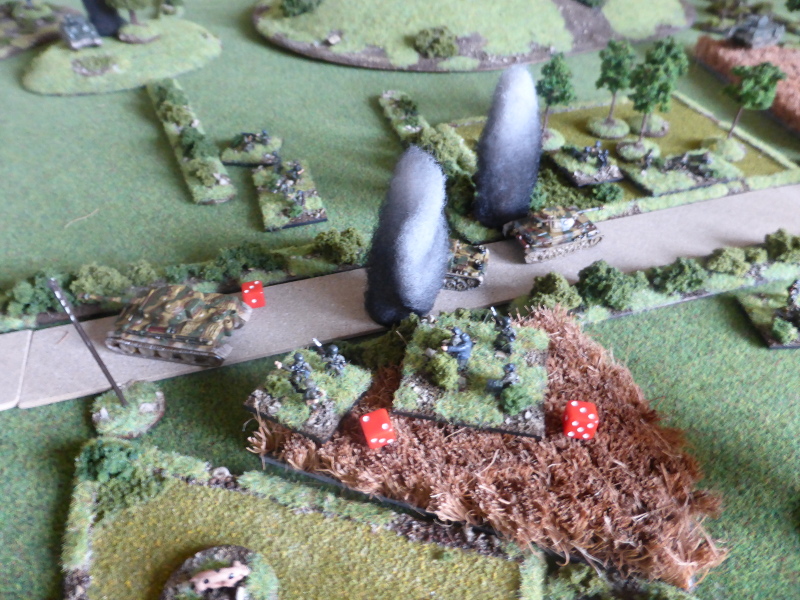
The Canadians got off to a poor start, with their FAO failing to get through and the FAC blundering, which resulted in the Typhoon surviving some low level ack-ack, but able to be on call next Turn. The Sherman battlegroup de-buses and the tanks take up firing positions as best they can. The Churchills fail their command roll, but the CO arrives and briskly advances his units forward. Trying to get through to the FAO, he succeeds, and he is able to call in a stonk right on top of the Fallschirmjager, resulting in the loss of two infantry units and an MG unit suppressed. Ouch!
Under fire, the Fallschirmjager advance as best they can, with the Tiger I and PzIV engaing a Sherman on the hill, which they brew up in short order. At least it is not all one way traffic.
 |
| An overview at the end of Turn 2. |
 |
| A wobbly shot, no due down to the effects of the artillery stonk. |
 |
| The menacing German armour making good advances down the road. Where is the air support when you need it? |
 |
| The Fallschirmjager have advanced to the relative safety of an orchard, well away from the Churchills battlegroup. |
 |
| The Sherman battlegroup in a good position, but they have lost one tank already. |
 |
| Another view of the German armour. |
Turn 3
With a tempting target to its front, the Sherman Firefly op fires on the nearest PZIV, hitting it, but failing to suppress it. The HQ then promptly fails its command roll! The Churchill battlegroup are only able to move once and the FAO fails its command roll. The FAC manages to call in the Typhoon from its cab rank, but ack-ack sees it driven off for this turn. The CO once again plays a bit of a blinder, leading to his Sherman advancing to be able to shoot the German armour in the rear.
The German armour trades fire with the Canadian Shermans resulting in the loss of one Sherman and one PZIV. Somehow the Sherman Firefly survives an inordinate number of die being thrown at it, which is not what the German tanks wanted.
 |
| The Typhoon arrives only to be driven off by ack-ack. |
 |
| The end of Turn 3 and lots of tanks are already burning. |
 |
| The CO's battlegroup has advanced into and past Magny. |
 |
| A lone Sherman threatens the German rear. |
 |
| The Churchills battlegroup are only able to make steady progress. |
 |
| Tanks brewing up all over the place. |
 |
| The Firefly is left to to face the Tiger I on its own. |
 |
| The FAC and his commanding view of the battlefield. |
Turn 4
The Sherman battlegroups infantry advance into the farmhouse by the road to create a good blocking position that the German armour can't ignore. Meanwhile the Churchills battlegroup HQ blunders and moves towards its own baseline. The FAO has no visible targets, so its over to the FAC. Once again he calls down a Typhoon from the cab rank, but this time it dodges most of the flak and makes a run in on the German armour that is sitting invitingly on the road. It's carnage, pure and simple. The rockets destroy a PZIV and the Stug III, suppress the Tiger I, and HQ unit and the CO. It's game over for the Fallschirmjager and their attempted escape.
 |
| The Typhoon wreaks havoc on the German armour. |
 |
| Another view of the devastation. |
 |
| The state of play at the end of the game. |
 |
| The Canadians in control of Magny. |
 |
| The Churchills battlegroup threatening the German rear. |
 |
| With only a Tiger I left and limited infantry, the fat lady has sung as far as the Germans are concerned. |
 |
| A lone Sherman guarding the approaches to Magny. |
 |
| The Fallschirmjager in the open. |
 |
| The escape route that eluded the Germans in the end. |
Post Game Thoughts
Well I don't think I've ever seen a game come to such a swift and dramatic conclusion! I thought it might be a tough ask for the Germans, but early on it did feel like they might be able to break through, as their armour was getting the better of the Canadians. Despite it being a quick game, I really did enjoy it. So as always some thoughts on the game:
- I did think long and hard about whether to allow the Canadians access to both an FAO and an FAC. Hindsight is a wonderful thing, but I think I would allow the FAO only one Battery on call, rather than the three I gave them. Still useful but not so deadly as to adversely impact on the game. The downside is that it would have given the Canadians another 180 points to play with, which might have caused its own issues.
- The FAC I think I would still allow, but would much rather come up with a way of depicting the roving nature of Allied air support during the Normandy campaign. Maybe it arrives on a roll of 10 or more on 2D6? This is something that I need to go and have a think about.
- Initially I did plan to play the encirclement scenario, where both sides have equal points. However I thought that this might make it too hard for the Canadians, especially given the superiority of the German armour.
- I liked the Random arrival points for the Canadians, which gave both sides an uncertainty as to what would Turn up and where. I will certainly use this in future games as and when required.
- The amount of terrain felt right, especially the Bocage hedgerows, but it showed how vital hills where in the campaign given their commanding views of the surrounding countryside.
- Another option would have been to make the first few Turns of the game count as early morning, thus limiting the view of all concerned. This would have delayed the effectiveness of the FAO and FAC. Again something to think about for future games.
Even though briefer than anticipated, another great game of BKCII. I've got another planned game soon, this loosely based around the Saar Offensive of 1939. More details to follow once I've painted up a few more units.