Having made an orderly withdrawl from the last battle, General Cope and his troops have taken up what they think is a strong defensive position near to the village of Preston. Flushed with his 'success', Bonnie Prince Charlie is keen to keep up the pressure on the government troops, so has followed closely behind. The French also want to seize Preston as it is rather renowned for the making of fetching tartan trews, which the French are keen for the Highlanders to wear, as they are somewhat offended by the devils in skirts going 'commando'.
French OOB
2 x French Line Infantry - Superior
2 x Lowlanders - Inferior
4 x Highlanders - as per the HoW '45 rules
1 x Baggot's Hussars - Inferior
1 x French Light Artillery - Standard
Hanoverian OOB
3 x Line Infantry - Standard
1 x Militia - Inferior
1 x Light Infantry - Standard
2 x Dragoons - Standard
1 x Light Artillery - Standard
Deployment
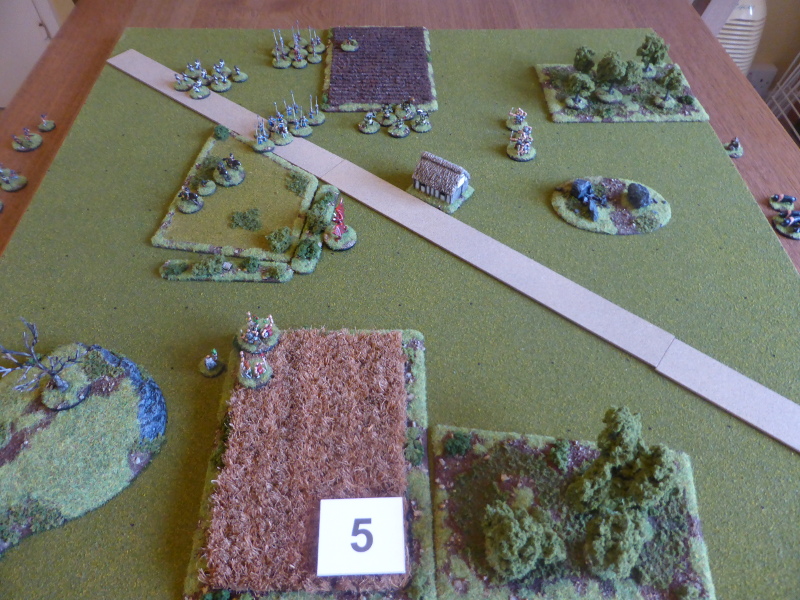
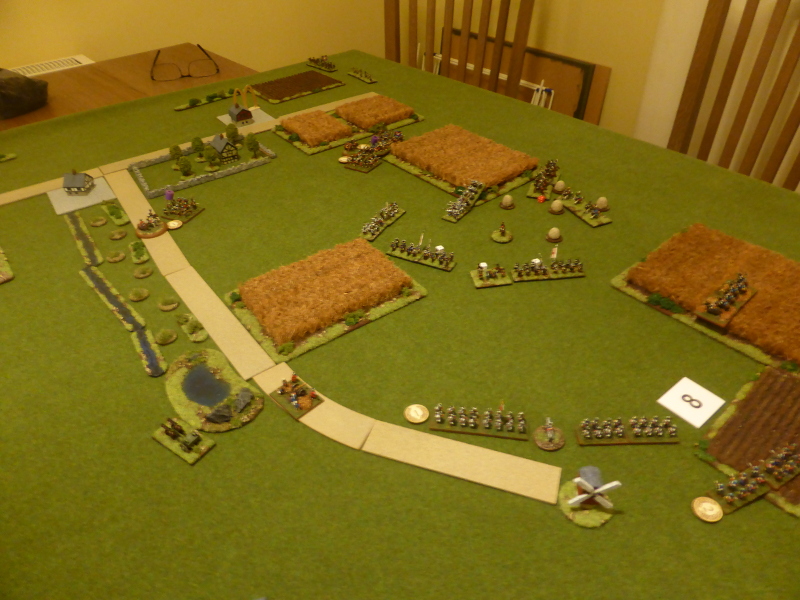
The table is (unsurprisingly) a copy of the Battle of Prestonpans. The French and Jacobites can deploy anywhere to the West of the road, the Hanoverians anywhere to the East. The BUA can only be occupied by Light Infantry, as the walls were some 6'-9' high, so I decided they were too tall to be easily occupied by any other troops. The drainage ditch by the road halves all movement to cross, given that in some accunts it was 10'-12' wide and considered a formidable obstacle by the Highlanders in the actual battle. The cornfields are for show as the battlefield was flat and the corn had been recently harvested. The French and Jacobites deploy first, then the Hanoverians, to reflect General Cope's moves in the actual battle.
 |
| An overview of the table, with Preton to the top. |
 |
| The French and Lowlanders ready to advance. |
 |
| The Light Infantry safe behind the walls. |
 |
| The Hanoverian line with the Dragoons on the wings. |
Turn1
The Highlanders got off to a dreadful start, with a Feeble roll, meaning they could not advance towards the Hanoverians. Dave's face was a picture considering this was a new command die! The French and Lowlanders at least advanced and the artillery piece deployed by the road. In response the Hanoverian cavalry moved to try and see off Baggot's Hussars.
 |
| The end of Turn 1. |
 |
| The Hanoverians look on as the Lowlanders lead the advance. |
Turn2
You couldn't make it up as yet again the Highlanders rolled a 1! Would Dave be able to make it three games in a row where he has rolled a '1' three times in succession? The French had little option but to advance slightly, hoping that the Highlanders would soon join the fray. Baggot's Hussars retreated so as not to be caught in the open by the Dragoons. The Hanoverian artillery opened up at long range on the Lowlanders, causing one hit.
 |
| The end of Turn 2. |
 |
| The French and Lowlanders advance is paused. |
 |
| The Dragoons continue to move towards the left flank. |
 |
| The Light Infantry are bemused by the lack of action from the Highlanders. |
Turn 3
Suddenly the Highlanders burst into life, with one unit charging the Light Infantry, supported by two other units. Shocked by this the Light Infantry fail to shoot back and in the ensuing melee are done for, but at least they manage to send the attacking Highlanders back to reform. Elsewhere there is some movement and shooting, with the French artillery causing one hit on a British Line Infantry unit.
 |
| The end of Turn 3. |
 |
| The Hanoverian line still faces off against the French and Lowlanders. |
 |
| The Highlanders charge home, causing the loss of the Light Infantry. |
Turn 4
The French, Lowlanders and Highlanders all advance, whilst the Hanoverians hold their positions. Boths sides cavalry continues to manouevre, as the Hanoverian artillery caused more hits on the Lowlanders.
 |
| The end of Turn 4. |
 |
| The Highlanders in search of their trews... |
 |
| Linear warfare, or Mexican stand off? |
Turn 5
The French, Lowlanders and Highlanders all continued to advance, as the Hanoverians refused their left flank whilst the Dragoons withdrew to face the threat to their right flank. Combined fire saw the demise of a Lowlander unit, which severely disrupted their lines.
 |
| The end of Turn 5. |
 |
| As the Lowlanders break, neighbouring units takes hits as well. |
 |
| A view from the Hanoverian lines. |
 |
| The Highlanders squeeze through Preston. |
Turn 6
As the Highlanders debouched onto the field of battle, the French and Lowlanders continued to advance. This was halted as combined fire saw one French unit have to retire to reform. For the moment the threat from the French and lowlanders had been seen off.
 |
| The end of Turn 6. |
 |
| The French and Lowlanders in disarray. |
 |
| Happy Hanoverians. |
 |
| The Dragoons less than happy as they see the Highlanders emerge from Preston. |
 |
| Private Whiddle and the 3rd Foot & Mouth anxiously look on. |
Turn 7
As the French and Lowlanders retreat, more artillery fire sees the remaining Lowlander unit forced to retire to reform. The Highlanders scenting blood, double move towards the Dragoons as the Hanoverian line manouevres to counter this new threat to their right flank.
 |
| The end of Turn 7. |
 |
| The French and Lowlanders pull back out of artillery range. |
 |
| The Dragoons feeling somewhat isolated. |
 |
| The Hanoverians realign their right flank. |
Turn 8
The Highlanders charged into the Dragoons, who elected to countercharge to try and protect the Hanoverian right flank - brave lads! As they charged in, the Highlanders failed to cause any hits from shooting, but sent the Dragoons reeling back to reform, happy to have somehow survived the charge.
 |
| The end of Turn 8. |
 |
| The Jacobites are threatening and almost turning both Hanoverian flanks. |
 |
| The Dragoons reforming but happy to still be in the game. |
 |
| Baggot's Hussars threaten the Hanoverian left flank. |
Turn 9
Under pressure from all sides, the Hanoverians begin to withdraw their troops. Baggot's Hussars charge in to try and disrupt this, but the Hanoverian Dragoons manage to turn to meet the threat, enabling them to send them reeling back to reform.
 |
| End of Turn 9. |
 |
| Baggot's Hussars reforming. |
 |
| The Hanoverian Line Infantry cover the flank as the other troops withdraw. |
 |
| The Hanoverians almost form square. |
 |
| The French and Lowlanders in no position to affect the withdrawl. |
 |
| The Highlanders content to look on. |
End of Game
At this point we took stock of things and concluded that with neither side having a realistic prospect of defeating the other, that the Hanoverians would withdraw South, with their cavalry protecting them.
Post Game Thoughts
Yet another fun game and one that was somehwat hampered by Dave's propensity to roll a '1' at important points in the game. Frustrating for him, lucky for me but one that has become a part of the campaign narrative. Anyway, time to reflect upon the game, so:
- If the Highlanders had been able to get moving in the first two Turns, then the Hanoverians might have been in a bit of a predicament. The story of the campaign in many ways.
- It was interesting to view Dave's deployment, as I would have been tempted to put some troops by the drainage ditch to try and pin some of the Hanoverian line, whilst the rest came in on the flank in force. Whether it would have worked we will never know.
- The Hanoverian artillery proved deadly, especially when shooting at the Lowlanders when within grapeshot range. This made it hard for them to prosecute any attacks as they were repeatedly being knocked back or taking several hits. I think this is the first time that the artillery has been that effective.
- Once again the 12 odd units a side worked perfectly for a mid-week game. This 'size of force' is making re-think my future gaming requirements, as this is just about perfect for my gaming needs these days.
- As Dave said at the end of the game, we are pretty much at a natural point for a final showdown battle, with bothsides deployed in a conventional sense. In all of the previous games, neither side has been able to deliver a telling blow, so rather than going for more of the same, time to settle it once and for all. I need to have a think about this in terms of forces, but it should be fun whatever happens.
With the campaign drawing to a close, we had a chat about what to game next. Ancients was my suggestion as we haven't really played this 'period' before. I think the main reason has been trying to find a set of rules that has the elegant simplicity of Honours of War or Bloody Big Battles. We tried Hail Caesar, but they just didn't click as they had too many add-ons for us. Sword & Spear are not bad, but possibly not right for us just yet.
Anyway, I'm getting ahead of myself as I need to tie up our campaign, which has been fun and certainly more interesting than if it was a straight historical one. So until next time...