Showing posts with label Hail Caesar. Show all posts

Monday, 14 April 2025

The Wars Of The Roses - A Trial Game

These past few weeks I've been doing a lot of reading with regards to the WotR, as it's a period I know very little about. Alongside this I've been running a few quick try out games using the Hail Caeser! rules and the WotR supplement that came out last year, to get a handle on the basic mechanics and to see if I enjoyed the games or not. To aid me in this I dug out my block armies, which were made for this very purpose. 

I kept verything very simple so that I could focus on the gameplay itself, without any chrome getting in the way, as there are lots of options one could add on, which would only compicate things at this stage. The battle was a simple line up and have a go at each other, so not too far from what appeared to have happened in many of the battles from this period.

Each side had a Vanguard, Mainguard and Rearguard, which consisted of 3 units of Household troops (Bill & Bow) and a unit of Men-at-Arms. No Artillery or Light cavalry was used to keep things simple, as I'm still learning what might have passed for tactics and deployment during these Wars. 

So onto the action!

Both sides lined up ready to knock the living daylights out of each other. The yellow dice record the number of arrows available and the tall square block are the MAA. The circles are for the commanders of each Division.

The end of Turn 1. Blue opened with a very Frederickian oblique attack, due to the Vanguard failing to move the the Rearguard being rather keen to get stuck in. The Red Mainguard was disrupted by the Blue arrowstorm early on, leading it somewhat broken up, but the Vanguard and Rearguard moved forward to engage in volleys of arrows. Both sides started taking hits and some Disorder.

The end of Turn 2. Both sides continued to close and the arrowstorms saw each side lose a unit of Household troops (the irregular organised blocks at the bottom of the photo).

The end of Turn 3. The Red Vanguard comes under pressure as it loses another unit of Houshold troops, forcing them to charge in to try and turn the battle in their favour. Elsewhere the arrows continued to fly, with Blue losing two unit of Household troops as a result, putting pressure on the Vanguard and Mainguard.

Battle is joined as the Red Vanguard if forced into some close combat, but it is a draw and both sides remain locked together.

The Read Mainguard appear to have a slight advantage over the Blue Mainguard.

The Red Rearguard has an advantage here.

The end of Turn 4. The battle degenerates into local scrums, with Red just having a slight advantage, but it is very messy!

The Red Vanguard is forced back and is now a Broken Division, so would have to retreat unless it could Rally a hit off somewhere, but this is unlikely as the Blue Rearguard would most likely follow up and press their advantage.

Both Mainguards are struggling for an advantage, but Red is in a slightly better position at the moment.

The Red Rearguard has broken the Blue Vanguard's MAA and are in better shape to press home their advantage.


End of the Game
I had to call the game at this point as I was required elswhere. Looking at it both sides were in pretty poor shape, with each flank broadly under the control of one side and the centre about Evens. So a bloody draw would seem a fair outcome.

Post Game Thoughts
Well I enjoyed that and it was certainly quick and quite brutal at times, with units suddenly breaking under the hail of arrows coming their way. The trial games beforehand paid off as I felt fairly comfortable playing a full game as it were. I'm sure I made a few errors here and there, but nothing major as far as I can tell. So a few thoughts from my games so far:
  • The Arrowstorm rules works really nicely, with the battle opening with an archery duel, either at long or short range. The latter is more deadly so you need to maybe husband your arrows, but have to be careful not to be broken with some still in your quiver!
  • The Breaktests give a nice distinction between Ranged and Close Combat attacks, with the former leading to units breaking or retreating more often than those that are stuck knocking the living daylights out of each other.
  • When to Hold Disordered or Retreat In Good Order is a bit of a quandry, as being Disordered is not ideal but retreating might leave a flank exposed to an attack, certainly later on in the game once units are quite close to each other.
  • Having only 6 Turns of game play means you really need to get stuck in from the off, which is a nice change from say Black Powder II or Honours of War.

What Next?
Well not a lot gaming or painting wise, as we have family coming over to stay for a few weeks, so a full house and the gaming room being used as an office-cum-bedroom means I will have time, nor space to game or paint. Still at least I have plenty of books to read!

I will due a review of the Hail Caesar! WotR supplement in due course and my thoughts on the period too, hopefully in a few days. So far I'm enjoying my trial games and HC! too as a set of rules, which is of course a good thing.

Thanks for reading and I hope you enjoyed the brief AAR and as always, any comments greatly appreciated!

TTFN.


Monday, 14 October 2024

Deus Vult!

I suppose my first exposure to the Crusades was a toy crusader knight from a cereal box given to me by my grandparents in the late 1960's. As a child of about 6 years old, this seemed wonderfully exotic and was a treasured gift for many a year. Growing up we all seemed to admire the tales of Richard the Lionheart, not knowing the reality behind the myth.

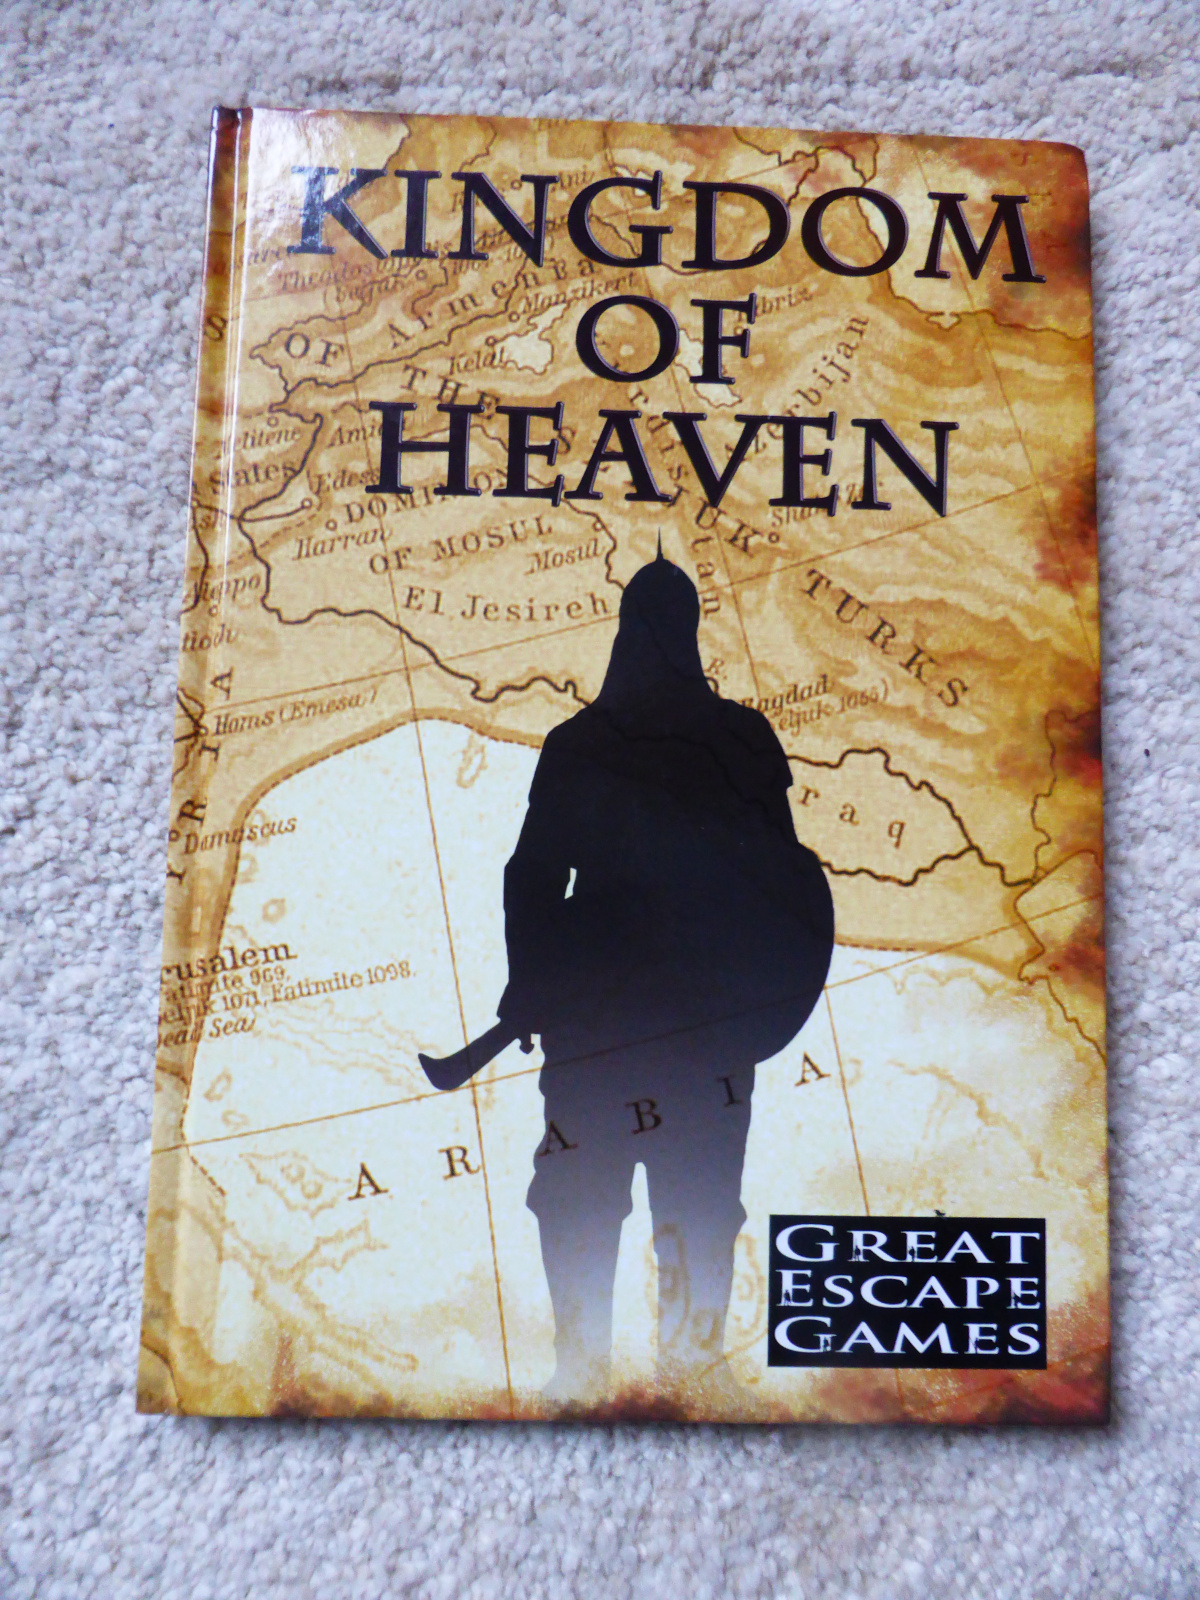
Many years ago after the visually superb 'Kingdom of Heaven' film came out, I did ponder long and hard as to whether to try and game this period using the Warmaster Ancients rules, but frankly was put off by the sheer number of bases and miniatures required. A common theme I fear looking back over many a project contemplated and then discarded by the wayside!

My next venture was somewhat off the beaten track, this time with the Baltic Crusades using Lion Rampant and/or Hail Caeser rules, inspired by Michael Leck's post on this period. He put me onto the 'Arn: Knight Templar' trilogy of books as well as the Swedish tv Series of the same name. As is sadly often the case, lists were drawn up, figures bought, plans made and then: nothing. the butterfly had flapped its wings and my mind had wandered onto yet another project.

Quite by chance Richard on his excellent Blog showcased a couple of excellent books that I'd not heard about nor considered reading. But always on the lookout for a good book I bought the following for a bargain price:


Then a few weeks later the chaps from Little Wars TV were back with a Battle for Acre game to kick off things in there new enlarged games room. I always like what these guys put on but my interest was really grabbed by the fact that they were using Lion Rampant II with a few tweaks for the game. Having playtested the original rules way back when, and others since in the same stable, I thought that this would be a good way to maybe scratch that itch from the 'Kingdom of Heaven' film initial idea. The game certainly looked fun and so I started to have a think about how I might go about this.

Looking at my bookpile I dug out the following which I bought as reference for the Baltic Crusades some 10 years ago or more:


Luckily for me it also has plenty of stuff on the 'traditional' Crusades that most people seem to play. Alongside this I remembered that a few years ago some books were released as almost 'army books' for Lion Rampant; one of the Vikings in the Mediterranean and the other on the Crusades. I'd considered the former but never the latter. However as my interest had been piqued, I managed to track down the Crusades book which duly arrived today.


From a quick flick through it really is a nice book and alongside the above, it will really give me plenty of ideas and options for forces to make for some small games and/or battles. Luckily I think I have enough figures for the Western Crusaders, only needing to make some purchases for the 'Muslim' forces. 

So not having planned this project at all just a few weeks ago, it seems I have something else to keep the old grey cells ticking over! Not that I'm one to complain but let's hope I can get enough units based and painted to get these onto the table. Then of course I'll need some buildings and terrain...

Thanks for reading and for leaving a comment too.

TTFN.

Wednesday, 8 July 2015

Escort the Siege Engine - A Hail Caesar AAR

Background
Last week we decided to have a break from Black Powder and chose to give Hail Caesar a run out. Despite having had the rules for over a year, I had never had a game with them, with Dux Bellorum having giving me my 'Ancients' fix. So what forces to go with four our inaugral game? Dave fancied giving his Mongols a run out (or should that be gallop?) against his Brettonians masquerading as Medieval French.

Scenario
This was to be a variation on one that Dave had run at his club before, with the Bretonnians having to escort a siege engine off the table, whilst under Mongol attacks from all sides. The Bretonnians deployed off table in line-of-march, with the Mongols organised into 4 Tumen that would randomly arrive and various points on the table. 

As this was a first game and very much a learning exercise for me, we weren't too worried about details of winning and losing, rather just getting familiar with the game mechanics after all of those Black Powder games.

The Battle
As per recent games, the captioned photos will provide a guide to how the game payed out.

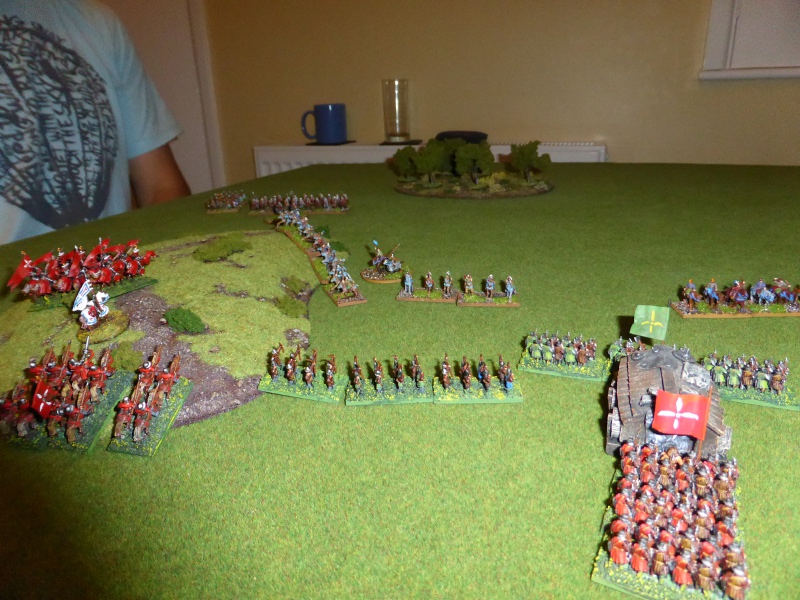
The Bretonnian vanguard arrived on the table with the siege engine closely following behind, escorted by Medium Infantry. The vanguard consisted of two units of archers on either flank and a unit of Sergeants in the centre. From behind the woods appeared the first Mongol Tumen, consisting solely of Horse Archers
The Bretonnians moved slowly onto the table (this siege engine could only move 6cm per Turn) and deployed to face the Mongol threat to their front. The Rearguard arrived in the form of Knights who again deployed on either flank, not knowing if and when further Mongol riders might appear and from what direction. The Mongols advanced slightly to form a blocking positon whilst another Tumen arrived (top left) formed of Heavy Cavalry and Levied Infantry.
As the siege train advanced slowly forward, the Bretonnian Sergeants charged the Horse Archers who evaded whilst shooting with Parthian shots (very annoying). Elswewhere the Bretonnian Archers and Knights advanced forward, but their shooting was rather ineffective. The Mongol Heavy Cavalry just sat there, despite their General urging them to advance.
With the Mongol Tumens all on the table, the Bretonnians deployed as best they could to meet the threat. Once again the Archers shooting was pretty poor whilst the Mongol Horse Archers continued to harass and evade the Kinghts.
Despite having plenty of targets, the Archers couldn't hit a barn door. Maybe if they'd had crossbows it might have helped, as these English weapons were obviously not suiting them!
The Battle descends into a swirling mass of moving cavalry, with the Mongol Horse Archers moving with ease around the Bretonnian units. Once again evades and Parthian shots merely goad the Bretonnian knights.
The Archers continue to suffer hits from the Horse Archers, whilst the Knights attempt to charge home, but to no avail.
The Bretonnians are somewhat spread out by the threat to their flanks and front, but at least one charge was successful, destroying one unit of Horse Archers. Sadly one unit of knights has charged off into the distance, simply unable to catch the Mongol Horse Archers that continued to cock-a-snoop at them.
A disasterous round of shooting by the Mongols coupled with shocking die rolls by myself led to the loss of the Sergeants and Knights on the right flank. With this loss there was nothing to prevent the Mongols from shooting at will into the deployd infantry and archers. Short of Divine intervention, it spelt the end of the Bretonnians.
The Archers and Infantry face the Mongols on their own.
Maybe a last ditch attempt by the Knights to save the day may pay off...
...but despite their initial charge being successful...
...they are caught in the flank by the Mongol Heavy cavalry and are destroyed.
The End
With the loss of the Kinghts it really was game over. We looked at the lie of the land and both agreed that there was no that the Bretonnians could possibly salvage anything from the game and so called it a day.

Post Game Thoughts
So not a bad game but one that was certainly very different from the Black Powder games we had played. So some thoughts on the game and rules:

  • After all the speed and movement of previous weeks, the game felt very slow, which is appropriate for the period. However it did take some getting used to.
  • We found ourselves refering to the rulebook a lot, much more so than Black Powder. Afterall this was my first game and Dave hadn't played for a year, so this was to be expected. However a couple of points did tax us somewhat as the rules in the book and the ones in the Useful rules section appeared to contradict each other. Only by re-reading the relevant sections post game in the cold light of day were we able (hopefully) to clear things up.
  • Early on we got the Evade rules wrong, but later on found out the right way to play them. Again to be expected first time out and they really wouldn't have affected the outcome in anyway.
  • With regards to the Evade rule, we figured out that it would be nigh on impossible for the Bretonnian Knights to ever catch the Mongol Horse Archers, short of a series of failed commands by the Mongols. Whilst historically accurate it was frustrating knowing that they were almost impossible to catch. However if caught they would be automatically destroyed.
  • For a first game the two forces were quite hard to get to grips with in terms of the best tactics to use. Dave certainly handled things much better than myself. As we said post game you would need a good few games to really get to know how best to use the troops at your disposal, but then that is true for any game and period.
So all-in-all another good evenings gaming. Certainly more taxing than Black Powder due to this being my first game. With regards the points raised above, we decided that the next game would be a classic Romans vs Ancient Britons, which hopefully will be easier to come to terms with. Only time will tell...

Friday, 9 January 2015

Red vs Blue Wargaming


Time, or more specifically lack of, is always my enemy when it comes to painting new armies etc. Then of course there is always the issue of shiny new toys or rules coming along to distract the weak willed and feeble minded gamer like myself. Over the years I've tried to come up with ways to overcome this problem, but to no avail. I tried 2mm armies that gave the feel of large battles but they just didn't grab me, plus there was the issue of yet another set of terrain and scenery to try and store.


Whilst at work one day I remembered a picture in a wargames magazine of a game at a show/convention, where the game was played on a normal table with standard scenery etc, but instead if figures, the units were represented by painted blocks of red and blue for each side. The game had a nice visual appeal but looked like something you might encounter at a staff college. The more I thought about it the more the idea appealed to me.

The blocks could be easily made at work and painted there and could represent any units from any time period. One minute they could be Greeks vs Romans or Prussians vs Austrians in 1866, the next Parliamentarians vs Royalists at Naseby. Just change the flags/standards and unit names etc to suite the relevant battle.

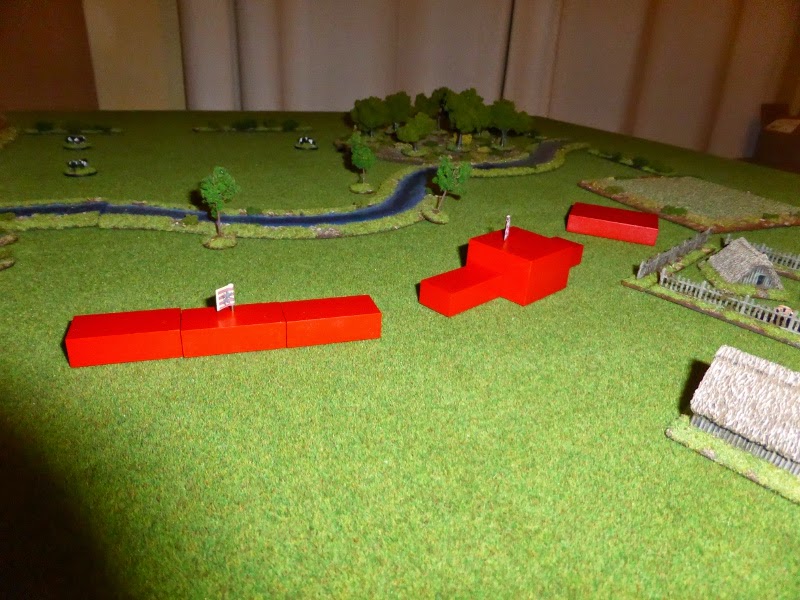
So in some spare moments at work I quickly knocked up a few sample blocks to see how they looked. As I mainly game in 10mm, I decided to use my standard base sizes of 40mm x 20mm. Add in base thickness and figure height and I decided upon a unit height of 1/2" or 12.70mm and for pike blocks I increased this to 1"/25.40mm. The main reason was that these are readily available thicknesses for mdf or acrylic, making my job that much easier. The results can be seen below.

A block of pike with two wings of shotte, supported by commaned shotte on the left and an artillery battery to the right, command the ford of a local river.
Another view that gives a better idea of the size of the blocks.
The field boundaries make the table 3'x3'.
The same blocks but now arranged as a unit of infantry with a unit of cavalry on the left wing.

I'm happy with the way they've come out so far. To be honest I'm not sure about the flags. I'm going to increase the size of them to give them more visual impact, but these were ones that I happened to have at hand. Unit commanders are most likely to be round in shape to make them stand out on the wargames table, but I've yet to actually make any samples. Another thought is to add in some more colours for units, to make allied units etc stand out from the main protaganists. For the present I will be sticking with blue and red. So all that remains is for me to work out a cutting list to give me enough basic units for a variety of games. Once this is done, with a bit of luck I might be able to have everything finished by the end of the month.So far I've made about sixty 40mm x 20mm blocks, so am well on the way...

Friday, 26 December 2014

Trial by Battle - The Hundred Years War - volume I

Over the years I have read many, many history and military history books. Some stick in the mind as superb examples of their craft for their time, for example:
  • 'Blitzkreig' by Len Deighton. The first book that took a measured and impartial view of the war. Apparently he was not popular for suggesting that the British arms and equipment, as well as performance, was not what it had been perported to be...
  • 'A Bridge Too Far' by Cornelius Ryan. It could be argued that this book created the 'Arnhem' myth. It certainly set off my love of the Paras that exists to this day.
  • 'Armageddon' by Max Hastings. To my mind a superb writer who not only covers the broad breadth of a conflict with consummate ease, but illustrates it with superb and telling detail. Harrowing at times, especially with regards the Eastern Front, it is a book I return to time and time again.
  • 'It Never Snows In September' by Robert Kershaw. A stunning book that covers the Operation Market-Garden campaign from the German point of view. It explodes some of the myths from 'A Bridge Too Far', but is extremely well written and even handed in its approach. If anything I now prefer this to 'A Bridge Too Far'.
To the above I can now confidently add 'Trial by Battle' by Jonathan Sumption. It is certainly one of the very best history books that I have ever read. What makes it even more remarkable is the fact that he wrote it in his spare time, despite him being a practising QC. The level of detail is superb, combined with the broad brush required for this seminal conflict in English history. For anyone interested in this period, I think it is one of the 'must have' books for the library shelf.

In wargaming terms, there is so much to choose from already, and I haven't even reached Crecy yet! The campaign in Flanders, the tit-for-tat raids in Gascony or the conflict in Brittany? Which to choose from?

Well I've plenty of time to choose, or even game all of them. But so far my plans are to use the following rules for the conflict:
  • 'Songs of Shadows and Dust'. Although set in ancient Rome, it is easily transferable to the HYW. A lot of the scenarios are ready made for the intrigues at Avignon, in Brittany etc.
  • 'Songs of Arthur and Merlin'. Scaling up slightly from the above, these will work well for settings such as the banditry in Brittany during the truce of Malestroit. With at times only a dozen or so men involved, they seem a perfect fir for this.
  • 'Lion Rampant'. So when the big boys get involved with their retinues in Flanders, Gascony etc, these will be my 'go-to' rules. Again the scenarios and lists are all there waiting to go.
  • 'Hail Caesar'. For any battles larger than a personal retinue, whether a relatively small scale action, or all the way up to Crecy or Agincourt.
So, this will be one of my projects for 2015. How well I achieve my aims remains to be seen. I plan to use the same 'set up' for my Baltic Crusades project. Let's hope I can maintain focus and get some painting done soon to get this up and running.