Having failed to get in my planned CWC game a week or so ago, last Friday saw me determined to get some die rolling in in the form of another game of BKCII and my mini AVBCW campaign. Luckily things went to plan and I was able to sketch out the bare ones of the action on Thursday, set the table up Friday afternoon ready for kick off in the evening.
Based on the previous game, this time forces of the Army of the Severn Valley were mounting a suprise counter attack on the Morris Miners before they became too secure in their colliery base. The forces involved and broad background fluff are as follows:
Morris Miners
Having failed to shift the forces of G.U.R.R.T. Lusch from Stonehill, the Morris Miners rapidly withdrew to their base at the colliery on Memorial Road in Hanham. Division within the ranks and frankly underhand dealings had seen Bill Morris depart with the K.F.C. and Colonel Saunders, leaving the Miners somewhat in the lurch.
Fortunately possible salvation was at hand as local soldiers with experience of the SCW within the ranks of the International Brigade rallied to their cause. They were aided and abetted by the Lord of Brislington Hall, across the river in Somerset, a staunch supporter of the Somerset Freedom Fighters.
CO (CV8) Ron Bartlett
HQ (CV7) D Pike
9 x Militia
2 x MG
1 x Mortar
1 x Field Gun
1 x AC
1 x MkV WWI tank (Beast of Bodmin)
1 x Whippet (Flash)
Army of the Severn Valley
With the Territorials under Lusch having held out on Stonehill, thereby keeping the main Bristol to Bath road open, reinforcements from the Horfield Barracks, in the form of the Gloster Yeomanry and the Royal Tank Regiment, were rushed down to try and crush the local rebellion and restore law and order to this part of Gloucestershire. They were helped out by recently arrived troops of the Kings German Legion.
CO (CV8) Major Thornbury
3 x Vickers E tanks
3 x Regulars
1 x Bristol Biplane (scheduled support)
HQ (CV7) Captain Yate
6 x Regulars
1 x AT Rifle upgrade
1 x Mortar
1 x HMG
HQ (CV7) Kapitan Ewald
6 x Regulars
1 x MG
Scenario 3 - Counter Attack
As per the rulebook, but the Morris Miners allowed one section of barbed wire.
Set Up
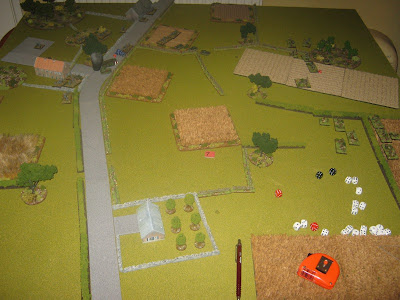
The Colliery is at the top left of the picture with Memorial Road running North to South as viewed. The MM deployment zone was broadly to the left of the road. The AoftSV would be using mobile deployment and coming in from the right table edge.
Turn 1
All units of the AotSV failed to arrive! The MM stood their ground.
 |
| MM and the Beast of Bodmin. |
 |
| A view to the entrance to the colliery |
 |
| The left flank of the MM with AC. |
Turn 2
Major Thornbury arrives (but no-one else from the AotSV) and promptly advances at full speed ahead towards the MMs. Some MG, mortar and IG fire suppresses an infantry unit.
 |
| Tanks move to the fence line supported by infantry. |
Turn 3
The Bristol Biplane arrives and suppresses 2 tanks, 2 militia, 1 IG and an MG unit. Captain Yate arrives, but no sign of the KGL under Kapitan Ewald. Thornbury advances his tanks around to the right flank as more co-ordinated fire from the MMs suppresses one infantry unit.
 |
| The effect of the Bristol Biplane bombing run. |
 |
| Captain Yate leads his troops bravely into battle. |
 |
| The Vickers tanks advance to threaten the MM left flank. |
Turn 4
No action at all from the AotSV due to Blunders or failed command rolls. Meanwhile the MMs under Bartlett and Pike are having a field day, destroying two of the infantry units attached to the tanks and suppressing the other. A perfect display of combined arms operations. Well done chaps!
 |
| View of the battle seen from the Bristol Biplane. |
Turn 5 (or Time for Tea!)
With the loss of most of the supporting infantry and the tardy nature of both Yate and Ewald, things are not looking too rosy for the AotSV. However, all COs and HQs on both sides fail their command rolls. Obviously they were taking a bit of tiffin' as this war business can be damned thirsty work!
| A stiff upper lip is required at all times. |
Turn 6
Kapitan Ewald finally arrives with the KGL, but probably too late to affect the outcome. Captain Yate stands his ground whilst the tanks engage the Beast of Bodmin in a dual to the death. Despite a spirited resistance, the Beast succumbs to the superior fire power of the Vickers tanks. Bartlett and Pike continue their brilliant marshalling of their meagre forces and destroy the final supporting infantry unit.
 |
| The KGL move to the cover of the wood. |
 |
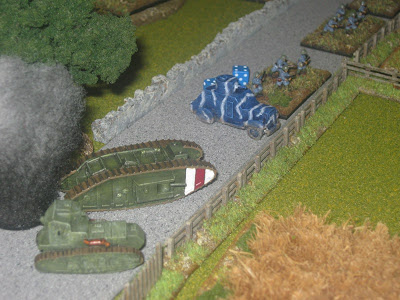
| The Beast of Bodmin ready to do battle. |
 |
| The Beast succumbs. |
Turn 7
Yate and Ewald move too little too late to affect the outocme of the battle. In a last desperate bid for victory, the Vickers turn their fire on 'Flash', the Whippet tank, but can only supress it before Thornbury blunders, effectively removing any chance of the AotSV defeating the MMs.
Bartlett and Pike turn their fire onto the KGL, destroying one infantry unit and suppressing another, as well as moving into position to assault the tanks.
 |
| The Vickers tanks look very exposed without infantry support. |
Turn 8
A last ditch attempt by the AotSV to gain victory failed as once again the CO and HQs all failed thier command rolls! With victory already assured, Bartlett and Pike set about assaulting the Vickers tanks. With consumate skill, two militia units assaulted the three tanks, one at a time, destroying all three without them suffering a scratch.
 |
| The assault begins. |
 |
| Three - Nil. |
Losses
The AotSV lost 3 tanks and 5 infantry units to the MMs solitary MkV tank. A resounding victory for the MMs to say the least!
Thoughts on the game
It was always going to be hard for the AotSV to dislodge the MMs from their colliery, but it certainly became a challenge almost from Turn 1, when not a single unit arrived. With so many failed command rolls, and the few blunders through out the game, the game as a contest was over by Turn 4. With the Tea Break of Turn 5 any chance of a victory for the AotSV had definately gone.
However I decided to carry on to see if things could be turned around to affect the overall campaign, but if anything, things got worse. So with such a convincing victory for the MMs, this campaign has now closed. In a few weeks I will have come up with another area and forces to do battle. Watch this space.
