I count myself to have been rather lucky over the past few years in having played many games set in the Seven Years War using my good friend Keith Flint's home brewed rules. Then a year or so ago Keith announced that Osprey had accepted his rules for publication and so the serious business of turning them into a commercial ruleset began. Well in what seems a blink of an eye the rules are finished and are due for release on the 20th November this year.

Now the only downside in playtesting with Keith has been that I haven't had to concentrate too much on the rules as Keith has been there to answer my questions and point out the follies of my actions, which have been legion. So I thought it was high time I got some solo games in in advance of publication to once again become au fait with the rules. Also Dave Fielder and I plan to give these a good run out, having had some very enjoyable SYW games of Black Powder.
Quick Rules Overview
At this point it is worth giving a brief overview of the game for those not familiar with the rules. So a Turn sequence is broadly as follows:
Quick Rules Overview
At this point it is worth giving a brief overview of the game for those not familiar with the rules. So a Turn sequence is broadly as follows:
- Dice for Movement Initiative. Each player rolls to see who gets to go first this turn using a D6. The winner can then move one Brigade of troops. It is then his Opponents turn to move one Brigade. This goes on back and forth until all troops have been moved.
- Movement Phase. Dependent upon the Command Rating of the Brigade Commander, troops can move generally once per Turn, sometimes two or if you're really unlucky not at all. The Commanders are rated as 'Dashing', 'Dependable' and 'Dithering'. So the 'Dashing' chaps have a better chance of moving more than once, whilst the 'Dithering' ones have a better chance of, well, dithering.
- Dice for Firing Initiative. Essentially the same as for Movement above. This does make you think of where you need to fire first, to get the jump on your opponent.
- Firing and Melee. This is done with an Average Die to even out those times when you roll a load of 6s or 1s that really affect your game. The die roll is modified by troop quality as well as the normal things like terrain and distance. I find this nice and elegant and gives good balance to the game.
- Rally Phase. Does what it says on the tin as they say.
- Troops. Not part of the Turn sequence, but troops are rated as 'Superior' (Grenadiers etc), 'Standard' (Line infantry) and 'Inferior' (Freikorps). So Grenadiers shooting or attacking Freikorps have a better chance of inflicting hits due to the difference in the troop quality.
- National Characteristics. The various Nations can have advantages, so the Prussians early on have better commmanders and movement, but the Austrians have better artillery, reflecting the state of the protaganists throughout the war.
So not actually having any figures to play with, my multi-purpose wooden blocks were brought out of the attic to once more grace the wargames table. With time being somewhat limited, I chose a scenario I'd had my eye on for some time from 'Scenarios For All Ages' by Grant & Asquith.
Scenario 22 - Making the Best of a Bad Job
The Prussian columns have been advancing into Bohemia at the start of the 1761 campaign season. One column has become somewhat lost, knowing only that it must head in an Eastward direction until it re-establishes contact with other Prussian forces. During the march they have become strung out along the route and are not in the best arrangement to meet any enemy troops.
The Austrians are not in an ideal position either. Their cavalry has gone off to search for forage whilst the rest of the troops are in camp at the edge of some woods and are unprepared for action.
The Austrians are not in an ideal position either. Their cavalry has gone off to search for forage whilst the rest of the troops are in camp at the edge of some woods and are unprepared for action.
Objectives
The Prussians have to exit off the Eastern edge of the table with at least 60% of their troops, including their artillery, in 10 Turns. The Austrians simply have to prevent the Prussians exiting the table.
The Prussians have to exit off the Eastern edge of the table with at least 60% of their troops, including their artillery, in 10 Turns. The Austrians simply have to prevent the Prussians exiting the table.
Prussian Forces (Blue)
1 x Dashing Commander
1 x Light Cavalry (Hussars)
2 x Line Infantry
1 x Dependable Commander
1 x Heavy Cavalry (Cuirassiers)
2 x Line Infantry
1 x Medium Artillery
1 x Freikorps (Independent but rated as Poor)
Austrian Forces (Red)
1 x Dependable Commander
3 x Line Infantry
1 x Grenzers (Independent)
1 x Medium Artillery
Deployment
The Austrians deployed behind the hill and by the woods, but unprpeared for combat. They would require a successful command roll to form into line ready to meet the advanceing Prussians.
The Prussians were strung out on their line of march, with the Hussars and two units of Line infantry forming the vanguard under the Dashing commander. The rest of the units were under the Dependable Commanders sphere of control

The Prussians were strung out on their line of march, with the Hussars and two units of Line infantry forming the vanguard under the Dashing commander. The rest of the units were under the Dependable Commanders sphere of control

Turn1
The Austrians won the roll for movement initiative and were able to quickly form a rough line and deploy their artillery piece. The Prussians all passed their command rolls and started deploy either side of the road as well as continuing to advance forward.
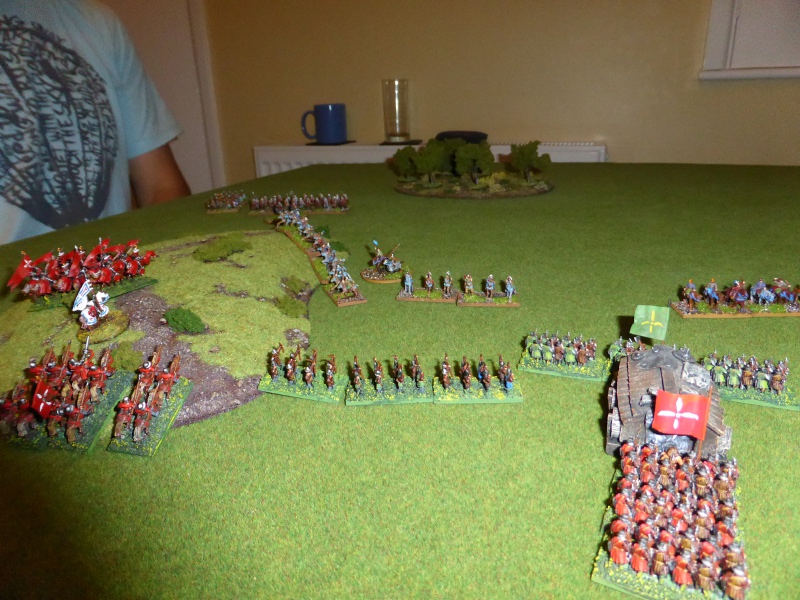
 |
| Austrian Grenzers sit astride the road whilst the Hussars and Cuirassiers move off to the left and the Freikorps to the right. |
Turn 2
The Austrians once again won the roll for movement and continued to straighten their lines to improve their position astride the road, but also mindful of their left flank. Well the Prussian Dependable commander did not live up to his name and his units were unable to advance towards the Austrians, somewhat hampering their planned attack. The Dashing commander did what he could, as did the Freikorps, but the Prussians were now distinctly strung out along the road.
 |
| The Hussars probe forward whilst the Freikorps move to try and flank the Austrian left. |
Turn3
The Austrians once again went first but their command roll meant they could only move away from the Prussians, which wasn't too much of a disaster as they could still improve their position. Disaster once again struck the Prussians as the Dependable commander and the Freikorps were unable to advance. The Dashing commander did what he could, but with no support could only deploy his Line infantry.
 |
| The Prussian advance falters badly. |
Turn4
It came as no suprise for the Austrians to win the movement roll, allowing them form a very solid line across the road. At least the Prussians were all able to move, moving into position to initiate a firefight with the Austrians, who true to form won the roll off to go first. Both sides traded fire with a few hits caused on the front line troops.
 |
| The Prussian attack finally gets going against a strong Austrian position. |
Turn 5
The Prussians finally got to go first and advanced on a broad front. In the ensuing firefight, one Prussian unit was forced back having received 4 hits, causing it to spend the next turn re-forming. Other units took a few hits, but were able to rally most off at the end of the turn.

Turn 6
Once again the Prussians went first, but the Dashing commander lived up to his name too well, with his units having to make at least one move towards the enemy. This resulted in a Line infantry unit charging on its own into the solid Austrian line, which resulted in its demise as a result of closing fire and close combat. Elswhere more shots were traded but to little effect.
Turn 7
The Austrians in a strong position hold the line despite having won the movement roll off. The Prussian attack once more fragments as the Freikorps moved back whilst the Dashing commanders advance without much support. Only the artillery is in range and once again each trade a few shots but to no real effect.
Turn 8
The Prussians finally got to go first and advanced on a broad front. In the ensuing firefight, one Prussian unit was forced back having received 4 hits, causing it to spend the next turn re-forming. Other units took a few hits, but were able to rally most off at the end of the turn.

Turn 6
Once again the Prussians went first, but the Dashing commander lived up to his name too well, with his units having to make at least one move towards the enemy. This resulted in a Line infantry unit charging on its own into the solid Austrian line, which resulted in its demise as a result of closing fire and close combat. Elswhere more shots were traded but to little effect.
 |
| The Prussians charge in only to meet their end at the hands of combined Austrian shooting and melee. |
 |
| With the attack faltering on the Prussian left, the Schwerpunkt moves towards the Austrian left. |
Turn 7
The Austrians in a strong position hold the line despite having won the movement roll off. The Prussian attack once more fragments as the Freikorps moved back whilst the Dashing commanders advance without much support. Only the artillery is in range and once again each trade a few shots but to no real effect.
 |
| The Prussians are rapidly running out of time and their disjointed commands do not help their cause one jot. |
Turn 8
The Prussian crucially win the intiative to move first but their (less than) Dependable commander fails meaning they are unable to advance towards the Austrians for a co-ordinated attack . With this all hope of exiting the table goes and they abandon their positions and retreat back along the road.
The End
 |
| The final positions before the Prussians withdraw in good order. |
The End
Well with the failed command roll in Turn 8, all hope of exiting the table went with only two moves left in the game.
Post Game Thoughts
Well as a first solo outing I was very happy with how things went game wise. Most of the rules came back to me, with the aid of the QRS, and only a few times did I have to refer to the main rules. So as always some musings on the game and rules etc:
- I must say I think Keith has done a great job with these rules. They work very nicely and capture the feel of the SYW in a very simple but elegant fashion. At first I was not sure about the use of average die, but I find it to be a refreshing change from rolling 'buckets of die' and one that gives a better resolution IMHO.
- For anyone wishing to game this period, I highly recommend them buying or getting access to a copy of 'The Military Experience in the Age of Reason' by Christopher Duffy. It really does give a superb overview of the whole period, especially of the SYW. For a novice like myself I have learnt an awful lot from this book which has helped me appreciate how the Armies performed in the period and how that translates onto the gaming table.
- My wooden blocks work perfectly for these sort of games. I do however need to make some nice markers for the units so that I can keep track of which block is which unit, but also from an aesthetic point of view. I may even try flags on them as others have suggested.
- The scenario worked well but may have been more suitable for the Napoleonic period. The slow movement of SYW armies in comparison make it quite hard for the Prussians to get into combat quickly enough for them to have a chance of winning the game. Naturally their mission wasn't helped by some exceptionally poor die rolling by the 'Dependable' commander, but then I have a track record of turning good commanders into chinless wonders with my die rolling!
Well, I hope to be able to get another game in soon as I really enjoyed this first solo run out. I think I will try and find a scenario more suited to the SYW period to give both sides an even chance. I will have a browse thought the scenario book as well as the simply superb Kronoskaf website. I'm sure I will be able to find something suitable.