Showing posts with label BKCIV. Show all posts

Tuesday, 25 April 2023

Warning Order #62

The latest issue of the ever excellent Warning Order magazine is now available for downloading. I always enjoy perusing what Matt has to say and being of a similar age, sometimes it is quite a trip down memory lane. 

Last issue Matt asked for some feedback on playing BKCIV games and how others go about it. I contacted him and gave him my thoughts and how I approach things etc. Fortunately for me he found this interesting and useful and, as a result, published it in this edition!

Right, off to have more of a gander on what else is in this issue.

Monday, 19 December 2022

Creating A BKC Scenario

In the latest Warning Order magazine, Matt Irsik had some post-game musings on the rules themselves and also how they played their games, which made for some interesting reading. He asked for some ideas on how other gamers approached things and I duly sent him my two penn'orth. So as mentioned at the end of that post, I thought I'd jot down how I approach creating a scenario for BKC, but this could equally apply to other rulesets and periods. So in a rough chronological order:

Select A Setting or Period
  • This normally starts with what am I in the mood to play. It might sound bloomin' obvious, but you want to game what grabs you at that particular time.
  • So is it Normandy '44, Sicily '43, Russia '41 or Poland '39? Each have their own merits for sure and sometimes you just fancy some Early War action as opposed Late War.
  • Rather stating the obvious again but what collections do you have to game with? If mainly a Late War tank based force, then this naturally limits your options. 
  • For Solo play all of the above is quite easy to sort out, but with other friends and gamers, you might have to adjust things to suit. 
Select A Scenario
  • Do you want to play a historical action, such as the D-Day landings or Poland '39?
  • Or do you want to play one based upon a Grant & Asquith book for example?
  • To keep things simple depending upon the time you have, then one from the rulebook might fit the bill nicely.
  • Some scenarios might not be applicable, such as an Airborne Landing in Poland '39 or Russian '45. Not impossible of course but worth bearing in mind. I find that if it feels right and plausible, then you get a better game from it.
OOB
  • I tend to do some basic research for both sides at the start once the Period and Scenario have broadly been selected.
  • Decide who will be the Attacker, who the Defender. Depending upon the Period, this might point towards one force rather than the other. So Poland '39 is most likely to see the Germans attacking, but it is not out of the questions to have the boot on the Polish foot for something different.
  • Do you use Points or Historical OOB? I tend to use a mix of both. For solo games I'm not too fussy, but if I've got a friend coming over, I will take more care and attention to try and make sure they have a good game by giving both sides a chance as it were.
  • The Scenario will often dictate the OOB being used. So for example a tank heavy force would not really be suited for a Stalingrad type scenario. I know it's stating the obvious a bit, but still worth bearing in mind.
  • How many players per side will there be? Based upon experience each player should have roughly a Battalion plus Support to play with. If more than that it can be hard to keep track of things and then the game can start to bog down with too many units to co-ordinate. So if each player does have their own Battalion, then roughly speaking they can do their own Turn alongside other players without too many problems surfacing.
Table Size
  • Do you have space for a 6' x 4' table or larger or will that be a push? Maybe 4' x 4' would be more appropriate? Again Scenario selection and the number of players might mean a certain size is required. Naturally this can feed back into the above affecting the Scenario, OOB etc selected.
Table Layout
  • Quite early on I will start sketching out the table layout, based upon all of the above, to help me start firming things up in my mind. If a scenario from a Grant & Asquith book, then the broad details are already there and then just need tweaking to suit the period being played. Again the same is true of a historical action. But if it's a scenario from the rulebook, then you are obviously starting with a blank page. This will take more time and effort but it is a rewarding task in its own right IMHO.
  • On this 'map' I will sketch out rough deployment areas, scheduled attacks, reinforcement arrival points etc. Again for solo play I do not have to worry too much about this and can keep it quite simple. If a friend is coming over then this will be more detailed and accurate so that they can plan there Attack or Defence. 
  • I will take into account major areas of terrain, such as woods, rivers, BUA's etc to make sure that the terrain does not unduly inhibit one side more than the other. Sometimes this will naturally happen if based upon a historical action, but then that's part and parcel of playing it.
Scenario Specifics
  • Are there any specific things that need to be taken into account, such as the weather, night time action, when reserves might arrive?
  • What is the Objective for either side for the game? If using a scenario from the rulebook, then this is easy to sort out. Ditto for a Grant & Asquith type scenario, but some tweaks might be required. For historical actions then this is less easy to figure out, well for me it is. Either side might have different victory conditions, which can make for a fun and challenging game.
  • Player briefings are usually required alongside a map so that again they can plan things in advance and hit the ground running when arriving chez moi.
Pause & Take Stock
  • At this point I normally like to leave things for a day or two to let everything settle down in my mind and to let it wander a bit. Quite often I will have some slightly altered ideas on all of the above and tweak things here and there. A period of reflection is well worth doing if you can as it really does make a difference.
Set Up The Game
  • Normally I try and set the game up at least a day in advance, taking into account all of the above. I will work round and view everything from all sides to try and make sure I haven't made any glaring errors!
  • Then if possible I leave it over night and come back to it fresh in the morning. It is amazing what you pick up when you look at it with fresh eyes the next day. Often I will move the odd thing here and there to remove possible obstacles the might inhibit one side more than the other. Again I will walk round just to give things a final once over.
  • If playing with a friend, I will send over some photos of the layout from their own side, trying to give them an advanced view to help them plan their strategy and tactics.
Time
  • A normal game for me lasts about 2-3 hours when playing solo or with a friend, where we each have roughly a Battalion per side with support. If more people are playing then you might need to allow another hour or so.
  • This excludes of course setting up and taking down the game. Normally the set up will take me a couple of hours as I find it is good not to rush things so that you avoid some glaring terrain placements that might unduly affect the game.
  • Take down is around an hour or so.
A Campaign
  • These days I find campaigns a much more attractive option and a better gaming experience. Naturally this is not an option for everyone but a lot of the above can be carried over from one game to another.
  • I like narrative based games where the outcome of one game naturally suggests one or more options. The alternative of course is to use the Campaign system in the BKCIV rulebook, or one of the many options out there.
  • For the players, having to marshal their forces over the campaign is something that to my mind, really adds another dimension to our games. No last minute Pyrhhic victories in a one off game, but careful consideration and husbanding of ones troops.

Well there you have it. I hope this might have been useful in some shape or form, but I found it interesting to jot these things down from my own point of view.

So until next time, stay safe and keep healthy.

Saturday, 10 December 2022

Warning Order Issue #61

Matt Irsik and the chaps from Wasatch Front Historical Gaming Society have just released the latest version of their magazine, Warning Order #61. As always an interesting read and to my mind just as good as any of the main print wargaming magazines. Of interest to me are their thoughts on playing BKCIV and their recent trial game of Honours of War, both faovurite rulesets of mine. They also touch upon playing the War of the Roses using Hail Caesar!, but this seems to be prior to knowing that the new edition will include this period in the book. Plenty to enjoy on a cold and cloudy Sunday morning that we have forecast tomorrow.

Matt always likes feedback so if you have the chance, let him know your thoughts etc. I plan to on how I approach BKCII/IV and HoW as well.

Saturday, 3 October 2020

Libertad! SCW Supplement

When BKCIV was released, it was announced around that time that there probably would be supplements to follow, given the space restrictions within the main rulebook. One of these was to be for the Spanish Civil War, a period that attracted me more or less from the off when I first started playing BKC I & II. Having put on demo games at Colours and played a variety of one off games over the years, this interest morphed into the A Very British Civil War fictional setting, with the timeframe similar to that of the SCW.

So when it was announced a month or so ago that the supplement was ready as a pdf and a hard copy would soon follow, I was a very happy bunny. Last week the hard copy was available and I duly ordered my copy, which arrived today.

The first thing that you notice is the very striking front cover which I love and I think captures the period very well. The supplement runs to 36 pages, so what do you get for your money? Well some images can be found below and then I'll run through the contents after:

 
The front cover that will certainly stand out when wargames shows return at some poitn in the future.

One of the scenarios inside with a great map by Henry Hyde.

The Army Lists.

A sample army list in the same format as the BKCIV rulebook.

 
 The supplement has been written by Rob Anderson and Mark Fry and I think they've done a fantastic job! Leon at Pendraken has given the supplement a lovely clean look to it so it a pleasure to look at. The the maps by Henry Hyde are beautifully done in his usual style and are clear to read whilst at the same time having a great look to them. So 10/10 for presentation.

The rules specific to the SCW all feel right and nothing jars which is good to see. The 'Improvised Street Barricades' rule I can see working equally well for WWII and beyond. The  'Line Commander' rules I'm not sure whether I'll use or not yet, as my current vogue for Company Commanders might make them less applicable for my games, but I'll have to have a proper read through first. Some Armies have 'Improvised Portees' which is a nice touch and again could transfer to early WWII. I think another 10/10 here.
 
There are five scenarios in the supplement, with a paragraph or two of background information, excellent OOB and as already mentioned, Henry's maps are great. Each scenario ends with the number of Turns to be played and Victory Conditions for both sides. These are so well presented and tempting, whether a large or small battle, that I'm keen to give one or two of them a run out soon. Once again 10/10 for the scenarios.

There are 11 Nationalist and 13 Republican Army Lists, ranging from the standard to the obscure for me. You are certainly spoilt for choice here, that's for sure. I will be using these alongside Bob Cordery's excellent SCW source book, 'La Ultima Cruzada'. All the lists can be used as a basis for AVBCW and some have nice additions, such as improvised portees, which I certainly want to make for my games. I think 10/10 for the sheer breadth and depth of the lists.

At the end of the supplement are two pages listing all of Pendraken's SCW range, which I think is rather useful to have to hand, rather than constantly referring to the internet for said ranges.

It will come as no surprise that this supplement comes highly recommended, whether as a pdf or hard copy, the latter being my preference everytime. At £6 I think this is excellent value and well worth the money. So if you like the SCW or the AVBCW, I think you will find much to enjoy in this supplement. Rumour has it that a Korean supplement may be in the offing in the future, but this is of less interest to me, but never say never! Until next time...


Tuesday, 14 April 2020

Solo Wargaming Guide for Blitzkreig Commander

Last week Leon from Pendraken Miniatures dropped me a line asking if I would be interested in putting together a simple guide on how I go about setting up my solo games of BKC. Only too happy to help I jotted down some notes and ideas over a few days and then typed them up and send them off for approval. Leon was happy with my humble efforts and he worked his magic and produced the guide which can be found here . 

Hopefully my thoughts might be useful and inspire some people to give solo wargaming a go. Now I admit that it is much better to play against a friend, as not only do you have that challenge, but also the fun and banter that comes with it before, during and after a game. However in these difficult times this is nigh on impossible for the vast majority of gamers, so solo or online gaming is the only avenue available.

I would like to think that how I go about setting up a BKC game works equally well across different periods and rulesets. I think it does as I use broadly the same criteria when setting up an Honours of War game for example. Whether it is of use or not, I hope it might inspire some people to get their games out and give solo wargaming a go. Until next time...


Sunday, 23 June 2019

3 Days, 3 Games - Day 2, Italian Invasion of Greece 1940

For Day Two of my mini-gaming marathon, I had the pleasure of the company of Mark Fry, the lead author on BKCIV. We had met all to briefly at our local table top sale a few months ago and, given that we both lived in Bristol, agreed to meet up to get a game or two in. So after an exhange of e-mails a date was agreed and Mark chose to play the Italian Invasion of Greece in 1940

Now readers of my Blog will know that this is a period of the war that interests me and that I have gamed on and off in the past. This time I had the opportunity to try out a mini-campaign, which as you know I'm a big fan of. Mark kindly let me sort things out my end and so broadly I came up with the following:

Operation G - 'what if?'
Il Duce has, for once, been decisive in his decision to launch a partial attack on Greece. Following provocative attacks by the Italians on Greek shipping from the sea and the air, they crossed the Albanian border in the middle of August 1940. The Littoral Group has been given the task off advancing along the coast and seizing crossings over the Kalamas river, thus giving a spring board for further advances into Greece, with the ultimate objective of the port of Igoumenitsa. With the port in Greek hands, seaborne forces can be landed to push further into the Greek mainland.

The Greeks have been expecting an attack, but their main forces are in the Pindus and Macedonian sectors, fearing a joint attack from Italy and Bulgaria. However, intelligence reports suggest that Bulgaria is distinctly luke warm to the idea, so they are in the process of re-distributing their forces to meet only an Italian attack from Albania.

OOB
Italians
1 x CO (CV8)
1 x HQ (CV8)
1 x HQ (CV7)
9 x Regular Infantry
2 x MG
1 x Mortar
4 x L3/35 Tankettes 

Greeks
1 x CO (CV8)
1 x HQ (CV8)
6 x Militia Infantry (representing Border Guards and Police units)
2 x ATR upgrades
1 x MG
1 x Mortar 
1 x 37mm ATG

The Greeks are classed as Stubborn and therefore roll one less dice when rolling for fallback when suppressed.
The Greeks can Dig-In, either in the Initiative phase, meaning they are hit on a 5+ from direct fire.

Mark chose to play the Greeks and deployed first. The game was scheduled to last 8 Turns, with the Italians going first and using Mobile Deployment. I didn't take any nots as we were chatting away during the game, but hopefully the following 'photos will give you an idea of how the game went.
 

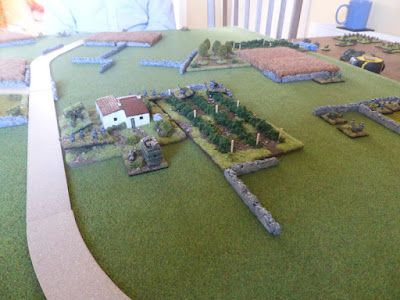
The view of the table, with the Greek deployment in the bottom left hand third of the table. The river is classed as impassable at this point, as are the rocky hills to vehicles or AFVs. The Greeks have wisely chosen to form a blocking position where the terrain forms a natural bottle neck.

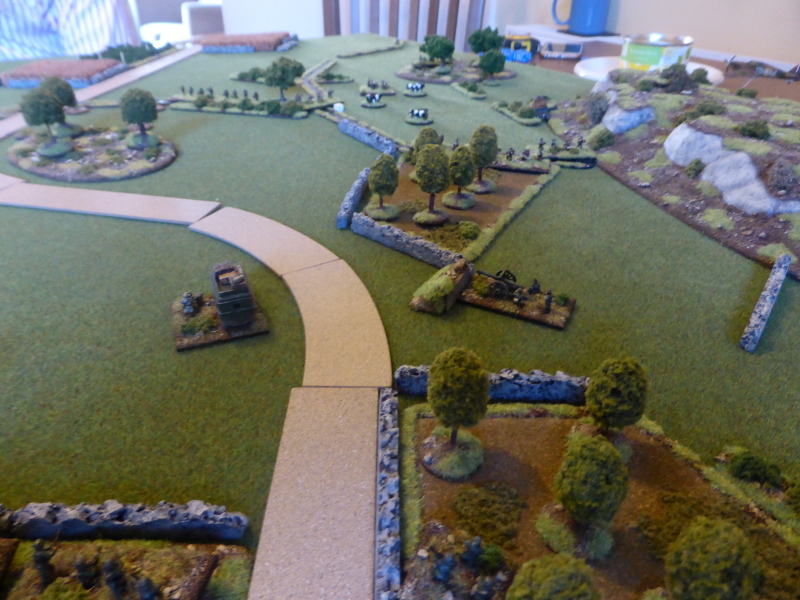
The Greeks troops spread out in their defensive positions, with the ATG in the orchard by the road. The mortar has been set up on the hill to give it a good field of fire.

Despite their low CVs, the Italians make good progress onto the table, with only the CO failing to show. However they immediately come under fire from the Greek mortar.

The Italians seek cover in the vineyards, with the aim of drinking their way through Greece.

The Italian advance coninues apace, with the CO arriving in his battle bus. Having revealed its position, the Greek mortar comes under sustained fire from the Italians and is soon destroyed. An early blow for the Greeks which deprives then of any indirect fire.

The Italian wine tour continues in safety as they are out of range of any of the Greek wepaons.

Given their low CVs, the Italians are advancing with alacrity, especially the Tankettes, which are threatening the Greek flank. The Greeks open fire with their ATR, managing to inflict one hit.

A view from the Greek positions on the plain.

The Greek view from the hill.

The Italians have managed to turn the Greek flank and combined fire has seen the Greek losses mount. With their position untenable, the Greeks wisely with draw. But they have slowed down the Italian advance long enough for a better defensive postion to be prepared in the rear.

The Greek view as their left flank crumbles.

The view from the Italian positions.


Post Game Thoughts
That was an enjoyable game that moved alon at a fair old pace. The Greeks managed to hold on until the end of Turn 7, so didn't do too badly at all. However the Italians suffered no losses, so are still in the driving seat, with the momentum certainly with them. As always some thoughts on the game etc:

  • One of the pleasures of wargaming is the chance to chat with liked minded fellows about our wonderful hobby. This was certainly the case with Mark and we spent a large amount of time chatting about BKCIV, its development, plans going forward and out gaming background etc. Certainly all very convivial and enjoyable.
  • The Italians certainly had some steady die rolls on the command front, with the odd Double 1 thrown in for good measure. I was worried that they might not get across the table in time, but for this game I needn't have worried. How my luck will hold out for next game only the Olympian Gods know!
  • Mark's die rolling at critical times was really unlucky. As he said his troops couldn't hit a barn door, which allowed the Italians to continue with their advance. 
  • The loss of the Greek mortar early on certainly hampered the Greek defence. Post game we agreed that he would have been better keeping it out of sight and using the troops on the hill to spot for it. This would have certainly impacted on the Italian troops and their advance across the open terrain. 
  • Playing the game as part of a mini-campaign means that Mark's efforts were not in vain. It will certainly be a tougher ask to secure a contested river crossing, but both sides will have more assets available, which means a chance to get my Italian planes out once again.

So there we have it. Day Two done and dusted and a very enjoyable one it was too. Next game is some SYW shenigans with Keith Flint using his Post of Honour rules, which I'm really looking forward to. So until next time...

Saturday, 25 May 2019

Push on to Porrazitto - Game 4 of an operation Husky Campaign

The British, having broken through the Italian defences, are pushing on quickly towards Porrazitto, which lies not far from the objective of Catania. The Italians have rushed some troops into the area, this time supported by advanced elements of the German 1st Fallschimjager heavy weapons battalion. They have not had time to prepare any defences nor have any artillery support available.

OOB
Essentially we have the same British force as the last game, namely an infantry Battalion with some armoured support and off table artillery and air support. 

For the Axis, we have a reduced strength Italian Infantry Battalion, but importantly supported by the Fallschirmjager and their mortars and machine guns.

Scenario Details
This is pretty much a straight forward Scenario 6: Exploitation scenario. The only thing to note is that the terrain to the South East of the bottom road and stream is classed as Difficult Terrain, thus incurring a -1CV to command rolls. The rocky outcrop is impassable to all vehicles and AFVs.

Deployment
The Axis troops focussed on holding the two small BUAs, with troops also on the right flank to try and prevent flank attacks. Importantly the Fallschirmjager posted an MG unit on the rocky outcrop to give commanding views of most of the table, which allowed them to sport for the mortar units.

Given the tricky terrain on their right flank, the British deployed mainy in the centre and on their left flank.

An overview of the table.

The Falschirmjager MG unit with its commanding views.

The Axis centre and right flank.

The Axis left flank.


Turn 1
The British got off to a bad start, with a Blunder on their first command roll, which resulted in the loss of an MG unit even before they'd arrived on the table! The armour then failed to show up, but at least the right flank arrived and advanced as far as they could. The FAO, FAC and Recce all arrived at the end of the Turn.

In response, the Axis right flank pushed forward to counter the threat of the British FAO or FAC advancing too far ahead and exposing themselves to Close Assault. The Axis left flank then came into play (CV9) and succeeded in calling down 4 turns of mortar fire on the exposed British infantry, resulting in the loss of 2 Infantry units, 1 MG unit and 3 other units suppressed! Well that's what happens when you have good troops ably supported. I did feel somewhat embarrassed as Dave's first Turn was about as bad as it can get.

The end of Turn 1.

The results of the Axis mortar fire; not pretty.

The Axis right flank pushes forward.

The Fallschirmjager MG unit still has a great view of the enemy.


Turn 2
The British FAC managed to call in his Air Support, with the Hurricane really taking it to 'Jerry', with 4 unit suppressed as a result of his strafing. The left flank and armour both arrived, with a Sherman being suppressed by Op Fire.

Once again the mortars caused a loss of another infantry unit, with others still being suppressed. The Axis ATGs duelled with the Shermans, with them taking a hit apiece. The Axis appeared to be having the better of the opening Turns, in no small part due to the Fallschirmjager mortars.

The Hurricane's strafing run.

The end of Turn 2.

The British armour taking cover behind a wall as they exchange fire with the ATGs.

The British right flank once again receives unwelcome attention from the Boche.


Turn 3
The FAC once again manages to call in his Air support, only to see it driven off by AA fire. The FAO does better, with his artillery suppressing 4 units. It could have been worse, but the saves from the stone buildings in the BUA really helped the Axis troops. The British left flank played a blinder and made 3 moves, including a Double 1. This could potentially Turn the game in their favour. Unfortunately the Shermans failed their command roll and the CO couldn't get through either.

The Axis had a bad Turn, as the Fallschirmjager failed their command roll. the right flank then Blundered, leaving the CI at -2CV for this Turn and the next. Unsurpisingly he was unable to command the mortars. Could this be the turning point?
The end of Turn 3.

The FAO's artillery failed to cause any suppression.

The British left flank has pushed up and is threatening the Axis troops in the orchard.


Turn 4
A quiet Turn for the British, as their right flank manages to advance one move, being careful of the waiting Axis troops in and around the BUA. The FAC called in the Hurricane, but this deviated so much that it strafed open country. The FAO had better luck, with the artillery strike destroying an MG unit. The left flank failed its command roll, but the CO managed to get through and they close assaulted the Axis troops in the orchard, seeing them off after two turns of Close Assault. 

The Axis right flank openend up on the Sherman, which managed to make its save, otherwise it was a gonner. In response, the British armour destroyed the offending ATG. The Fallcshirmjager HQ made his command roll, which was a Double 1. this lead to the mortars once again raining down death and destruction, with 4 Infantry units gone and the 6pdr ATG suppressed. The tide had once again turned in favour of the Axis.
The end of Turn 4.

A knocked out Sherman can be seen smoking in the distance.

The British armour stuck in front of Porrazitto and lacking infantry support.

The Axis troops still firmly in control of Porrazitto.


Turn 5
With the right flank gone, it was left to the British left flank to prosecute the attack, which was becoming increasingly difficult to achieve. As they advanced, the armour attempted to retreat, only to see another Sherman knocked out. The FAC failed to get through but the FAO and his artillery managed to destroy the Axis Pak 40. However, the British had reached their breakpoint and with no realistic opportunity of achieving their goal, we decided to call it a day.
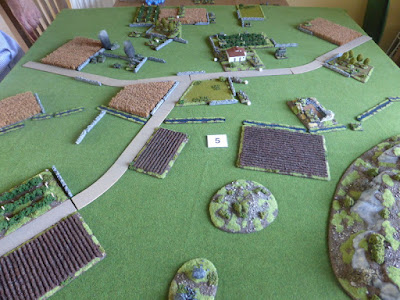
The end of Turn 5 and the game.

The Axis troops firmly in command of the battlefield.

The 'Tommy Cookers' in the distance.

The British left flank unable to make any headway without incurring significant losses.


Post Game Thoughts.
Well the Fallschirmjager certainly made a huge difference in this game. The British also got off to a poor start and from Turn 1 were never reaaly able to recover, although their left flank in Turn 3 caused me some jitters! So as always, some thoughts on the game, the rules etc;
  • The three German mortars and one Infantry Gun certainly won the game for the Axis, no shadow of a doubt. In fact the only other units that fired were the ATGs. They are devastating and its painful to be on the receiving end, as I know from previous games. But then historically they were very, very effective. Having a unit on the rocky outcrop allowed me to call down fire almost at will on the exposed British. In BKCIV, even troops next to Linear Terrain can now be seen, which made it even harder for the British. I think going forward I may revert to BKCII and units cannot be seen from High Ground when in contact with Linear Terrain, unless they move or shoot.
  • Having a good CV of 9 again really helped, as I could do so much more compared to previous games with only 8's.
  • The Terrain certainly favoured the Defenders this game, with the BUA buildings being made of stone, meant that the units inside could only be hit on 6's and had a 4+ Save. This did make a big difference, especially when under artillery fire as normally I would have had lots of units suppressed or even gone.
  • Hindsight is a wonderful thing but the use of smoke could have really helped the British. Simply put we forgot this, but hopefully we will remember for future games. 
  • Post game we chatted about how effective the German mortars were compared to the British artillery. The Germans rolled 9 dice and didn't deviate whereas the British only rolled 6, but had to deviate, which is not much but can make a difference. Sometimes the template can favour artillery over mortars, but experience shows that German mortars are more deadly unless you take 2-3 25pdr Batteries. If you do this then you can swing the game too far in favour of the British. Game balance is a tricky thing that's for sure.
This game brought a natural end to our campaign. We could have carried on but then you get into the rather attritional games of well dug-in units with field defences against large amounts of artillery which are, in my experience, rather dull affairs.
 
We not have a break of a few weeks due to family stuff and holidays, but hope to resume in June with the Battle of Wavre using Bloody Big Battles as the ruleset. It's a while since we've played these but they are a great set of rules. In the meantime I will be trying to carry on basing and painting units as well as scratch building terrain, which I really enjoy. So until next time...

Saturday, 18 May 2019

Siesta in Sortino - Game 3 of an Operation Husky Campaign

With the Italians having managed to cause enough problems for the British in last weeks game, this had bought them time to set up a defensive line in advance of the town of Sortino. The terrain is much more rocky and barren than down on the plain, so the Italians were hoping to take advantage of the high ground.

OOB
Italians
1 x CO (CV9)
2 x HQ (CV8)
1 x FAO (CV6)
9 x Infantry Units (3 with ATR upgrade)
2 x MG Units
1 x Mortar (gun pit)
2 x ATG (gun pits)
1 x IG (gun pit)
1 x 20mm AA Unit 
1 x Semovente 75/18
3 x 75mm Artillery Units
1 x Marked Minefield 

British
1 x CO (CV9)
3 x HQ (CV8)
1 x FAO (CV8)
1 x FAC (CV8)
1 x Daimler Recce Unit
12 x Infantry Units
2 x MG Units
1 x Mortar 
1 x 6pdr aTG + tow
2 x Honey Tank Units
4 x Sherman Tank Units
1 x 25pdr Battery
1 x Hurricane Ground Support 

Scenario Details
The Italians deploy first in their 1/3 of the table.
The British deploy using Mobile Deployment.
The Italians can deploy their marked minefield anywhere on the table.
8 Turns 
British Objective to defeat the Italians and breakthrough towards Sortino. The Italians to simply hold on.
The streams are impassable to vehicles. Infantry cound them as Linear Terrain for movement. 
The rocky outcrop is impassable to vehicles

Deployment
The Italians deployed in and around the small farm in their deployment zone. they put the bulk of the AT support in the centre and on the left wing, in anticipation that this would be the area the British armour would be forced to come through, given that the bridge had been mined.

The British deployed mainly towards their right flank, to allow the armour as much free movement as possible, given the limits of the terrain.


An overview of the table, with the Italian delpoyment zone on the right.

Dave had brought along his pineapple rings in anticipation of having a Hawaiian pizza topping to celebrate his victory. Quelle horreur!

The view from the Italian side.

It was obvious from this where the main threat would come from.


Turn 1
Frankly a rather poor Turn by both sides, with only the British right flank getting up to much. The Italians failed to call in their mortar when they had a clear view to the British infantry in the open! Not a great start.


The end of Turn 1.

The British arrive at a somewhat leisurely pace onto the table.

The Italians despite great views, fail to call in artillery or mortar strikes onto the British.


Turn 2
Another poor Turn, with the British left flank failing completely and their right flank still a tad sluggish. For the Italians it was a catalogue of failed rolls right across the board. Another chance gone to attack infantry in the open. Bugger!


The end of Turn 2.

The strung out British advance.


Turn 3
The British get off to a better start this Turn, with their right flank advancing nicely, but a Sherman is suppressed by Opportunity fire. This does however reveal their position which leads to an airstrike by the Hurricane. The British CO has had to move over to the left flank to goad them into action, which he succeeds in doing. Yet again the Italians fail to take any advantage of the infantry in the open, so have to be content with moving their infantry slightly to meet the expected attacks.

 
The Hurricane arrives and doges the flak thrown at it ...

... but only supresses one unit.

The end of Turn 3.

The British armour in a good position.

The British left flank finally arrives.


Turn 4
The British start the Turn with some Initiative fire on the dug-in ATG on the hill, but fail to suppress it. Then they and the rest of their flank fail their command rolls. However on the left flank the CO plays an absoulte blinder, moving his units 5 times, including a Command Bonus. This really alters the complexion of things as suddenly the Italians are under threat from both flanks. The British CO moves onto the rocky out crop, which the Italians have stupidly left unprotected, to get a better view.

In response the Italian ATG manages to knock out one Sherman, but is then destroyed by Opportunity fire back, which is a big blow. Under pressure the infantry on the left flank retreat and just when they needed to move, the right flank failed its command roll. Things are not looking good for the Italians.

 
The Hurricane pilot refuelling before his next mission.

The end of Turn 4.

Despite coming under early fire, the British are in a great position to flank the Italians and also gain the high ground.

The Italians try and pull back to better defensive positions.

The British left flank advances to the stream junction and to the woods.


Turn 5
The British FAC fails again but the FAO succeeds, leading to two Italian units being suppressed. However the right flank and armour fail, with the left flank only moving once. The Italians again fail to do much, largely due to lack of targets. Both sides exchange some fire and cause suppression.

 
The effect of the British artillery.

The end of Turn 5.

The view from the Italian right flank.

The view from the Italian left flank.


Turn 6
The pineapple rings did their work as the FAC calls in the Hurricane again, leading to 3 units being suppressed on the Italian right flank. This leaves the way open for the British, who in a mix of fire and manouevre, move into the woods on the Italian right flank. Not to be outdone, the Shermans and Honeys move round the Italian left flank, leaving things looking pretty grim for the Italian defenders.

The Italians try to respond, with their FAO finally getting through, only to see the strike deviate and fall on open ground. Again some rearranging takes place where possible, but a Blunder by the CO puts pay to planned movement and shooting.

 
Biggles is back and this time he means business ...

... with his strafing run being spot on.

The end of Turn 6.

The British armour lined up ready to move or shoot.

The Italian flank obviously turned.

The British hav cleared the Italians from the woods and the flank is under severe threat.

The Italians feel as if they are in a replay of Rorke's Drift, as the Buffalo Horns of the British attack engulf them.


Turn 7
Luckily for the Italians both the FAO and FAC co-ordinated attacks fail to achieve anything, which is a welcome reprieve. However the pressure is maintained from the British armour and the troops on the left flank. 

The Italians respond where possible, with their FAO calling in his artillery which leads to 3 units and the British FAO suppressed. Again the CO fails his command roll, when he could have done with the Semovente having more shots at the British.

 
The Hurricane fails to achieve anything this Turn.

The end of Turn 7.

The British armour shoot up the Italians in and around the farm.

Small comfort as the British left flank is suppressed.


Turn 8
A glimmer of hope appears when the Hurricane arrives and deviates onto his own tanks, only for the Italian AA fire to drive him off! Oh the irony of it all. The end is nigh as the British armour destroys the Semovente and an infantry unit, taking the Italians to their breakpoint. This they pass but it is a clear vicotry to the British.


Almost a case of Blue-on-Blue as the Hurricane deviates onto his own armour.

The end of Turn 8 and the game.

The British armour in complete control.

The open Italian right flank.

Rorke's Drift.

The British left flank.


The End of the Game
In the end a clear and decisive victory for the British. It didn't seem that that would be likely early on and even at the half-way point, given both sides poor command rolls. Also once again we finished a full 8 Turn game!

Post Game Thoughts
As always some thoughts on the game, the rules and the scenario: 
  • It had been a busy week on the work and home front and I ran out of time to have a proper think about my deployment. Hindsight is a wonderful thing but I should have deployed my ATGs either all on the hill on the right, or kept them close to the farm where they could have had good support from the infantry. In the end they fell between both stools. Also on the right flank I simply did not secure the rocky outcrop, which allowed the British FAO to gain a great viewpoint from which to call in attacks.
  • There has been some debate on the Pendraken forum about whether to use the hits stay on or come off rules. It is interesting to note that if we had used the hits come off as written, then the Italians would have comfortably held on to their positions and would have not felt too threatened. This is why I personally prefer the hits stay on option as well as it feeling right.
  • I should have taken more ATGs, which I have, but simply have not found the time to paint. Lesson learnt.
  • Both sides command rolls were really, really poor early on. For the Bitish they could not get moving, with their right flank infantry only making it to the stream over the entire game. For the Italians their failure early on not to be able to call in attacks on the British infantry whilst in the open probably cost them the game. Such is the fickle nature of the Die Gods. 
  • I thought the scenario worked well, but I wasn't too happy with the layout of the terrain. Frankly it was a bit more rushed than normal due to the circumstances already mentioned. It is hard to give both sides a fair chance and terrain can make or break things on this front. Normally I will set the game up a day or so in advance, to give me time to look at things afresh, and then tweak things as I see fit.
  • The Recce rules continue to be an issue, but they always were in BKCII. We like the random movement, but that's about it. More thought required on this, but whether we will be albe to come up with a workeable solution remains to be seen. 
 
So there we have it. We have another game planned for next week, which I have already started to think about. This may lead to a natural end to our campaign, largely due to having to pick our daughter up from Uni followed by a family holiday, which means I will be hors de combat for 3 weeks or so. So until next time ...