Well it has been some time since I have been able to update my Blog. A combination of the Summer hols with the family and that damned thing called 'work' have been to blame. Fortunately a window of opportunity presented itself over the weekend, so despite being a little under the weather, I managed to get in a game of AVBCW.
The premise of this encounter was that the Army of the Severn Valley, loyal to Edward VII, having taken control of Bristol, was intent on pushing Eastwards towards Bath to secure their flank. The forces at their disposal consisted of the Kings German Legion and the Corpo de Spedizione Italiano.
The Kings German Legion (1st Jagerbataillon) force consisted of seasoned German 'volunteers', all WWI veterans and members of the Freikorps. These 'volunteers' had been supplied with arms and equipment and transported in secret to the Avonmouth docks on the Severn Estuary. The force consisted of the following under the command of Colonel J F van der Decken:
1 x HQ (CV8)
9 x Infantry (Regulars)
3 x AT Rifle upgrades
3 x MGs
1 x 81mm Mortar
The Corpo de Spedizione Italiano (Italian Expeditionary Corps) had been offered to Edward VII as a gesture of support from one King, Victor Emmanuel, to another. In reality the offer had come from Mussolini and the King had merely been the front man. Mussolini hoped that by supporting the King, he could gain further influence in North and East Africa, an area of potential conflict with the British. The CSI was led by Console M Marino of the 7th Group of Banderas "Fiamme Nere" (Black Flames), which consisted of the 735th Bandera 'Implacabile', a Black Shirt Fascist Battalion, supported by the L3/35 tankettes of Major Lohengrin Giraud and a Staffel of the famed 'Condor Legion'. The force consisted of the following:
1 x CO(CV9)
3 x Infantry (Militia)
1 x 75mm IG and tow6 x L3/35 Tankettes
1 x HQ(CV7)
6x Infantry (Militia)
2 x MGs
1 x 81mm Mortar
3 x L3/35 Tankettes
1 x FAC (CV7)
1 x Bf-109E
Arrayed against this formidable force was the 3rd 'Bath' Battalion of the Somerset Light Infantry of the Loyal Army of the South, with support from the Royal Horse Artillery. Hearing of the fall of Bristol to the above forces, the Bishop of Bath and Wells had put out an urgent call for support. The forces of the LAotS responded as quickly as they could and took up blocking positions astride the A431 at Swineford, a natural bottleneck of the Bristol to Bath road. The forces under the command of Lieutenant Colonel Flectcher Vane Esq and Captain Curruthers consisted of the following:
1 x CO (CV8)
1 x HQ (CV8)
9 x Infantry (Regulars)
2 x MGs
1 x 3" Mortar
1 x 25mm ATG
1 x Mk V Male Tank
2 x 18pdr Artillery Support Units
The scenario was loosely based around 'Breakthrough Attack' on p38 of BKC, with the objective of the AotSV of clearing the blocking troops from Swineford so that they could move on to more favourable positions nearer to Bath. For the LAotS, they had to hold onto Swineford for as long as possible.
Table Set Up
 |
| View of Swineford from Bristol |
 |
| RHA with a commanding view of the Bristol to Bath road. |
 |
| 3rd 'Bath' Battalion astride the road. |
 | ||
| Covering the ford on the Avon. |
Turn 1
The 735th Bandera under Seniore Bruno Calzolari, made a quick advance along the road, whilst the van der Deckens KGL came down from the hills around Upton Cheyney to take the RHA and supporting units by suprise in the flank, leading to the loss of one gun. Console Marino ably supported this attack by quickly advancing towards the KGL.
Captain Curruthers was shaken by this sudden threat to the flank, but LC Fletcher Vane, late of the Bengal Lancers, was used to flank attacks from this sort after his time on the North West Frontier, and calmly took charge. Mortar and artillery fire destroyed units of the KGL whilst the 'Beast of Bodmin' moved to support te threatened flank.
 |
| 735th Bandera advance |
 |
| Tankettes and Armoured Car on the A431 |
 |
| Console Marino moves up to support the KGL |
 |
| The 'Destruction of Sennacharib' |
 |
| The KGL in action |
Turn 2
Calzolari's mortar supports the KGL attack and the 735th continue to advance. The KGL finish off the last RHA gun under initiative fire, then move and fire to keep the 3rd 'Bath' Battalion heads down. Console Marino moves into line with Calzolari ready for the attack.
With the flank beginning to buckle under the attack from all sides, Captain Curruthers is not coping well with the situation. Once again Flecther Vane's cool head and experience shows as well directed mortar and fire from the 'Beasts' guns destroy and suppress more KGL units.
 |
| The KGL contesting the hill |
 |
| Slowly clearing the hill |
 |
| The CSI move up |
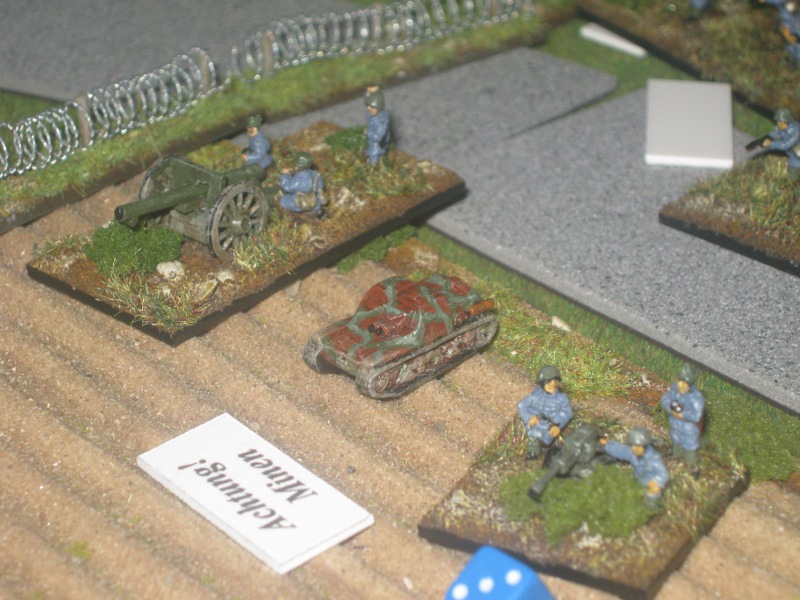
 |
| Major Girauds tankettes with 'liberated' gun tow in background |
Turn 3
The 'Condor Legion' Bf-109 arrvies to support the attack on the hill. A little local flak is enough to send him off course lsightly so that he bombs and strafes both sides! There is little movement as van der Decker and Console Marino dither as what is the best course of action.
Captain Curruthers has now taken control of himself and moved what troops he can into better positions. With the KGL behind the crest of the hill and the rest of the CSI out of sight, there is little for the 'Bath' boys to do.
 | |||
| Shooo! |
Turn 4
Once again the Bf-109 returns and hits the same KGL troops, who by now are less than pleased with his accuracy. Despite this Blue-on-Blue, they continue to attack over the hill, only to be met by a hail of fire, suppressing some units and forcing others to run away. Calzolari troops, shaken by the fire and fury on the hill, choose to keep their heads down. However, Console Marino and his troops make the most of the fire on the hill to move up close to the edge of Swineford.
Captain Curruthers is definately not cool under fire and there are suspicions that he may be in league with the AotSV. However, Fletcher Van is coolness personified and more mortar and MkV tank gunfire continue to take their toll on the hard pressed KGL.
 |
| The bloody fight for the hill continues |
 |
| Lining up for the attack |
 |
| The threat from the flank |
 |
| Ready for the off |
Turn 5
With the 'Bath' Battalion firmly esconced in Swineford, the CSI struggle to do much damage to them, despite Console Marino doeing his best to motivate his troops.
Suspicions of Curruthers being in league with the enemy are swiftly removed as his troops poor fire into the KGL, killing and suppressing many units. More fire from the 'Beast' suppresses the CSI infantry gun, the only major threat to it.
Turn 6
Seniore Calzolari orders his troops to assault the 'Beast', but the attack is easily repulsed. Van der Decken decides that discretion is the better part of valour and moves his troops back behind the brow of the hill to avoid the fire coming from Swineford. Console Marino orders the tankettes to make a dash through the gap in the wall in full view of the 'Beast' and the now redployed AT gun. Taking the 'Beast' and AT gun by suprise, they all make the gap bar one that is suppressed.
Fletcher Vane orders the 'Beast' and AT gun to pour fire into the exposed lanks of the tankettes. Despite 3 rounds of rapid fire, only one tankette is destroyed!
 |
| The tankettes make a run for it. |
 |
| Despite such juicy targets, the 'Beast' and AT gun miss! |
Turn 7
The tankettes wisely use their initiative to move out of the way of the line of fire. Calzolari's troops move up to get ready to assault into Swineford. Console Marino directs the fire with aplomb that leads to the 'Beast' and AT gun being destroyed, with Fletcher Vane being suppressed.
Curruthers does his best with Fletcher Vane out of action, but the writing is on the wall. The 'Bath' Battalion are close to breaking point.
 |
| Death of the 'Beast' |
 |
| Fletcher Vane is suppressed |
Turn 8
The Bf-109 arrives again to add support to the final assault, but achieves litte due to the confines of the built up area of Swineford. Calzolaris troops assualt into Swineford, with mixed results, but the 'Bath' Battalion are now pass their breakpoint.
Fletcher Vane passes his break test on -2 to the die roll, but the game is really over as they are threatened on all sides.
 |
| The net closes |
 |
| "What plane?" "That plane!!!" |
Conclusion
With the CSI closing in for the kill, Fletcher Van wisely decided to make a strategic withdrawl to preserve his forces for another battle. Despite the CSI winning, they had suffered equal losses to the 3rd 'Bath' battalion, especially the KGL that was a shadow of it's former self. So in the end I decided that it was an honourable draw.
Even though this was a quickly set up AVBCW game, I very much enjoyed it, as always. What I really need to do is come up with a more detailed background for all the forces and factions in and around the Bristol area that I live, similar to that done by Nik Harwood. So apart from trying to find tie to paint up more of my figures, I need to sort the background out.
TTFN.
Steve J.