Thursday 25 March 2021

One Hour Wargames Scenario 6: Flank Attack

I've had this scenario ready to go for quite sometime, but after a variety of factors caused some delay, I finally managed to get around to giving it a run out on the table yesterday. Once again my good gaming chums Dave and Keith were up for giving the orders for their respective teams, with my goodself in the position to execute them well or completely cock things up. I'll leave you to decide which...

The excellent scenarios from OHW provided the basis for the game, with the numbers of units involved upped via Thomas' also excellent Wargaming 19thC Europe. Personally the combination of the two give a perfect solo game or one for an evening after work with friends, when time is limited. 

Rules - Honours of War
Both sides were using the Austrian stats and had Dependable commanders.
 
Ruthenian OOB (Keith)
5 x Line Infantry (with battalion guns)
2 x Jaegers (with rifles)
1 x Dragoons
2 x Medium Artillery 

Moravian OOB (Dave)
6 x Line Infantry (with battalion guns)
1 x Jaegers (with rifles)
1 x Dragoons
2 x Medium Artillery
 
Scenario 
This is broadly based upon Salamanca and is ideally a game with an umpire for the giving of information to either side and deployment, as will become clear below.

 
The map as given to Dave (Moravia) at the start of the briefing. His orders are to break through the Ruthenian blocking force astride the road on the Northern end of the table and raid the enemy supply dump. First of all he has to give give his order of march for his units, which are deployed in the hatched blue area. Once received, he is given the following map.

Dave is then informed that as he approaches the blocking position (hatched red zone 1), he suddenly sees Ruthenian troops in the distance (hatched red zone 2), but is unable to determine their number of composition. Keith (Ruthenian commander) has had this map from the start, so knows he is making a surprise flank attack, but again is not certain what strength the Moravian force is. Both sides need to move quickly to either breakthrough or to prevent it.

With all the information to hand, Dave & Keith then sent me their plan of attack, as can be seen in the photo. The Moravians are to push forward and try to breakthrough with their 1st & 2nd Brigades, with the 3rd Brigade and Dragoons acting as a blocking force cum flank protections. The Ruthenian 1st Brigade is to hold on to the last man, as the 2nd Brigade moves to reinforce their position. The Jaegers are to harass and fall back if attacked, whilst the Dragoons are to act agressively (remember this bit) and attack where possible, no matter the consequences.
 
Deployment
With orders received, I set about deploying both sides as can be seen below. I used my wooden blocks for the game and not only do I find them fun to play with, but they make the action a lot easier to follow, due to my limited photography skills and if using my Commission Figurines figures.
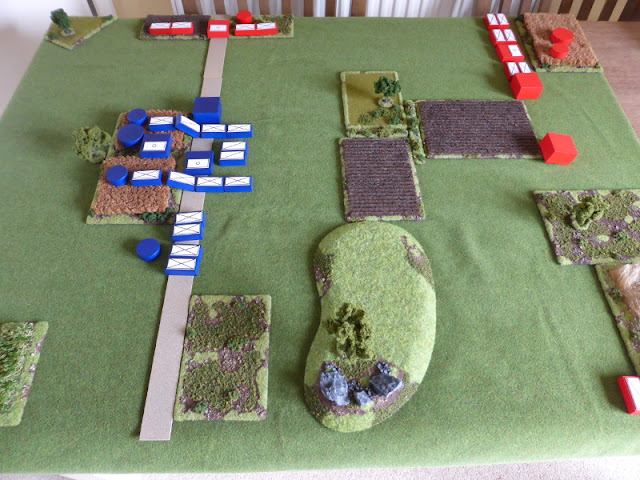
 
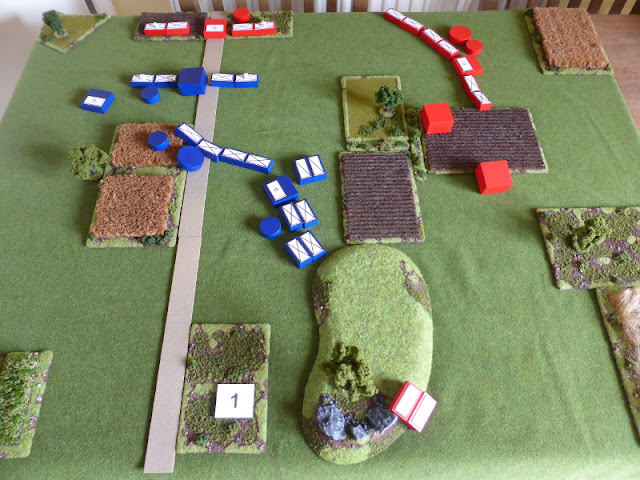
An overview of the table, typically open Austrian farmland with few hedges or fences.

There's an awful of of Moravian troops right in front of very few Ruthenians.

The Ruthenian 'cavalry' ready to ride to the rescue.

The lone Ruthenian Dragoon unit with orders to act agressively.

 
Turn 1
The Moravian troops automatically started first, with movement then following normal Honours of War intiative rolls. The Ruthenians won the Fire Initiative.
 
The Moravian 1st Bde rolled an 'Inspiring' move and quickly closed with the Ruthenian blocking position. The 2nd Bde moved out to the right as ordered, with the 3rd Bde and Dragoons taking up flank protection. The Ruthenian 2nd Bde made an 'Admirable' move and so closed as quickly as they could, with the independent Jaegers and Dragoons moving smartly forward.


Both sides open up, with honours fairly even, but the Moravian Jaegers couldn't hit a barn door!

The Moravian 2nd & 3rd Bde's on the move, as the Ruthenian 2nd Bde closes fast.

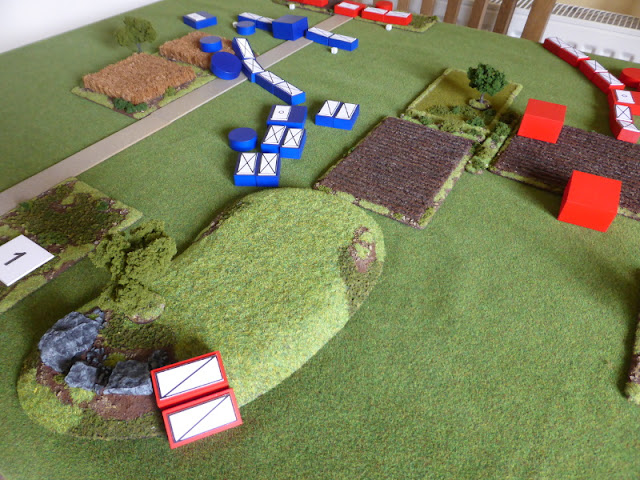
The Ruthenian Dragoons advance to the hill, unbeknownst to the Moravian troops.
 
 
Turn 2
The Ruthenians won the movement initiative and elected to let the Moravians move first. They also won the fire initiative.
 
The Moravian 1st Bde held position, except that its supporting artillery unlimbered and entered the fray, with the 2nd & 3rd Bde's deploying and moving forward where possible. The Ruthenian 2nd Bde moved forward and formed as solid line from where they hoped to stop the Moravian advance. The independent Jaegers made an 'Admirable' move and closed to the small hedges by the fields. The Ruthenian Dragoons, as per their orders, acted agressively...

The fire fight intensifies, with the Moravian 1st Bde losing a battalion and the Ruthenians only just avoiding the same. Maybe if the Moravian Jaegers could hit anything, it might have been different.

The Ruthenian Dragoons as they crested the hill they spotted the Moravian Line Infantry, who failed to turn in response as the Dragoons charged in, with them being dispatched in swift order (the red die marks them as routed).

The Ruthenian Dragoons then pursued and hit another Moravian Line Infantry unit who, although managing to turn, could not shoot as they were reloading.

In two rounds of fighting, the Ruthenian Dragoons once again prevailed, destroying yet another Moravian Line Infantry unit!
 
The end of a rather dramatic Turn 2.

The Moravian 3rd Bde has ceased to exist, with the 2nd Bde's flank somewhat in the air.

Both sides 1st Bde's have taking a battering, but the Ruthenian's are marginally the less worse for wear.
 
Turn 3
The Ruthenian's once again allowed the Moravian's to go first, but crucially the Moravian's won the fire initiative.

Despite the loss of the Moravian 3rd Bde, they still had a chance to clear the road, albeit a remote one. The Moravian 1st & 2nd Bde's moved forward to close the range, whilst the Ruthenian 2nd Bde made an 'Inspiring' movement roll and also closed the range with the Moravian 2nd Bde. The Ruthenian Dragoons charged into the unlimbered Moravian artillery, as the Moravian Dragoons moved back to try and protect the rear as well as looking for a chance to charge their counterparts.

The Moravian's took a bit of a battering, as the limbered artillery was automatically overrun by the Ruthenian Dragoons, whilst the 2nd Bde lost a battalion to converged fire from two sides.

The Ruthenian 1st Bde's reforming battalion finally quit the field of battle after taking more hits. Despite this they held firm and the Moravian 2nd Bde had another battalion in a poor way after taking 3 hits.

The end of Turn 3 and the game, as the Moravian's were being flanked and had little left with which to achieve a pyrrhic breakthrough of offer any meaningful resistance.


The End of the Game
Well that was very quick and a much more decisive victory than I would ever have thought, possible, looking at the forces involved and how the scenario was set up. I thought it would be tough one for the Ruthenian's, but 'twas not to be.

The final butcher's bill.


Post Game Thoughts
After a bit of a break, it was good to be back on the games table using Honours of War and my wooden blocks. Despite it being a very quick and one-sided game, I enjoyed it and thanks once again to Dave and Keith for their help with the scenario. So as always some thoughts in no particular order:
 
  • As mentioned earlier, this sort of scenario really benefits from an umpire/third party, so that the flank attack is a surpise to the attacking player. 
  • Both sides had good plans and it could easily have gone the other way, with the Moravian's breaking through, but the die favoured the Ruthenian's when it mattered. Winning the fire initiative and/or the Moravian Jaegers actually hitting anything, could have turned the tide early on. Certainly a scenario that has replay potential to it.
  • Both sides had their fair share of 'Inspiring' and 'Admirable' moves, so honours even here. 
  • The Ruthenian Dragoon's attack in Turn 2 was probably the game changer, as single handedly they destroyed the Moravian 3rd Bde and then in the following Turn their supporting artillery. Keith ordered them to act agressively and they certainly obliged. I was unsure whether to make them charge, as I probably wouldn't have done it, but orders are orders, which is half the fun of these sorts of games.
  • Honours of War is really a great set of rules and as mentioned many times, my default rules for the SYW and 18thC gaming in general. 
  • As the hill blocked line of sight, I simply followed the Moravian orders until such time as they could see the other side of the hill, rather than playing the God like view that some players do. Unfortunately they really didn't get to see the otherside due to the Dragoons attack!
 
Next up is the second game in my narrative 'Rebels & Patriots' campaign, which should get played in the next day or two, all being well. Fingers crossed things are beginning to move in the right direction here in the UK, so maybe it won't be too long before we can meet up with friends, albeit outside, which will be nice. I think it's about 5 months since I've seen anyone! Face-to-face gaming might be some time off, but at least there's light at then end of the tunnel.

So until next time stay safe!

Sunday 14 March 2021

Chekov's Cherry Orchards - The Kirschkrieg Campaign

With the campaign broadly set up, it was fairly easy to set up the first game, using the campaign narrative as a guide:

Background
Major Molotov was on his third raid into Ruthenian territory, this time having pillaged the cherry orchards of one Anton Chekov. Unbeknown to Molotov, Chekov had managed to get word to Rittmeister Radetsky that his orchards were under attack. Radetsky swiftly assembled some of his troops and aimed to catch the Moravians on their way back across the border.
 
Scenario J: A Long Way From Home
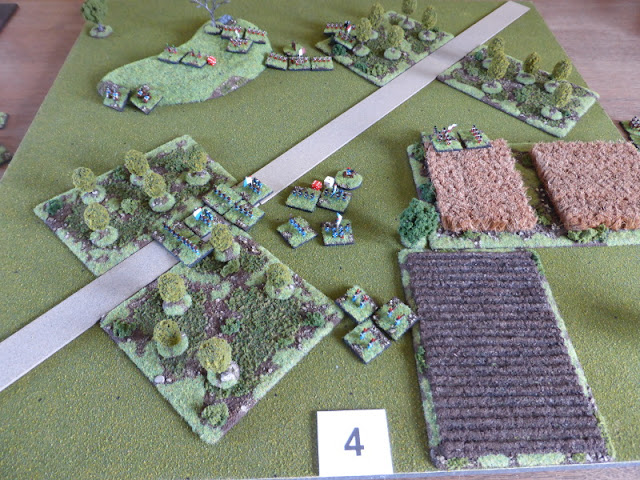
I chose the above scenario from the rulebook, as it seemed a good way to start the campaign, with the only change being to use 'Dawns & Departures' to generate the terrain, which can be seen below on the map. The NE and SW squares contain cherry orchards, the NW square a small hill and the SE square ploughed fields or crops.


The Ruthenians have split their force into two, to try and stop the Moravians, who need to exit as many troops off the NE end of the table, ideally via the road.


Ruthenian OOB - 18 pts
4 x Line Infantry
1 x Jaegers 

Moravian OOB - 24 pts
3 x Line Infantry
1 x Light Infantry
1 x Jaegers
1 x Hussars

The Plans
For Rittmeister Radetsky, the plan was simple, in that it was to advance as quickly as possible towards the orchards in the NE corner and to try to form a cohesive defensive line there. For Major Molotov, his plan, if you can call it that as he was unware of the impending ambush, was to quit Ruthenian territory as quickly as possible, using his Hussars and Jaegers to cover his flanks.

The Game
 
Both sides deployed, as per their options in the map above.

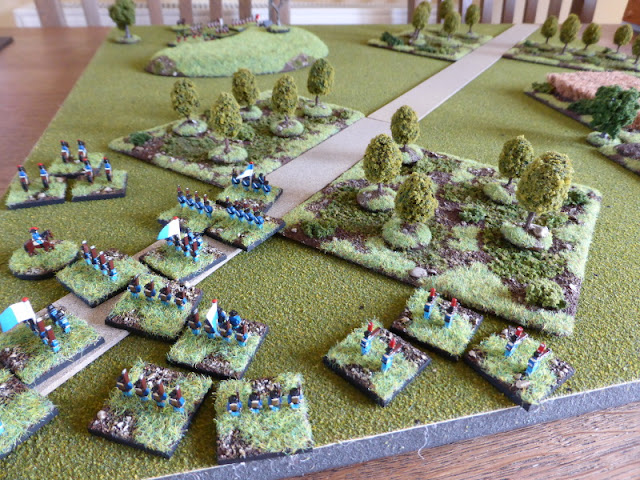
Major Molotov follows his Light Infantry who are leading the way, with the Jaegers and Hussars covering his flanks.

The smaller of the two Ruthenian ambush forces.

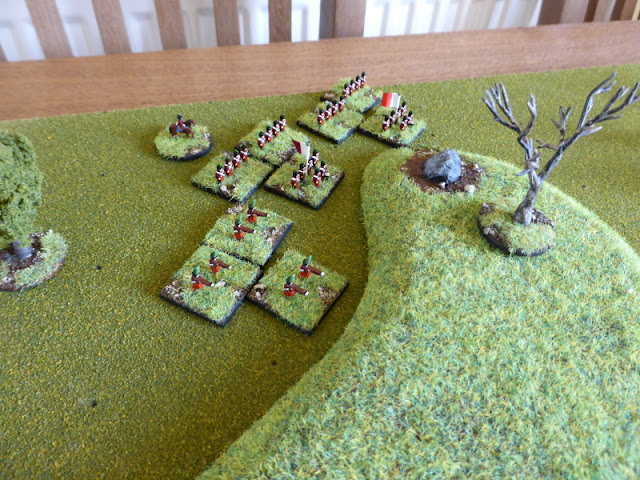
The main Ruthenian force, led by Rittmeister Radetsky.

The end of Turn 1. The Ruthenians got off to a good start, with all their troops moving forward as quickly as possible. They also rolled a Double 6, followed by a 6, meaning the Grand Duke had agreed to send re-inforcements in the form of another Line infantry unit. this bit of good luck meant that from the off, they were almost at parity with the Moravian troops facing them. Unaware of the ambush, Major Molotove moved forward with his troops, only to receive a message from his Jaegers and Hussars that Ruthenian troops had been spotted on both flanks.


The Moravian Jaegers spot the Ruthenians moving towards the cornfield.

Major Molotov and his troops move through Chekov's cherry orchards, as yet unaware of the ambush that awaits.

Rittmeister Radetsky moves off, thankful for the unexpected re-inforcements from the Grand-Duke.

The end of Turn 2. The Ruthenian re-inforcements failed to follow Rittmeister Radetsky, possibly due to the rumours surrounding him at court. All other units moved forward, with the Jaegers hitting and disordering the Moravian Hussars. The Hussars rallied from the shock of being hit, whilst the Moravian troops pushed forward to try and clear the orchards. The Moravian Jaegers on the right flank made a skirmish move and managed to disorder the nearest Ruthenian Line Infantry unit.

The Jaegers emerge from the orchard and hit the Ruthenians in the cornfield, as the Moravian Light Infantry begin to move clear of the orchards.

Rittmeister Radetsky and his troops approach the edge of the orchards, but he is unaware that his re-inforcements aren't following him.

The Ruthenian Jaegers draw first blood as they hit the Moravian Hussars, who see their numbers dwindle.

The end of Turn 3. Rittmeister Radestsky managed to form his unit into Close Order, but the unit next to him somehow discovered that they were low on ammo (a double 1 rolled), which wasn't ideal, as was the Jaegers failure to shoot. At least the re-inforcements decided to play ball and moved forward. The Ruthenian Line Infantry in the cornfield hit the Moravian Light Infantry, causing them to become disordered. As the Moravian troops continued to clear the orchards, the Moravian Jaegers routed the Ruthenian Line Infantry who had just shot at their Light Infantry. The Moravian Hussars made a skirmish move and disordered the Ruthenian Jaegers on the hill.

The Moravian Light Infantry are disordered (middle pic with blue die) by shots from the cornfield, but their Jaegers catch the Ruthenian culprits off guard, routing them as they catch them in the flank with thier shooting.

The Moravian Hussars push forward and disorder the Ruthenian Jaegers on the hill.

The end of Turn 4. Rittmeister Radetsky could only look on in horror as his Jaegers, with a rush of blood to the head, charged at the Moravian Hussars (a double 1 again). Surprised by this the Hussars failed to counter-charge, yet despite overwhelming odds, the Ruthenian Jaegers survived, but had to retreat back disordered. Things got better when the Moravian Light Infantry routed after taking fire to their front from the remaining Line infantry unit in the cornfield. Having already formed close order and still yet to fire, Rittmeister Radetsky gave the order and a devastating volley errupted from the Ruthenian line, hitting Major Molotov's unit, with himself only just escaping with his life. However his unit was broken and when he failed to rally his troops, they routed from the field, taking him with them in their headlong rush to escape!

The Moravian Light Infantry break, with Major Molotov's unit broken...

... who then fail to rally and quit the field!


End of Game
With Major Molotov suddenly fleeing, another unit failed its morale test and became disordered, at which point it was pretty obvious that the remaining Moravian troops had little to no chance of breaking through the Ruthenian lines.
 
Post Game Thoughts
Well, that was over much more quickly than anticipated! Still it felt longer and was a fun and entertaining game, more so due to it being part of a campaign. So first of some thoughts on the game:
  • The terrain certainly didn't favour the Moravian troops, who were somewhat bottlenecked by the orchards either side of their line of advance. But that's one of the great things about the Dawns & Departures rules, as you never quite know what terrain you will be fighting over.
  • The Moravian troops might have been better off trying to move through the orchards first, but as this would have slowed them down, in all likelyhood the Ruthenian's would have had more time to form a formidable defensive line.
  • In my games of R&P, it's been very rare to roll any double 1's or 6's, yet there were three in this game, all of them for the Ruthenian side. The re-inforcements at the start really helped Rittmeister Radetsky, as from the off he was almost equal in terms of Line Infantry, which in this type of scenario, really counted. What looked like a tough ask suddenly became a lot easier.
  • How the Ruthenian Jaegers survived their suicidal charge, I'll never know, but it was certainly an amusing point during the game, especially when the Hussars failed to counter-charge. Maybe I can weave this into the campaign narrative somehow...
  • If you can form Close Order and still have First Fire up your sleeve, then that is a formidable option to have, talk less of if the unit is also Good Shooters, meaning that first volley will hit on 2+!
  • As always I'd say the rules gave a fun and quick game, that was easy to play and remember the rules. They may be simple but they are not simplistic, which is a big tick in the box for me these days.
 
In terms of the campaign, we have:
Rittmeister Radetsky now on 19 Honour.
Major Molotov still on 10 Honour.
 
I have some idea for the next campaign game, which will move one rung down the ladder, as the Moravian troops were unable to cross the border into their own territory, but more on that in the next post.

I have another game lined up with my friends giving me remote orders, using Neil Thomas' OHW scenarios, as per previous games. Honours of War will be the rules again and I'm looking forward to getting this onto the table. My painting mojo is low as I'm preferring to play games at present, but this might change.
 
I recently tweaked the layout of my Blog pages, which has allowed me to post larger images, but frankly it has been a pain to format this post😣. For some reason it decided to play silly buggers as a I was writing, which took me over half an hour to correct, with lots of Anglo-Saxon expletives along the way! Hopefully it was worth it and makes it easier to see the action in the accompanying photos, but any feedback would be greatly appreciated.

So until next time stay safe and keep healthy!


Thursday 11 March 2021

The Kirschkrieg Campaign

After a break of over a month doing some of my other hobbies and enjoying at times some wonderful Springlike weather, it's now time to get back to some wargaming. I've had several ideas for campaigns and games bubbling away and I've been working on them, even whilst away from the games table. 

Out of the ideas I chose to bring forward a simple Rebels & Patriots campaign, that I've been meaning to do for quite some time. Now I have some books on how to set up campaigns as well as the Two Fat Lardies 'Dawns & Departures' pdf for use with 'Sharpe Practice II'. So a day or so ago I dug out the latter and after a quick perusal, I had created a simple ladder campaign that can be seen below:


The 'Dawns & Departures' pdf has lots of great ideas within it and if you want, you can go into an awful lot of detail in setting up your campaign and running it. However I wanted something more simple and so opted for a ladder style campaign, as this would be easier for me to run solo using the 'Rebels & Patriots' rules. Despite it's simplicity, there is a lot more to it given the way the terrain is generated, so each game in each square is never the same, which is good. Also I will be using my usual narrative approach to drive things and see where it takes me. Simples!
 
Background Fluff
Incursions are a constant problem along the Ruthenian - Moravian border. Lately the Moravians have been making raids to steal the famous Ruthenian cherries, to flavour their vodkas, which has somewhat miffed the Ruthenians, who love nothing better than a glace cherry tart for their pudding. With the stakes so high, both sides have upped the ante and dispatched their best commanders to the border...
 
Commanders
I rolled for the Officer's traits as per the rulebook and came up with the following, which helped create the narrative for the campaign;

Ruthenian Rittmeister Radetsky (Battle Scar +5 Honour)
An experienced officer, he has been somewhat overlooked for promotion, either due to lack of the right family connections, or possibly due to some faux pas at the Grand-Duke's Valentine's Day Ball. However he is too good an officer for the Ruthenian's to ignore, so has been quietly sent to the border to deal with the cherry rustling that is causing concern at court.

Moravian Major Molotov (Officer's unit may re-roll one failed hit per Turn)
As the Quarter Masters brother, he is ideally placed to gain such materiel as required for the incursions into Ruthenian territory, leading to several successful raids and good hauls of cherries. Both brothers benefit from this as their cherry cocktails are famous throughout Moravia, even enjoyed as breakfast by the Margrave himself.

Scenario
This has already been chosen and is almost ready to go, but more of which in another post. Until then stay safe and I hope you enjoy the campaign.

Monday 1 March 2021

Greco-Italian War 1940

I'm not sure when I first became interested in gaming the Greco-Italian War 1940-41, but it was around the time we were looking to put on a demo game of BKCII at Colours quite a few years ago. We also considered the Italian limited invasion of France 1940, which is probably even more obscure. In the end we settled upon the Italian CTV's involvement in the Spanish Civil War.

Over the years since I have done the odd game now and then, pitting the Italians against the Greeks and the British Commonwealth troops, but a lack of suitable books on the subject has limited scope to create a decent stab at a campaign. Most books seem to focus on the German involvement in 1941, with the first part of the conflict largely ignored. Mario Cervi's superb 'The Hollow Legions' is an exception, but lacks the sort of detail a gamers needs.

Fortunately Osprey have published the first half of the conflict as part of their Campaign series early this year. I had debated on whether to buy this or not, but the author's previous works on the Italian Army I found to be excellent alongside a desire to run a campaign based upon this conflict tipped my hand and a copy duly arrived a few days ago.

 
Osprey's Campaign 358 cover.

The Contents are set out in the standard format.

The excellent and very detailed OOB.

The maps of the campaign are very useful and there are 6 of them, which makes following the campaign much easier than is often the case with Osprey. You need these as the action does cover a wide area and a lot of movement to and fro by both sides.

The detailed maps of the action help if you want to recreate certain actions in the Central and Northern parts of the front.


From a first read through I'm very impressed by this book, as it gives an awful lot more detail than you can readily find online. It is exactly the sort of detail I have been after for quite sometime and is perfect to allow me to create my own mini-campaign based around this conflict, but more on that in another post.  In no particular order the following have been useful and of interest:
 
  • A broad brush overview of the origins of the campaign is a useful reminder of the salient points in the build up to the conflict. If you want more detail, the Cervi's book is the place to go.
  • The Opposing Forces part is quite illuminating as it highlights the lack of equipment available to both sides, especially the Italians in terms of Corps assets which you would think were readily available. Perfect in terms of deciding what to allocate to a force in terms of BKC OOB etc.
  • My interest in this campaign very much centres upon the Litoral Group that acted along the coast on the Italian right flank. The OOB give just the right level of info to know what units were allocated and when to form a good starting point for the campaign. Ditto in terms of the Greek forces opposite them.
  • The Opposing Plans gives some nice little bits of info for organising the campaign, such as planned naval landings, which I broadly knew about, and airborne operations which I didn't.
  • The Campaign part is as one would expect detailed, but to the right level and importantly for me, doesn't neglect the operations along the coast by both sides, as most information tends to focus upon the Central and Northern areas of operation. I have gamed these areas in the past and to be honest, it's hard to have 'fun' gaming over mountainous terrain. Useful for undertanding why stuff happened for sure, but for myself, not 'fun'.
  • The maps throughout are brilliant as they do show the back and forth nature of this campaign and cover all areas equally, including the Litorale Group, as so far I had been unable to find any good information on where they operated. Problem solved!
  • The Naval and Air Operations are covered and for me, just the right amount of information to make informed choices as to the support I may or may not allocate to each side. Also the aircraft used by the Greeks has been a revelation and I can see some of my models moving to the fore of the painting queue.
 
Overall a very good Osprey book and well worth getting if you have any interest in the Campaign whatsoever. I may even get the companion volume when it comes out if it's by the same author, even though I don't have that much interest in the second part of the Campaign when the Germans became involved. However it could prove useful to carry on my planned campaign but with German and Commonwealth support. Plenty to think upon for sure.

In the meantime I have some painting to do, which I've neglected of late as some Spring like weather and lack of motivation has meant the brushes have stayed firmly in the drawer. Sadly we have some new cases of the Brazilian Variant of Covid-19 in Bristol that has mutated to a point that's worrying the Boffins. Given we had a Bristol Variant near us recently we are watching the News for updates and hope it doesn't spread down towards us. So until next time stay safe!