After some interesting and entertaining games set during the fictional Prussian invasion of England, this week saw us return to some 'proper' historical gaming in the form of the the Battle of Isted from the 1st Schleswig-Holstein War 1848 - 1850. Now most of us probably only know of this war due to Palmerston's purported quote on the Schleswig-Holstein issue:
“Only three people have ever really understood the Schleswig-Holstein
business—the Prince Consort, who is dead—a German professor, who has
gone mad—and I, who have forgotten all about it."
Not a famous conflict by any means, as the 2nd Schleswig-Holstein War is, generally speaking, better known. I think this is a shame, as both conlficts have a lot to recommend them, but not if you are the authors of the 'Black Powder' ruleset:
"We pass over the early wars of German unification without much feeling of regret - the Schleswig War (Denmark versus Prussia) and Second Schleswig War (this time with added Austrians) are not without their supporters, but whether we would want to encourage them is another matter."
I am firmly a supporter of both conflicts, so do not agree with the above quote.
Enough of the background 'history' and on with the game. Once again 'Bloody Big Battles' was to be our chosen ruleset and full details of the scenario can be found in the BBB Yahoo Group file . Broadly speaking both sides are evenly matched, with "the Danes having numbers and more active troops against the Schleswig-Holsteiners with better equipment and a strong position."
The map of the game can be found below, with the only change being that I lost the top and bottom sections to allow me to fit everything onto out standard 4' x 4' table. The Schleswig-Holstein forces are in Blue with the Danes in red.
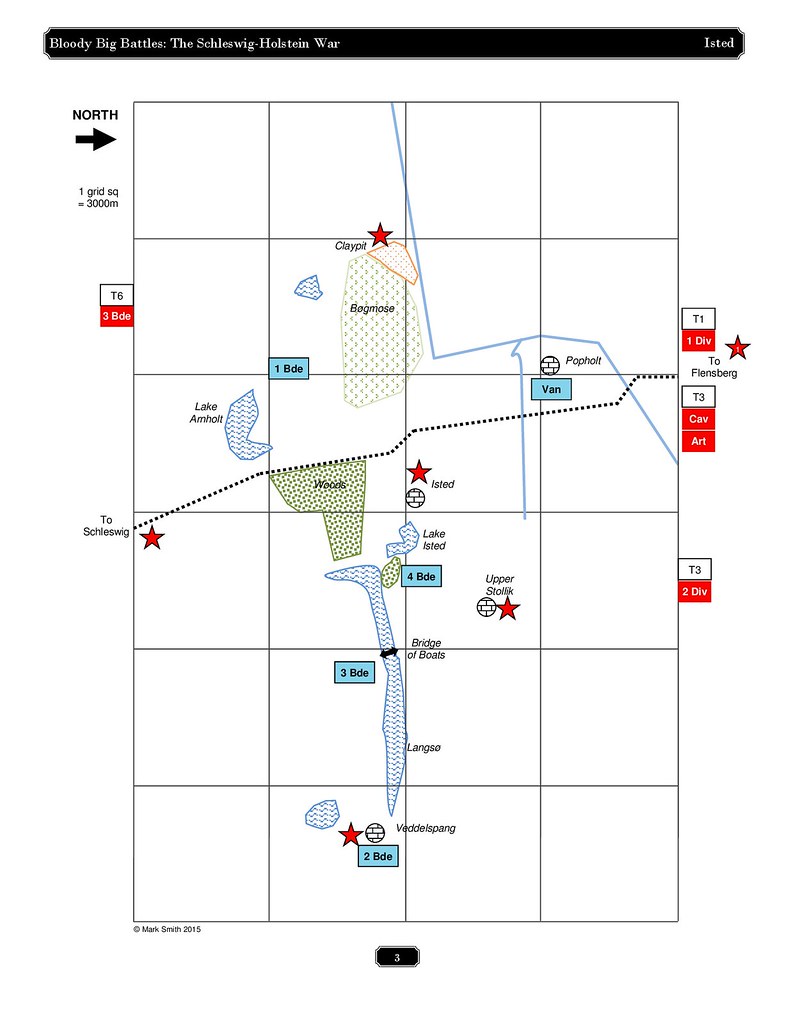
I chose to be the Danes, mainly because of watching and enjoying a lot of Scandinavian dramas on the BBC, which in my book is as good a reason as any. Once again no notes were taken during the game as it was full of action from start to finish. Hopefully I can remember most of what happened, but it is a few days since the game so my memory may play tricks with me...
 |
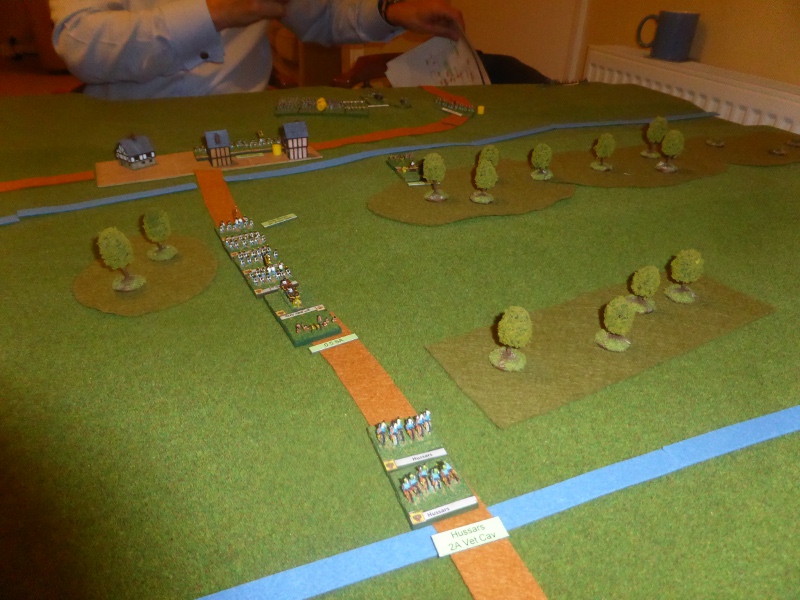
| The Danish forces in position as dictated by the scenario. |
 |
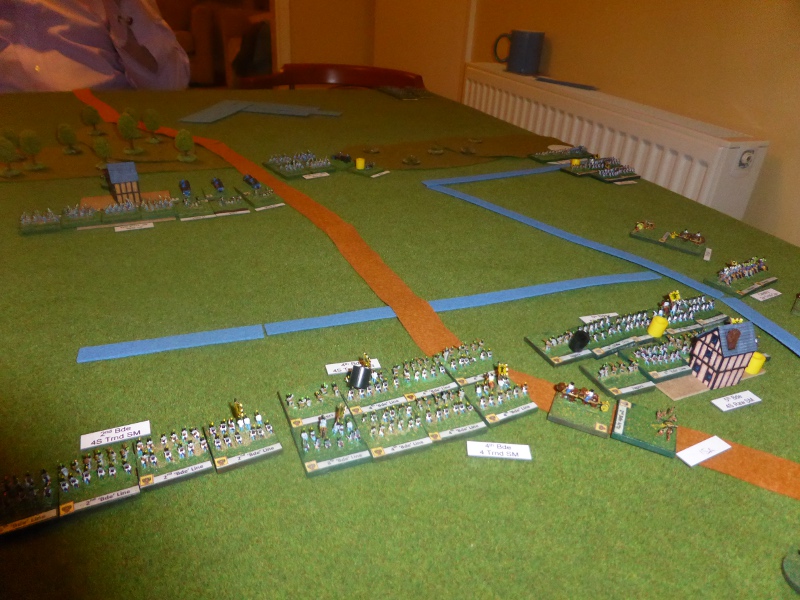
| We moved the Schleswig-Holstein 2nd Brigade (by the Turn counter) onto the table due to having removed their deployment area due the table being too small. |
 |
| A view from where the Danish 2nd Division would enter the fray. |
 |
| The Danish 4th and 5th Brigades enter along the stream by the village of Popholt. |
 |
| Part of the Schleswig-Holstein vanguard wisely withdraws to a better position to trade space for time and establish a defense in depth. Both sides get to grips from the off, with low ammo and disruption markers already evident. |
 |
| The Schleswig-Holstein troops manage to quickly occupy Isted, one of the objectives of the game. |
 |
| Turn 2 sees the rest of the Danish 1st Division arrive. |
 |
| The Danish 1st Division struggles to move out of their deployment area and past Popholt. However they try their best to move their 6th Brigade along the right flank to move towards the Claypit, another of the objectives. At least their numbers are having an effect on the Schleswig-Holstein vanguard, which is disrupted and in one case spent. |
 |
| Despite the pressure on the vanguard, the Schleswig-Holstein troops have taken up strong defensive positions in Upper Stolik and have reinforced Isted. |
 |
| A view from the Schleswig-Holstein side, where the 3rd Brigade is still inactive along Lake Langso. |
 |
| The Danish 2nd Division arrives as the 1st Division sporadically pushes forward, whilst the Schleswig-Holstein 3rd Brigade moves out across Lake Langso towards Upper Stolik. |
 |
| The view from the Danish 2nd Division towards Upper Stolik. |
 |
| The Schleswig-Holstein vanguard is under severe pressure as the Danish 6th Brigade continues to push towards the Claypit. |
 |
| The action hots up right across the board as both sides shoot at each other, with many low ammo and disrupted markers much in evidence. |
 |
| An unsupported Danish unit pays the price as it moves to attack Upper Stolik, but the Schleswig-Holstein troops have all been left low on ammo. |
 |
| The Danish troops line up ready to move towards Isted. |
 |
| The Danish Guards in action by the Claypit, which is weakly held but is a great defensive position. |
 |
| The Danish troops push forward towards Isted and Upper Stolik, as part of the Schleswig-Holstein 2nd Brigade moves along the rear to try and be in a better position to support the rest of the army. |
 |
| The action intensifies at Upper Stolik. |
 |
| The Danish centre pushing towards Isted and attempting to flank Upper Stolik. |
 |
| The Danish troops pay a heavy price as they attack towards Isted, which is strongly held with 3 batteries of artillery in support. |
 |
| The Danish troops push on out of Popholt, having taken it in assault and attempt to move past Isted to try and isolate it from their lines of communication. |
 |
| The Danish troops resolutely push forward all across the board. |
 |
| At heavy cost the Danish troops have captured Upper Stolik. |
 |
| The attacks falter outside of Isted due to effective artillery support. |
 |
| The Danish pressure continues as both sides continue to take casualties. |
 |
| Upper Stolik is the scene of heavy fighting as the Danes manage to hold onto the village despite determined Schleswig-Holstein attacks. |
 |
| The Danes cannot make any headway towards Isted... |
 |
| ... but they have managed to capture the Claypit and are closing in on cutting the road to Schleswig. |
 |
| The Danish 3rd Brigade arrives, forcing the Schleswig-Holstein 2nd Brigade to divert and meet the threat. |
Sadly at this point time defeated us and I completely forgot to take photos of the final Turn!!! However looking at the situation we agreed that the Danish troops were in a better position and had gained a minor victory of the Schleswig-Holstein forces.
Post Game Thoughts
Well what a game that was! It lasted over 3 hours and was full of action from the first to the last Turn. In fact I can safely say that was the best game we have had with Bloody Big Battles and all credit to Mark Smith for coming up with such a great scenario. Given that so much happened during the game, I'll try to comment on the salient points that we talked about during and after the game:
- The scenario notes recommend 4 players and for the game to last around 2 1/2 hours. I think we did well to almost complete it (we finished Turn 7) in around 3 hours with just the two of us.
- This is simply a great scenario and one that we thought would make a great club type game, with an umpire and some 'blind' markers to add a certain level of friction. Visibility was limited to 12" for all of the game, reflecting the fact that the battle took place during a foggy and wet summer day. Having 'blinds' would help reflect this and the fact that the commanders sometimes lost contact with their units during the battles due to the poor visibility.
- With quite a few units only having muskets, it felt like a Napoleonic battle for much of the game. This meant that the artillery was a really important factor and one which Dave used to much greater effect than I.
- Re-reading the rules post game, we got a few things wrong, but nothing that materially afftected the outcome of the game. As a result I'm making a short aide memoire of some of these points so that (hopefully) this doesn't happen again.
- Once again the 'Bloody Big Battles' ruleset has come up trumps. I cannot recommend these rules highly enough. If you get the chance, give them a go. Hopefully you will get to enjoy them as much as we do.
- Having bought figures for both sides from Pendraken Miniatures excellent 1st Schleswig-Holstein War range, I really should make a start on getting them based. I have the books, I have the rules, I just don't have the figures for a game yet. The story of my wargaming life?
So, next week we are sticking with something a bit 'left field' and gaming 'The Battle of Tapio-Bickse 1849' from the Hungarian War of Independence, which is not something you see gamed every day...