Tuesday 30 June 2020

The War of the Rharbarberian Succession - Campaign Turn 5 Moves

As a bit of a refresher, both armies were closing towards each other around Offenburgh. The Prusskians had won the first major battle to the East of the capital, but the Ruthenians had been able to quit the field of battle, albeit in a rather battered and disordered state.

The positions at the end of Campaign Turn 4

With the orders in from both players for Campaign Turn 5, it was time to look at how they could be executed on the map, the outcome of which can be seen below.

The opening moves of Campaign Turn 5. Two battles that will take place can be seen to the North East and East of Offenburgh.


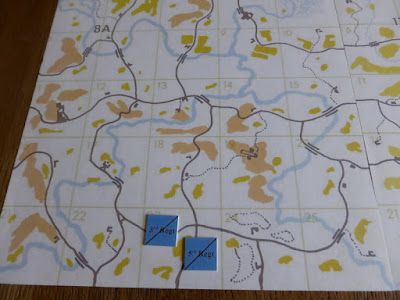
The Ruthenian 3rd & 5th Cavalry have advanced and pushed back the Prusskian 2nd Cavalry, who have had to retreat to 9A/7, where the Prusskian 1st Division has arrived to support the Light Infantry Battalion that was guarding the bridge there. With their arrival, the 3rd & 5th Cavalry have wisely chosen to 'observe' the enemy from a safe distance, but are in a position to threaten one of the Prusskian Lines of Communication. The Ruthenian 4th Division has moved to the South East of Offenburgh and is in a position to advance against the Prusskian right flank or move to assist the Ruthenian right flank as required.

The Ruthenian 6th Division has pushed aggressively forward against the Prusskian 4th Cavalry, who have retreated in the face of overwhelming force. Fortunately the Prusskian 3rd Division has been sent to re-inforce them, but they have to cross the river in order to do this. Will they arrive in time or will the Ruthenians be able to defeat them in detail? Battle will be joined between these forces.

After their recent victory, the Prusskian 5th Division and 6th Cavalry have moved against the the Ruthenian 2nd Division and 1st Cavalry. The Ruthenians moving to assist the 6th Divisions advance, have no choice but to halt in favourable terrain if possible, to give battle to help protect the Ruthenian 6th Divisions advance. One of their Brigades is still feeling the after effects of the previous battle and they their cavalry is weaker than the Prusskians. This could be a tough ask but if the terrain favours them, it might equal things up a bit. Again battle will be joined.

We have reached what might be the decisive battles of the campaign. I will play both out before posting the AAR's so not as to affect either players decisions in terms of deployment, tactics etc as the two battle are so close to each other. The first one, the  Ruthenian 6th Divisions aggressive advance has been worked out in terms of the terrain to be fought over, which should be interesting. I just need to set the table up, send info to both players and hopefully fight the battle today.

There will be some radio silence for a bit on this campaign as outlined above, so until next time...

Saturday 27 June 2020

The War of the Rhabarberian Succession - Turn 4 Flank Attack

With the Turn 4 moves completed in the campaign, one battle had to be resolved before Turn 5 could commence. As the Ruthenian 2nd Division advanced to join the 1st Cavalry Regiment (9B/11), it detached a Brigade with support to protect its right flank. Unbeknown to the Ruthenian 2nd Division commander, he had the Prusskian 5th Division bearing down on his right flank and so would naturally 'bump into' the detached Brigade. This in short was the outline for the battle.

With the terrain dictated by the map, it was fairlt easy to set the table up ready for the game. Mostly open grassland, it was punctuated with some orchards and a farmhouse by the road junction. I added in some rhubard fields (the artificial grass pieces on the table) for campaign flavour, using the cornfields rule from the 'Glory Hallelujah!' supplement, which we had found rather fun.

With the table thus set up, I sent 'photos to both players asking for their plans of attack and deployment. Once received I would then play the game solo, following their orders as best I could as the game developed..
 
Prusskian Orders (Red)
Dave's classic Zulu attack, which has stood him in good stead in our games. His ojective was to defeat the enemy as quickly as possible so as to keep the initiative for the next Campaign Turn.


Ruthenian Orders (Blue)
Keith's deployment made the best of the limited terrain available to him. His orders were to inflict as many casualties on the enemy as possible, then withdraw once he had lost the first unit, with the Light Infantry covering the withdrawl.


Deployment
Following the above orders, I set both sides up as closely as I could to their plans. The Prusskians would get the first Turn and start the game on the table edge.

An overview of the table. The Ruthenians have advanced up the road from the South and, as they reach the farmhouse, the spy the Prusskian hordes arriving on their flank. They deploy quickly and await the inevitable assault.

The view from the Ruthenian lines.

The view from the Prusskian lines. There are an awful lot of them...

Turn 1
The Prusskian commander sent his cavalry forward on the right flank, to probe the enemy positions. The Light Infantry were to support them, but failed their command roll. The rest of the Division made some small advances, but nothing spectacular. 

The Ruthenians, content to hold in their current positions, opened fire with their artillery, which failed to hit anything.

The end of Turn 1.

A Frederickian oblique attack developing? the artillery has been massed into a Grand Battery, moving in support of the centre and right flank. The large square bottom right is the Light Infantry unit.

The left flank gently moves off, which is not really what the commander wanted.

Turn 2
The Prusskian cavalry held position awaiting the Light Infantry, which once again failed its command roll. The Left Flank also failed its command roll, but the Centre and Right Flank advanced and opened fire on the Ruthenian Right Flank, causing Disorder and 2 hits.

The Ruthenian Light Infantry that had been held in reserve, moved up to support the Right Flank. The Right Flank, Artillery and Centre opened fire, but only managed to hit one unit in the Prusskian Centre, causing 2 hits and Disorder.

The end of Turn 2.

Both sides exchange fire and take similar amounts of damage.

The Ruthenian view of the battle.

The Prusskian view.

The tardy Prusskian left flank.

Turn 3
The Prusskian Cavalry moved once to put pressure on the Ruthenian left, having tired of waiting for the Light Infantry. The Light infantry rolled a Blunder which at least led them to advance one whole move! Then the Centre also Blundered, leading to two units retreating one move! Not really what the Commander wanted. At least the Left Flank moved once and the Right Flank moved forward, unlimbered the Artillery and prepared to shoot with the infantry. The Ruthenian Centre in the farmhouse became Disordered and took one hit, whilst the Right Flank became Shaken and Disordered, but easily passed their Break Test.

The Ruthenian Left Flank moved up to be within range of the enemy, as did the Light Infantry. The Left Flank Disordered a unit on the Prusskian right, whilst in the Centre the Prusskians lost an Infantry Unit to artillery fire, as it failed its Break Test and turned tail. Elsewhere the shooting failed to hit anything.

The end of Turn 3.

The Prusskian Infantry Battalion breaks and heads for home.

The Ruthenian lines are slowly coming under pressure and are in danger of being flanked.

The Prusskian mass begins to close in.

The Left Flank is still too far behind the rest of the Division.

Turn 4
As the Prusskain Cavalry continued to advance past the Ruthenian left, the Light Infantry once gain failed its command roll! Finally the Left Flank found its mojo and moved three moves to really put pressure on the Ruthenian Right Flank. With the Centre and Right Flank in position to try and gain fire superiority over the enemy, the massed Artillery failed to hit anything, whilst the Infantry either missed or had their hits saved, bar one unit which took one hit. Not the best shooting by a long stretch.

With the Ruthenian Right Flank in danger of being turned, the Light Infantry and Right Flank withdrew slightly to offer a refused flank. Now it was the Ruthenians turn for poor shooting, with only the Left Flank causing two hits on the Prusskian Right.

The end of Turn 4.

The Ruthenian Refused Flank.

The Ruthenian Left Flank in danger of being turned by the Prusskian Cavalry.

The Prusskian Centre and right Flank are now finally back together again. The Light infantry still stubbornly fail to move (bottom right).

The Prusskian Left Flank finally get their act together.

Turn 5
As the Prusskian Cavalry cut the Ruthenian LoC, the Light Infantry yet again failed their command roll!!! Across the board the Prusskians advanced and shot at the Ruthenians. The Ruthenian Right Flank once again had to take a Break Test and again passed it with flying colours. In the centre the Ruthenian Artillery was destroyed and the Ruthenian Left Flank had to retreat one move after taking a Break Test. Pressure was beginning to tell.

With the loss of the Artillery unit and the general situation, it was time for the Ruthenian forces to start their withdrawl. The Centre and Left Flank made a Disorderly Retreat, whilst the Right Flank withdrew two moves. The Light Infantry moved off and shot at the Prusskian Cavalry, causing one hit.

The end of the Prusskian Turn.

The Artillery unit in the centre (square block) is destroyed.

The end of the Ruthenian turn.

The Ruthenian withdrawl is under a lot of pressure, but is still in with a chance.

The Prusskian 'horns' try and close on the Ruthenians.

Turn 6
Having come under fire, the Prusskian Cavalry wanted to move out of range but failed thier command roll. The Light Infantry finally passed a command roll, a case of too little too late! Across the board the Prusskians shot at the Ruthenians, leaving the Centre Shaken. Again the Ruthenian Right Flank took hits, six of them, saved four and then passed their Break Test. What are the chances?!

Still needing to withdraw, the Ruthenian Left Flank and Centre made Disorderly Retreats, whilst the heroic Right Flank managed to exit the table. The Ruthenian Light infantry moved towards the beleaguered Prusskian Cavalry, but only managed Disorder them.

The end of the Prusskian Turn.

The Ruthenians are under severe pressure.

The end of the Ruthenian Turn.

The Ruthenian Light Infantry engage the Prusskian Cavalry as the Ruthenians continue with their Disorderly Retreats.

The view from the Ruthenian lines.


End of Game
I rolled for the Prusskian commands to quickly see if they could hamper the withdrawl, but they couldn't so with that I called it a day as the remaining Ruthenian units could exit the table safely.

Post Game Thoughts
Well that was much closer than I thought it would be for a variety of reasons. A great game and fun to implement Dave's and Keith's orders, which made decision making easy for myself. Yet again Black Powder II gave a nice game, with plenty of challenges and was easy to play. So as always some post game thoughts in no particular order:

  • The failure of the Prusskian Light Infantry was one of those episodes where you almost knew they were going to continue to fail until it was all over bar the shouting. If they had moved as planned, their extra firepower and their threat to the flank might have made for a very different game.
  • Stars of the show undoubtedly had to be the Ruthenian Right Flank Battalion that survived three Break Tests in the game! This kept the Ruthenians at the party for far longer than would normally happen, given my usual die rolling. Again one of those episodes where you just knew they were going to pass. I think going forward they deserve some bonus in the next game to reflect their heroic action.
  • Both sides shooting at times was somewhat poor and could have turned the game either way if it had been more effective. In the long run the Prusskian numbers would have told, but in campaign terms losses could be crucial.
  • Even though the Ruthenian force managed to withdraw as planned, they were rather battered and almost hors de combat. Again this needs to be reflected somehow in terms of the campaign.
  • The loss of the Ruthenian Artillery unit will probably hurt them more than the Prusskian's Infantry Battalion. Only time will tell.
  • Playing this as part of a campaign made a difference as to how I approached the end of the game. Normally I would have called it a day as the Ruthenians started to withdraw, but with the campaign aspect, I played it right to the end to see if any units were caught or destroyed before they could exit the table. This certainly added a level of tension not normally seen as the end of a game.
  • I think it goes without saying but playing the campaign as a whole is great fun and certainly comes up with intriguing actions such as this one.

So now all I have to do is update the campaign map, take account of how this actions might affect either side and then await further orders for Turn 5. Until next time...

Wednesday 24 June 2020

The War of the Rhabarberian Succession - the Opening Moves.

The sudden death of the ruler of Rhabarberia had left a problem in the local geo-politics of this part of Mittel Europa. The heir, Prinz Rupert, was not yet of an age to assume the throne and frankly spent most of his time asking Mummy where his chin was. With the two main powers in the region locked in battle in the Austro-Prussian War, the Elector of Prusskia and the Grand-Duke of Ruthenia both saw an opportunity to annexe the Principality of Rhabarberia.

A certain enmity existed between the two States as the Elector hated rhubard, the main export from Rhabarberia, whilst the Grand-Duke liked nothing better to go with his custard. Wishing to protect the lucrative rhubard fields, the Ruthenian Army advanced in to Rhabarberia whilst it helped Prinz Rupert find his chin. The Prusskian Army could not stand idly by and so also advanced, under the guise of protecting Rhabarberian independence, but with the real aim of replacing the rhubard fields with some nice cabbage.

With the broad mechanics of the campaign sorted and the players briefed, it was time to kick things off. Each player gave me a broad guide to their intentions, which can be seen below.

The Army of the Elector of Prusskia (Red)
Standing general Divisional actions on meeting enemy:

  • If enemy forces are met, cavalry to chase off enemy light screens. Aggression to be applied to this.
  • Light infantry to always be in lead elements of Division to move forward and assist cavalry. Aggression to be applied to this.
  • 1st Brigade to Deploy in order to hold current position until enemy can be driven off. Use artillery to chase off enemy.
  • On completion of clearing enemy continue to forward movement.
  • If main body is met, deploy to engage and win fire fight with all available firepower. 
  • Be prepared to take advantage of weak flanks.
  • Bull horns, then main body.

The Army of the Grand-Duke of Ruthenia (Blue) 
Strong centre, outflanking on the right, cavalry diversion on the left.
insert keith and daves starting orders/plans here. 

Starting Positions
Each player was asked for their starting positions and first Turn orders of movement. I then simply applied them to the map and moved them to fit in with their orders according to the terrain and their standing orders. Once the moves had been completed, I then updated the players on their troops positions (which did not always correspond to their orders) as well as showing them 'photos and, where appropriate, enemy troops positions. This maintained a true fog of war in the early Turns and as they made contact, more was revealed. Good use of cavalry screens was crucial as not only did it allow the commander to 'see' the enemy, but it also blocked the enemy's view to troops behind the screen etc.

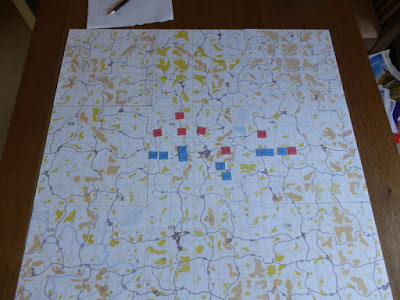
An overview of the Principality of Rharbarberia, with the capital in the middle of the board.


End of Turn 1
Both sides advance as per their orders, with the road network favouring the Ruthenians at this point.


End of Turn 2
Cavalry from both sides approaches the capital, Offenburgh, whilst the infantry is still someway back.


Turn 3
As the cavalry started to see enemy troops, the fog of war lifted somewhat, allowing the respective commanders to concentrate their forces as they saw fit. This Turn saw the first engagement, with cavalry meeting to the East of the capital, Offenburgh.


The Prusskian cavalry outnumbers the Ruthenian cavalry.


An AAR of the cavalry clash can be found here. The aftermath of the cavalry clash can be seen below.


Turn 4
Both sides manouevred for position and as they did so, the Prusskian 5th Division caught a detached Brigade from the Ruthenian 2nd Division by surpise as they advanced to the East of Offenburgh.


Both Armies surround Offenburgh, which has closed its gates to both sides.

The action is about to get interesting to the East of Offenburgh.

So this latest battle will be fought over the next day or so and the outcome may or may not have a big influence on the overall campaign.

Campaign Thoughts So Far
I thought I'd jot down some notes on how the campaign has gone so far:
  • Ideally it would be good to have the map permanently set up somewhere, so you don't have to keep re-positioning the counters each Turn. Sadly I don't have such a space. 
  • When setting out the maps squares, it is important to have a good look at how the road network works in terms of movement etc. Also are the rivers fordable or not, how hilly is the terrain and what effects, if any, might this have on troop movement. I sort of did this when chossing the squares, but would pay more attention next time.
  • With the fog of war early on, using your cavalry to scout ahead is an absolute must. With my God like overview, it is interesting to see the orders each Turn and what might unfold when they can 'see' each other.
  • Make sure you have plenty of counters that cover various situations, such as detached troops etc. I had some but need more at am currently noting this on my master sheet as it were. 
  • You have to interpret both sides orders as best you can when making simultaneous movement and naturally try to be fair and even handed to both sides. Some are easy to do than others, especially when a battle might ensue. So I think what would logically happen given the orders received, the terrain being moved over and the presense of the enemy. 
  • Try and give some intel to both sides, especially in the early Turns when they are quite far apart, to aid them in manouevering towards the enemy. Afterall if is no fun for the players if they spend 10 Turns wandering around the countryside! This can take any form you fancy, but I went along the lines of 'enemy cavalry has been spotted a days march from Offenburgh'. Enough to be useful but not so detailed as to provide unrealistic intel.
  • Keep the campaign area to a size that allows for some early manouevring, but also means both sides begin to make contact after 2-3 Campaign Turns. With my movement rates, I found a 3x3 square grid perfect for this.
So far all has broadly gone to plan and I think Dave and Keith are enjoying themselves. I'm certainly having fun, even though it does take a fair amount of work. Right, time to go and sort out the latest battle. So until next time...