After last week's trial game to get back into the swing of things with Black Powder, it was time to properly kick off our ACW campaign. Ours is broadly set around the famous Shenandoah Valley campaign of 1862, with our action taking place in one of the side valleys. CS Grant's 'Programmed Wargames Scenarios' would provide the action in the form of the mini-campaign contained as the back of the book.
In advance of the start, I had randomly rolled for the map of the valley as laid out in the book, as well as sending Dave his force list as given in the book. I would be taking on the roll of the Confederates, who are defending the valley and have the advantage, if you can call it that, of knowing the terrain in advance. Dave's Union troops on the other hand has little knowledge of what lay ahead, other than some rudimentary sketch maps, whose accuracy could not be attested to.
In advance of the start, I had randomly rolled for the map of the valley as laid out in the book, as well as sending Dave his force list as given in the book. I would be taking on the roll of the Confederates, who are defending the valley and have the advantage, if you can call it that, of knowing the terrain in advance. Dave's Union troops on the other hand has little knowledge of what lay ahead, other than some rudimentary sketch maps, whose accuracy could not be attested to.
Union Army Orders
'Stonewall' Jackson is causing some problems in the
Shenandoah Valley. General Rosecrans has ordered your Division to
explore a side valley in an attempt to cut his lines of communication,
which could lead to him being defeated in detail. It is known that the
valley is defended by Confederate troops, but where and in what strength
is unknown.
Mission:
To reconnoitre the valley route through the mountain range in order that the exit may be secured.
Objectives:
- Send back detailed reports of the route.
- Press on as far as possible defeating enemy opposition within the force's capability.
- Move at best speed.
- If the valley exit itself can be secured the force should do so. If this is not possible then a detailed appraisal of what the enemy consists of, what their defences are like and what force would be required to take it.
Major General Brad Wurst (Divisional Commander)
“He was not the wurst of a Brad bunch”
Brigadier Sly T. Lone
… a street brawler, hard to understand at times
1st New York Infantry
3rd New York Infantry
79th New York Infantry
5th Avenue Zouaves
Lone Artillery Battery
Brigadier Donald D. Gump
… Momma used to say he was a bit orange
Boston Grenadiers
New York Gumpers … Loyal to the Donald, nobody knows why though
New York New Yorkers … so good they named them twice!
Artillery
Colonel Shirley J. Wayne
… Just don’t call him surely
1st Union Cavalry
2nd Union Cavalry
1st Independents
1st Lonesome Rangers (Light Infantry Skirmishers)
81st New York Jagers (Light Infantry Skirmishers) … Germans!
2nd Independents (Cavalry)
3rd New York Bootleggers (Marauders) …
fellas who were kicked out of the gangs of NY
4th Bostonian Botanists (Marauders) …
intellectuals who felt the call
Confederate Orders
Your force is stationed at the head of the valley to give early warning of any Union troops movements. You are to send a rider back to the next position post haste, whilst your units are to remain in contact with the Union troops, but must not be outflanked.
OOB
Colonel Rhett Butler
1st Georgia Legion Cavalry
2nd Georgia Legion Cavalry
Map Deployment
Dave was given a basic map upon which to draw out his line of march. When this was done, he was given a second map with some more information and an indication of where the Confederate troops were, but not exactly how many and of what type.


- Rebels troops can be seen in and around the woods on the hill. From a distance they appear to be cavalry.
- The terrain is fairly open, with some areas of cultivation and broken ground.
- The valley is flanked by hills.
- As far as is known there are no rivers or streams.

So with all the pre-game stuff sorted, it was time to get the toys on the table and to start the campaign.
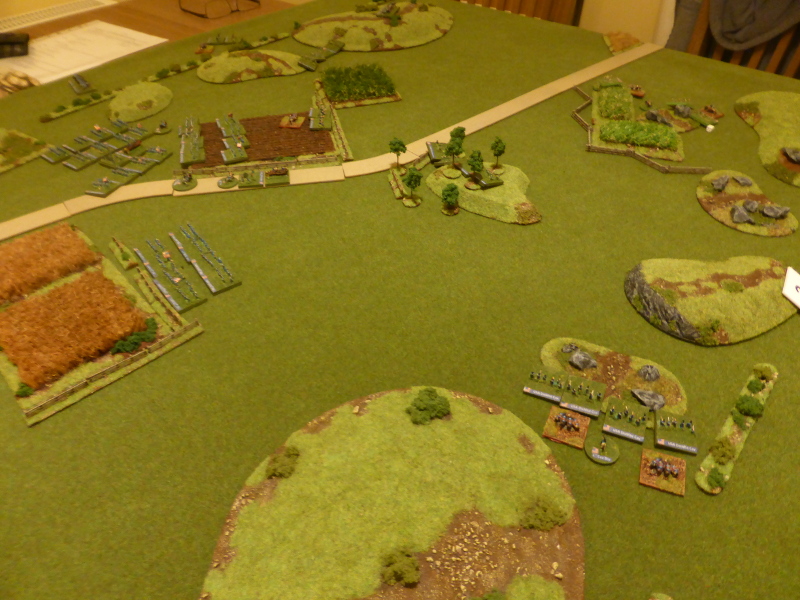
 |
| An overview of the table, with the Confederates on the hill in the middle. The Union troops are ready to appear on the left hand side of the table. |
 |
| The Confederate troops about to be in for a big surprise. |
Turn 1
Colonel Wayne's cavalry came forward on the right flank and seeing Reb's on the hill, dismounted in the rocky terrain to secure the flank. On the left the Union cavalry pured forward and dismounted by the cornfield North of the Reb's position. Following on behind where the skirmishers and Brigadier Sly T'Lone's infantry Brigade.
Seeing the mass of enemy arriving, Colonel Butler ordered a rider, Sergeant Paul Revere, to be 'gone with the wind' and report on the Yankees arrival. Following his orders, he mounted his troops up and started pulling back but keeping the enemy in view.
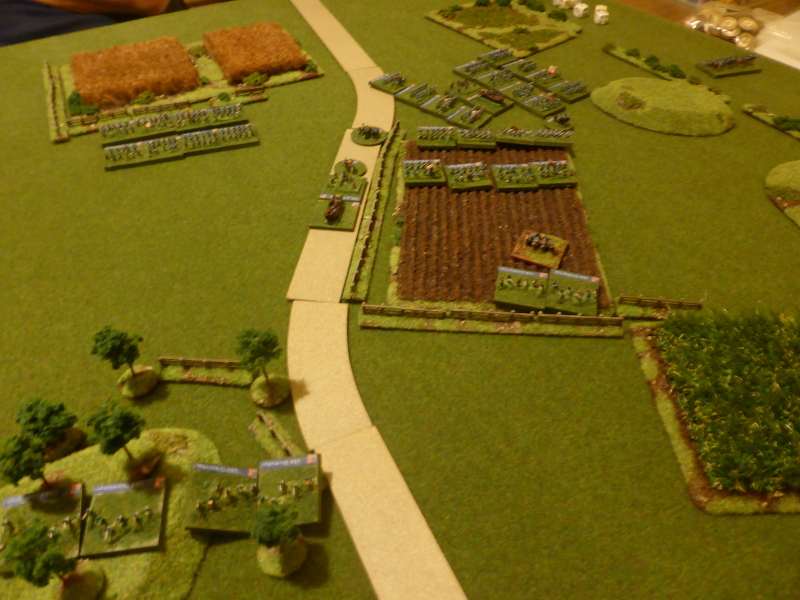
 |
| The end of Turn 1. |
 |
| Union cavalry on the left flank threaten to turn the Confederate position. |
 |
| Colonel Wayne's cavalry in the rocky terrain, in case of ambush by the |
 |
| Brigadier T'Lone's Brigade, preceeded by a cloud of skirmishers. |
Turn 2
Colonel Wayne is reluctant to leave the cover of the rocks, but the cavalry on the left flank push forward and shoot at the Reb's, but fail to hit them. In the middle, Brigadier Gump's Brigade arrived and moved to the left flank due to the traffic jam of troops in the centre. With such overwhelming force facing them, Colonel Butler has no option but to move back to the snake fence line to hopefully wing a few Yankees before withdrawing.
 |
| The end of Turn 2. |
 |
| A view of the Confederate cavalry by the snake fencing and the threat facing them. |
 |
| Yankee cavalry and skirmishers put pressure on the Reb's right flank. |
 |
| The Union troops struggle to move up the single road. |
 |
| Colonel Wayne is waiting for, well I'm not sure...? |
 |
| The mass of Union infantry. |
Turn 3
With the Confederate's under a lot of pressure, the Union cavalry on the left flank mounted up and moved onto the hills to threaten their line of retreat. Sadly Colonel Wayne still sat in the rocks, but the infantry continue to push forward and the skirmishers managed to get some shots on target, leading to a Confederate unit being Disordered. With fire coming from the front and movement to their flank, Butler's cavalry moved back to the relative safety of the cornfields.
 |
| The end of Turn 3. |
 |
| Colonel Butler and his Georgia Legion cavalry are facing a formidable amount of troops. |
 |
| The Union cavalry on the hill. |
 |
| A view from the Union right flank. |
 |
| The mass of Union infantry, who are hampered in their movements by the sheer mass of men. |
Turn 4
Suddenly someone shouted "action!" and Colonel Wayne mounted up his troopers who raced forward to
 |
| The end of turn 4. |
 |
| Colonel Butler exits stage right. |
 |
| Colonel Wayne arrives too late for his moment of glory in the spotlight. |
 |
| Union troops pour forward. |
 |
| The Union battleline finally shakes out from the bottleneck. |
 |
| The hand of God moment. |
End of Game and Off Table Movement
With that came the end of the game. Whilst we were playing, I had also been rolling to see how far Sergeant Revere managed to ride 'off table' and fortunately he had reached the next Confederate position to warn them that a sizeable Union force was on its way down the valley.
With the 'on table part' of the game over, I diced to see how far Colonel Butler could move with his Georgia Legions. Not far enough it turned out and he was 'caught' by the Union cavalry. However Dave decided not to initiate combat a this stage as he did not know what was coming and couldn't affored to possibly lose any cavalry so early on in the campaign. He decided to shadow the Rebs cavalry, which was a wise move and one I was also happy with.
In preperation for the next game, I quickly sketched out a map to give Dave an idea of what the next engagement would entail, but more of that in the next post.
Post Game Thoughts
So a funny old game where not a lot happened in the traditional sense, but was intriguing nonetheless. As always plenty of thoughts on the game and in no particular order:
- Hindsight is a wonderful thing and to be honest this game could probably have been played out with some counters and on a simple map, as it's mainly a 'battle' of manouevre. My cavalry might have been able to inflcit some casualties on the Union troops, but as they had carbines, they were outranged by the infantry, so had no choice but to retreat. also they had orders to follow.
- With both sides having specific orders to follow was quite a refreshing change, as we both had to bear these in mind. Plus of course with it being a campaign, neither side could afford a Pyhrric victory.
- As Dave only had a rough map to follow, he had no idea of what might be awaiting him on or off table, which gave a very effective Fog of War. With his advance plan of action which he stuck to until he made contact with the enemy, also added to the feel of the game. through out he could be sure if there might be flank attacks coming in, reinforcements arriving etc, so used his cavalry to provide that protective sceen to his main force.
- Dave's die rolling was exceptional, with most units, apart from Colonel Wayne's cavalry, getting 2-3 moves per Turn, which meant they whizzed across the table. Having been used to the rather sedate nature of 18thC Linear warfare, this was a bit of a shock. Still nice to play something different and it certainly gave the feel of an open ACW battle.
- When Black Powder II came out I had not planned on buying it. However as Dave had bought a copy it made sense to try and get one. Luckily I found one at a very good price and was very glad I bought it. It is, IMHO, a great improvement over the original, as it is better laid out, has a great index and contents page and the changes are, fomr what I can see, for the better. We have kept things fairly vanilla for this campaign so we can get a good handle on the core mechanics. After all we don't want to run before we can walk.
- The 'Glory Hallelujah!' supplement is simply excellent and well worth getting if you want to play the ACW with BPI or BPII. It even has rules for river boats which is extremely tempting...
- Having been put off the ACW by my old club many years ago (everyone had the Iron Brigade, the Louisiana Tigers etc) I'm really enjoying gaming this conflict, along with reading up on it. Recently I bought books on Chancellorsville and Gettysburg by Sears and, having started reading the former, have been entranced by his writing style as well as the wealth of information contained therein. For once a book has tempted me away from my laptop at night, which is a good thing as I had planned to read more this year.
- I aim to improve on my maps next time around, as I want to try and achieve something like these as seen on Peter's Blog. I did try some colour, but my old pencils weren't up to the job, so bought some felt tip pens instead. Let's hope they work.
- I'm still trying to get the feel of an ACW table, but I think I'm getting there. My plans has been to make some more fencing, but this has taken a back seat to some figure basing, more of which in another post.
- A Divisional sized game with a few Brigades per side plus some support, is more than adequate for our mid-week games on my 4' x 4' table. For those who like this sort of game, it is worth checking out Norm's Blog to see what can be done with even smaller forces, yet still have a good game. His transfer of the action from a boardgame to the table is very well done and something I think we could all aspire too.
Well, I think I've waffled on long enough. Next week we will have a 'proper' game, with the Union troops having to force a river crossing against an unknown number of Confederate troops. Maybe I'll call it the Battle of Fredericksburg...


