With the Italians having managed to cause enough problems for the British in last weeks game, this had bought them time to set up a defensive line in advance of the town of Sortino. The terrain is much more rocky and barren than down on the plain, so the Italians were hoping to take advantage of the high ground.
OOB
Italians
1 x CO (CV9)
2 x HQ (CV8)
1 x FAO (CV6)
9 x Infantry Units (3 with ATR upgrade)
2 x MG Units
1 x Mortar (gun pit)
2 x ATG (gun pits)
1 x IG (gun pit)
1 x 20mm AA Unit
1 x Semovente 75/18
3 x 75mm Artillery Units
1 x Marked Minefield
British
1 x CO (CV9)
3 x HQ (CV8)
1 x FAO (CV8)
1 x FAC (CV8)
1 x Daimler Recce Unit
12 x Infantry Units
2 x MG Units
1 x Mortar
1 x 6pdr aTG + tow
2 x Honey Tank Units
4 x Sherman Tank Units
1 x 25pdr Battery
1 x Hurricane Ground Support
Scenario Details
The Italians deploy first in their 1/3 of the table.
The British deploy using Mobile Deployment.
The Italians can deploy their marked minefield anywhere on the table.
8 Turns
British Objective to defeat the Italians and breakthrough towards Sortino. The Italians to simply hold on.
The streams are impassable to vehicles. Infantry cound them as Linear Terrain for movement.
The rocky outcrop is impassable to vehicles
Deployment
The Italians deployed in and around the small farm in their deployment zone. they put the bulk of the AT support in the centre and on the left wing, in anticipation that this would be the area the British armour would be forced to come through, given that the bridge had been mined.
The British deployed mainly towards their right flank, to allow the armour as much free movement as possible, given the limits of the terrain.
The British deployed mainly towards their right flank, to allow the armour as much free movement as possible, given the limits of the terrain.
 |
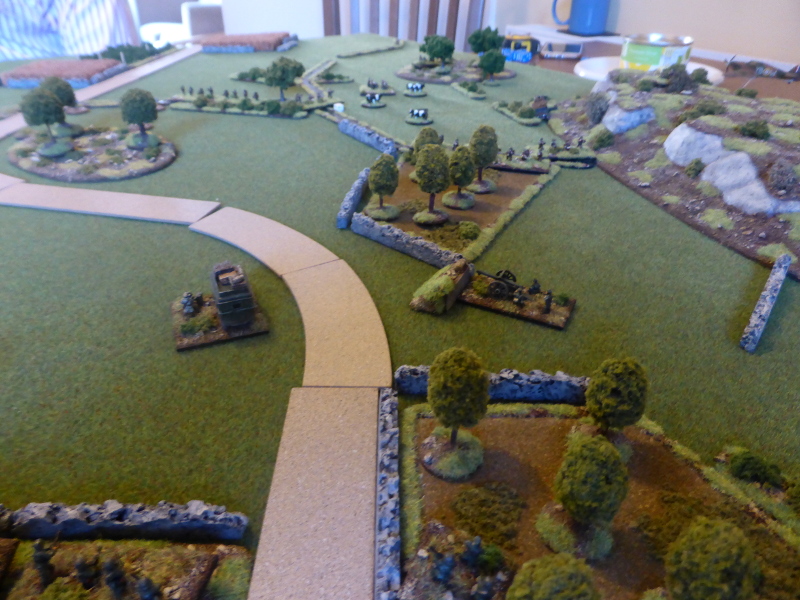
| An overview of the table, with the Italian delpoyment zone on the right. |
 |
| Dave had brought along his pineapple rings in anticipation of having a Hawaiian pizza topping to celebrate his victory. Quelle horreur! |
 |
| The view from the Italian side. |
 |
| It was obvious from this where the main threat would come from. |
Turn 1
Frankly a rather poor Turn by both sides, with only the British right flank getting up to much. The Italians failed to call in their mortar when they had a clear view to the British infantry in the open! Not a great start.
 |
| The end of Turn 1. |
 |
| The British arrive at a somewhat leisurely pace onto the table. |
 |
| The Italians despite great views, fail to call in artillery or mortar strikes onto the British. |
Turn 2
Another poor Turn, with the British left flank failing completely and their right flank still a tad sluggish. For the Italians it was a catalogue of failed rolls right across the board. Another chance gone to attack infantry in the open. Bugger!
 |
| The end of Turn 2. |
 |
| The strung out British advance. |
Turn 3
The British get off to a better start this Turn, with their right flank advancing nicely, but a Sherman is suppressed by Opportunity fire. This does however reveal their position which leads to an airstrike by the Hurricane. The British CO has had to move over to the left flank to goad them into action, which he succeeds in doing. Yet again the Italians fail to take any advantage of the infantry in the open, so have to be content with moving their infantry slightly to meet the expected attacks.
 |
| The Hurricane arrives and doges the flak thrown at it ... |
 |
| ... but only supresses one unit. |
 |
| The end of Turn 3. |
 |
| The British armour in a good position. |
 |
| The British left flank finally arrives. |
Turn 4
The British start the Turn with some Initiative fire on the dug-in ATG on the hill, but fail to suppress it. Then they and the rest of their flank fail their command rolls. However on the left flank the CO plays an absoulte blinder, moving his units 5 times, including a Command Bonus. This really alters the complexion of things as suddenly the Italians are under threat from both flanks. The British CO moves onto the rocky out crop, which the Italians have stupidly left unprotected, to get a better view.
In response the Italian ATG manages to knock out one Sherman, but is then destroyed by Opportunity fire back, which is a big blow. Under pressure the infantry on the left flank retreat and just when they needed to move, the right flank failed its command roll. Things are not looking good for the Italians.
 |
| The Hurricane pilot refuelling before his next mission. |
 |
| The end of Turn 4. |
 |
| Despite coming under early fire, the British are in a great position to flank the Italians and also gain the high ground. |
 |
| The Italians try and pull back to better defensive positions. |
 |
| The British left flank advances to the stream junction and to the woods. |
Turn 5
The British FAC fails again but the FAO succeeds, leading to two Italian units being suppressed. However the right flank and armour fail, with the left flank only moving once. The Italians again fail to do much, largely due to lack of targets. Both sides exchange some fire and cause suppression.
 |
| The effect of the British artillery. |
 |
| The end of Turn 5. |
 |
| The view from the Italian right flank. |
 |
| The view from the Italian left flank. |
Turn 6
The pineapple rings did their work as the FAC calls in the Hurricane again, leading to 3 units being suppressed on the Italian right flank. This leaves the way open for the British, who in a mix of fire and manouevre, move into the woods on the Italian right flank. Not to be outdone, the Shermans and Honeys move round the Italian left flank, leaving things looking pretty grim for the Italian defenders.
The Italians try to respond, with their FAO finally getting through, only to see the strike deviate and fall on open ground. Again some rearranging takes place where possible, but a Blunder by the CO puts pay to planned movement and shooting.
 |
| Biggles is back and this time he means business ... |
 |
| ... with his strafing run being spot on. |
 |
| The end of Turn 6. |
 |
| The British armour lined up ready to move or shoot. |
 |
| The Italian flank obviously turned. |
 |
| The British hav cleared the Italians from the woods and the flank is under severe threat. |
 |
| The Italians feel as if they are in a replay of Rorke's Drift, as the Buffalo Horns of the British attack engulf them. |
Turn 7
Luckily for the Italians both the FAO and FAC co-ordinated attacks fail to achieve anything, which is a welcome reprieve. However the pressure is maintained from the British armour and the troops on the left flank.
The Italians respond where possible, with their FAO calling in his artillery which leads to 3 units and the British FAO suppressed. Again the CO fails his command roll, when he could have done with the Semovente having more shots at the British.
 |
| The Hurricane fails to achieve anything this Turn. |
 |
| The end of Turn 7. |
 |
| The British armour shoot up the Italians in and around the farm. |
 |
| Small comfort as the British left flank is suppressed. |
Turn 8
A glimmer of hope appears when the Hurricane arrives and deviates onto his own tanks, only for the Italian AA fire to drive him off! Oh the irony of it all. The end is nigh as the British armour destroys the Semovente and an infantry unit, taking the Italians to their breakpoint. This they pass but it is a clear vicotry to the British.
 |
| Almost a case of Blue-on-Blue as the Hurricane deviates onto his own armour. |
 |
| The end of Turn 8 and the game. |
 |
| The British armour in complete control. |
 |
| The open Italian right flank. |
 |
| Rorke's Drift. |
 |
| The British left flank. |
The End of the Game
In the end a clear and decisive victory for the British. It didn't seem that that would be likely early on and even at the half-way point, given both sides poor command rolls. Also once again we finished a full 8 Turn game!
Post Game Thoughts
As always some thoughts on the game, the rules and the scenario:
- It had been a busy week on the work and home front and I ran out of time to have a proper think about my deployment. Hindsight is a wonderful thing but I should have deployed my ATGs either all on the hill on the right, or kept them close to the farm where they could have had good support from the infantry. In the end they fell between both stools. Also on the right flank I simply did not secure the rocky outcrop, which allowed the British FAO to gain a great viewpoint from which to call in attacks.
- There has been some debate on the Pendraken forum about whether to use the hits stay on or come off rules. It is interesting to note that if we had used the hits come off as written, then the Italians would have comfortably held on to their positions and would have not felt too threatened. This is why I personally prefer the hits stay on option as well as it feeling right.
- I should have taken more ATGs, which I have, but simply have not found the time to paint. Lesson learnt.
- Both sides command rolls were really, really poor early on. For the Bitish they could not get moving, with their right flank infantry only making it to the stream over the entire game. For the Italians their failure early on not to be able to call in attacks on the British infantry whilst in the open probably cost them the game. Such is the fickle nature of the Die Gods.
- I thought the scenario worked well, but I wasn't too happy with the layout of the terrain. Frankly it was a bit more rushed than normal due to the circumstances already mentioned. It is hard to give both sides a fair chance and terrain can make or break things on this front. Normally I will set the game up a day or so in advance, to give me time to look at things afresh, and then tweak things as I see fit.
- The Recce rules continue to be an issue, but they always were in BKCII. We like the random movement, but that's about it. More thought required on this, but whether we will be albe to come up with a workeable solution remains to be seen.
So there we have it. We have another game planned for next week, which I have already started to think about. This may lead to a natural end to our campaign, largely due to having to pick our daughter up from Uni followed by a family holiday, which means I will be hors de combat for 3 weeks or so. So until next time ...
I thought the table looked good. I took particular note of your comment re the effect of taking hits off v leaving them on and was quite taken by the British luck in getting 5 activations like that, a complete contrast to failing command rolls and something to have regard for when considering enemy potential.
ReplyDeleteGlad you liked the look of the table Norm. It's the line of sight you have to be carfeul of, especially with linear terrain, compared to low area terrain.
DeleteI can't think of a point in this game where a unit might have been knocked out in one Turn, possibly towards the end with the combined effects of artillery and small arms, but this would have removed one, maybe two units at most. This is why I'm a firm advocate of hits staying on.
I've played in games where high CV armies have failed to do much, whilst in contrast low CV ones have had Lady Luck on their side. Normally it evens out in a game, but this one the Die Gods were just not with me.