After my trial game earlier in the week, I decided to give the A&MW rules are more considered run out. Again I used the Classical rules for the game and kept things pretty simple, with units basically being Heavy, Medium or light for ease of play. I know some gamers think this approach too vanilla, but I've found that it works as well, if not better, than adding lots of chrome.
The game was played on a 2' x 2' table and with 8 units per side. An Average Die was used to see how many unit could move each Turn. The scenario was a pretty standard line up and defeat the enemy as I didn't want to run before I could walk as it were.
OOB
'Romanesque'
1 x Heavy Infantry - Elite
2 x Auxiliary Infantry - Average
2 x Auxiliary Infantry - Levy
1 x Light Infantry - Average
2 x Heavy Cavalry - Average
'Germanic'
1 x Heavy Infantry - Elite
3 x Auxiliary Infantry - Average
2 x Auxiliary Infantry - Levy
2 x Light Infantry (Archers & Javelins) - Average
Terrain
I didn't want the table too cluttered but needed some terrain to try out the rules and to improve the visual look of the game. The centre was kept fairly open apart from the farmhouse and a hedge. As with other 'new' rules or periods, it can be a bit of a steep learning curve getting the terrain 'right' for a game. More of this later.
Turn 1
Germanic - 4 Units to move.
Romanesque - 3 Units to move.
Both sides pushed out their Light Infantry with support where possible, whilst the Romanesque army moved their Heavy Cavalry onto the hill.
 |
| The end of Turn 1, with the Germanic army at the bottom of the table. |
Turn 2
Germanic & Romanesque - 4 Units to move.
The Germanic army managed to maintain a broadly cohesive line, whereas the Romanesque one was rather untidy.
 |
| The end of Turn 2. |
Turn 3
Germanic - 5 Units to move.
Romanesque - 4 Units to move.
The Germanic army split its force, sending the left flank towards the cavalry on the hill with the aim of forming a holding position, whilst their right flank delivered the main attack. The Romanesque army seemed intent on a Frederickian (or should that be Alexandrian?)oblique attack towards the farmhouse. Crucially they managed to get a unit to the hedgeline which would probably make for a good defensive position.
 |
| The end of Turn 3. |
 |
| The Germanic left flank. |
 |
| The Germanic right flank with their archers by the hedge. |
Turn 4
Germanic - 2 Units to move.
Romanesque - 3 Units to move.
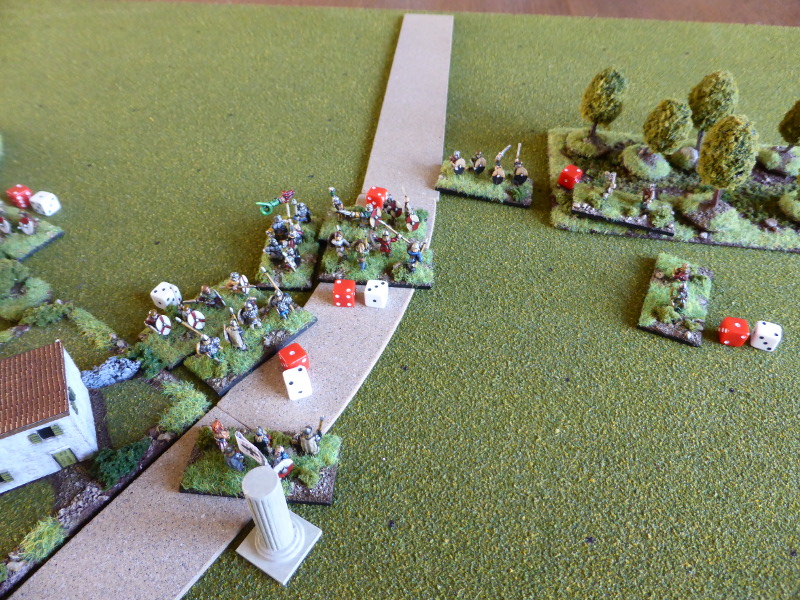
The lack of movement hampered the Germanic army's plan somewhat, but the Romanesque one continued to push forward and their archers caused hits on their opposite number.
 |
| The end of Turn 4. |
 |
| The lack of movement slows down the left flank. |
 |
| The right flank having advanced comes under attack from the enemy archers. |
Turn 5
Germanic - 4 units to move.
Romanesque - 2 Units to move.
The Germanic javelin light infantry moved towards the Romanesque cavalry, throwing their javelins as they went. The archers returned the compliments (or tit for tat) causing hits on the Romanesque archers. Piqued by the javelins, the Romanesque cavalry charged and avoided the javelins that came their way as they closed. In combat both sides took hits but the Germanic javelin light infantry lost a base and failed a morale test, thus losing another. The archery tit for tat continued, but this time the Germanic archers lost a base but passed their morale test.
 |
| The end of Turn 5. |
 |
| The cavalry charge into the Germanic Light and Auxilliary infantry and gain the upper hand. |
 |
| The Germanic right flank and the archers have lost a base. |
Turn 6
Germanic - 3 Units to move.
Romanesque - 2 Units to move.
Melee breaks out across the Germanic left flank and the archers trade shots.
 |
| The end of Germanic Turn 6. |
 |
| The Germanic javelin light infantry retreat as the cavalry are attacked in the flank. Both side start losing bases but the fight across the hedge is inconclusive. |
 |
| A rash charge by a Germanic Axulliary infantry? |
 |
| The end of Romanesque Turn 6. |
 |
| The melee becomes more confused as mini battles break out everywhere. |
 |
| The Germanic unit is rather isolated as the Romanesque troops secure the area by the farmhouse. |
Turn 7
Germanic - 4 Units to move.
Romanesque - 2 Units to move.
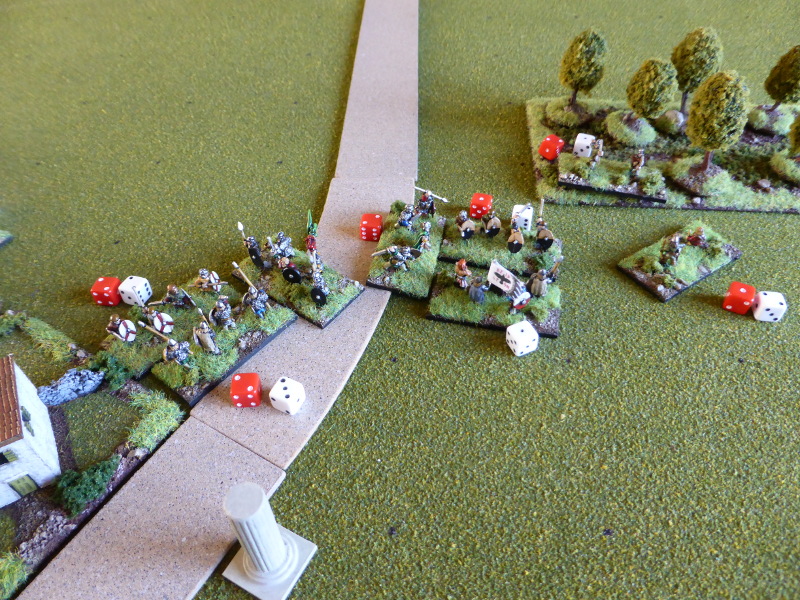
As the fighting continues, the Germanic army loses a base in the fight with the Romanesque cavalry.
 |
| The end of Germanic Turn 7. |
 |
| The Germanic javelin light infantry move back in to engage the Romanesque cavalry's flank. |
 |
| Germanic infantry try and support the isolated unit. |
 |
| The end of Romanesque Turn 7. |
 |
| A Germanic infantry unit breaks (4 hits on the red die). |
 |
| The fighting intensifies by the farmhouse as the Romanesque left flank appears by the edge of the wood. |
Turn 8
Germanic - 4 Units to move.
Romanesque - 5 Units to move.
With fighting right across the board, the Germanic army loses two more units.
 |
| The end of Germanic Turn 8. |
 |
| Many units are close to breaking. |
 |
| Another Germanic unit breaks (4 hits on red die). |
 |
| The end of Romanesque Turn 8. |
 |
| The Germanic light infantry break having been charged by the cavalry. |
 |
| Very confused fighting as the Heavy infantry joins the fray. |
 |
| The protracted fight across the hedge. |
 |
| The Germanic casualties. |
End of Game
With the Germanic army already having lost 3 units and in a more precarious position than the Romanesque army, I called it a day, as it would be hard, but not impossible, for them to turn the situation around.
Post Game Thoughts
Well an enjoyable game and one that took less than an hour to play. I once again enjoyed the rules and nothing really jarred, which is nice. As always some post game thoughts and quite a few of them this time:
- Placing the farmhouse in the middle broke the battle into two distinct fights. I chose not to allow any infantry into the BUA, unless they were Light Infantry. If they did enter I would have used the same rules as for fighting in woods. Next time I will try a more open battle field to see what happens.
- Protect your flanks. An obvious statement but I was very aware of the threat that the cavalry posed. I need to paint some more up to see what effect these have on the game.
- Light infantry charged by cavalry or infantry are unable to evade as far as I can see. A simple house rule can fix this if required and I will probably use this in future games.
- Once units started losing bases, the game becomes very attritional as it is more or less impossible to leave combat in these rules. Not a problem as far as I can see, but again a house rules could fix this should you so desire.
- Rather like Bloody Big Battles, it is easy to remember distances as they are 8cm, 12cm and 24cm with the units used, which is a big help.
- The Average Die worked well again and I'm toying with the idea of adding a +1 whilst the army commanders bases is still on the table.
- The Heavy Infantry are the Tiger II's of the army, able to dish out and take punishment and as per this game I will limit them to only one unit per army.
- This game did scratch that Ancients itch which is nice and the rules certainly give me game that I enjoy and feels right for me.
- The Classical rules worked well and at some point I will give the others a run out. Certainly the Medieval rules are of interest for some potential Italian Wars in the future.
- In terms of scenarios, I will look at those in One Hour Wargames and give them a run out to see how they play. I want to keep things simple until i've got a better handle on the period and the rules.
- The 2' x 2' table worked perfectly well again for my single base units and given my current limited gaming space, I'm very happy that it did.
So there we have it. I will have another game soon but am trying to sort out the bare bones of a mini BKC campaign. I'm getting there but have too many ideas! So until next time...


As always, a lot of action in a 2’ x 2’. I quite like the idea of not being able to leave combat in an ancients game.
ReplyDeleteSince the Thomas rules are quite encompassing in this volume, especially when one adds in the special rules in the army lists, the absence of evade seems deliberate. Perhaps evade as we know it from many other rules sets, is being replaced by the author using a function of role instead, by simply allowing the light infantry / skirmishers to frustrate the enemy and absorb the attack since javelin users get to use defensive fire when charged. Perhaps their involvement draws a line between the skirmishing phase and the main clash phase?
I was conscious of trying not to be influenced by previous rules I've played where by and large skirmishing units can evade, or attempt to do so. Now I've no idea whether this happened in reality as I'm well versed in this 'period'. It just struck me that this played differently but was no worse for it.
DeleteAs for being able to leave close combat, skirmishers can do so if they have more movement that the unit they are in combat with, which seems sensible. Other units are in for a slug fest which felt right. Having played lots of games of late where units that fail a morale check as it were would retreat (or break completely) from combat, this again stood out as being different, but no worse for it.
Nice action and enjoyable battle account, Steve. While I have AMW, I have never given the rules a close read let alone a game. My ancients gaming has been confined primarily to Commands & Colors, Impetvs, and To the Strongest. I enjoy all three of these systems.
ReplyDeleteThanks Jonathan. I've played TtS and enjoyed the games, but I play so little I wanted a game that I could pick up easily after a break and not have to remember lots of things as it were. A&MW does this for me and even in my simple games allows me to concentrate on the game rather than the rulebook. As long as we all find rules that work for us, that's all that matters.
DeleteA great read Steve and nice to see the rules being used again. I have ordered the book and look forward to trying them out. Also looking forward to your BKC campaign. I shall be embarking on a BKC-fest as soon as I get the figures and vehicles painted!
ReplyDeleteThanks Jon and look forward to your BKC game(s) and your thought of A&MW. I have drafted out my BKC campaign and hope to start it soon.
DeleteGreat post Steve, I am coming around to the idea of 6mm and getting a full game played on a 2x2. As you mentioned the scale provides for flanking moves etc, etc.
ReplyDeleteBest wishes
Stuart
Thanks Stu. It's surprising how much can fit on a 2' x 2' table, even in WWII and still give a good game. Hope you get the chance to give it a go.
DeleteNice game Steve, glad you enjoyed it - I very much enjoyed the write-up.
ReplyDeleteJust on a few of your points:
The rules of light infantry and cavalry moving and firing are supposed to avoid the need for any evasion rules, I think. In my experience, this works fine and light infantry can be quite hard to catch for heavy infantry based armies.
The game does become very attritional, most definitely. I don't have a problem with this historically (once troops are committed, they are in there) but it does have a game effect that, a bit like chess, the endgame can be a bit slow.
I think that you were testing morale for units which lost bases in melee combat? In the rules as written, morale tests are only required for losses in melee - I wasn't sure if this was an intentional change on your part, because that will make missile troops significantly more lethal.
I have just done a Romans vs Ancient Britons battle with this ruleset - hopefully I can get it written up in a day or two (I have a backlog!)...
Thanks! Ah, I had missed the part about only testing morale from losses in melee. Luckily it didn't affect this game and has been noted. I'm looking forward to your AAR and thoughts on the game.
DeleteThanks for sharing Steve, a nice and clear report.
ReplyDeleteThanks Pat:)
Delete