As planned, another warm up game was played out today and something a little larger and sort of Waterloo'esque, with the British defending a ridge with some cover and the French trying to evict them from it. Again I kept everything pretty simple, with the French classed as Regular all round, but the British Superior for Firing.
I'll let the photos tell the story with appropriate annotations as before. So without further ado:
 |
| A torrential down pour just before the French launched their attack, which was rahter appropriate given the setting. |
 |
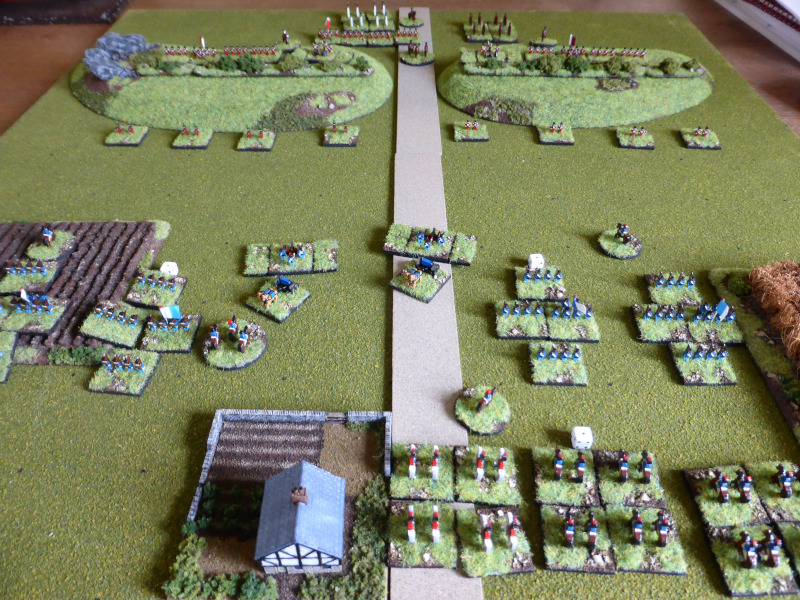
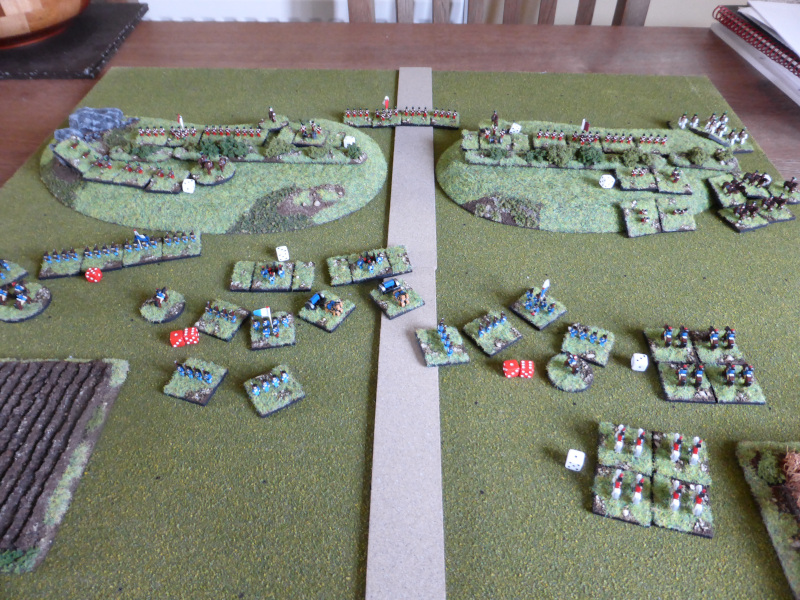
| A broad overview of the table. |
 |
| French Horse Artillery ready to support the French Company columns. |
 |
| The British arrayed along the ridge behind the crest line, except for the Foot Artillery and the Light Battalions to the fore. The Light Battalion on the left was armed with rifles. |
 |
| French Heavy Cavalry ready to move on in support of the Infantry. |
 |
| The French move off and the Horse Artillery deploy astride the road. |
 |
| The British Foot Artillery draw first blood and bounce through also catches some Heavy Cavalry, much to their surprise. |
 |
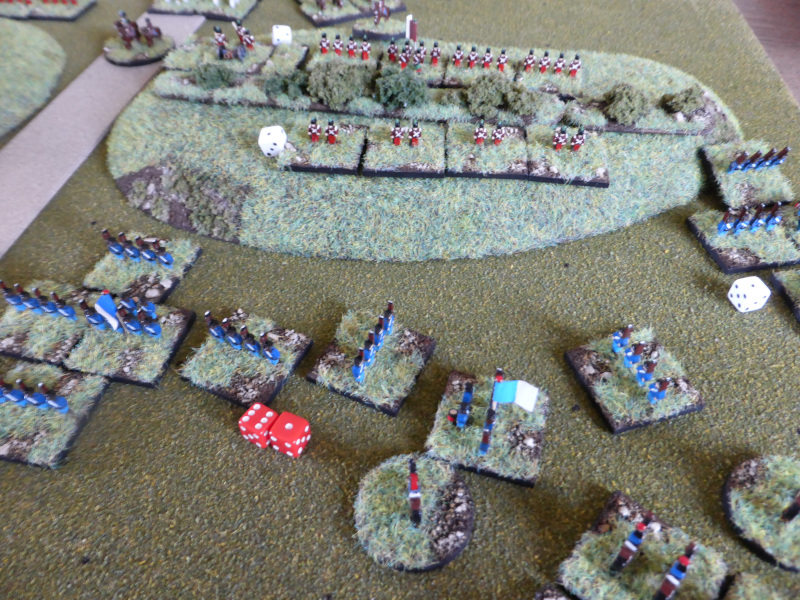
| The Rifles make the most of their longer range as the French close with them. |
 |
| As the French advance, the Light Battalions fall back slightly to be closer to the ridgeline. |
 |
| The Rifles continue to take their toll on the French columns. |
 |
| The shooting is less effective on the French right flank. |
 |
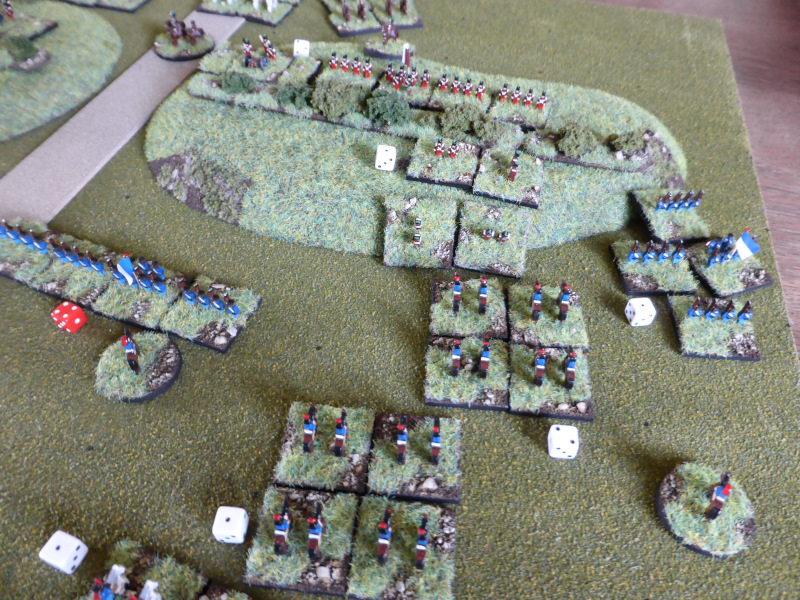
| As the French close, they form one unit into Line, whilst the others remain in Company Columns. |
 |
| However the British shooting is rather effective, leaving two units Weakened. |
 |
| The Heavy Cavalry begin to move up in the hope of exploiting any gaps created in the British lines. |
 |
| As the attacks stalls in front of the British line, one Company Column attempts to outflank the British position... |
 |
| ...with the Heavy Cavalry continuing to move up in support. |
 |
| The Horse artillery limber up to move closer as the Line Infantry is blocking their targets on the ridge. |
 |
| French Company Columns assault the British Line on the left flank... |
 |
| ...only to be driven back... |
 |
| ...with heavy losses, including the Brigade Commander (double 6). |
 |
| The French lose a Line Infantry unit on the right flank. |
 |
| The Horse Artillery deploy close to the British line to try and shoot the French Line Infantry onto the British positions. |
 |
| The French try again on the left flank. |
 |
| Desperate times call for desperate measure as the French Heavy Cavalry charge the Light Battalion, that manage to form square in time... |
 |
| ...leading to the French Heavy Cavalry being heavily defeated. |
 |
| The French are not in a good state at this point. |
 |
| The French Heavy Cavalry are close to breaking too. |
 |
| The British Cavalry charge the French Company Column that fails to form square... |
 |
| ...leading to them losing and having to retreat... |
 |
| ... and causing the French Heavy Cavalry to break, but the British Cavalry fail to follow up. |
 |
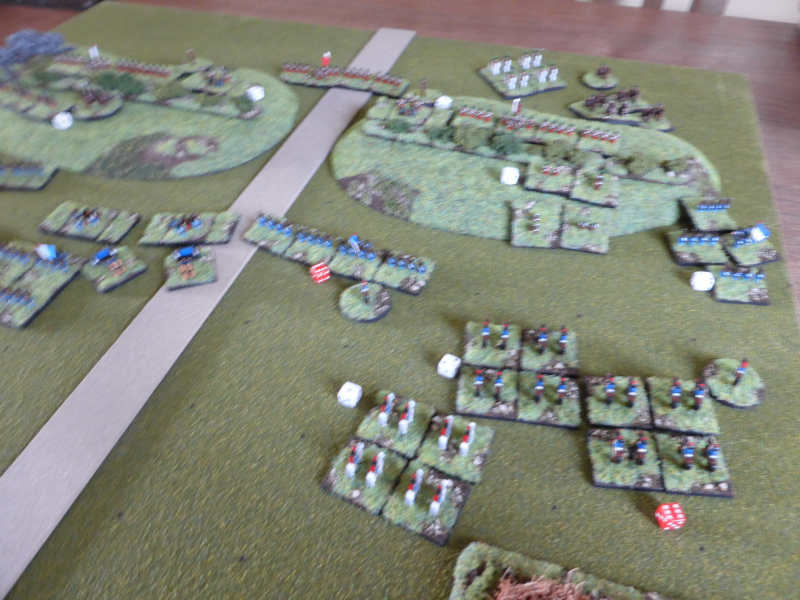
| The end of the Battle as the French centre breaks. |
 |
| The left wing begins to collapse and break... |
 |
| ...as does the right. |
Post Game Thoughts
Well that was fun and full of action! In the end it was a lot easier for the British than I thought it would be. Some thoughts on why this was the case and other points in general:
- The British being classed as Superior for Firing with the +1 that made to the die roll was quite a big difference between the sides. A lot of the time they were hitting on a 3+ and for most of the game made average of slightly above die rolls.
- The Light Battalions rule which Keith has toyed with on the Forum worked well and certainly felt right compared to the rules as written. Having one unit equipped with Rifles also was telling with their extra 6cm range. It may not seem much but one round of unapposed shooting can make a small but important difference.
- The French horse Artillery being more mobile in support of the Line Infantry was good and felt right.
- It was nice remembering to try and use the Cavalry in a Napleonic rather than a SYW style. Certainly forcing the British Light Infantry to form square was good, but the French were unable to capitalise on it, unlike the British that managed to catch the French before they could form square.
- The cover that the hedgerow provided was again a small but important advantage to the British artillery that helped keep them in the game. The British Infantry lining the hedge and the ridge never got into the game, but I imagine that the cover would have been important to them too.
- The rules flowed well and with the previous games and re-reading the rules, I rarely had recourse to use the book. I still need to write up my aide memoire as mentioned before though.
Next up will be another game, but adding in more detail in terms of troop and command quality, once I have my labels sorted out. So until then stay safe and keep healthy!


Steve - it’s good to see you’re managing to fine-tune your “generalship” skills and give the Frenchies a sound beating. I trust you can performh equally well when you play the role of Wellington. Ideally keep your main line troops safe behind the ridge line and when (if?) the enemy get close then unleash a sudden, devastating fire-storm to destroy them.
ReplyDeleteGiven that you’re using a small tabletop battlefield, I wonder what would have happened if the French had advanced across the British front (as indeed they did in this game) but then paused one wing - “pinning” the British forces directly opposite, say with artillery and just a single infantry battalion - whilst switching the other infantry battalion onto the other wing and launching a swift assault? Would superior numbers prevail?
I look forward to reading your next warm up battle report. Sadly, despite what many wargamers like to imagine, not all armies comprise “superior” troops led by “capable” generals.
Cheers,
Geoff
Fine tuing my generalship skills I'm not so sure about, but getting more au fait with the rules is certainly true! Fingers crossed it goes as well next week as it did during this game.
DeleteOne option is to explore the massive attack in columns that the French made later in the day, so see how that plays out and how the reserves might then come into play to possibly shore up the British line. This is the advantage of the small 2' x 2' table in that I can zoom in on a small action and very quickly try some options, without the distractions of a larger game.
It will be interesting to see how both sides fair with a mix of troops and generals. I shall naturally be using the guides within the rulebook. It should be fun!
Excellent looking game.
ReplyDeleteThanks Ben and glad you liked it.
DeleteSo, D'Erlon fails again! Very interesting Steve, and thanks for posting. Even in a small wargame, co-ordinating all 3 arms can be a problem - so no wonder it was tricky in a real battle.
ReplyDeleteI suppose it does sort of represent D'Erlon's attack, which hadn't really occured to me. What I did notice was the complete lack of room to manouevre and co-ordinate the various arms, which as you say was a real problem during the battle itself. As the infantry closed they masked the guns, which then took time to try and support closer to the ridge. I might make the French artillery 12 pdrs to see how that plays out. Time for a replay with a few more French columns to see what happens.
DeleteProof if proof were needed that small scale miniatures and table top playing areas can still produce a lot of enjoyment - and look good too!
ReplyDeleteWhilst large 28mm games do look good at shows where you have the space to really make the most of what they offer, in the average house it can, to use Rick Priestly's phrase; "look like a school geography field trip" rather than a battle! Smaller scales can look lost at shows but I think they are perfect for domestic settings, plus here I can sit at the table and not strain my back, yet play on the equivalent of a 4' x 4' table. The dining table equates to around a 7' x 5' one if I'm in the mood and have the time for large battles. Again, no worries about back problems the next day!
DeleteGood to see your smaller scale giving a good contest. I am still considering some small scale gaming for my future van adventures
ReplyDeleteThanks Matt. I would think that some small scale games with 6mm or 10mm figures would work well for your mobile games. Obviously Bob Cordery's The Portable Wargame or any of Neil Thomas' books are a great place to start. However Honours of War, BPII etc all work well, just with smaller forces. I look forward to see what you come up with.
DeleteI seem to be spending a lot of time at the moment thinking about small scale figures and options ? We’ll see where that leads too
Delete