Sit Rep Dawn Day Two
The night had been well spent by both sides, with the Axis withdrawing the remnants of the Italian company back over the river to the comparative safety of an orchard, as well as bringing forward their FJ reserves.
The British had been very busy with the CO sending out orders left, right and centre. All of his Battlegroup was now in play and he had also put in requests for air support, both bomber and ground attack, as well as some engineering AFVs to help overcome the Axis defences.
Axis Losses To Date
One platoon of infantry, a 47mm ATG and the L5-30.
British Losses To Date
One platoon from 'A' company and a Humber AC.
Damage & Repairs
The British had been unable to make repairs on the battlefield to their Churchill 6 pdr (keep its 3 hits from Day One), but the Italians had been able to keep their MG unit almost fighting fit (keep 1 hit from the 3 taken on Day One).
Positions At Dawn Day Two
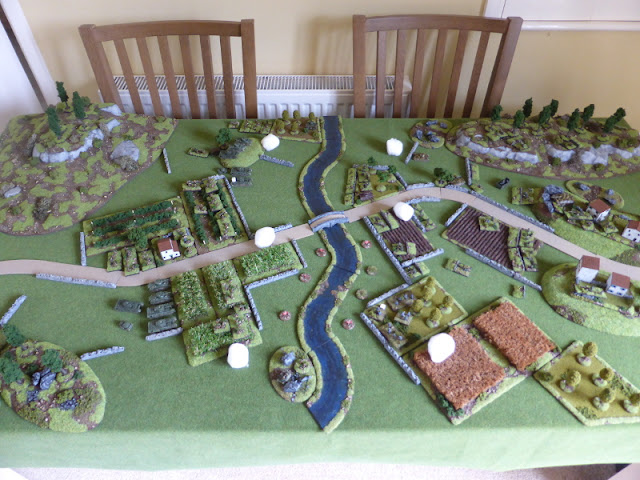
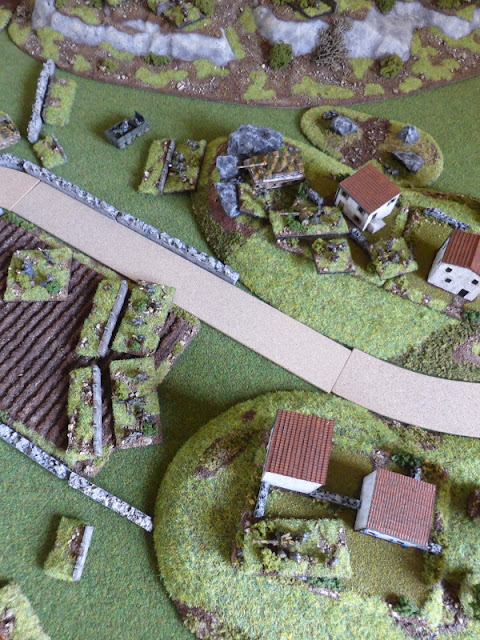
The following photos will give an idea of how both sides have deployed for that start of Day Two.
 |
| An overview of the table, with mist along the river, obscuring both sides. It is expected to lift between 8.00 & 9.00am, or thereabouts. |
 |
| Despite the overnight mist, the British have been able to locate the Axis minefield, just below the bridge and covering both sides of the ford. |
 |
| The Italian troops in the orchard behind stone walls and covered by the minefield to the front. They are not dug-in. |
 |
| 'A' company is covering the mined ford in case of any Axis counter-attacks from this direction. |
 |
| 'B' company has moved into the vineyard, helping to cover the other tank squadron to its left. |
 |
| The Recce Honey has taken up a concealed position at the edge of the orchard, ready to provide eyes and ears to the attack from the left flank. |
 |
| The British reserves which are yet to arrive in the form of a Sherman flail, Churchill SBG and WASP carrier. Ground attack aircraft and bombers are off table in the wings. |
 |
| The FJ have moved forward to the fall back trenches to add more depth to their positions. |
 |
| The FJ mortars in their gun-pits will provide much needed fire support. |
 |
| The Tiger I and Pak 40 in their gun and AFV pits, with a commanding view down the valley. They will be very hard to shift from these positions. |
 |
| A Stug III in its AFV pit, commanding the approaches to the bridge. |
 |
| The Pz IV is providing mobile flank protection to the units in the orchard by the bridge. |
Plans
The British CO is planning on probing the Axis defences in front of his left flank, hoping to they will be able to cross the river quickly and start to unlock the Axis positions. He has some smoke support from the artillery to help mask this manouevre, but not much. He is hoping that his request for air support will be met as he's sure it will be sorely needed in the coming hours.
The Axis plans are to maintain their positions, relying upon their long range firepower from their Tiger I and ATGs, plus the potentially devastating firepower from their mortars, which are as effective as off table artillery, if not more so. The only potential weak point is their right flank which is covered by the Italians. If the British can gain a foothold their, then they may have a real fight on their hands.
So that table is all set for the Day Two action to kick-off, which hopefully will be later today when I finished 'Daddy Day Care'. I'm really looking forward to this and hope it's a good one. Until next time, stay safe and keep healthy.


Handsome setup, Steve! You have a lot of great looking terrain and toys. This will be fun to watch play out especially with the defenders so well situated.
ReplyDeleteThankyou Jonathan. As I make most of all terrain, which I do enjoy, I can try ensure a cohesive look across all pieces, as the look of a game is very important to me. 'Daddy Day Care' done and hope to kick things off this afternoon/evening.
DeleteI am envious of your terrain situation. My Daddy Daycare days are long gone. Now, it is the occasional Granddaddy Daycare! It was my turn for that yesterday afternoon.
DeleteI could say the same about your figure collection! As I'm a full time carer for our son, it varies day-to-day how much help he needs, but I'm on call 24/7 as it were. Today was getting out of the house so our daughter could do her online end of year exam in peace, but we got soaked as the weather is not very late Spring like here:(
DeleteHmm. I don't recall all of the white cotton balls scattered about when I first read this instalment.
DeleteThey were there in this post Jonathan, but not Day One, as as the captions say, they are to represent the early morning mist/fog by the river in the valley that has formed overnight. I hope this clears things up?
DeleteMy eyes are still a bit misty...
DeleteVery good;)
DeleteUh-oh Tigers!
ReplyDeleteWell only one Tiger I to be fair, but still a formidable opponent nonetheless. I included it as IIRC in Gooderson's book there is mention of a Tiger I that 'sniped' at Allied units, but they could never spot it in the hilltop town. Only when they took it did they find its various positions, as it would move from one to another to minimise the chances of being spotted. Oh and of course there is just the simple pleasure of having a nice model on the table!
DeleteIt’s always good to see the more unusual units (such as the RSI) make it onto the tabletop.
ReplyDeleteI hope all goes well for us plucky Brits on day 2. Fingers crossed,
Geoff
Thanks Geoff and I like to have more 'exotic' units in my games where possible. Fingers crossed for the brits as you say!
DeleteA very nice tabletop layout and looking forward to reading about the game.
ReplyDeleteThanks Peter and the game is scheduled for today, all being well.
DeleteLooking good but a bit of a tease ! I guess we’ll have to wait 🙂
ReplyDeleteThanks Matt. I'm trying to break it down into digestible chunks, rather than one mammoth post. I also find it easier for myself, as I can concentrate on sections and details, which tends to get lost in the broader posts.
DeleteNow in the process of sorting out some 60 photos for the next AAR(S)!
As everyone has said Steve, the table looks great, terrain and figures. Its interesting to base a game on a real small action and then compare what happens in the game to what happened in real life. Will you be relocating the Tiger, as the Germans did in reality? That would have an advantage for the Brits in that it would obviously not fire every turn, if it was busy relocating...the term "sniped at Allied units" implies random, intermittent fire, not a constant barrage?
ReplyDeleteThanks Keith. I like to use actual actions as a guide cum basis for my games, as you can get unusual situations to play out that you may not normally think of putting on the table.
DeleteRe: the Tiger I, with BKCII the C&C means that it may not fire every Turn, which could represent the sniping aspect. In terms of relocating, a lot will be depend upon how the game unfolds and whether it is necessary or not.
That looks quite superb! One to look forward to for sure.
ReplyDeleteRegards, James
Thanks James and I hope you enjoy the next report.
Delete