So with the British in position, the CO ordered his troops into action...
 |
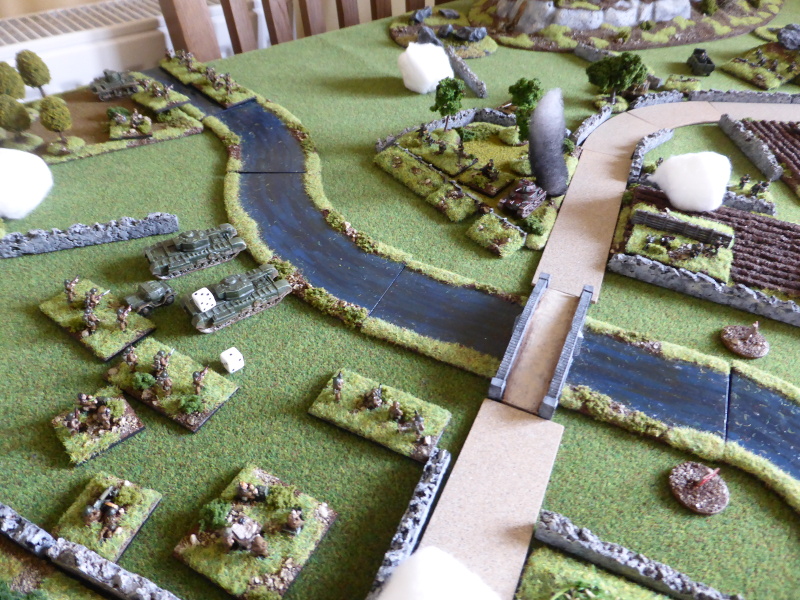
Positions at 7.00am onwards. The Recce infantry quietly crossed the river, confirming that there was a gap between the minefield and the rocky outcrop, which the relayed to the CO. On the left flank both 'C' company and the Churchills from the 1st squadron, failed to receive there orders, but fortunately the CO was close at hand to remedy this. As the Churchills advanced through the mist, they came under fire from the dug-in M15/42, which failed to inflict any damage on the tanks, but the M15/42 survived a hail of fire as it was most certainly well dug-in.
The Italian infantry in the orchard spotted the British Recce infantry by the river bank and fired at them, but only inflicted minor damage. The M15/42 failed to receive orders to carry on firing at the Churchills. No other Axis units could see anything through the mist by the river, so held their fire. |
 |
| As the British Recce infantry cross the river, they come under fire from the Italians in the orchard. However the fact that they found a crossing point has given the British CO another option for flanking the Axis positions. |
 |
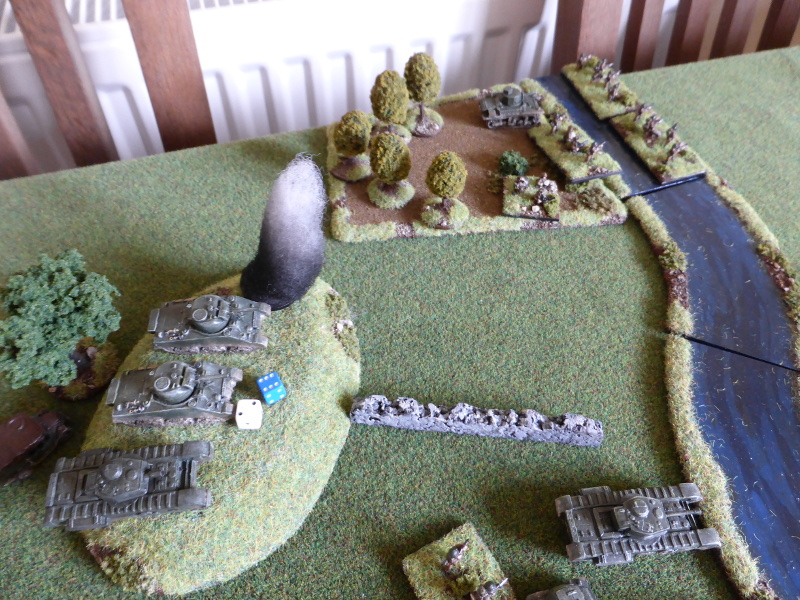
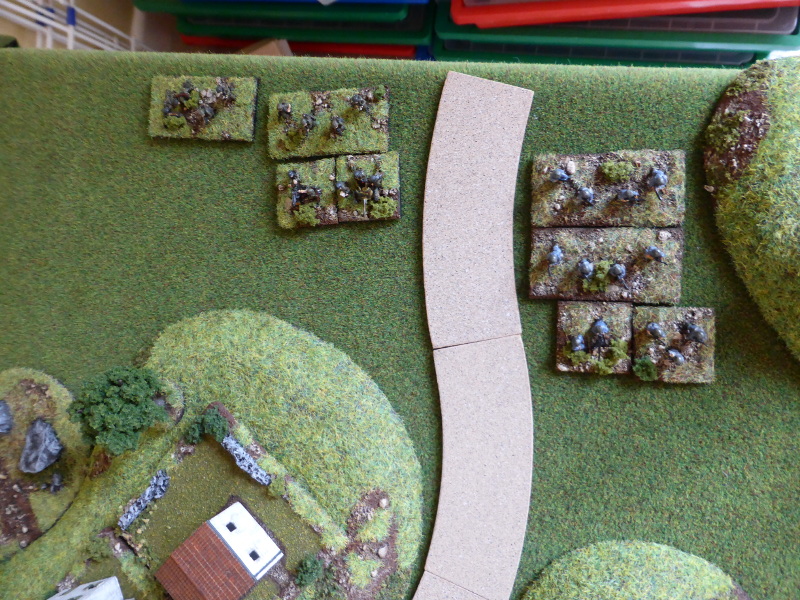
| Two troops of Churchills arrive at the river edge and come under fire from the dug-in M15/52, which fails to damage the Churchills (the 3 hits are from Day One), but manages to survive being shot at from close range due to being well dug-in. 'C' company advance to the edge of the orchard (top of picture) where the Honey has managed to locate a PzIV through the mist. |
 |
| The British reinforcements requested at the end of Day One begin to arrive in the form of a Sherman Flail, Churchill AVRE and WASP Carrier. |
 |
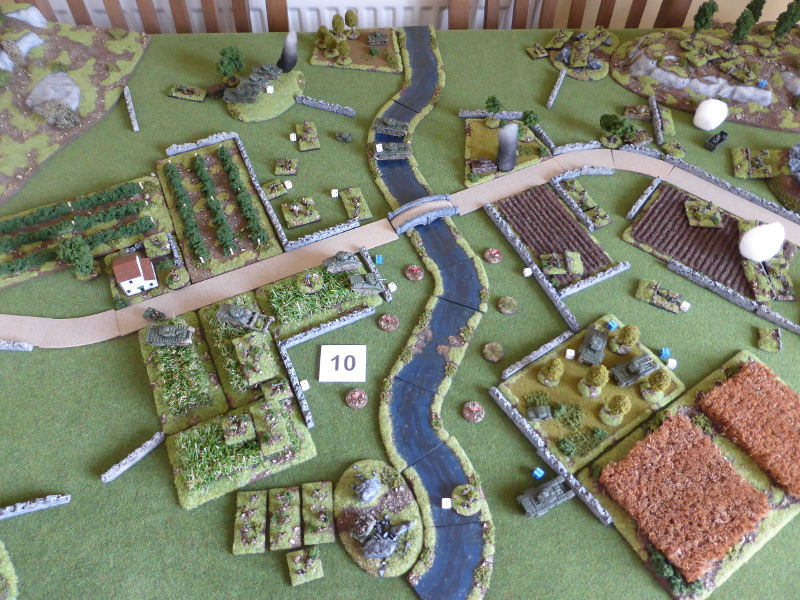
Positions at 8.00am onwards. The mist began to lift so that it was imperative that the British get a move on before they came into full view of the Axis troops. The British Recce infantry contacted the FAO who then managed to call in his battery of artillery on the Italian in the orchard. The strike left them suppressed and then 'A' company on the right opened fire on the Italians, leading to one infantry platoon being lost as it retreated back into the suppressed Italian HQ. With another crossing located, the CO ordered the Churchills of the 2nd squadron to move to the right, with the Shermans moving up in support to help shoot them over the river.
On the left flank the Churchills of the 1st squadron KO'd the M15/42, as 'B' company was ordered forward in support of the tanks. 'C' company by the orchard quietly crossed the river and held position on the river bank to see what was in front of them once the fog lifted.
With the Italians to a man suppressed, they were unable to respond the the British moves, whilst the FJ 1st kompanie could only opportunity fire on 'B' company as they emerged through the mist, as they had a failure of command when it mattered the most. The FJ CO ordered the PzIV from its position to move to support the dug-in Stug III to help counter the emerging threat from the Churchills to their front. This move left a potential gap for 'C' company to exploit. |
 |
| The Italians take a pounding from the British artillery and 'A' company. |
 |
| The 2nd squadron Churchill tanks begin to move forward to try and exploit the crossing found by the Recce infantry, whilst the Shermans move up to support them. 'A' company hold their positions to also provide support. |
 |
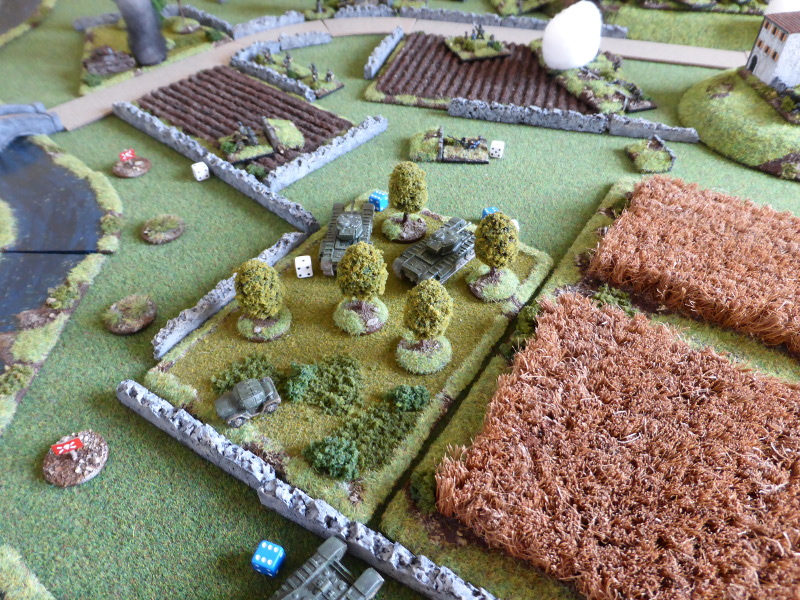
| 'B' company move forward to support 1st squadrons Churchills but comes under fire from the FJ 1st kompanie dug-in on the edge of the orchard. |
 |
| The Pz IV has moved to its new position as ordered, but has unwittingly left a gap on the flank. |
 |
| 'C' company have quietly crossed over the river and as yet have not been spotted. |
 |
| The reinforcements near the farm and the action. 'D' company is still being held in reserve behind the farm. |
 |
Positions at 9.00am onwards. As the mist cleared, the British FAO once again called his artillery down onto the hapless Italians in the orchard, who were all KO'd. This left a gap that the British needed to exploit quickly before the Axis troops could react. As the tanks of 2nd squadron advanced, they came under fire from dug-in Pak 35/36 and Pak 38, who failed to halt the Churchill tanks. 'A' company provided supporting fire but failed to silence the guns. The CO ordered 'D' company to move from its position in reserve to the right flank to help support the push across the river by 2nd squadron and 'A' company.
1st Squadron on the left began a fire fight with the dug-in FJ to their front, supported by 'B' company. The British weight of fire finally told, leading the the FJ losing one platoon, but 'B' company were hit hard, losing a platoon too as well as a platoon suppressed.
The Axis CO ordered his Tiger I and Pak 40 to fire on the 2nd squadron tanks hull down on the hill, managing to brew up one Sherman and suppress another. He ordered his other units to hold fire, especially the mortars whose positions he didn't want to reveal yet. Not sure of this was a wise move, but only time would tell. |
 |
| The Churchills of the the 2nd squadron continue to push towards the river, but come under fire as they approach, with 'D' company moving up in support (bottom left). |
 |
| The reserves take up positions and await further orders. |
 |
| 1st squadron and 'B' company come under intense fire and the latter are in an exposed position in the open. |
 |
| The Shermans take heavy and effective fire the Tiger I and Pak 40. 'C' company are ordered to hold their position along the river bank and await developments before moving forward. |
 |
| The greater range and firepower of the German guns has already began to take its toll on the British tanks. |
 |
| The Pak 38 has had less effect against the heavily armoured Churchills. |
 |
| The Pak 35/36 'door knockers' try their best to dent the British armour, but to no avail. |
 |
| The Pz IV has no targets yet, so waits patiently. |
 |
Positions at 10.00am onwards. With no sign yet of his air support, the British CO ordered his FAO to call down smoke on the hilltop town, in an attempt to 'blind' the Axis troops there. Luckily the FAO go through and the smoke landed as ordered, with the Tiger I and Pak 40 unable to see any targets, plus the mortars had a restricted field of view.
The 2nd squadron Churchills moved across the river and into the orchard, as 'A' company and the Shermans KO'd a Pak 35/36 and suppressed some dug-in FJ infantry by the bridge, but a Sherman was suppressed by the Pak 38 on the hilltop that was not blinded by the smoke. 'D' company continued to move forward in support. The CO ordered the Sherman flai forward to try to clear the ford of mines to allow another avenue across the river.
The 1st squadron Churchills moved across the river and KO's the dug-in MG42, but as they did so, 'B' company was hit by mortar fire and suppressed. 'C' company quickly moved off from the river and into the rocky outcrops near to the Axis mortar positions.
The FJ 1st kompanie engaged the exposed 'B' company, which took hits but the FJ lost a platoon to combined fire from 2nd squadron tanks. With the orchard almost certainly lost and the British infantry closing towards the mortar positions, the Pz IV was ordered back to try and take up a better position. |
 |
| The 2nd squadron Churchills move to the edge of the orchard, were they come under fire from the dug-in AA gun and the Pak 38, but they have little effect against the Churchill's armour. |
 |
| 'D' company moves slowly forward as the Sherman flail moves up to try and clear the ford of mines. |
 |
| 2nd squadron Shermans begin to clear the bridge surroundings of Axis troops with 'A' company support, but start to take hits in the process. |
 |
| 'B' company is in a parlous state as the Churchills and Shermans of the 1st squadron have cleared the orchard of the enemy. |
 |
| 'C' company at the foot of the rocky hill and are in a good position to begin to threaten the Axis dug-in mortars. The Pz IV hasn't been able to join the battle yet as it has been ordered hither and tither. |
 |
| The Pak 38 tries to halt the tanks of the 2nd squadron but to no avail. |
 |
| The Stug III and Pz IV await targets of opportunity. |
 |
| The Axis losses begin to mount. |
To be continued.


No comments:
Post a Comment