Last week we played the second of our ACW campaign scenarios, the details of which can be found below:
Background
Butler's Georgia Legion cavalry have retreated towards the next Confederate position, the village of Terabithia. They have been shadowed all of the way by elements of the Union cavalry, who halted when they saw the enemy in and around the villlage, reporting back the Rebs dispositions to their commander.
With dusk falling, the Union troops halted for the night and Butler's troops covered the approaches to Terabithia. As dawn broke and the early morning mist lifted, the Union troops were already deployed for battle.
Rebs OOB
Butler's Georgia Legions
Ulysses Everett 'Dapper Dan' McGill (O/C at Terabithia)
1st & 2nd Kentucky (The Soggy Bottom Boys)
1st Kentucky Artillery Battery (behind defensive earthwork that has been hastily thrown up)
Reb's Orders
Ulysses E McGill has orders to hold the river crossing for as long as possible and to inflict as many casualties on the enemy as he can. If and when the Union troops affect a crossing, he is to withdraw in good order back to the next Confederate position.
Deployment
As before, the Union troops had a rough idea of the layout of the terrain ahead, from which they could plan their attack. From this Dave made his deployments and plan, which he sketched onto the map, but would not be revealed until the game had finished.
 |
| The Union map, now in glorious Technicolor due to some crayons being captured in the last action. |
 |
| The Union plan of attack. |
 |
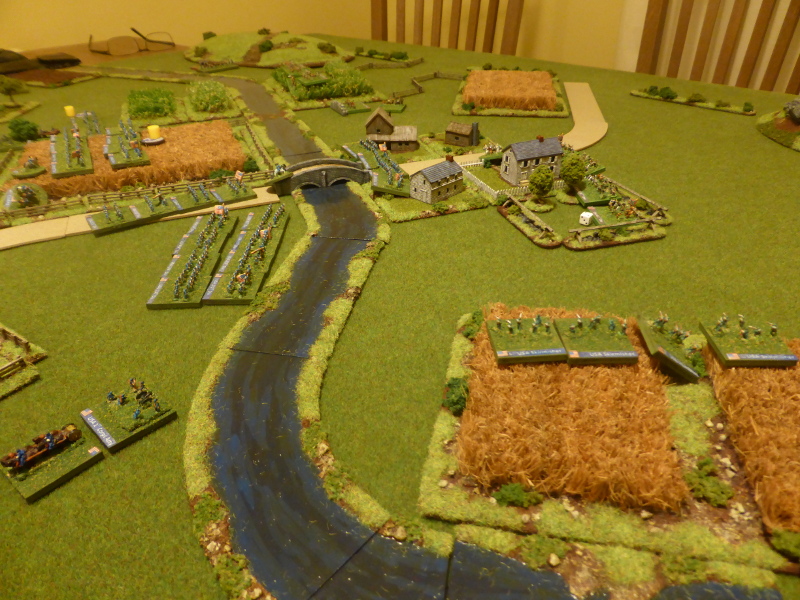
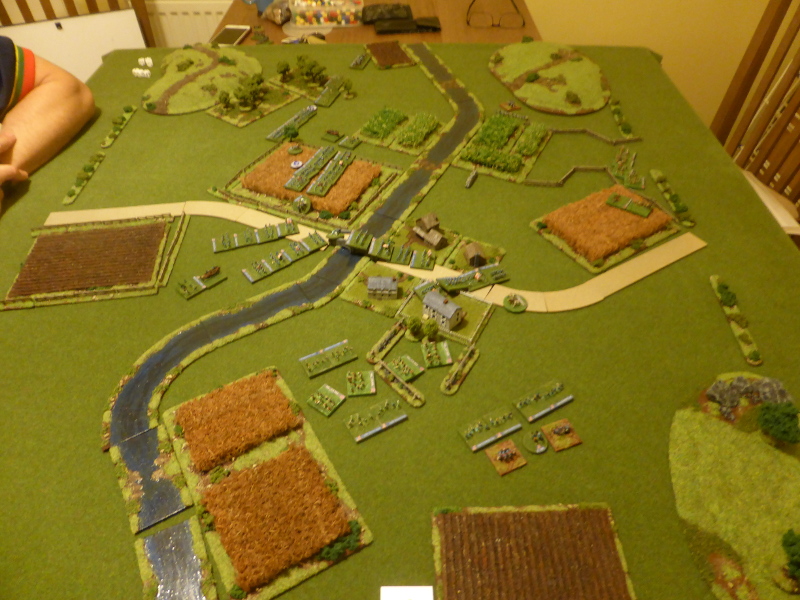
| An overview of the table. |
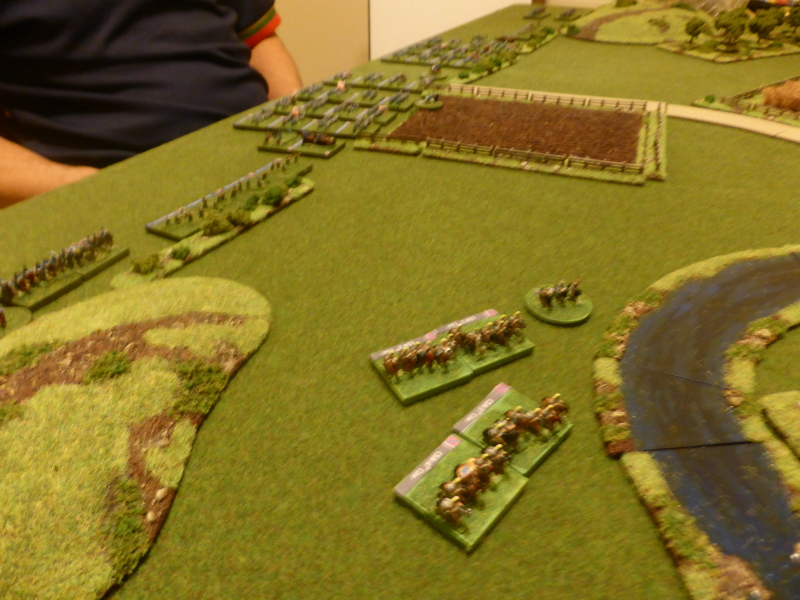 |
| Butler's Georgia Legions attempting to reach the comparative safety of the other side of the river. |
 |
| The 1st Kentucky in Terabithia and defending the bridge. |
 |
| The artillery battery behind their earthwork cover one of the fords, with the 2nd Kentucky on their right, poised to move against either crossing. |
Opening Scene, Turn 1, Take 1
The game got off to a funny old start, with Butler's Georgia Legions only able to make it just over the ford, due to rolling only one move. In contrast Shirley Wayne rolled low and surged forward (three moves) and caught them in the rear, even after they had evaded. The combat that followed resulted in a draw, with both sides moving apart.
 |
| The cavalry clash at the ford. |
 |
| Both sides are disordered in the melee... |
 |
| ... and end up moving one move away from each other. |
Turn 1, Take 2
Right, having read the rules for Charges a moment or two after the initial action, I realised that we had got it wrong and in fact the evading cavalry unit was automatically destroyed, which was a much more heroic outcome for Shirley Wayne and his boys! If in doubt, read the rules...
Elsewhere the Union infantry of Sly T'Lone and Gump pushed forward, but the cavalry and skirmishers on the left flank all failed to move. In response what was left of Butler's command moved into the peach orchard and dismounted, to try and cover the left flank. The 1st Kentucky moved to the left of Terabithia to help in the defence of the left flank.
 |
| The end of Turn 1. |
 |
| Wayne's troops in the process of crossing the ford after defeating Butler's Georgia Legions. |
 |
| The Confederate's reinforce their left flank. |
 |
| The Confederate right flank just see a mass of men on the move towards them. |
Turn 2
Once again Wayne's cavalry rolled low and so were able to make a wide sweeping move to threaten to turn the Confederate left flank. As they passed by the peach orchard, they came under crossing fire, but only one unit was disordered as they dismounted at the edge of a ploughed field. In the centre both Sly T'Lone and Gump's Brigades surged forward and the left flank managed to get moving.
In response the 2nd Kentucky and their supporting artillery managed to disorder two Battalions of Gump's Brigade. Over on their left, Butler's cavalry blundered and moved out of the peach orchard towards the river and Sly T'Lone's brigade! This completely unhinged the Confederate position, forcing 'Dapper Dan' McGill to move the 1st Kentucky to the rear of Terabithia to cover any approach my Wayne's cavalry.
 |
| The end of Turn 2. |
 |
| Wayne's cavalry threatening the Confederate flank and lines of communication. |
 |
| Butler's blunder leads to the dismounted Georgia Legion moving out into the open, which is not a good place to be. |
 |
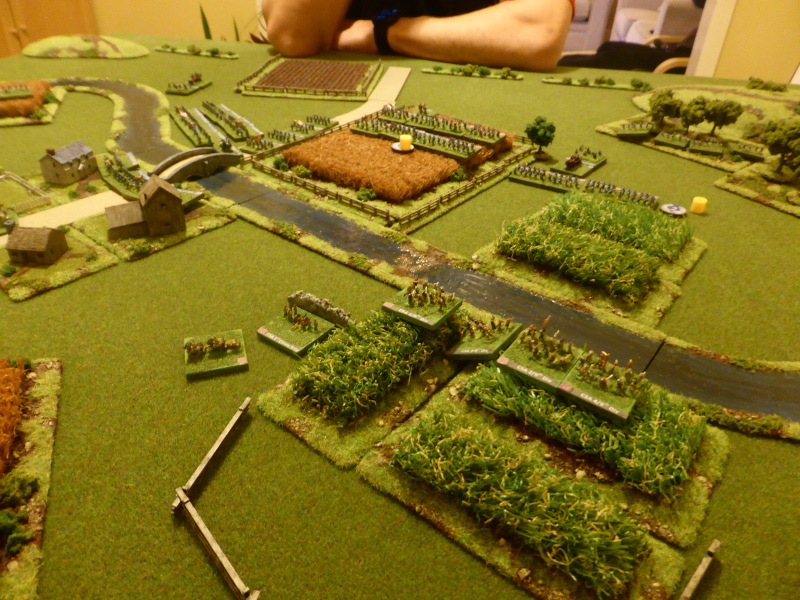
| The Confederate right flank is making it tough going for Gump's brigade as they advance through the wheat fields. |
 |
| A view of Sly T'Lone's and Gump's brigades as they advance towards Terabithia. |
 |
| The Union left flank finally gets moving. |
Turn 3
With Butler and McGill's troops in a less than ideal situation, things went from bad to worse as Sly T'Lone's Brigade moved to the river and across the bridge into Terabithia, with Wayne's cavalry holding position to pin McGill and the skirmishers moving to the edge of the cornfield to enfilade Butler's beleaguered command. With a tremendous weight of fire poured into them, Butler's command ceased to exist. In the Union centre Gump failed to move whilst the troops on the left flank continued to push forward.
In response McGill's 1st Kentucky shot at but failed to hit Wayne's cavalry, but at least the 2nd Kentucky and the artillery battery continued to cause hits and disorder on Gump's Brigade. However the Confederate position was looking distinctly untenable, but another round of shooting might be enough to send some of Gump's Yankees reeling...
 |
| Butler's dismounted cavalry enveloped on three sides. |
 |
| The end of Butler's command. |
 |
| The end of Turn 3. |
 |
| McGill and the 1st Kentucky are in a tight spot. |
 |
| The view from the Union right flank. |
 |
| The 2nd Kentucky continue to hold their own in the face of Gump's Brigade, despite being outnumbered 4:1. |
 |
| The 2nd Kentucky have a threat to their right flank. |
Turn 4
With the loss of Butler's Legion, the way into Terabithia was wide open, so the Union skirmishers and Wayne's dismounted cavalry moved in to close the net. Surrounded on all sides the 1st Kentucky decided to surrender as their commander Ulysses E McGill could be heard saying "Oh brother where art thou?" as he made his escape.
With the town secured, Gump concentrated on using 'passage of lines' to move his disordered troops back and out of harms way, as two Battalions were close to becoming shaken. On the left flank, the Union skirmishers moved in and despite concentrated shooting from their front and flank, the 2nd Kentucky somehow escaped unscathed.
With no chance of keeping up any meaningful resistance, the remaining Confederate troops made good their escape, whilst the Union troops were securing Terabithia and making their crossings over the fords.
 |
| The surrender of the 1st Kentucky. |
 |
| The end of Turn 4. |
 |
| The 1st Kentucky are escorted to the rear as Sly T'Lone's brigade secure the village. |
 |
| The 2nd Kentucky and the supporting artillery battery make good their escape. |
End of Game
The end of the game came far more quickly than either of us had anticipated, due to the Blunder leaving the Confederate left flank somewhat exposed. Still we had fun and to be fair, Dave did feel a bit embarrassed as hit exceptional die rolling.
Campaign Effects
With a resounding Union victory, the remaining Confederate troops are no in full retreat to the final Confederate position and the end of the valley. On the way the pick up some more troops who had hoped to form another blocking position, but with the losses sustained in this action this was simply impracticable.
With a unit of Union skirmishers escorting the prisoners to the rear, as well as dressing lines in Terabithia and getting across the ford, the Union troops are unable to to pursue the retreating Reb's.
Post Game Thoughts
A game that got off to a bad start with Butler's command getting caught in the ford and then it went from bad to worse with the Blunder! Still as always it was very enjoyable and we had fun, which is all that matters really. So as always some thoughts on the game:
- After the game we talked about how quickly units can move if they get three activation's in a Turn. We have been halving the distances and using inches, but we will probably give using cm's a go to see if this makes any difference. to be fair in the rulebook it does say you can amend things if you things units can move too far etc, as the authors do play on a much bigger table than most gamer's can accommodate.
- The game was played on a 4' x 3' table which felt right for the scenario, but probably a bit more depth might have been better.
- With the experience of a few games under our belts, we are using too much cavalry for the period and it would probably be better to have used half the units as listed in the campaign and used more infantry instead. In future I will used the unit lists as a broad guide and tweak to suit a specific period or conflict.
- Hindsight is a wonderful thing and I could have dismounted Butler's cavalry at the ford, which would have been a reasonable defensive position. However I ordered them to get to 'safety' but the die failed to play ball.
- In terms of the scenario I did think of allowing Butler's Legions to have crossed the ford, but this didn't feel right in terms of how the campaign was going. This would certainly have aided my defence, but I like the narrative to sometimes drive the action as it were.
- If in doubt, read the rules! This is something I have been doing since the game to hopefully avoid what happened in the first charge of the game...
- The Blunder combined with the early loss of one of Butler's Legion cost the Confederates the game. When I told my wife I was losing badly at the start of the game, her response was "well you always lose". Nice to know that your loved ones care...
- Ignoring the disasters on the left flank, the right flank showed that with a bit of luck, a few troops could hold off many more if the die rolls go your way. For once my shooting was pretty good, managing to disorder half of Gump's Brigade. If I had been able to make one or two go Shaken, then that would have had an effect upon the campaign, with those units being reduced in effectiveness for the next game. Sadly this was not to be.
- Once the campaign had run its course, I think we will try a few historical actions, just to see how things play out. Most probably these will be from the Glory Hallelujah! supplement, but we will have to wait and see.
So there we have it. The final game of the campaign beckons and I'm looking forward to it and hopefully I might manage a fighting draw, but we will have to wait and see. I'm continuing to enjoy reading Sear's account of Chancellorsville, which is really opening my eyes to this whole conflict. In other news I've nearly finished basing up my mid-19thC ImagiNations armies, which was one of my aims for the start of the year. So until next time...
Hello there Steve J,
ReplyDeleteA neat little action old chap and I rather like some the names you have cobbled together. Also, 'The Union map, now in glorious Technicolor due to some crayons being captured in the last action.' would this have been in Pencilvania?
All the best,
DC
Glad you enjoyed it David and we always try and come up with 'fun' names. I must admit I love your idea of the action being in 'Pencilvania'.
DeleteEven if I don't like the ACW: the table is looking amazing. Very well done! The photos are very fine too.
ReplyDeleteThanks for your kind words and glad you enjoyed the look. I was never into the ACW before but it is really growing on me.
DeleteA nice sharp action, which seemed to really open up in the first couple of turns due to the order / command system of Black Powder, a real strength, in my view, of scripting and control being taken away from the players by these rules.
ReplyDeleteIn the Glory Hallelujah rules, the penalty of no fire for a unit that moves more than once, helps put the hand of restraint on Players using large movements, even on a successful command roll.
I love the C&C system of BP, which is a great strength as you rightly say. Dave is certainly having the run of the die so far, so I'm hoping it swings back in my favour tomorrow night...
DeleteI think the only being able to move once and shoot should be used across the board, certainly until you get 'modern' magazine fed rifles. I will be using this and other GH rules as the basis for my ImagiNations games, as I think they work a treat.
Wayne's sweeping moved around the Rebel left really set the stage for a difficult action for the defenders. Outflanked from the get-go, coupled with butler's blunder, did the Confederates have a chance?
ReplyDeleteLove the work on your maps! You are giving Peter a serious run for the money.
Well done!
It was going to be a tough task as you say, but the Blunder really cost them the game. Thanks for the kind comment re: the map, which is easier to do on an A3 sheet of paper.
Delete