As mentioned at the end of our last game, we would have a final standard set piece battle to decide the outcome of our Brexite campaign. As this has been broadly based upon the '45, but set a year earlier, it made sense to have it happen around Derby, which historically the the Southern most point of the Jacobite advance. Based upon previous games, I came up with the following OOB, with some of the commanders rating only rolled for once they had been allocated to their relevant commands, mainly applying to the Hanoverian force.
Jacobites OOB
1 x C-in-C - Dithering
French Brigade (left flank) - Dependable
2 x Superior Line Infantry
1 x Standard Line infantry
1 x Medium Artillery
Jacobite Brigade (right flank) - Dependable
1 x Post of Honour Higlanders
1 x Highlanders
2 x Lowlanders (Inferior)
1 x French Light Artillery
French Cavalry (left flank) - Dependable
1 x Superior
1 x Standard
Independent Units
1 x Baggot's Hussars (Inferior)
1 x Standard French Light Infantry
Hanoverian OOB
1 x C-in-C - Dependable
Right Flank Infantry - Dependable
1 x Superior Line Infantry
2 x Standard Line Infantry
1 x Medium Artillery
Left Flank Infantry - Dependable
2 x Standard Line Infantry
1 x Militia (Inferior)
1 x Light Artillery
Right Flank Cavalry - Dashing
1 x Superior
1 x Standard
Left Flank Cavalry - Dithering
1 x Standard
1 x Inferior
Independent
1 x Standard Light Infantry
Deployment
Having read quite a few books by Donald Featherstone, I thought it would be good to use his curtain idea, to allow both sides to deploy in ignorance of what the other was up to. My version was to deploy my troops first and then cover them up, so Dave couldn't see them as he deployed his Franco-Jacobites. This worked well, with both of us going for a fairly typical set up with infantry in the centre, supported by artillery, with cavalry and light infantry on the flanks.
 |
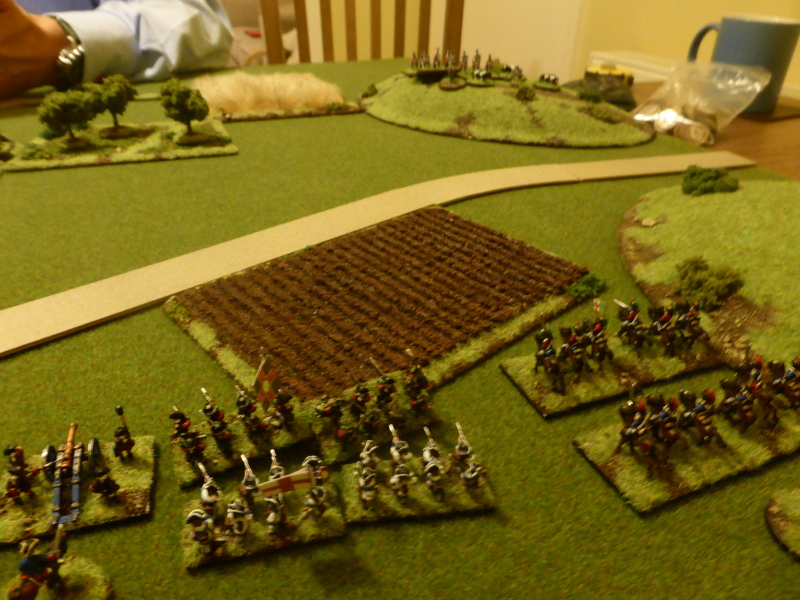
| An overview of the table, with the Franco-Jacobites on the left. The river is impassable to all troops except via the bridge or the ford. Only the woods affect line-of-sight and movement, with the fields there purely for show. The villages were classed as Light Cover only. |
 |
| The Jacobites on the left flank, with the Light Infantry to the fore. |
 |
| The French troops on the left flank, led by the Royal Ecosse and The Wild Geese. |
 |
| The Hanoverian line. |
 |
| The Hanoverian right flank supported by cavalry with their Dashing commander, Ponsonby. |
 |
| The Hanoverian left flank looking towards the Franco-Jacobites. |
Plans of Attack
My plan was to send my Light Infantry into the woods on my left flank, supported by the cavalry, as I was expecting the Jacobites to be on this flank. Fearsome in the attack, I was hoping to be able to cause some hits on them or to tempt them into an early charge from which I could withdraw from, thus dulling their offensive potential. On the right flank, the plan was to advance the cavalry to protect the flank, whilst waiting for an opportune moment to charge their French adversaries.
Dave's plan can be see below:

So with both sides deployed, we took some time to take stock of the situation. It very quickly became apparent that the battle would most likely be decided by who could defeat the enemy cavalry on or around the hills, thus exposing the othersides flank, from which they could threaten to roll it up.
Turn 1
The French and Jacobites both advanced forward, whilst the Hanoverian line held position. The Hanoverian cavalry on the left flank advanced towards the wood as the Light Infantry entered it, hoping to be able to reach the edge from which to take pot shots at the Highlanders. On the right flank, Ponsonby the Dashing commander rolld a '6' which meant he had to advance towards the enemy, which was the French cavalry. He was just short of being able contact them. There was some shooting from the artillery, with the Hanoverian medium gun taking one hit.
 |
| The end of Turn 1. |
 |
| The Hanoverians advance towards and into the wood. |
 |
| Ponsonby's cavalry keen to get stuck in. |
 |
| The French Light Infantry lead the advance, with the Highlanders behind them and the Lowlanders to their left. Baggot's Hussars take up the rear. |
Turn 2
The Franco-Jacobites won the Initiative roll as decided to go first. Knowing Dave's propensity to roll a one at critical moments in the game, he jokingly showed me what a one was on the die, then rolled it for it to come up a one!!! This stopped his French cavalry from charging Ponsonby's horse, much to my relief. With it then being my turn, I too rolled a one, but as Ponsonby was a Dashing commander, this still allowed me to charge in. Huzzah!
The combat was a close fought thing, with the French Superior cavalry being destroyed, but the Hanoverian Superior cavalry having to retire on 4 hits to reform. It could easily have gone the other way, but the Hanoverians had got a small but important advantage on this flank.
Elsewhere, the French and Jacobites advanced, with the Light infantry of both sides meeting in the woods, causing one hit on each other as they exchanged fire. The artillery failed to cause any hits.
 |
| French inaction. |
 |
| The closely fought combat. |
 |
| The aftermath of the combat. |
 |
| The end of Turn 2. |
 |
| As the Light infantry meet in the woods, the Hanoverian left flank is refused as they watch the Jacobite advance. |
 |
| The French advance. |
 |
| The Hanoverian light artillery are just out of range as the French hove into view. |
 |
| The refused flank look on at the advancing Jacobites. |
Turn 3
The Jacobites continue to push forward, reaching the edge of the woods, whilst the French hold position as they fear getting too close the Hanoverian medium artillery, which could be devastating when in range for giving them a whiff of shot. The Hanoverian cavalry reform and dress ranks, whilst the Light infantry in the woods fail to hit each other. The Hanoverian light artillery causes one hit on the Lowlanders.
 |
| The end of Turn 3. |
 |
| The Light infantry continue to shoot it out, but somewhat ineffectively. |
 |
| The Hanoverian cavalry on the left flank look on, ready to charge any troops exiting the woods if required. |
 |
| A view from the Hanoverian line. |
 |
| Ponsonby's horse reform. |
Turn 4
The French light infantry failed their command roll to charge their Hanoverian counterparts, who decide with withdraw as the Jacobite Highlanders enter the woods and get too close for comfort. The French decide to withdraw slightly so as not to expose themselves to too much artillery fire as well as the threat from the Hanoverian cavalry. Once again both sides artillery are ineffective, so no action to report.
 |
| The end of Turn 4. |
 |
| The Hanoverian left flank is still refused with the expected arrival of the Jacobite Highlanders. The cavalry have changed formation to give them great freedome of movement should they need it. |
 |
| The Hanoverian right flank watch the French withdraw slightly. |
 |
| The Hanoverian light artillery fail to cause any hits on the distant Lowlanders. |
Turn 5
With his cavalry reformed, Ponsonby ordered another charge on the French cavalry on the hill. I another closely fought contest, Ponsonby's horse prevail, thus leaving the French flank hanging in the air.
The Jacobites do their best to advance, but the Hanoverian left flank has ample time to withdraw and dress their lines to meet the impending attack. Again both sides artillery is ineffective.
 |
| Ponsonby's horse charge in and just manage to destroy the French Dragoons. |
 |
| The end of Turn 5. |
 |
| The Hanoverian left flank has dressed their lines and are ready for the Jacobites who are at the edge of the wood. |
 |
| A view towards the French who now have no cavalry to protect their flank. |
 |
| Ponsonby's cavalry reform but have a wide open flank from where they can either threaten or attack the French flank, or simply move into the rear to threaten their lines-of-communication. |
End of Game
At this point it was obvious that the French would be unable to advance without cavalry protecting their flank, as well as the fact that they were facing an intact Hanoverian line. The Jacobites although close to the Hanoverians, would most likely take quite a few casualties as they tried to get to grips with the enemy. So we decided that descretion was the better part of valour and the Franco-Jacobites with drew from the field of battle, handing campaign victory to the Hanoverians.
Post Game Thoughts
Well not quite the climatic denoument to our campaign that we were expecting, but nevertheless an interesting game upon which to finish. So some thoughts on the campaign and the game in general and as always in no particular order:
- As predicted the cavalry engagement decided the game, but rather more quickly than either of us had anticipated. Both clashes were close, with one point deciding each in favour of the Hanoverians. It could have easily gone with other way which immediately would have weakened the Hanoverian right flank, thus allowing the French a better opportunity for an advance.
- As Dave noted it is much harder for an Attacker than a Defender with these rules, due to the penalty for moving whilst shooting. This was something we had not really encountered in our previous games, but it was noticeable in this one. So I think there is a case to give the Attacker a slight numerical advantage or maybe an extra artillery piece to help offset this.
- The other option to the above could be to use the orders from Grant's Programmed Wargames Scenario book, so each player had a set to follow. This way maybe both would have to attack, or maybe only one flank etc. Again this is something to consider but could give intriguing and challenging games.
- Both sides artillery was once again ineffective, mainly due to the fact that we were often shooting at long range and only occasionally at effective range. We did use the counter battery fire rules, which give a chance of inflicting permanent hits on artillery pieces that cannot be rallied off. this is definitely something to be used in future games.
- Playing the campaign has been great fun as it really does make you approach the outcome of a game in a different way. No longer a fight to the death or until you're left with 25% of your force etc, but a case of preserving your lines-of-communication, your artillery etc. I'm sure this is something we will do more of and certainly have plans for in the New Year.
- The Hidden Deployment worked well and gives another interesting edge to the game. With 10mm figures it is easy to make covers, so I hope to be able to use these in the future where appropriate.
- Even with our 'what if?' campaign, it is a hard task for the Jacobites to win. They are hampered by a Dithering C-in-C in the form of Bonnie Prince Charlie, with limited artillery, poor cavalry and some excellent but one trick ponies in their Highlander infantry. I think if we were to do this again, I would change the C-in-C to Dependable and justify this by saying the the Young Pretender had wisely delegated command and had listened to his councillors more. There would still need to be French involvement as once the Hanoverians had retreated South and were operating on Interior Lines as well as having regular troops to call upon, the Jacobites would be on a hiding to nothing without their support.
So there we have it, our Brexite campaign at an end and the Hanoverian troops still very much involved in Europe, much to the chagrin of Louis XIV. It would be nice to return to this 'period' in the future, but time to move onto another set of rules and a different period.
Our plans for the New Year are to play one of the campaigns from the aforementioned Grant book, with it set at some point in the American Civil War. We're not sure whether we will use Black Powder as the ruleset, with the Glory Hallelujah supplement amendement, or Bloody Big Battles. I need to read more on the campaign to get a better idea of which rules might be the best fit. So until next time...
Our plans for the New Year are to play one of the campaigns from the aforementioned Grant book, with it set at some point in the American Civil War. We're not sure whether we will use Black Powder as the ruleset, with the Glory Hallelujah supplement amendement, or Bloody Big Battles. I need to read more on the campaign to get a better idea of which rules might be the best fit. So until next time...
Very enjoyable battle report, Steve! In HoW, cavalry clashes often end up in destroying one or both units and sometimes both. Cavalry can be fragile oh, so, important to victory.
ReplyDeleteAttacking is more difficult in HoW and I think that seems right. Defenders need to be softened up by artillery first or hit in waves to push them out of their position. To make an omelette, one must crack some eggs!
Thanks Jonathan! A cavalry charge delivered at the right time can, as we saw in this game, be the turning point leading to victory. I have some more cavalry on the painting table to allow for a bit more durability as, as you rightly say, they often tend to self destruct.
DeleteWith our smaller games, 3 infantry units to 1 artillery unit is not quite enough to close with the opposition. Ideally 4-6 units per brigade is better and allows for units to rotate back as they take hits to recover. Again I have units on the table to allow for this.
HoW seems to be producing good management of this size of games with believable narrative. Look forward to the ACW game, I like some of the Glory Hallelujah amendments, especially anything that moves more than once cannot fire.
ReplyDeleteHoW works really well for this size game or much larger ones. I have played the starter scenarios in the book, which are great to learn the mechanics, but I wouldn't want to play many that size unless part of a campaign. The good thing is that we rarely need to refer to the rulebook as we've played enough games just to use the QRS, with the odd common sense decision.
DeleteThe ACW campaign should be fun and I might get some trial games in with my wooden blocks before the New Year just to refresh myself with the rules.
A nice tabletop layout and interesting game report. I liked the blind deployment approach and planning before the game.
ReplyDeleteThankyou Peter. The blind deployment really adds another dimension to the whole experience: ditto the orders cum planning. The latter is something I'm keen to explore further in the New Year.
Delete