Following on from yet another Jacobite victory last week, the action has now moved on to Carlisle. The Jacobites having divided their forces, have sent one force towards Newcastle and the other towards Carlisle, in an attempt to confuse the Hanoverians. Our game is based upon the latter force, with some details below.
Hanoverian Force
Lt Col James Durand of the 1st Foot guards has been put in charge of the defence of Carlisle. A pretty thankless task given the poor quality troops at his disposal and lack of any meaningful defences around Carlisle. His only hope is that he can hold out long enough for some reinforcements from General Wade coming to his aid before he is overwhelmed by the Jacobite troops. At his disposal are:
1 x Carlisle Militia deployed as pickets on the outskirts of the town (Inferior)
2 x Invalids Infantry (Inferior)
1 x Light Artillery (Inferior)
General Wade is hoping to arrive with:
2 x Infantry (Standard)
1 x Artillery (Inferior)
1 x Light Dragoons (Inferior)
Jacobite Force
No idea other than their are thousands of them!
11th October 1745 - somewhere outside of Carlisle
The Town Militia have deployed along some hedges with a view towards the old Roman road that crosses one of the many small rivers that criss cross the local area. They know that they will be reinforced by the Invalid Infantry, so are fairly confident of their position. Through the early morning mist they can hear the Jacobites approaching and steel themselves in readiness for the battle...
Turn 1
The Jacobite advance guard of Lowlanders arrived and advanced down the road as quickly as they could. The Town Milita simply held their position.
 |
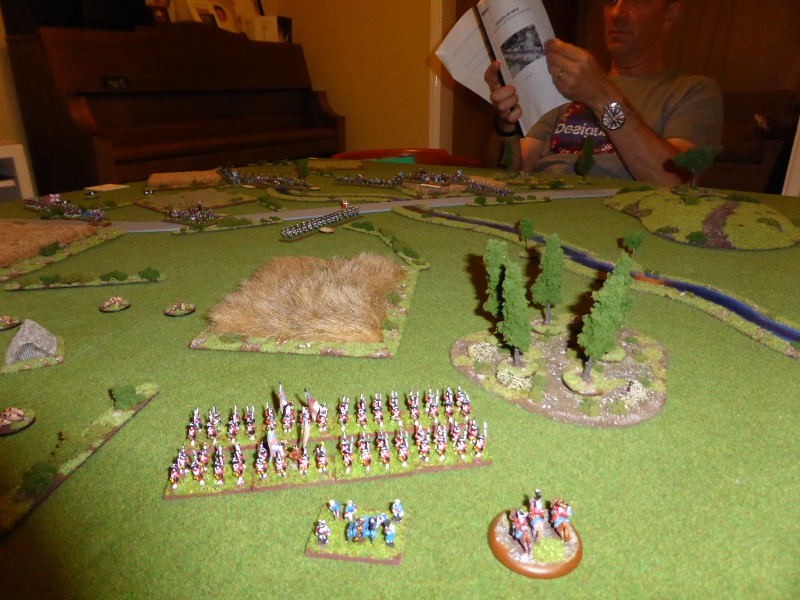
| The Jacobites would advance from the left table edge, whilst the Invalids would arrive from the bottom righ thand corner, representing the road from Carlisle. General Wade and his troops would arrive from the top right hand corner. |
 |
| For once the Lowlanders move with some determination onto the battlefield. |
 |
| The Town Milita await their foe behind the hedgerow. |
Turn 2
After their advance in the first Turn, the Lowlanders reverted to type with a Poor command roll, leaving them to move off the road. The French promptly followed suit! Only the Highlanders played ball, rushing onto the table and advancing towards the river. Fortunately for the Town Militia the Invalids could be seen advancing from Carlisle, with flags flying and drums beating.
 |
| The Highlanders pour onto the table as the Invalids arrive in the nick of time. |
 |
| Lt Col Durand at the head of his troops. What a magnificent sight! |
Turn 3
The Jacobites appeared to be intent upon confusing the Hanoverians as once again, a Poor command roll left the Lowlanders just moving sideways as they were unable to advance towards the enemy. The Highlanders ignored their crab like cousins, rushing forward to try and get to grips with the enemy. Seeing an opportunity, the Town Milita turned and moved to bring their muskets to bear on the Highlanders left flank. As the invalids deployed across the road to meet the Highlander rush, the French made an Admirable command roll and quickly crossed the river. With no sign of General Wade, the Hanoverian right flank was in danger of being flanked early on in the engagement.
 |
| Battle is joined very quickly due to the Highlanders keeness to get to grips with the enemy. |
 |
| Lt Col Durand forms his Invalids up as the Town Militia pour fire into the Highlanders flank, causing 3 hits. |
Turn 4
The Lowlanders actually advanced forwards for once, obviously having been inspired by their kilted cousins. The Highlanders charged into combat as the Invalids tried to from a good defensive line. As the Town Militia turned to face the French in their rear, they were charged by some Highlanders, which put them in a somewhat precarious positon. The Hanoverians really needed General Wade to appear, but there was still no sign of him and his troops.
 |
| The masses of Jacobites trrops can clearly be seen as the Hanoverians face assaults to their front and flank. |
 |
| The Invalids look towards a large number of Jacobite reinforcements as battle is joined to their right. |
 |
| The Highlanders charge into the Town Militia... |
 |
| ...who somehow survive the engagement and destroy the Highlanders in the process! |
 |
| The Jacobite commander is looking pensive as things are finely balanced. |
Turn 5
Yet again the Lowlanders make a Poor command roll, and once more move crab like around the table, possibly mesmerising the Hanoverians who cannot make head nor tail of this strategy. As General Wade finally arrives, the Jacobites charge in, only for a unit to be destroyed by closing fire and following artillery fire. The Brigade commander succumbs to his wounds, being replaced by a Dithering commander. Although an undoubted blow to the Jacobites, the Hanoverians lose the Town Militia and a unit of the invalids. Things are now definitely hanging in the balance for both sides.
 |
| The engagement takes on an almost Napoleonic feel as troops are spread all over the table. |
 |
| Both sides have taken losses in the centre. |
 |
| General Wade's arrival could tip the balance in favour of the Hanoverians. |
Turn 6
Unbelievably the Lowlanders roll yet another Poor command and crab about the table. This appears to be their default manouevre as this is not the first battle that they have done this. As General Wade continues his advance, the Highlanders and French push forward to try and inflict as much damage as they can before Wade arrives.
 |
| The Lowlanders left high and dry as the rest of the Jacobites force takes the battle to the Hanoverians. Wade is still too far away to be an immediate threat to the Jacobites. |
 |
| The Invalids lose their artillery unit as the French and Highlanders close in for the kill. |
Turn 7
In a turn up for the books, the Lowlanders advance! Sadly General Wade rolls a Poor command and this hands the initiative to the Jacobites, who seize the opportunity and start to move towards Carlisle.
 |
| The Highlanders start to make for Carlisle as the Invalids are charged in the flank and General Wade is too far away to help. Things are not looking good for the Hanoverians. |
 |
| Carlisle here we come! |
Turn 8
Exhausted by their advance, the Lowlanders once again roll a Poor command and crab about. Words fail me to be honest. Despite General Wade's advance, he cannot prevent the Highlanders exiting the table.
 |
| The Jacobites appear to be close to victory. |
Turn 9
As General Wade rolls a Poor command once again, the Lowlanders advance once all danger appears to have passed.
 |
| Short of a miracle, the Jacobites appear to have gained Carlisle. |
Turn 10
In a last ditch attempt, the Hanoverian Dragoons move towards the French in a valiant attempt to stop the Jacobites.
 |
| General Wade forms his troops up, ready to try and snatch victory from the jaws of defeat. |
Turn 11
The last throw of the die fails for the Hanoverians. The Jacobites win the fire initiative and the Lowlanders (yes they actually did something) destroy a unit of regulars as well as sending the Dragoons reeling in disarray. Carlisle is theirs for the taking.
 |
| As both sides close for the final time... |
 |
| ...the Jacobites come off better, leading to a decisive win for them. |
Post Game Thoughts
Well that was an absolutely cracking game! One of the best games I've had in quite some time. It was certainly full of action, looked great and could have gone either way. So as always a few thoughts:
- These rules really are the Poodles Privates. We have yet to find anything broken with them, despite trying out various types of scenarios, troops, situations etc. You'd be foolish not to buy them IMHO.
- The Jacobite Lowlanders once again made it hard for the Hanoverians to gain the upper hand. If they had advanced as planned, they may come under enough fire to make it hard for the Jacobites to gain victory due to their Inferior status. Their crabbing about was certainly amusing and caused much comment throughout the game.
- If General Wade had been able to arrive a bit earlier and had not rolled a couple of Poor commands, the game might have been even more exciting than it was.
- I was nice to be able to have a game with a bit more scenery on it. Not only does it look nicer, but it also adds another dimension to the movement of both sides.
- It shows that you can have a great game on a small table with relatively few units. We both felt that this game had plenty of action and manouevre, yet was played out on a 4'x4' table and in under 2 hours. What's not to like?
So far the games have followed the historical campaign which is nice. Next up is Derby, which should be played out in a couple of weeks. We also thought that this could make for a nice 'what if?' type campaign, with the French providing more support and the Prussians coming to the aid of the Hanoverians. Maybe this is something for another day...


Sounds like a great game. I don't get much time for commenting these days but I do enjoy your battle reports.
ReplyDeleteThanks
Cheers
Richard
It was indeed a great game Richard and nice to know you enjoy my battle reports:).
DeleteThanks guys. Great to see you're enjoying the rules.
ReplyDeleteIt appears I have my co-authors for the first supplement, working title Honours of War 1740-50: Succession and Revolt. Covering the WAS and the '45.
Or maybe I'll just post your adaptions for free on the website (which should be up in a week or so), especially as I'm now the Consumer's Champion. See MWBG 390, Blogs of the Month.
Best wishes, Keith.
I like the working title of your first supplement. But if you're now the Consumers Champion, you must get a spot on daytime tv berating the proliferation of wargaming supplements that target the weak and feeble of the gaming world, such as myself;).
DeleteSeriously, you could put them up on your website as a free download, as they seem to work a treat for this period. I think Dave and I have a pretty good feel for what troop types work for the various forces, so it wouldn't take much work.
Nice. I'll be in touch.
Delete10MM Tartan is a real pig to paint ;-) Still at least I have me deep frozen battered pizza to look forward too.
ReplyDeleteHmmm, luckily Dave painted these so I don't have that problem to worry me:)
DeleteI know I painted them ;-)
DeleteAh Mr Harwood, to you then! They do look great on the table. Another project for the future me-thinks...
Delete