Tuesday, 22 February 2022

Operation Cygnet - Day Two - Fallschirmjager Attack On 'D' coy.

With the UK being battered by a series of storms, I was able to get in my next campaign game somewhat earlier than planned. So without further ado, details of the scenario and the AAR itself:

British OOB
1 x CO (CV 9)
1 x FAO (CV 8)
1 x 25 pdr Battery
1 x Typhoon Ground Attack
'D' Coy
1 x HQ (CV 8)
3 x Infantry
1 x MG
1 x 3" Mortar
1st Recce Sqdn
1 x HQ (CV 8)
2 x Armoured Cars
2 x Infantry
AVRE
1 x HQ
1 x Churchill Crocodile
1 x Churchill AVRE

Fallschirmjager OOB
1 x CO (CV 9)
3rd FJ Kompanie
1 x HQ (CV 8)
3 x Infantry
1 x MG
1 x 81mm Mortar
FJ Assault Engineers
1 x HQ (CV 8)
1 x Infantry
1 x MG
1 x 81mm Mortar
FJ Heavy Weapons Kompanie
1 x HQ (CV 8)
1 x MG
1 x 120mm Mortar
1 x Pak 38
1 x le.IG-18

Scenario Details
  • The British CO arrives from Turn 4.
  • The British 1st Recce Sqdn arrives from Turn 2.
  • 'D' Coy starts the game Dug-in, making them 5+ to hit in Open Terrain.
  • The Typhoon is looking for 'Targets of Opportunity' and so can arrive each Turn on a 4+ die roll.
  • The FJ start 20cm on the table and with any Support Units deployed as required.
Objective
The Fallschirmjager are making a 'Spoiling Attack' towards the crossroads and 'D' Coy, with the aim of causing as much disruption and damage as possible, to delay the advance along 'Club Route'.

Table Layout
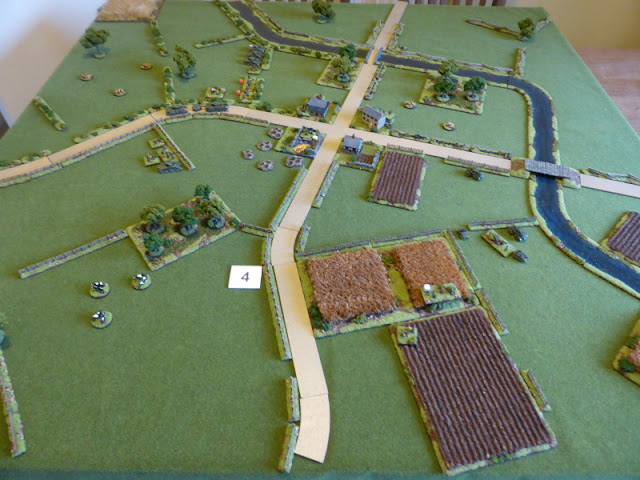
The beauty of the Warplan 5/5 maps is that the terrain is pretty much set up for you, just requiring some detail added to the overall scheme.

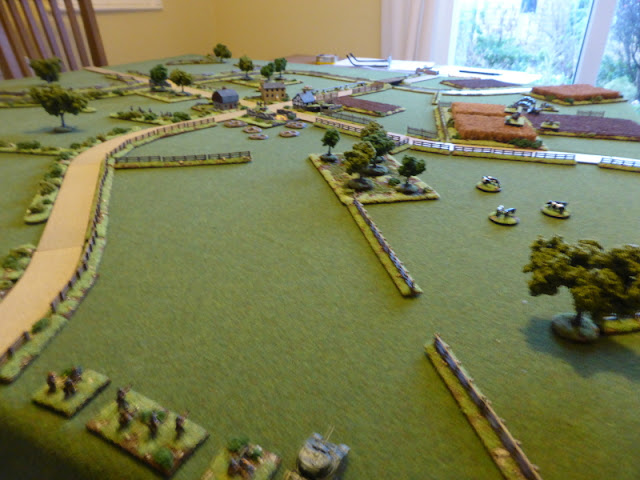
An overview of the table, with Wuppertell off the left hand table edge, from where the Fallschirmjager will advance.

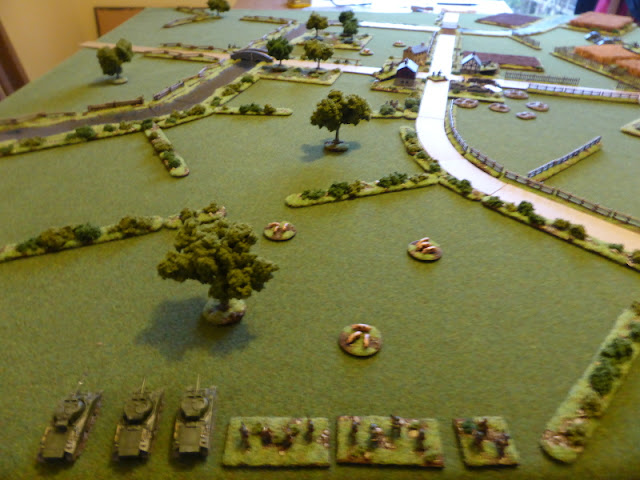
1st Recce Sqdn which will arrive on Turn 2 using mobile deployment.

'D' Coy dug-in at the edge of the rocky terrain, covering the road from Wuppertell.

3rd FJ Kompanie (left) and FJ Assault Engineers (right) advancing through the woods to avoid being seen for as long as possible.

FJ Heavy Weapons Kompanie deployed to cover the flank of the advancing FJ Infantry and to watch the road.


The Battle
As of late, the captions and photos will give an idea of how the action unfolded.

The end of Turn 1. 

The 3rd FJ & FJ Assault Engineers advanced through the wood. with nothing visible 'D' Coy maintained a general watch, whilst the AVRE's failed to move forward to support them.

The FJ near the edge of the wood.

The end of Turn 2.

The 3rd FJ Kompanie and the FJ Assault Engineers moved to the edge of the woods, but were unable to spot 'D' Coy in their dug-in positions. In contrast, the 'D' Coy HQ spotted the movement of the FJ as they arrived at the edge of the wood, but failed to get through to his platoons to fire. The FAO also failed to get through to his artillery. As this was happening the 1st Recce Sqdn moved slowly forward, searching for an enemy troops as they did so.

1st Recce Sqdn arrive.

The AVRE's seem in no hurry to move up to support 'D' Coy.

The FJ infantry search the open ground, hoping to spot the enemy, but fail to do so.

The end of Turn 3.

'D' Coy had obviously chosen their positions well as once again the FJ infantry failed to spot them. Knowing that the FJ were in the woods, the FAO managed to get through to his artillery, calling in a strike which  suppressed 3 FJ infantry. 'D' Coy opened fire too, KO'ing 1 x FJ MG unit. Elsewhere the 1st Recce Sqdn continued to carefully probe forward and the AVRE's started to move towards the sound of gunfire.

1st Recce Sqdn  fail to spot the concealed FJ Heavy Weapons Kompanie in the wood as they move forward.

The FJ infantry take hits and are suppressed by the British artillery.

With contact made, the Typhoon roving the area spots the FJ and makes an attack run, but it's shooting is wide of the mark, only managing to suppress 1 x FJ infantry unit.

The end of Turn 4.

With 'D' Coy having revealed their positions last Turn, the FJ called in their mortars and with supporting fire, suppressed 1 x MG and 1 x Infantry unit from 'D' Coy. The FAO managed to call in an artillery strike again which saw another FJ infantry unit KO'd. Unfortunately C&C issues meant that 'D' Coy couldn't capitalise on the situation after the artillery strike, which was a welcome reprieve for the FJ.


The 1st Recce Sqdn advance to the road and again fail to spot the FJ Heavy Weapons Kompanie.

The AVRE's move into position to support 'D' Coy. Without armoured support, these will be tough for the FJ to deal with.

The end of Turn 5.

The FJ Heavy Weapons Kompanie spotted the 1st Recce Sqdn armoured cars and with some very accurate shooting, managed to KO both of them. Once again the mortars and FJ infantry opened up on 'D' Coy, KO'ing 1 x Infantry and 1 x MG. Opportunity fire back from the infantry and the Churchill tank, managed to KO another FJ MG unit. Having suffered several Turns of artillery fire, the 3rd FJ Kompanie began to fall back further into the woods to avoid being seen.

For those supporting the British at this point, it's probably best to not read anymore of this, as across the board, all command units failed their command rolls!!!


The FJ Heavy Weapons Kompanie look on as the 1st Recce Sqdn armoured cars brew up.

The FJ infantry start to fall back.

'D' Coy's position is looking rather thin, but fortunately they have some armoured support for protection.

With the armoured cars, brewing up, the 1st Recce Sqdn infantry hold their positions as they lack the offensive power to move forward.

The end of Turn 6.

The FJ begin to pull back all of their units, as the mortars call down oanother stonk on the 'D' Coy 3" mortar, suppressing it. The British FAO does managed to call his artillery down on the FJ, but only hits an HQ unit and fails to suppress it. With no targets in sight, 'D' Coy takes a breather and sits tight on the crossroads.

The Churchill Crocodile pushed forward slightly to help 'D' Coy's defensive position.

The FJ pull back through the woods towards Wuppertell.

The end of Turn 7.

Almost of repeat of the previous Turn, with the FJ mortars suppressing the 3" mortar, which only just avoids being KO'd, plus an infantry unit. The FAO has more luck this time, suppressing a FJ infantry unit.

The final acts of the engagement, with most of 'D' Coy suppressed.

A lone FJ infantry unit is caught in the open as the rest of the units have moved back to Wuppertell.


End of the Game
The FJ spoiling attack had achieved its limited objectives, but at what cost? Ditto 'D' Coy's defence of the road junction?

The Fallschirmjager lost 2 x MG units and 2 x Infantry units (two platoons had to merge into one due to losses sustained).

'D' Coy lost 1 x MG unit and 1 x Infantry unit and there supporting Mortar was all but KO'd. The 1st Recce Sqdn took a bit of a battering, losing both armoured cars for no gain.

So a costly action for both sides and no clear victor, although the FJ back in Wuppertell are still a thorn in the British flank.

Post Game Thoughts
Another interesting little action, the sort of which only a campaign can really throw up. As always BKCII with my house rules provided a good game. On the action itself, some post game thought in no particular order:
  • The Typhoon and the 'Targets of Opportunity' worked well, except for the fact that it only showed up once in the game and to little effect. This can easily be fixed by a slight weak to the die roll required, but I don't want it to be too omnipresent as otherwise it could skew the game and make FACs redundant. Something to tweak going forward for sure.
  • The Recce rules from Battlegroup Panzer Grenadier gave another good account for themselves, but as mentioned before, I do need to write up a simple guide for use in my games. What was missing were some small scale scouting groups from both sides, that would be sent out from the parent Coys/Kompanies. If I hadn't been using the BGP rules, then both sides would have been unable to spot each other due to the lack of aforementioned Recce infantry, unless moving into the open to draw fire upon themselves. Again another pretty easy fix.
  • The one Artillery Battery for the British, with it's much smaller template, did limit the effect, compared to other games I've played where they may have up to three on call. This reflects the current state of the campaign well and also reduces the game changing nature that British artillery can have. This may alter as the campaign progresses and other assets are brought up.
  • Once again the German mortars more than proved their worth. With high CV's for the FJ, they can be as, if not more, devastating than the British artillery at times. I am tempted though to allow them to do some pre-planned fire missions, as later on in the war the Germans did use them in more of an artillery role, as well as for close support. Another thing to have a think about.
  • If the British hadn't had failed command rolls right across the board in Turn 5, then the FJ might have taken quite a few more losses, given the position they were in. Sometimes the Die Gods just take their favours away at a critical time!
  • It was interesting in that this was a mainly infantry attack and defence, which is not something I've played for years. For the FJ it certainly hampered their ability to prosecute their attacks and for the British, with only the AVRE's in limited support, their options in defence were limited.
  • As with the above, the change from cultivated land and woods to open terrain in front of 'D' Coy, meant that the FJ had no real option of attacking 'D' Coys positions without armoured support. Being caught in the open by artillery would have been very costly indeed.
  • In campaign terms, the FJ spoiling attack from Wuppertell worked, albeit it with heavier losses than anticipated. The attack drew in the British CO and consideration to this sector needs to be made in light of the continued presence of the FJ in Wuppertell. Resources may have to be diverted from near the bridge to Pemba, which will then limit the offensive capability of the units already in position. And of course there are more unknown German units on the way...

The campaign is moving along nicely and this latest action has certainly put the cat amongst the pigeons for the British, with some tricky choices to be made. I have some thinking to do before the next campaign moves are made, but then this is what it's all about and i'm enjoying the whole process.

So until next time stay safe and keep healthy.

Sunday, 20 February 2022

BUA Terrain

Some years ago when we were playing quite a few games of Bloody Big Battles, I knocked up some quick test pieces to represent the BUA's needed for the game. They were OK, but I was never really that happy with them. A week or so ago I stumbled upon them and thought that with a bit of tweaking they would be really useful for me BKCII campaign that I'm currently running. So after a few evenings of the odd hours spent here and there they were finished and ready to go.

For those that are interested:
  • The bases are all 2mm mdf and are 3" square (75mm).
  • The buildings are all from Leven Miniatures.
  • The broken stone walls in the damaged BUA are made of cork coasters, about 2mm thick.
  • The bases were covered with railway base mats that come with a 'flock' already attached. Additional flock and foliage were added as required.
  • The fence is plastic HO/OO stock that I had left over from when I played in 15mm and was simply cut down to a more suitable height for 10mm figures.
  • The stone wall is from Commission Figurines and is laser cut mdf (and very nice it is too).
  • The old enameled sign is from a rang of posters for 28mm that I was given years ago by a friend, pre good quality printers I might add. Nowadays just go online and select what you want and print it out. It was stuck to some 0.5mm card, then I distressed the edges, added some holes and then bent it to suit the terrain it was to sit upon. Areas were painted to look like rust and then when dry, some gloss lacquer was applied to give it a nice sheen.

The row of houses with Pendraken 10mm miniatures in front to give an idea of scale.

I'm really happy with how the enameled sign came out.

The Leven Miniatures buildings are removable so that I can put a unit in it's place to show it's in the building.


The Commission Figurines mdf wall come up a treat, even with a quick and simple paint job.

I really enjoyed adding some extra details to these and am very happy with the result. I have plenty more ideas for this sort of stuff, but really should spend more time painting figures rather than terrain, but I do enjoy scratch building too much!

Well I hope you liked these and that they might give you some ideas for your own terrain etc. So until next time stay safe and keep healthy!

Friday, 18 February 2022

Operation Cygnet - Campaign Moves - Day Two

With the conclusion of the Battle for Tremleurr, it was time to get back to the Campaign and further movement by both sides:

Night Moves
As the remnants of the 1st FJ Kompanie retreat North over the bridge, they made their way towards the road junction in 14. The 3rd Recce Sqdn pushed forward over the same bridge and halted for the night to secure the approaches to Tremleurr. In the village itself the 'C' Coy 7th SLI and 'C' Sqdn Sherwood Rangers set about securing their positions and a small group was sent out to destroy the bridge to the SE to help secure their flank from possible counter-attack.

Under the cover of darkness to avoid possible air attack, more German units arrived at 2, 11 & 16.

Positions during the night on Day One.


Day Two Turn 1 - Weather Fair
The 1st Recce Sqdn held its position to the South of Wuppertell (12) to observe any enemy movement. They spotted the unit that had arrived at 11, which proved to be a blank, but not the unit at 16. The 2nd Recce Sqdn pushed forward into 8 but failed to spot the German unit in 7. On the right the 3rdRecce Sqdn moved off from near Tremleurr and soon spotted the remnants of the 1st FJ Kompanie. Radioing their position back to base, they continued their advance, pushing forward to the road junction and bridge at 9. From there they spotted the German units to the North of the bridge at 8, revealing them to be a Heer Kompanie and a Stug III Kompanie.

'A' & 'B' Coys 7th SLI with their attached Shermans from the Sherwood Rangers moved to the edge of 8, close to the 2nd Recce Sqdn. 'D' Coy followed up to secure the road junction and to help cover any attack from Wuppertell. 'C' moved out of Tremleurr and pushed the 1st FJ Kompanie back from the crossroads in 14. The AVRE's and Artillery moved back onto Club Route to help support the main advance.

The German unit in 16 moved into Wuppertell to support the existing FJ's that were in the village. The German unit that had arrived in the night at 2 moved to the bridge at 1 as the terrain precluded them from crossing into 3. The German units in 3 & 4 both moved into Pemba to help support the Heer & Stug III Kompanie's to the South by the bridge. The German unit in 7 stayed put and occupied the farm and woods either side of the road.

The end of Turn 1 moves on Day Two. The British are pushing forward well but have a significant threat to their left flank and what looks to be a strong defensive position to their front over the bridge.


Day Two Turn 2 - Weather Fair
The 1st Recce Sqdn spots the newly arrived German unit in Wuppertell, which turns out to be another FJ unit, this time the Heavy Weapons Kompanie. Once again the 2nd Recce Sqdn fails to spot the enemy to their left in 7, whilst the 3rd Recce Sqdn move over the wooden bridge in 4 and manage to spot some German Artillery in Pemba.

'A' & 'B' Coys move forward to cover the bridge whilst the 2nd Recce Sqdn covers their left flank. To their rear 'D' Coy dig-in as the Artillery and AVRE's move up to support.  On the right 'C' Coy pushes forward to the bridge at 9, with the aim of supporting any attack by advancing into the flank of the German positions.

The German units in Pemba and by the bridge to the South of it hold their positions and begin to dig-in. The German unit in 1 moves into 6 with the aim of moving East to support the other unit in 7, which decides to fire upon the 2nd Recce Sqdn and is revealed to be a Volkstuurm Kompanie. what is left of the 1st FJ Kompanie moves into 10, hoping that German reinforcements might arrive from the East, to which they can attach themselves.

The FJ units in Wuppertell, seeing the British advance somewhat strung out, decide to make a spoiling attack, with the aim of disrupting any build up for the attack on the bridge in 8.

The end of Turn 2 moves on Day Two.

The FJ move off to mount a strong spoiling attack against 'D' Coy.

The British begin to move into position for what might be a multi-pronged attack on the German Heer & Stug III Kompanies, but with a Volkstuurm Kompanie to the flank which be problematic..


Campaign Thoughts
Well some more interesting decisions had to be made over these two Turns, for both sides as it turned out. For the British do they continue to push on towards the bridge at 8, before the German defences can possibly build up, or do they deal with the threat from Wuppertell? For 'C' Coy, do they move back to support Club Route or try and push round on the right flank to turn the German positions? For the Germans do the FJ stay in Wuppertell and hope for some armoured support arriving, or do they take a gamble and attack the 'D' Coy whilst they have limited support available?

As you can see from the above which options I chose and this has resulted in the next battle to be played out, namely the FJ attack on 'D' Company. I'm hoping to get this played out soonish but given that half-term is upon us and with the ongoing decorating, this might be easier said than done. Add in some repairs from Storm Eunice damage that need to be done and my plans might take longer than hoped.

So until then stay safe and keep healthy!


Wednesday, 16 February 2022

Operation Cygnet - The Attack on Tremleurr

This scenario, the first of the campaign, has been ready to go for sometime now, but a combination of decorating and 'real life' over the past few weeks has meant that it was only a couple of days ago that I was finally able to get the game onto the table and played out. I could have played it earlier but it would all have felt a bit rushed, which I certainly didn't want. So without further ado some background info and then the AAR itself.

German OOB - 1st Kompanie, 3rd Battalion, FJR 6
1 x HQ
3 x Fallschirmjager (1 x Panzerfaust upgrade)
1 x MG
1 x 81mm Mortar
1 x Pak 35/36 (with stielgranate 41, count as Panzershreck)

British OOB - 'C' Coy 7th Battalion SLI & 'C' Sqdn' Sherwood Rangers
1 x CO
2 x HQ
3 x Infantry Veterans (1 x PIAT upgrade)
1 x MG
3 x Shermans
1 x Firefly
1 x Churchill Crocodile
1 x Churchill AVRE
1 x 25 pdr Battery (1 x scheduled strike)

British OOB - 'C' Sqdn 43 Recce Regt
1 x HQ
2 x Humber 37mm
2 x Infantry
1 x 3" Mortar
1 x 6 pdr ATG + tow

Weather
Mist     - 1CV & 50cm Visibility
Dusk   - 1CV & 25cm Visibility
Night   - 2CV & 10cm Visibility

Scenario Turns (8 max)
1 - 3 Mist
4      Dusk
5+    Night

Objective
British - To seize Tremleurr and cover the bridges to the East.
Germans - To delay the British for as long as possible and minimise casualties.

Set Up
Taking the info from the Warplan 5/5 maps and terrain details, it was pretty easy to set things up, which makes things a lot easier for me. Most of the terrain was fairly open grazing land, with hedges and fences, except for the South Eastern area that was more arable and cultivated land. The river was deep and so could only be crossed via the two bridges.

An over view of the table, with Tremleurr in the centre, occupied by the Fallschirmjager. 'C' Sqdn 43rd Recce Regt deployed to the South of Tremleurr, with 'C' Coy 7th SLI and 'C' Sqdn Sherwood Rangers entering from the western table edge.

The view from the 3rd Recce Sqdn, with their aim being to pin the Fallschirmjager in position and to swing past Tremleurr with their armoured cars to cut off their retreat if this became a viable option.

One platoon and troop of Shermans were to advance along the right of the road with...

... with the CO and the AVRE's advancing along the road and...

... the rest of the force to swing left to try and attack Tremleurr from the rear.

The Fallschirmjager in all position, covering both approaches towards Tremleurr.


The Attack

The end of Turn 1 (-1 CV & 50cm visibility). 

The 3rd Recce Sqdn moved off to the attack, spotting the Fallschirmjager in the house on the SE edge of Tremleurr. The armoured cars moved to provide fire support and to attack the flank, leading to the FJ becoming suppressed. Only the infantry and Shermans to the left of the road managed to arrive through the mist, carefully advancing as they went.

The Fallschirmjager spotting the Shermans opened up with their Pak 35/36, but failed to do much damage and were suppressed by return fire from the tanks.

3rd Recce Sqdn move to the attack.

An armoured car manages to move to the flank and cover the road into Tremleurr.

Only part of the British force arrives from the West.

The Pak 35/36 (bottom) engages the Shermans but takes fire in return.

The end of Turn 2 (-1 CV & 50cm visibility).

The British open up with their scheduled artillery strike on the SW edge of Tremleurr, which manages to suppress the Fallshirmjager unit in the ruined building there. The 3rd Recce Sqdn use Initiative Fire to suppress the Fallshirmjager to their front, but then fail to do anything else due to C&C issues. To the West the rest of 'C' Coy and 'C' Sqdn arrive and they all move towards Tremleurr, but do not engage the enemy.

The Fallschirmjager, seeing the rest of the British force arrive, move back into Tremleurr and the orchard to the North of it to trade time for space and hope that night arrives before the British can bring their overwhelming force to bear. Unfortunately C&C issues meant that the mortar to the North of the bridge was unable to bring down fire upon the British 3rd Recce Sqdn infantry that were rather tempting targets.


The Sherman on the right flank advances, but the infantry lag behind.

The CO and the AVRE's move up the road, led by a Churchill Crocodile.

The Fallschirmjager pull back into Tremleurr and the orchard (top left).

The end of Turn 3 (-1 CV & 50cm visibility).

The mist obviously played havoc with the British C&C and ability to shoot, as they pretty much all failed to move or hit anything across the board. with Dusk fast approaching not an ideal situation by any means.

For the Fallschirmjager, it was a welcome reprieve and finally they managed to bring down mortar fire on the 3rd Recce Sqdn infantry, with one platoon falling back destroyed another retreating and just avoiding the same fate.

The 3rd Recce Sqdn infantry take a pounding and the support armoured cars and 6 pdr ATG fail to suppress the Fallschirmjager in Tremleurr.

The stalled advance by the SLI and Sherwood Rangers.

The Fallschirmjager 81mm mortar (bottom left by bridge) manages to cause a good amount of damage, along with supporting fire from the Fallschrimjager infantry on the 3rd Recce Sqdn infantry platoons (top by the corn fields).

The end of Turn 4 (-1 CV & 25cm visibility).

With Dusk upon the battlefield, the 3rd Recce Sqdn made amends for the previous Turn's shooting and managed to KO the Fallschirmjager infantry unit to their front in Tremleurr. This left an opportunity for the armoured cars to push forward and try to cut off any possible retreat Northwards. 'C' Coy and 'C' Sqdn all moved forward and the AVRE's moved along the road too. The Pak 35/35 engaded the leading Churchill tank but failed to cause any damage and the tank was unable to shoot back when in an ideal position to do so.

Once again the Fallschirmjager mortar hit the 3rd Recce Sqdn infantry, suppressing them and from the orchard, the Fallschirmjager infantry shot at 'C' Coy, nearly KO'ing one platoon, but they paid a high price for this and superb shooting from the Shermans KO's the infantry unit.

The way is open for the 3rd Recce Sqdn to move past Tremleurr on the right to try and cut off the line of retreat over the bridge.

The SLI & Sherwood Rangers, with AVRE support, begin to attack Tremleurr.

'C' Coy takes heavy fire from the orchard (left by the bridge) but supporting fire from the Shermans KO's the Fallschirmjager infantry unit that had been there.

The end of Turn 5 (-2 CV &10cm visibility).

With Night having fallen, the 3rd Recce Sqdn fails to receive orders from their HQ and so remain in position, despite a perfect opportunity to push forward past Tremleurr. At least 'C' Sqdn sherwood Rangers and the AVRE's manage to push forward, but the Churchill Crocodile takes a hit from the Pak 35/36 and is suppressed!

With Night covering their moves, the Fallschirmjager begin to withdraw, with the 81mm leaving and the other units pulling back into Tremleurr to try and move towards the bridge to the North and safety.

The Shermand and AVRE's begin to close in on Tremleurr, forcing the Fallschirmjager to begin to withdraw.

An the noose begins to close, the Fallschirmjager try and move towards the bridge under the cover of darkness.

The end of Turn 6 (-2 CV & 10cm visibility).

Well not a lot happened as across the board all the British units failed the command rolls, which allowed the Fallschirmjager units to make some Initiative Moves towards the bridge. Unfortunately for them they too then failed their command rolls.

The Fallschirmjager move past the Shermans in the dark and begin to close in on the bridge and the road to relative safety.

The end of Turn 7 (-2 CV & 10cm visibility).

Once again the darkness hampered the 3rd Recce Sqdn who failed to move off yet again. At least the SLI and Sherwood Rangers got their acts together. As the Sherman troop and infantry platoon closed on on the SW edge of Tremleurr, to the NW the rest of 'C' Coy and 'C' Sqdn managed to locate the Fallschirmjager as they made their escape, KO'ing the MG unit. The Churchill Crocodile crew, somewhat miffed at being hit by the Pak 35/36, moved through Tremleurr and spotting it on the road, let rip with their flamethrower and the ATG was no more.

As the Pak 35/36 lit up the night sky, the remaining Fallschirmjager infantry unit and HQ quietly escaped over the bridge, leaving the British in control of Tremleurr.


End of the Game
So with night upon the battlefield and all the C&C issues that that had brought, the British settled in for the night in Tremleurr, sending the 3rd Recce Sqdn to cover the bridge as the rest of the units prepared to moved out at dawn to resume the advance.

Fallschirmjager Losses - 2 x Infantry, 1 x MG and 1 x Pak 35/36.
British Losses - 2 x Infantry '('C' Coy & 3rd Recce Sqdn)

Post Game Thoughts
I really enjoyed that after having waited quite sometime to get it onto the table. As always BKCII provided a great game, with the added bonus of it being part of a campaign. So having had a few days to reflect upon the game, some thoughts in no particular order:

  • The Weatherboard provided an interesting start to the game with the battlefield shrouded in mist, with the C&C issues and visibility that that brought. This carried on as Dusk and finally Night fell. I'm really happy with the friction that this provided to the game and it felt right given the reports I've read over the years of the confused fighting that took place during darkness. I imagine it might feature again in this campaign, depending upon how the campaign moves pan out. I did wonder as to whether the Defenders should have less penalties in terms of CV values, based upon they would have knowledge of the terrain they were in and so could move about more freely. Certainly something to think about for future games.
  • The British superiority in armour really made a difference, given that they had limited artillery support and no air support. At least they didn't lose any tanks in this attack, which was good.
  • When the Fallschirmjager mortar did get going, it did prove to be as deadly as normal. If there had been more daylight and/or better command rolls, the 3rd Recce Sqdn could have been in real trouble.
  • The 3rd Recce Sqdn got off to a great start, rolling a Double 1 that allowed them to suppress the Fallschirmjager infantry unit to their front, which helped prevent the aforementioned mortar coming into play for a few, vital, Turns. Having silenced the enemy, they then completely failed to exploit their superb position to quickly move round Tremleurr and cut of any line of retreat for the Fallschirmjager.
  • I enjoyed using the Recce and Spotting rules from Battlegroup Panzer Grenadier. They worked for me and I need to type them up onto an A4 sheet of paper for future use, along with a few other rules that look interesting.
  • The infantry failed to keep up with the tanks and I completely forgot my plan to use the tank riders rules. This dis happen quite a bit in Normandy, especially were tanks and infantry had been operating alongside each other for quite some time. I do have half-tracks and Kangaroos in the lead pile, which I suppose I should move up the queue to give me other options for transport.
  • Campaign wise I need to ponder as to whether the British will blow the bridges to help cover their flanks, leaving some intact for other avenues of advance. Likewise do the Germans do the same, when in position or conducting a fighting withdrawal? Again something to think about.
  • Whilst the Pak 35/36 didn't do much, I just love having them on the table. When they do do something, it's rather fun to see. I just hope I might get to use the stielgranate at some point in the campaign.

So next up it's naturally back to the campaign moves and to see what Day Two of the campaign brings. Hopefully these will be made over the next day or too and then another battle might be in the offing. Until then plenty more DIY to be done and the perennial job of being a full-time carer. So stay safe and keep healthy!