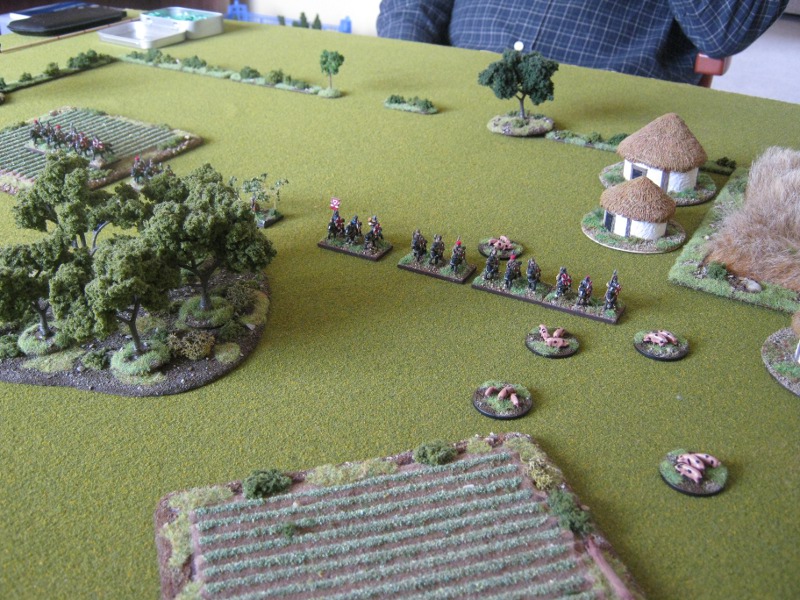
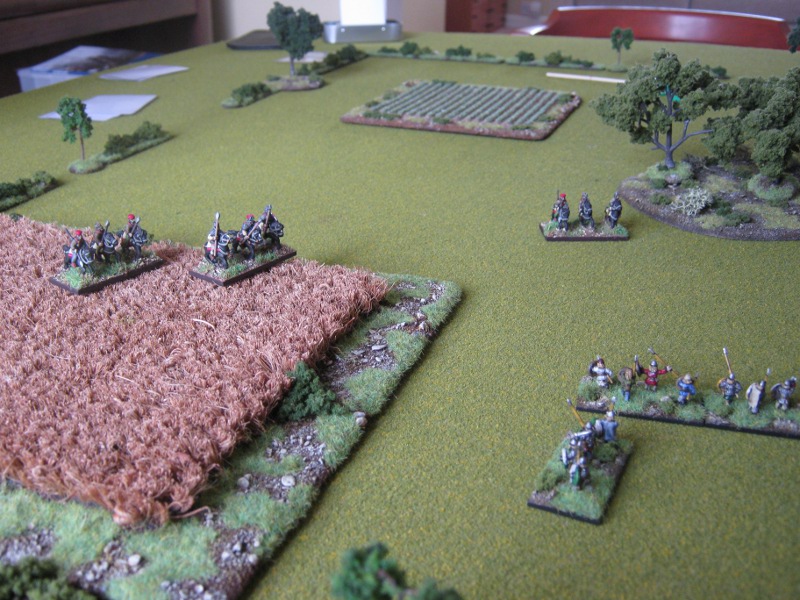
Sunday, 16 June 2013

'Operazione Mareleone' - The Battle of Pratt's Bottom

My wargaming has been extremely limited of late, but this is fairly normal for this time of year, as with the long summer evenings I prefer to spend as much time out of doors as I can, given that I'm cooped up in a workshop for most of the working week. Also I just haven't been in the mood to do any painting of late, largely due to the reasons outlined above.
However with an iffy weekend forecast on the weather front and with the Muse not upon me on the painting front, I thought I'd try and get a solo game in. So it was then a case of what to play? Given that I would have limited time for the game (see below for more on this) I settled for BKCII. With this sorted it was onto what period?
Now for many years I have been interested in wargaming Operation Seelowe, in large part due to these Airfix magazine articles as well as the excellent "Invasion" by Kenneth Macksey. 
 
My problem has always been not having the right forces painted up to game this 'what if?' period of WWII. Now I'm not one to let such trifling issues get in the way, so I set about figuring out what forces I could cobble together for an 'Operation Seelowe' inspired game. Having recently finished Skymen by Robert Kershaw, my mind turned to whether or not I could use my Italian troops for this, as there was some interesting information on the early Italian attempts at creating paratroopers in Libya. The more I thought about this the more I liked the idea of Italian troops taking part in the Axis invasion of Britain in the summer of 1940, so I quickly set about coming up with some background fluff for the scenario. 
Background
The British Expeditionary Force has been destroyed at Dunkirk, leaving Britain open to invasion. However the cost to the Wehrmacht is high and the continued operations in Southern France have further reduced the combat effectiveness of the German forces. To mount 'Operation Seelowe' effectively, outside help is required. Despite many reservations from the German high command, they have been 'forced' to accept Italian offers of assistance, in large part due to Hitlers personal intervention on behalf of his old friend Mussolini.

As King Cnut proved on the coast of East Anglia, the tide waits for no man and with weather conditions in the English Channel variable to say the least, the Axis forces have a limited window of opportunity to mount an invasion before the weather starts to turn in late summer. So a modified plan of attack including Italian assistance is presented to the Fuhrer, who finally gives his seal of approval.
Italian Forces
After the success of the German 22nd Luftlande Division in Holland, Mussolini ordered that an Italian equivalent be created. This led to the formation of the IX 'Falcone'  Divisione Ariasbarco, formed from existing Italian infantry divisions. Training was rudimentary to say the least but the Division was ready for action by the end of May, no mean feat given the short time avaialbe to them.

The Italian forces consisted of:
  • CO (CV8)
2 Battalions each of:
  •  2 x HQ (CV 8 & 7)
  •  9 x Regular infantry
  • 2 x MG
  • 1 x ATG
  • 1 x Mortar
Support was provided by:
  • 2 x Scheduled air support in the form of Henschel HS123 A dive bombers.
British Forces
With the loss of the BEF on the Dunkirk beaches, the defence of Britain, and England in particular, fell on the shoulders of the few regular Divisions left, but largely on those of the first line Terratorial Army units based in and around London and the South East.

The 5th Battalion, the Royal Sussex Regiment, was one such unit and had been deployed on the Eastern edge of the South Downs, to guard the approaches to London. The Battalion was supported by elements of the 65th Field Artillery Regiment, with attached elements of the Westminster Dragoons as a rapid reaction force.

The British force consisted of:
  • CO (CV8)
  • 2 x HQ (CV8 & 7)
  •  1 x FAO (CV6)
  • 12 x Green infantry (to reflect the TA status)
  • 2 x MG
  • 1 x Mortar
  • 3 x Vickers MKVI light tanks (Westminster Dragoons)
  • 1 x 18pdr Field Battery
Field defences consisted of:
  • 1 x Pillbox (to hold 1 x MG unit)
  • 6 x Trench sections
  • 2 x Lengths of barbed wire
  • 1 x Command post
Scenario Details
Well not wishing to over complicate things I went with pretty much as straight forward Scenario 11. Airborne Assault from the rulebook. In keeping with my ideas for the action I decided to deploy only 1 Company on the objective with an MG unit in the pillbox and with an HQ and FAO also deployed. The other units would be held in reserve and come onto the table from one of the 4 roads on a random die roll.

For the Italian units they would deploy as per the scenario, rather than using the more fun dropping marked bits of paper onto the table route. This was simply to help speed things up, but I do prefer the dropped paper route as it does produce a nice random element to the deployment.

Deployment
The British units deployed in an all round defensive posture on the bridge, with barbed wire deployed to the South to face the expected route of a land based attack.
 
The village of Pratt's Bottom to the South of the river, with Pratt's Folly to the North West and Home Farm just North of the bridge.
The defensive positions viewed from the East.
The view from the West, with the command post in the form of the telephone box in plain view.
Turn 1
The Italian airborne assault was preceded by targeted dive bomber attacks by the Luftwaffe. The Henschel HS 123 attacks succeeded in supressing the British command  and mortar unit in the defensive cordon. Following on behind the Ju-52s arrived and dropped their cargo with admirable accuracy North and South of the river.

The Italian 1st Battalion landed in and around Pratt's Folly, with the main assault team quickly setting off towards the bridge. The support team was a bit slow off the mark but did manage to assemble their ATG and mortar.

The Italian 3rd Battalion landed to the West of Pratt's Bottom, again with the assault team quickly moving into action, with them suppressing the British troops South of the bridge and setting up a flanking manouevre into the village. The support team was a bit disorganised having landed in and around the wood to the South West of the village.

With the HQ unit still reeling from the dive bomber attack, there was not a lot the British could do at the bridge. The FAO failed to make contact with his Field Artillery battery, so it was now a case of awaiting the arrival of the rest of the Battalion and the Westminster Dragoons. 

The die was rolled and they were to arrive on the road at the Southern end of the table. The Battalion HQ failed but the CO arrived with the Vickers light tanks, which proceeded to advance with all speed towards the sound of gunfire. They caught the Italian ATG in the open and proceded to suppress it with a hail of MG fire, giving them a real edge as the Italian troops had no AT rifles.

The first dive bomber attack which caused the suppression of the HQ and mortar.
The second attack was less successful.
The result of the first attack.
The 'Tante Ju' arrives bringing with it the 3rd Battalion.
The 1st Battalion arrives.
The 3rd Battalion deploys on arrival.
Some units are suppressed having landed in the wood.
The 1st Battalion arrives, but has units suppressed in the river and the rocky hill.
The view towards their objective.
They deploy in all round defence in case of attack.
The 1st Battalion assault team quickly moves towards the British defensive perimeter.
The 3rd Battalion assault team takes the attack to the British.
"Marching to the sound of gunfire". The Westminster Dragoons arrive to attack the recently landed Italians.
An overview of the battle field.
Turn 2
Suprised by the speedy arrival of the British armour, the 3rd Battalions' support team moves into cover of the woods where possible. Meanwhile the 3rd Battalion assault team ignores the threat to their rear and conrinues to attack the British, finishing off the dug-in infantry unit South of the river.

The 1st Battalion has an attack of the nerves, with both HQs failing to get their orders through. However the CO steps in and things soon get moving with both the assault and support teams moving into position for the attack.

The Westminster Dragoons initiative fire into the Italian ATG, quickly finishing it off, which is a major blow for the Italians. However the Battalion reinforcements fail to show up again, so there is little progress on this front.

Things hot up at the bridge, despite the FAO once again failing to get through. However combined fire from the infantry and mortar and pillbox see an MG unit nearly destroyed and an infantry unit suppressed in the village.

The CO steps in to get the 1st Battalion into position. Things are not looking too rosy for the British at the bridge.
The Italians take hits as they finish off one unit South of the bridge.
The Vickers light tanks make quick work of dispatching the Italian ATG.
End of play Turn 2.
Turn 3
In a suprise move, the Italian support team sends an infantry unit to assault the Westminster Dragoons. Blind to the attack on their right flank, the tank succumbs to the assault and the Italian infantry retreat into the woods before the British really know what has hit them. Unfortunately the HQ fails to capitalise on this show of bravado, leaving things precariously balanced. The 3rd Battalion assault team rashly advance, only to be suppressed by MG fire from the pillbox.

The 1st Battalion starts to get a bit edgy at the prospect of attacking the dug-in British, despite overwhelmingly superior numbers and fire power. The CO has to step in once again, but hits have started to mount on the British mortar team.

Once gain the British FAO fails, as does the HQ at the bridge, despite operating from his command post. However things look up on the other front with the arrival of the Battalion reinforcements, who advance with all speed towards the woods and the Italian infantry. The Vickers light tanks fire into said woods, but fail to hit anything, most likely blinded by the smoke from their burning comrades tank. The infantry attached to the CO have better luck, causing hits on the Italians but taking hits in return.
 
The Italian assault of the Westminster Dragoons...
... and the suprising result.
The 3rd Battalion moves to attack the bridge, but takes fire from the pillbox.
The 1st Battalion really just can't get moving.
The arrival of the Battalion reinforcements.
The firefight by the woods.
End of play Turn 3.

Turn 4
The 1st Battalion support team initiative assaults the British mortar, who only succumb to the inevitable after two turns of close combat. The rest of the Battalion pours fire into the British position, but to no effect.

The 3rd Battalion assault team wisely decidedes that discretion is the better part of valour and startsd to move back from assaulting the bridge. With the threat to their rear increasing, they decided to leave it to the 1st Battalion to take the objective. The firefight in the woods by the support team continues, but again to little effect.

The British FAO finally manages to get through to his Field Battery of 18pdrs, but the rounds deviate, only managing to supress the 3rd Battalion assault team HQ and one infantry unit. There is no action at the bridge, but the Battalion reinforcements continue their advance towards the edge of the cornfield, so as to be in a position to support the Westminster Dragoons. The infantry and Westminster Dragoons pour fire into the wood, finishing off one infantry unit and supressing two others.
 
The 3rd Battalion assault team start to retreat from attacking the bridge.
With the mortar team gone and Italian units on two sides, things are looking grim for the Brisitsh.
The attacks continue at the wood.
The Brisith infantry arrive to lend weight to the attack, but is this a case of "too little, too late?"
End of Turn 4.
End of Game
By the end of Turn 4 it was obvious that the game was all but up for the British. It was only a matter of time before the Italians would overwhelm the defences at the bridge, giving them the objective and the game. Even if I had decided to carry on, the British forces would not be strong enough to clear the Italian 3rd Battalion from in and around Pratt's Bottom, despite having armoured support, talk less of moving on to re-take the bridge. So I wisely called it a day and gave victory to the Italians.

Only a matter of time for the beleagured British.

Post Match Analysis
I was suprised at how quickly the game turned in favour of the Italians. To be honest I thought they would have a tough job gaining the objective. So why did the Italians win so quickly? Well a few thoughts below might explain things:
  • I decided to try a 'historical' deployment and only have a company defending the bridge. In hindsight this was simply not enough to withstand the Italians for any meaningful length of time. I should have deployed at least a 1/3 of my infantry and the MG guns, to give me good all round defence. You live and learn as they say.
  • The Italians were very quick off the mark, much more so than in other games I've played with them, so were able to close with the British more-or-less by Turn 1. Combine this with how close they were able to deploy to the objective, and potentially you have a game winning situation.
  • Having the British re-inforcements come on a random road didn't help the British. They would have been better off coming on from one of the roads North of the river, which would have severely hampered the Italian 1st Battalion. However being a solo game it worked as the Italians did not know where the British would arrive and so I had to play a careful game to start with.
  • With the British being Green troops, they simply did not have the firepower of the Italians, plus the extra die for suppression would have counted towards them in the long run. However it felt right for the scenario, but didn't help the game. But for a series of linked scenarios, I think it would be appropriate.
  • If I had deployed all of the British on the objective, I'm not sure whether the Italians would have been able to have a chance of taking the objective. Even with auto-suppression and hits staying on, dug-in troops are hard cookies to shift. I would need to re-gig the forces for both sides to play the scenario this way.
Well I learnt a lot from this scenario, as it's the first time I've played this. I will take the lessons outlined above for the next time I attempt an airborne assault. You live and learn as they say.

Lack of Gaming Time
As an aside to the game itself, I have often wondered why I simply don't get more games in, whether solo or with my friends. I thought about this as I was setting up the game, and so have jotted down a few thoughts below:
  • Like many gamers I do not have a dedicated games room. I play my games in the dining room. This means I have to find time when I can set things up and not get in the way of the family.
  • I do not have dedicated storage space. My figures, scenery etc are spread across the house, in the attic and the garage. Getting everything together takes time. I roughly timed myself whilst setting the game up and I took around 2 hours to get the table set. This is as long as a normal game!
  • At the end of a game I have to put everything away. Add on another hour.
  • Coming up with a scenario, sorting out army lists etc takes time. As a rough estimate this takes me over an hour, longer for a solo game as I have to do both sides. This tends to be thoughts out over a few days, but it still takes time. It is something I like to do as it adds flavour to a game, which is much more fun than two sides line up for an encounter type game.
  • Writing up an AAR. I enjoy this, but making notes during the game, taking pictures etc, then editing them and writing up the report take time. I reckon this AAR has taken me 4 hours or more, which is not unusual. Again it is spread over a few days, but it takes time.
  • So the game itself only takes up a 1/4 of the time involved in actually getting to play a game. No wonder I get to play so little! 
  • This is one reason that I have got into DBA 2.2 and Dux Bellorum, apart from being fun games to play, they take up so little time to set up, that I can actually spend more time playing games, which is what it's all about at the end of the day. 
So all I really need to do to overcome the issues outlined above is to get myself a dedicated games room. Now how do I broach the subject with SWMBO ...?

Saturday, 8 June 2013

Operation Market Larden

Saturday dawned bright and beautiful and once again it was an early start to set of to a wargames show. This time for once we headed North to the Wyvern Wargames Club situated outside of Evesham, who were holding a day devoted to the Too Fat Lardies rules sets. Craig and I were both keen to try out the forthcoming Chain of Command rules, which from the demo videos on Youtube looked extremely good.

After a nice journey up the M5, we arrived just after 9.00am to find a packed village hall where the show was being held. Due to a clerical cock-up the Wyvern chaps hadn't put us down for the demo games, depsite the relevant e-mails and payment being sent to them. However this was soon sorted out but huge demand for a go at the CoC rules meant that it did not look like we would get to have a go. Only time would tell. 

However a couple of the chaps at the club had put on a Russo-Japanese War game using slightly modified 'Through the Mud and Blood' rules which looked interesting, so we sat down to give this a go. Stu of Dust, Tears and Dice Blog fame (a great Blog that is well worth checking out) and Mark  hosted the game and were great chaps who patiently took us through the rules so that we were able to pick up the game mechanics very quickly. The game ebbed to and fro over a couple of hours, but in the end as the Japanese players we had pretty much run out of troops to take the objective so conceded the game. I took a few pics as we went which can be found below.

The Japanese attempt to flank the Russian trenches.
The Japanese play hide-and-seek in the corn.
The Russians wait with Slavic stoicism.
Chinses troops add support, or at least that was the plan.
Looking towards the seemingly impenetrable Russian trenches.
A lovely suprise in the form of wonderful cakes from the TFL boys, with a great message! If only all gamers followed this saying...
The Japanese in position to attack the Russian trenches, but in the end to no avail.
The Chinese seem to sense that the day will not be theirs and lag behind.
So after a brief lunch break we checked out a few other games and then headed over to the CoC table that had been so popular in the morning. A game was in progress so we sat down to watch and were able to chat with Rich from TFL as the game went along. Initially we thought we would miss out on a chance to give the game a go, but luckily for us the game quickly finished. Rich had only planned on running three games but very kindly put on a fourth for us despite being in demand from the very start of the day.

In short the game was everything that we had hoped it would be. We picked up the basic game mechanics very quickly and so they moved along at a nice pace. Rich intervened where necessary to explain or elaborate on points as and when it was necessary. The game again ebbed and flowed with the Germans in a slightly better position by close of play.

The British on the right side of the road, the Germans on the left with the village as the objective.
A firefight develops on the British right flank.

So the trip was definitely worth it as we got to play a couple of great games, but crucially try out Chain of Command which was our aim. These are definitely rules that we will both be buying as not only are they fun to play, but they are suitable for solo play and emminently 'tweakable' for other periods such as the AVBCW and SCW. The rules are due for release sometime in August, so we will just have to be patient!


Saturday, 1 June 2013

ImagiNations war gaming

A few years ago I bought the Black Powder rulebook by Warlord Games as it was en vogue at the club and seemed like a good set of rules. Unfortunately the type of games played at the club and the fact that they were always ACW, put me of said rules to the point that I sold them on within a year. Fast forward a few years and my good friend Keith developed his own set of rules for the Seven Years War that had a lot of similar mechanics to Black Powder. I was very impressed with the rules and the fun games that they produced, helped in no small measure by Keith's knowledge of the period, his wonderful 'old school' games table and the spirit within which the games were played.

At around the same time Sam Mustafa released Maurice, a set of rules for use within the 18th Century. Again these rules were bought and a few games played, all of which were very enjoyable, once again helped by my regular gaming chums and their attitude to playing the game in the right spirit. However one thing and another led to these rules being shelved as gaming time was (and continues to be) limited. Due to the rules mechanics these were unsuitable for solo games, something which I try to look for in a ruleset.

So fast forward another year and my mind once again turned to the Black Powder era, for a variety of reasons. I had a whole host of 2mm figures based for Maurice, along with two AWI armies, but was really after a set of rules suitable for solo play as well as standard games with my friends. For some reason my mind turned once again to the Black Powder rules. Having promised myself at the start of the year that I would not buy any new rules, in the space of a week or two I had bought DBA 2.2 followed by Black Powder!

The latter purchase was I must admit 'researched' over a few weeks so was not a rash decision, which may come as a suprise to those that know me. So when the book arrived I hoped that my purchase had not once again been in vain. I am happy to report that the rules were all that I hoped they would be, if not more. I asked myself why I sold the rules in the first place, and I can only refer you back to the experiences I had at the club. 

So in typical wargames butterfly mode my mind turned back to my 2mm SYW and 10mm AWI forces. Both periods would provide for very different styles of games due to a variety of factors, such as the lack of cavalry seen in the AWI. However I wanted to flesh out the latter especially as some new units had been added to the Pendraken range since I bought my initial forces. But given that cavalry was little used in this theatre, the question was how to fit them into my force?

The answer came in the form of the whole ImagiNations period, one that was 'created' by Charles S Grant and Peter Young in the dim and distant past of the 1960s I believe. In a sense I had already dabbled in this form of gaming with the whole 'A Very British Civil War' concept, one that is very popular at the present time. Inspiration, if any were needed, was provided by the likes of The Gentleman Warmonger Blog and the Maurice Campaign Blog, both of which show the joys of the ImagiNations world. There are many, many others out there, but these are among my favourites.

So now it is a case of coming up with my own ImagiNations forces. Inspired by The Gentleman Warmonger blog, I'm now looking at either forces based in and around Bristol as per my own AVBCW units, or going back to my roots in Cambridgeshire with the English Civil War as my inspiration. Another option is to find something in Mittel Europa and the myriad of small States, Bishoprics and Principalities that existed at around this time. One thing is for sure and that that is my AWI forces will form the core of both armies, with additional unitsd being added purely for ImagiNation use. High on the list are units from the Pendraken League of Augsburg range, as they are wonderfully sculpted by Clibinarium who is responsible for the AWI range and so will have a cohesive look to them. One thought is to use them for units based in Norfolk, as those that have lived in East Anglia know that this is the county that time forgot, giving a convenient excuse for the differences in uniform!

So now it is a case of getting down to some planning for future purchases, background 'history', unit names etc. Hopefully I will be able to update progress on some ideas in the near future. That's assuming that I don't get distracted by another 'period' before then!

Saturday, 18 May 2013

Dawn Attack

Even though Colours is around 4 months away, Craig and I decided a few weeks ago to try and get a game in to start sorting out the scenario for the demo table, as well as the warbands involved. With this in mind we arranged to meet up at mine for a spot of gaming on Saturday morning, and true to form, the weather was absolutely glorious!

We decided to try out the Dawn Attack scenario from the rulebook, with a view to combining it with the Village Raid scenario, as the basis for the demo game. Craig fielded his Welsh Warrior mounted warband, whilst I went with my newly finished Viking Sea Raiders. As I had no mounted units at all, Craig was automatically the Agressor for this scenario.

We also decided to try Craig's Gods cards, an idea borrowed from the Sumer to Sargon Blog. Basically anytime that a warband rolled a double as part of a successful command roll, they drew a card from the deck. This replaced the extra movement when a double one was rolled, but not when a double six was rolled, this still resulted in a loss of 1 Leadership Point as per normal.

Table Layout 
The only downside with the Sea Raider warband is that you only get to place one piece of scenery for the scenario. Facing a largely mounted warband that, by it's very nature is extremely mobile, meant that my warband felt very exposed once the table was laid out. I opted to chose a wood that I placed in the centre of the table, knowing that this would mean Craig would most likely have to split his warband, or concentrate everything on one flank, with the risk of the congestion that might ensue.

With the wood duly placed in the centre, I then used other pieces of scenery to mark out the edge of the table, in this case 30" square,  as well as adding a bit of character so that it wasn't billiard table bare. The other pieces of scenery had no bearing on the game, other than as eye candy.

Both sides then deployed as per the scenario as can be seen below.

An overall view of the table.
The Sea Raiders look towards the approaching cavalry.
The cavalry are forced to split into two by the wood.
The Welsh left flank are lured by the Gloster Old Spots...

Turn 1
The game started as per the normal turn sequence, with the Welsh skirmishers advancing into the wood. The Sea Raiders then rolled a double and drew a card that slowed the Welsh cavalry down to half pace for the next two turns! Just what the Doctor ordered. Another double saw another card drawn, that allowed the Sea Raiders to ignore all penalties for movement in the wood. Useful but highly unlikely that I would get to use it. The Welsh advanced slowly thanks to the Goddess card and the Sea Raiders attempted to form a battle line to face the oncoming cavalry.

The cavalry move on both flanks and the Sea Raiders form up to meet the attack.
The Welsh left flank.
The Welsh right flank.

Turn 2
The Welsh advance continued to be slow this turn thanks to the Goddess card, whilst the Sea Raiders dressed their lines as best they could.

The Sea Raiders are slow to get into position.
The Welsh skirmishers advance to the edge of the wood.
The Sea raiders look on as the enemy slowly advances.

Turn 3
The first action took place as the Welsh skirmishers shot at the Sea Raiders skirmishers, missing their target, only for the retaliatory bow fire to claim one hit on them. Both sides then continued to manouevre into positions for attack and defence.

The Welsh start to work towards the flanks.

Turn 4
The skirmishers once again exchanged shots, only for the Welsh to be hit and finished off, leaving the Welsh down by one Leadership Point. The Sea Raiders obligingly blundered, thereby losing a Leadership Point as well! Another double resulted in the Sea Raiders skirmishers gaining an extra point of agression, something that could be very useful. Both sides were still outside charge range so continued to manouevre as best they could.

The Welsh threaten the Sea Raiders left flank.
Only one unit notices the threat.
The Sea Raiders right flank is yet to form up.

Turn 5
After some ineffective bow shooting, combat was finally joined. On the Sea Raiders right flank some uncontrolled charges resulted in them charging the Welsh cavalry, only for the combats to be drawn. In the centre more uncontrolled charges resulted on the loss of one Welsh cavalry unit. On the Sea Raiders right flank, the Welsh cavalry charges were contained, much to my suprise.
Battle joined at last.
The cavalry and infantry slog it out.
The loss of the Welsh cavalry unit leaves the centre open, whilst the right flank manages to repulse on cavalry attack and contain the other.

Turn 6
There was movement from both sides to take advantage of gaps that appeared as a result of last turns combat. The fights from last turn continued with both sides losing one unit each. The Welsh and the Sea Raiders were now down 3 Leadership Points each, making for some tough decisions next turn. The Welsh rolled a double and the God card allowed him to move one unit outside of the normal turn sequence once per turn for the rest of the game.

The battlefield really opens up after both sides lose units.
The Sea Raider Companions charge the Welsh Mounted Companions.
The Welsh cavalry are taking lots of hits, for none in return.

Turns 7, 8 & 9
With things still finely in the balance, another double sees fate swing firmly in favour of the Sea Raiders, who sacrifice the Bow Skirmish unit in exchange for two extra Leadership Points. Over the next three turns, the Welsh lose more units, forcing them to take morale tests, which they pass two turns in a row. These Welsh are made of tough stuff!

Pressure mounts on the Welsh from all sides.
A very one sided combat.
Both sides Companions continue to slug it out.

Turn 10
The inevitable finally happened with last two Welsh units being destroyed, for the loss of one Sea Raider unit. The Welsh meet a gallant end and one which the Bards will surely immortalise in song.
With no one left to fight, the Sea Raiders are Lords of all they survey, including the Gloster Old Spots.

Afterthoughts
Well once again another cracking game of Dux Bellorum. Even though I hadn't played the game for a few months, the rules came back to me allowing me to concentrate on the game, which is a sign of a good ruleset IMHO. The Sea Raiders were everything I had hoped they would be, so now I have to come up with some good background fluff for them. Research is already well under way.

Despite having great fun with the Gods cards, we both felt they were a bit too much for use in the demo game as played. We will still use them, but only for when you roll a double one, which should limit their appearances on the table and not unduly affect game play. For solo games they add another bit of fun to the game, so I for one will be trying them out in the future.

Craig and I both agreed that the Dawn Attack scenario combined with the Village Raid one would make for a good demo game. We had originally planned to have three seperate warbands per side, but after the game decided that it would be better to have two slightly larger ones per side to allow for ease of control and more movement on the table. The plan is to still have plenty of the extras that the warbands can have, to really show of the game in the best light. We are already making plans for the next game so watch this space.

Sea Raider Warband

As mentioned in my previous post, I needed another warband for our planned Battle of Deorham game at Colours this year, which the Pendraken chaps had kindly agreed to sponsor. I wanted to field a warband that was slightly different from the rest, so chose the Sea Raider option from the rulebook. I liked the idea of having a Viking type warband to game with for no other reason than I have always liked them, most likely brought about by the simply superb film "The Vikings" with Kirk Douglas, Tony Curtiss and Janet Leigh. Who could not but be inspired by  scenes such as this? .

So with the theme decided upon, I chose my figures from the Pendraken Viking and Anglo-Saxon Dark Ages ranges. They are very different in feel and look from the Late Roman range, which is exactly what I wanted. After some research in the Osprey "The Vikings", part of their Elite Series range, I was ready to start painting. The results can be seen below.

The main Sea Raider warband in all it's glory.


Hrothgar of Horthaland with is Foot Companions and his war flag, Landeythan (Landwaster).


Noble Warriors
Ordinary Warriors.


Skirmishers with Bow and Javelin options.
Beserkirs (Beserkers) or Ulfhednar (Wolfcoats)


It has been quite sometime since I painted anything colourful, as for the past few years I have been concentrating exclusively on WWII period battlegroups. Reading some useful posts on the Pendraken forum helped with colour choices, as did looking at the images in the Dux Bellorum rulebook and on various Blogs. I'm happy with the result and have already started on my next warband.

Friday, 17 May 2013

Dux Bellorum at Colours 2013

For the past four or five years myself and my regular gaming chums have been putting on a demo table at the Colours show in September, organised by the Newbury and Reading Wargames Society. Every year so far the game has been either from the SCW or WWII period using the ever excellent Blitzkreig Commander ruleset. You can always have too much of a good thing so this year we thought about having a change.

So which ruleset and period to go for? Maurice by Sam Mustafa was discussed and soon discarded as, although a great set of rules, the card driven mechanics would not, in our opinion, make for a great demo game. A few other rules and periods quickly came and went (I won't bore you with the details), but pretty quickly we agreed upon the recently released rules from Dan Mersey, Dux Bellorum. So why Dux Bellorum I hear you ask?

Well from our point of view they provide fun, quick and entertaining games as well as looking good when on the war games table. This would allow us to not only play a few good games throughout the day, but also have plenty of time to talk about the game, figures etc with the attendees at the show. Another important point is that we would also have time to have a proper look at the show. This is something that we have been unable to do over the past few years, as one player per side could 'hold the fort' whilst the others took in the salubrious delights of what the traders have to offer, as well as look at the other demo games and have a general chat as we walk around the show.

So with the rules decided upon, we needed a battle. Chris had mentioned the previous year the Battle of Deorham , an action that is recorded in the Anglo-Saxon chronicle, but of which very little is known about. This would give us some artistic licence in terms of the warbands involved, which would allow us to field a variety of forces from the Dux Bellorum rulebook, which is rather useful when putting on a demo table. An added bonus is the fact that the battle is generally believed to have taken place near modern Dyrham, about 5 miles from Bristol and therefore 'home turf', so rather nice to have a bit of local flavour for the game.

Craig and I had already bought a few warbands from the excellent Pendraken Late Romans range for general use, but ideally we needed a few more warbands to make the demo game look right. I approached Dave and Leon of Pendraken to see if they would be interested in 'sponsoring' the table in the form of another warband or two. Being thoroughly decent chaps they immediately agreed and so our problem was solved. Lists of our requirements quickly winged their way to Pendraken HQ and within a week our shiny toys arrived at chez moi. So now we had a rule set, period and battle agreed upon, as well as a range of figures. The only outstanding thing was to come up with a scenario.  

However Craig and I already have a few ideas, so we just need a period of playtesting to make sure it is right for the demo game. Craig has already made a good start on the figures, as can be seen in his lovely Welsh Raiders, whilst I have just finished off my Saxon/Viking Sea Raiders. Hopefully I will get to take some pictures this weekend as we have a couple of trial games arranged for tomorrow. So watch this space for more updates on our progress towards Colours 2013.

Thursday, 9 May 2013

Chain of Command

I've always had a soft spot for skirmish wargaming, whether fantasy or WWII, as this was how I first started wargaming way back in the early 1970's. So my interest was certainly piqued when my friend and regular gaming partner Craig, put a post on his Blog about some new WWII skirmish rules, Chain of Command from the Two Fat Lardies. Now I hadn't heard of these rules, but the very positive comments made by Craig on his Blog made me want to check them out. After all we share very similar interests in wargaming and in what makes a good rule set. 

We used to play a lot of Rules of Engagement a few years ago, but in the end spent more time playing Blitzkreig Commander. Since then I think we have both been looking for a skirmish ruleset that has a good approach to Command and Control. I looked at I Ain't Been Shot Mum, again by the TFLs, but it just didn't grab me.

So I duly sat down at work and watched the very informative Youtube videos produced by the Two Fat Lardies (Now this is a great idea of promoting your games and for us the punters to see if it is the sort of game that would interest us, so this approach from the TFLs gets a big thumbs up from me). I must say that I was very impressed with what I saw and with the game mechanics and the way that the game handled command and control. I thought that this is a game that I want to play, and so plan to buy the rules when they come out some time this summer.

For those of you that may be interested in checking these rules out, below are links to the various Youtube videos, a Meeples and Miniatures podcast and an AAR on the TFLs Blog:


So a big thank you to Craig for giving me the 'heads up' on this, but I'm not sure if SWMBO would necessarily agree with my sentiments!

Sunday, 28 April 2013

"Less is more" - Discuss.

My friend and regular gaming partner Keith managed to break his arm skiing recently. So with him being off work for some time we decided it would be a good opportunity to meet up for a game or two of something. Initially we had decided upon a bit of a 'what if?' game of BKC with the premise that Italian troops had taken part in 'Operation Sealion'. However Keith had caused a bit of shock in wargaming circles by moving onto another period, so we agreed to give DBA a run out.

Now this was a ruleset that I heard an awful lot about over the years, but had never had the opportunity to try. As with many games, it has its adherents and detractors, but I went in with an open mind. I must admit I was interested to see how it played as I really enjoyed the pared down simplicity of the Dux Bellorum game by Dan Mersey, both in terms of the rules and the visual look of it. 

So I turned up at Keith's and after negotiating a rather excited welcome by his dogs, we settled down at the table to give the game a go. The rules were incredibly easy to pick up, thanks in part to Keith's explanation as we went along and also to having played Dux Bellorum. I think after 15 minutes I had a good grasp of the basic game mechanics, which allowed me to concentrate on tactics rather than remembering the rules. Things flowed along nicely and in the end we managed to get in three very enjoyable games in less than two hours. I must admit I was extremely taken with the rules and decided to look into them in more detail when I got home.

To help get over the somewhat notorious 'Barkerese', Keith kindly pointed me towards the very useful The Unofficial GuideTo DBA and the very good Fanaticus website, both of which I found of great use. Fortunately the DBA 2.2 rulebook has recently be re-published by John Curry and his History of Wargaming Project. In the end I decided to buy the rules as I was so taken with the game, and also with a view to using the army lists as guides for Dux Bellorum variant games in the future. The campaign section both in the book and on the Fanaticus website will come in very useful, as I for one do enjoy playing a series of linked narrative games.

So what was it about the game that caught my eye to the extent that I bought the rules within a few days of playing the game? Well  a few thoughts can be found below:

  • Finding time to set up a 'traditional' 6'x4' game at home is not always easy these days. As with Dux Bellorum, being able to whip out a 2'x2' board and a few bits of scenery makes it very easy to get a game in without major disruption to family life.
  • The game requires 12 stands per 'army', so as with Dux Bellorum, you require relatively few figures to make your 'army'. This to me is a big bonus as storage space is minimal, outlay on figures less than £10 for said 'army' and even for a notoriously slow painter such as myself, I can get an 'army' painted up pretty quickly if I set my mind to it!
  • The game can be scaled up to bigger games if required, typically onto the standard 6'x4' table with the 12 stands increasing to 36. So if you fancy the odd bigger game this can be easily done as part of a multi-player battle.
  • With the command system 'pips', the game is emminently suitable to solo play, another bonus as finding time to meet up with friends is not easy these days.
  • The rules are nice and simple to pick up, yet provide for a fast, fun and challenging game. Not always do I or my friends have time to spend hours at the gaming table (If we talked less maybe our games would be quicker!). With the above guide the rules are explained very well and cover pretty much all situations that might arise. You do not need a massive tome of a rulebook with endless charts and examples to have a good, enjoyable and challenging game.
  • I can easily use my Dux Bellorum warbands for DBA games if required.
  • The rather 'old school' feel of the game and the look rather appeal to me. When I set up my Blitzkreig Commander games I can spend up to two hours getting the table set and looking right. With a good baseboard and a few bits of scenery, I can still have a nice game that still looks good, but in a different way. It shows that you do not need need masses of 28mm figures, 8'x5' tables full of scenery to creat a good game. Although such games are certainly stunning and wargames visual porn, they leave me rather cold I'm afraid.
  • The set-up of the game I found rather nice, with each side rolling off to see who would be attacker or defender, and then which side the attacker would deploy. Scenery placement becomes rather interesting as you cannot gaurantee which edge you will deploy from. I might use this in Dux Bellorum games as well
So there you have it. My personal view of an old game that many love and many hate. Each to their own. Personally I'm looking forward to many more games of both DBA and Dux Bellorum with my friends or on my own, with the case certainly being made that "Less is more".


Saturday, 30 March 2013

The Battle for Winterbourne

Not having had the chance to meet up for a game since January, my regular gaming chum Craig and I decided to try and get one in over the Easter holiday period. Having checked with our respective SWMBO and our social calendars, Good Friday was good for both of us. We decided upon another AVBCW game rather than Dux Bellorum, mainly because my warbands were either undercoared at best or still in progress at worst. 

With the AVBCW decided upon, I drafted a scenario following on from our last outing in the period, The Battle for 'Beautiful Bertha'. I sent the draft idea and house rules to Craig, who was happy with them, so everything was set for some nice Bank holiday gaming. 

The AAR of the game, the Battle for Winterbourne, can be found here on our 'Storm Clouds Gather' Google site, along with plenty of other background material as well as other AAR reports etc.

One of the joys of the AVBCW 'period' is the ability to tailor games and background to your local area. This was true whilst deciding upon where to set our game. I know the area reasonably well and the view from Winterbourne and the Marle Hills is lovely and fitted in perfectly as the setting for the counter-attack scenario, as can be seen from the AAR. Craig also mentioned after that his wife had come across mention of the Thornbury Yeomanry, a unit neither of us had hear of, but will surely be making their debut on the wargames table sometime soon.

As most of you will know, I count BKCII as my favourite ruleset and have yet to have a bad game with it. It is also very adaptable, allowing 'house rules' to be used to reflect specific periods, actions, battles and gaming styles etc. Over a period of a few years, my regular gaming chums and I have settled upon most of the following, with some still 'work in progress'. A lot, if not all of these have come about via the BKC forum or optional rules with in the book. So I thought I'd take the opportunity to explain why I use the following 'house rules':

  • Hidden Deployment as per the CWC rules. Now we do not use this in all of our games, as sometimes we don't have the time for it. However when we do get the chance, it really does add another dimension to the game. This was true in the above game, as I had no idea of the dispostion of Craig's forces as he advanced towards my lines, and the same was true for him as to where my troops were deployed along the Marle Hills and in Winterbourne village. The moment of reveal was always interesting, finally knowing what you faced, or not as the case may be. If you have the time, I strongly recommend you give them a go.
  • Hits 'stay on'. I find this just works for me and provides for a much more fluid game. We saw this as the BUF forces finally started to assault the village. Normally troops in BUA are pretty much impervious to incoming fire, as the hits will come off at the end of the turn. However, when they stay on, they slowly build up, changing the game dynamic for the better IMHO. The same is also true of tanks such as the Panzer 1, Vicker MkVI etc. Even though armed with just MGs, these become more effective as their fire can slowly build up hits on units. The same is true of say Shermans facing a Tiger I, the hits slowly build up rather than the Tiger I often just shrugging them off at the end of the turn.
  • CO CV9 and HQs CV8.  As I mentioned in my AAR CSI Russia, having two low CV battlegroups can make for a very stop-start game. So where this is the case, I now up the respective CVs by one, which provides for a more fluid and interesting game.
  • Auto-Suppression. This has become a default for us in games with off-board artillery units and aircraft. However I thought I'd try it for mortars and infantry guns (the latter when using indrect fire). This feels right having read many reports of how mortars were very similar to artillery in the way that they caused infantry to go to ground.
So there you have it. I find these 'house rules' work for me, and many others given the various discussions on the BKC forum. All I can say give them a go and see what you think. If they work for you, great. If not, no problem at all. after all, it is only a game, ableit an excellent one!

Sunday, 17 March 2013

Battle of the Ford

My good friend and regular gaming partner Craig has just put up rather nice solo AAR, Battle of the Ford, on his new Blog. Well worth a look IMHO as it not only being a cracking game, it also shows his ideas of some random event cards, which originated from the excellent Sumer2Sargon Blog.

Craig is also in the process of merging his various Blogs onto this one site. He is a very talented painter and modeller so worth keeping an eye out for future posts from his old Blogs. Believe me there will be plenty of eye candy!

Sunday, 10 March 2013

10mm Romano-British

Well I finally managed to find some time today to start basing up my Dux Bellorum Romano-British warband. I'm ashamed to say that they have been in their bags for far too long, so it was good to actually have made some progress. The aim is to get the Saxons based up today as well if it all possible.

My good friend and regular gaming chum Craig and I decided to go down the 10mm route for several reasons. Firstly the Pendraken Late Roman sculpts by Clibinarium are simply superb. An absolute joy to behold and the level of detail is to be seen to be believed. Secondly we are both in the process of rationalising our various armies, battlegroups etc for a variety of periods into one scale, namely 1/144th or 10mm as some would have it. This has the advantage of both of us requiring just one set of scenery for all periods, rather than several, with the added bonus of much less storage space. Thirdly was cost. The warband shown below cost around £7.00. Yes you read it right, £7.00! Outstanding value for money in my book for nearly 40 figures.

As a comparison, the same warband in 28mm would be around £20, if I could order indiviual figures as I can from Pendraken (NB Pendraken do not charge extra for for individual figure requests, so whether you buy a standard pack or a complete mix of figures, the cost if still the same. Outstanding customer service IMHO).  In 15mm the price would be between £15.00 and £20.00. So I was able to order 2 warbands with options in terms of comparison for less than the price of 1 warband in a bigger scale. Now I freely admit that 10mm is not to everyones liking, but it suits me down to the ground. Heck I even enjoy gaming with 2mm miniatures for my sins!

So you can see a few images of the warband in their raw state. This is the core warband but I also have a few options that I haven't based yet, such as more Noble Riders, Mounted Skirmishers and Monks etc.


The core elements of the warband.
Foot Companions.
Ordinary Shieldwall.
Skirmishers with Bow and Javelin.
Noble Riders.

And just to show you how good these figures really are when painted up, just a couple of examples from last months Pendraken Painting Competition.

Whitejamest Late Romans for the Pendraken 2013 painting competition.
Craigs' wonderfully displayed Romano-British warband from the Pendraken 2013 painting competiton.