The Background
2nd Leutnant Radetsky spent a few days recovering from his wound, being wined and dined by the local gentry, as well as attending quite a few balls in his honour. But alas all good things come to an end and he soon received orders to head back to the front. After the incursion into Austrian territory, his superiors wanted to send him to the border village of Trauberk on a 'hearts and minds' mission, to make sure the populace was still supporting the Empire during all the shenanigans going on in Hungary and elsewhere.
For 'Il Cacciatore' things had been rather different, as he had to make a hasty retreat after the last battle, to rest and reform hos troops. He badly needed a base from which to mount raids into Austria itself, to help interrupt the Wiener Schnitzel supply route, which was crucial for the war effort on the home front and of course for Austrian prestige. He had heard that the local village of Trauberk might be sympathetic to his cause, as they wanted to shake of the shackles of Austrian control, as Slovenian national sentiment was rising during the turbulent year of 1848.
Austrian Freikorps OOB
2nd Leutnant Radetsky (17 Honour)
3 x Line Infantry
1 x Light Infantry
1 x Dragoons
1 x Jaegers
Italian Legion OOB
2nd Tenente 'Il Cacciatore'
1 x Line Infantry
2 x Light Infantry
1 x Dragoons
2 x Skirmishers
Scenario I: 'The Enemy's Enemy' and Objectives
The scenario is based upon a village in the centre of the table, with neither side quite knowing whether the locals will be friendly or not. Once the first unit that gets within 6" of the centre of the village, a dice is rolled to see what the villagers reaction will be. There are some modifiers, with a slim chance that they will defend their homes against all comers, rather than taking sides. The objective is to try and secure the village for your side and to defeat the enemy, taking as few casualties as possible.
The Action
As is the norm these days, the annotated photos will hopefully allow you to follow how tha game played out, so without further ado...
 |
| An overview of the table, with Trauberk in the centre, with the Austrians coming on from the South West corner, the Italians from the North East. |
 |
| Trauberk is strangely deserted and quiet... |
 |
| A gratuitous shot of some scenic items I finished this week. |
 |
| And another one! |
 |
| A wagon train leaving Trauberk before things get ugly. |
 |
| The Austrian force, with their Light Infantry and Jaegers on the left, Line Infantry in the centre with the Dragoons on the right. |
 |
| A verys imilar set up for the Italians, with light troops on the flanks and their sole Line Infantry unit on the road. |
 |
| The end of Turn 1. The Austrian troops made a patchy start, but Radetsky joined the Dragoons to push them forward to the edge of the village, but not quite close enough to trigger a reaction. All of the Italians moved forward but again could not get close enough to the village to see what the villagers might do next. |
 |
| "It's awfully quiet Sir", as one of the Dragoons said to Radetsky (cue some Ennio Morricone style music and the European version of tumbleweed blowing down the street. If there was a church, the bell would be ringing...). |
 |
| The Line Infantry advance. |
 |
| The wagon train leaving 'Dodge City' as fast as it can. |
 |
| The Italian left advances. |
 |
| As does the centre. |
 |
| Italian skirmishers blend in with the hills. |
 |
| The start of Turn 2. As Radetsky enters the village, the locals suddenly appear, all in support of the Emperor! |
 |
| The end of Turn 2. With Trauberk on the side of Austria, this inspired the Austrian troops who all moved forward. The villagers pushed to the edge of Trauberk and began to engage the Italians, but to no effect. 'Il Cacciatore' responded to the sound of gun fire as best he could, somewhat diappointed that his 'intel' was wrong about the villager's sympathies. As his troops moved forward, there was some 'Blue-on-Blue' shooting by mistake, but luckily if did little damage. |
 |
| The Austrian left pushes forward. |
 |
| The Austrian Jaegers reack the orchard and Line Infantry move up the road. |
 |
| Line Infantry on the right move up to try and cover the flank (the black dice denotes First Fire). |
 |
| The villagers move forward to defend Trauberk, but some accurate shooting from the Italian skirmishers sees them disordered but not disheartened. |
 |
| 'Il Cacciatore' moves his Line Infantry forward to try and form line to make the most of their shooting ability. |
 |
| Italian skirmishers on the left reach the wall and halt. |
 |
| The end of Turn 3. A poor turn for Radetsky & Co, as about half of the troops failed to activate, including the Dragoons under his command. The Italians failed to capitalise on the Austrian inertia, but did move forward in places and the Trauberk villagers were hit again, but their resolve remained firm! |
 |
| The Austrians fail to push forward into Trauberk and its environs. |
 |
| The viilage square is still up for grabs, as the Austrians fail to secure it. |
 |
| The citizens of Trauberk fall back under fire but remain loyal. |
 |
| Italian skirmishers move to flank the villagers. |
 |
| 'Il Cacciatore' from his Line infantry into 'Line' so that they can use 'Volley Fire' if the opportunity presents itself. |
 |
| Italian Light Infantry on the outskirts of the village. |
 |
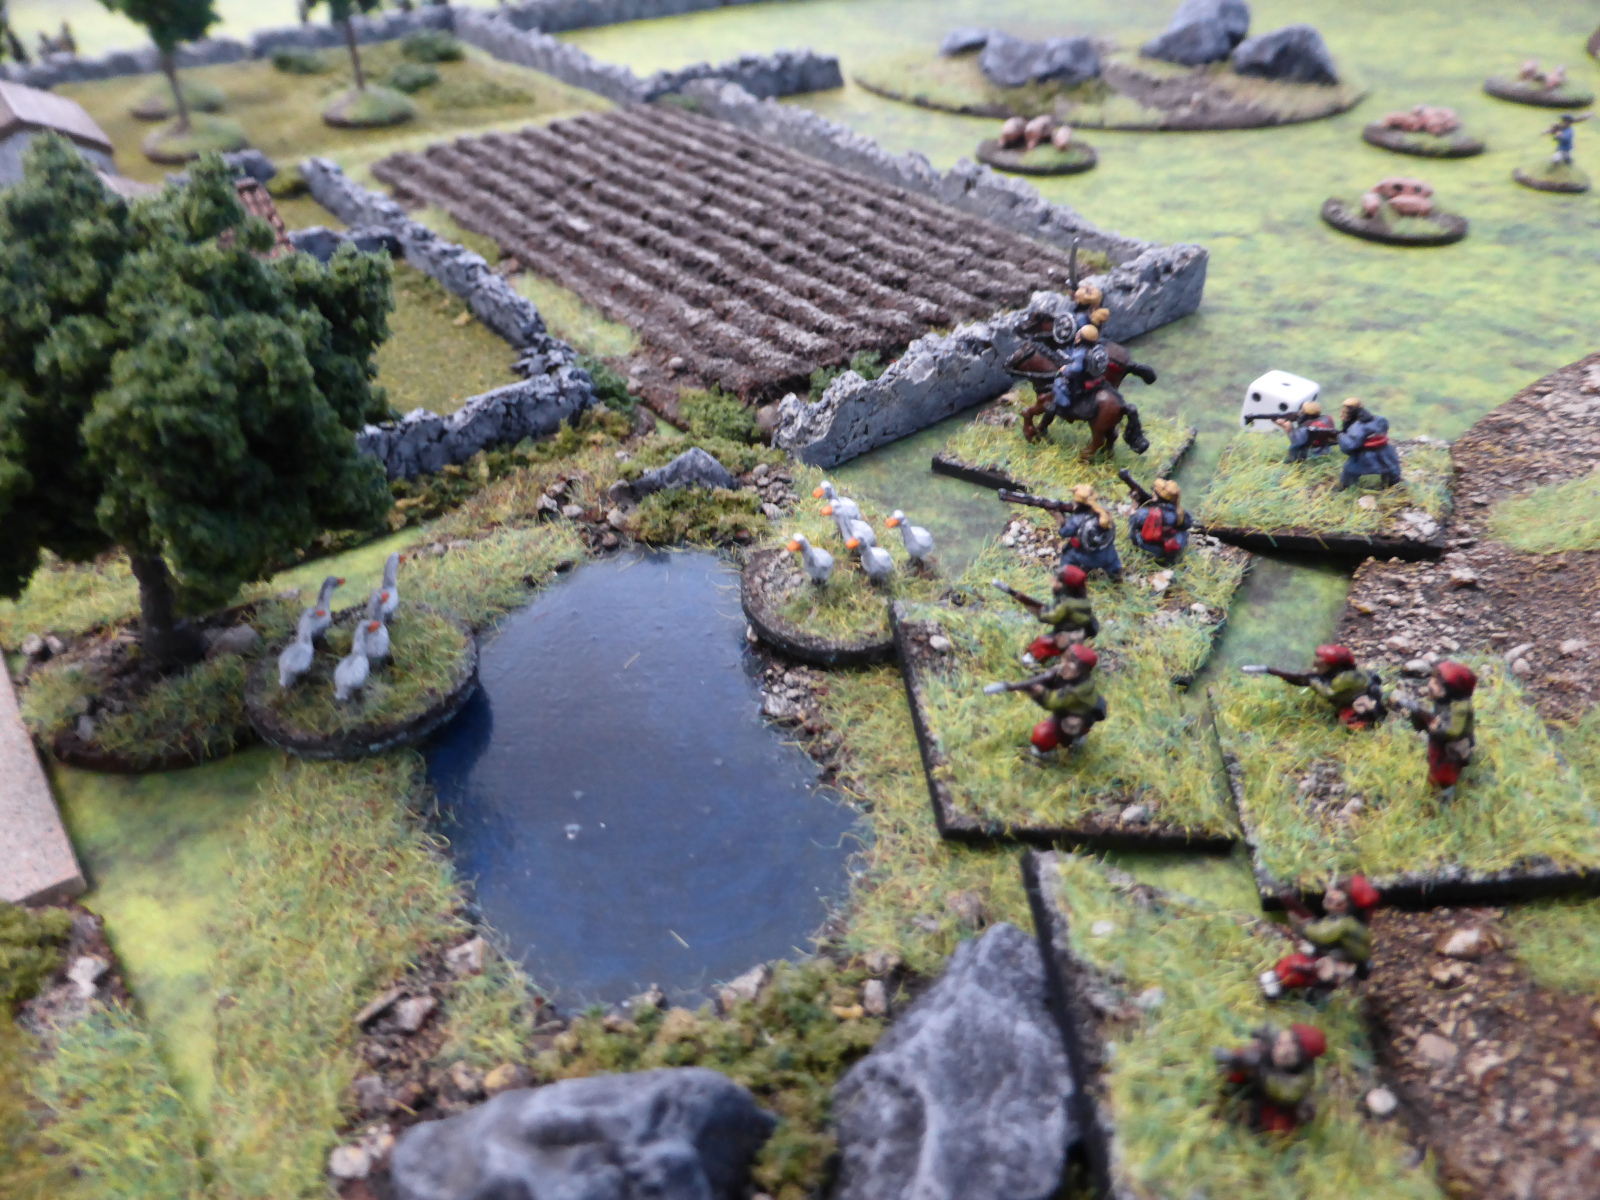
| Dragoons and Skirmishers reach the duckpond and engage the inhabitants of Trauberk. |
 |
| The start of Turn 4. The Trauberk villagers charge the Italian Light Infantry! |
 |
| The end of Turn 4. After last Turns inertia, the Austrians advanced and engaged the Italians, forcing the Skirimishers on both flanks back, one Disordered, the other Broken. The Trauberk villagers survived their attack on the Italians, but were forced back with a permanent Disorder marker ad they were half-strength now. The Italians suffered as one unit of Skirmishers routed and the other retreat again, whilst elsewhere they failed to activate of missed the proverbial 'barn door'! |
 |
| The Austrian left flank Disorders the Italian Dragoons by the duck pond. |
 |
| Line Infantry advance but as yet have still not moved into the village square. |
 |
| The Austrian Dragoons move forward to support the villagers. |
 |
| Line Infantry with the advantage of 'First Fire' force back the Italian Skirmishers, causing them to become Broken... |
 |
| ... and a failed Rally test leads to them Routing. |
 |
| All ready for 'Volley & First Fire', giving them a +2 to hit, the Italian Line Infantry fail to activate! |
 |
| The end of Turn 5. Accurate and effective Austrian shooting leads to the collapse of the Italian position, as the Italian Dragoons and Skirmishers are routed after shockingly bad dice rolls for Morale and Rally! Even the Line Infantry under 'Il Cacciatore' are Disordered. As a result the Italian flanks are wide open. |
 |
| The Villagers fall back to have support from the Line Infantry in the cornfield. |
 |
| The Dragoons control the duck pond. |
 |
| Finally the village square is secured. |
 |
| The Italian Dragoons and Skirmishers Rout en masse! |
 |
| Only three Italian units remain and so there position is untenable, as so they withdraw. |
End of Game
Suddenly it was all over! As the Italians melted away, Radetsky was happy to secure the village and celebrate the victory with the loyal inhabitants of Trauberk. His losses had been incredibly light, with barely a scratch to his forces, with the villagers taking the brunt of the Italian ire. 'Il Cacciatore' on the other hand had yet again suffered a stinging defeat at the hands of Radetsky. He needed to lick his wounds and get his troops together again quickly before the inevtitable action that would surely soon follow.
The Campaign
Another successful action saw Radetsky get a field promotion to a full Leutnant and a mention in dispatches. His star was certainly in the ascendant. With this action he gained enough Honour to roll on the Trait's Table, giving him 'Nom de Guerre' and another 5 Honour points. So now I need to decide upon a suitable name for him.
Honour - 28
'Il Cacciatore' on te other hand had yet again failed to gain any Honour from either action, but at least he hadn't lost any yet!
Honour - 10
Post Game Thoughts
Yet again another fun game of Rebels & Patriots that is really making a 'game-a-week' quite achievable at present! The narrative drive of the campaign is nice and giving me plenty of ideas, without it all becoming too labourious, which is one of the dangers of a campaign. Anyway, onto some thoughts on the game itself:
- It's the first time for ages that I've had the chance to use 'Volley fire' and 'First Fire'. Together they can be deadly as you get a +2 to hit if used together. Add in say a 'Marksmen' option and you might be hitting on a 2+ for once in a game. To be honest you rarely get that opportunity, but certainly for the Defender being more static, this can be a very useful bonus for sure.
- Both sides had some pretty bad shooting rolls right across the board all game. Back to the rifle range methinks...
- I've not had much 'Hard Cover' in my games, even during the playtesting way back when, but it really does alter the game somewhat. Going from 2 hits at short range or 3 at long, to cause a casualty, up to 4 or 5, makes this very significant force multiplier as it were.
- In this game I did use the Double 1 & Double 6 tables, just to see what effect it might have. The Italians did suffer a minor 'Blue-on-Blue' event that fortunately didn't affect the game at that point. With hindsight when the Villagers charged forward, I should have rolled for them as they got a double 6. I did this after the game and they would have got another free action, which could have been significant at that point.
- With regards to the Hard Cover above, Artillery might be an option for this game, but ti does take time to get into place and into action, so has limited used I feel. In a defensive position it would be more useful, if going for the larger calibre guns.
- I did feel sorry for poor old 'Il Cacciatore' as pretty much ever Morale or Rally roll went badly for him and his force! Lady Luck was not on his side once gain.
- Terrain wise it did take a bit of getting used to the BUA being WYSIWYG, after years of it being a generic area template for shooting, LOS etc.
- The Trauberk villagers were fun to play and it certainly helped the Austrian cause no end, alongside adding a nice piece to the narrative and the campaign going forward.
What Next?
Well I already have a couple of ideas for the next game in the campaign, but just need to sit down and flesh the ideas out a bit more, before deciding upon which route to take. Alongside this I'm still painting some units, namely some generic engineers-cum-villagers as they are useful for many scenarios, as well as some wagons, for decoration and for certain scenarios. All of these will be used for a vareity of rulesets which is nice.
I've been meaning to make a central piece as a sort of town square for years, but have never really needed one given the rules I use, which are for larger level actions such a BKCII and BPII. However at this smaller action level, I really do need one, as shown in this game, as I had to substitute trees in its place instead.
I'm not sure why I never got an Italian church from Leven Miniatures, or maybe I did and painted it for a different setting. Sadly their website is still not back up and running, so I fancy scratch building one myself, which should be fun. As the weather is still rather iffy, time outside is going to be limited, so it will keep me nicely occupied and I'm looking forward to giving it a go.
I'm still pondering an AVBCW BKCII campaign, for somethign completely different once this current campaign is over. This is on the back burner for present as I don't want to get too distracted at this stage! But more on that in due course.
As always thanks for reading and if you have the time and inclination to comment, it is grealty appreciated!
TTFN.


Wonderful stuff Steve, you are so right around the 'Volley fire' and 'First Fire'. It does need some nerve and good tactics to pull it off, I am finding you have to adopt the proper use of skirmishers to get the line into position. Looking forward to see what comes next.
ReplyDeleteCheers
Stu
Thanks Stu! I'm still a novice on the Volley and First Fire fronts, probably due to the scenarios played so far, as Light troops are a far better option for these. The next scenario could be more beneficial to have standard Line Infantry...
DeleteReally fun read and a fantastic looking battlefield. I find the whole very inspirational.
ReplyDeleteThanks and glad you found it inspirational:)!
DeleteSteve, your table is stunning! Have you posted a tutorial on how you made your fabulous hill pieces?
ReplyDeleteR&P allows for quick games, indeed. Matt and I can usually finish one in under 90 minutes. The combo of First Fire and Volley Fire can be crippling. In the AWI games we play, everyone ALWAYS seems to be in some sort of cover so no easy kills. Good stuff! Thank you!
Thanks Jon! Those rocky hills were the old GW plastic ones that came in two halves, that I modified and adding grits to for more detail. I did make a note on how long it took to make a hill for a friend a good few years ago now:
Deletehttps://wargameswithtoysoldier1685-1985.blogspot.com/2013/09/bespoke-hill.html
I have been pondering a post on how I went about making terrain for my games, the thoughts that went into the process, the stages gone through and lessons learnt. If others feel it might be of interest, then I could do one. It's really not that difficult.
The beauty of Dan's games are that they are quick and fun, so perfect for mid-week games such as I'm trying to achieve at present. The next game should see more opportunity to use Volley and First Fire, as the terrain will be more open I feel. I'm currently setting the game up so hopefully an AAR soon...
Yes, any terrain making tips you would like to pass on would be gratefully received, Steve!
DeleteNoted Keith and I will try and put something together in due course.
DeleteGreat looking table and figures as always and a good read, another good win for the Austrians it will be interesting to see if Il Cacciatore can get something out of this campaign.
ReplyDeleteThanks Donnie! Unusual for the Austrians to win in any games it seems, so a nice change here for once. Poor old 'Il Cacciatore' needs to pull something out of the bag soon or it could be curtains for him...
DeleteAn entertaining AAR Steve. Table looks good as ever. Thought they were Leven buildings. A great range.
ReplyDeleteThanks Chris! Yep, lovely Leven Miniatures buildings and a shame Mick Hoe is not back to full health yet to get the site up and running again. Fingers crossed he will be fit and well soon.
DeleteSplendid looking game, I do feel sorry for the Italian commander! My memory of Jonathan and Matts AWI games is of Jonathan being in cover and Matt having to advance and being shot to pieces so I'll be interested to see how it develops in your campaign. You definitely need a church, I remember seeing a Soviet black and white film that was suppressed and rereleased in the 1980s/90s called the commisar which was very much like a spaghetti western even down to the ringing bell, if you can imagine Clint Eastwood, female, pregnant and a communist commisar!
ReplyDeleteBest Iain
Yep! That is, indeed, how it worked!
DeleteThanks Iain:)! It's hard not to feel for 'Il Cacciatore' as he certainly hasn't had any luck so far. As mentioned on Jon's and Matt's Blog posts, advancing towards the enemy with R&P can be deadly, so the Attacker certainly needs a points advantage, as all agree on this matter. How much is more open to debate.
DeleteFantastic looking game!
ReplyDeleteLove miniatures and terrain!
Thanks and glad you liked it Michal!
DeleteI am enraptured by your terrain - absolutely stunning! Just goes to show what can be achieved in this scale. Of course your miniatures are no slouches either!
ReplyDeleteThat's very kind of you to say Ralph:)! The smaller scales can still look damned good, as your games show too. Over the years I've started adding those vignette items to my games to improve the visual aesthetics, which I think are working well now.
DeleteVignettes - yes, those have been on my to-do list for far too long...but you have provided inspiration, so, who knows?
DeleteI was inspired to finally do them by a few other Bloggers work, so nice to know I might do the same to you:).
DeleteSteve, a splendid table, glad you have found a routine for the weekly game.
ReplyDeleteThanks Norm and it is good to find I currently have the time and the mental energy for games, which hasn't always been the case.
DeleteFantastic looking game. The table was a treat to look at. Thoroughly enjoyed your report and look forward with anticipation to future engagements in this great campaign.
ReplyDeleteGlad you enjoyed it Richard:)! I'm about to lay the table for the next engagement, so an AAR should follow soon'ish...
DeleteThat was another super looking game, Steve, although the results so far are regretably reinforcing all our stereotypical views on the Italians as soldiers post 500AD!
ReplyDeleteThanks Keith:). Yep, old 'Il Cacciatore' is certainly not in the same league at present as Garibaldi, but then he had a rocky start to his 'career'.
DeleteAnother beautiful looking game Steve. The Austrians did remarkably well - perhaps aided by a lacklustre performance by the Italians. Let’s be generous and allow il Cacciatore to blame “zose Eengleesh dice”. I look forward to further daring adventures on the frontier…
ReplyDeleteCheers,
Geoff
Thanks Geoff:). The Italians never really got going, possibly aided by the Austrians gaining the first Turn. As for the dice, I can only blame the Muppet who rolled them;)!
DeleteOne thing this has highlighted is that if one side gets a couple of good games at the start, it is hard for the other side to catch up. This was well addressed with 'Mordheim' and their campaign system, which I might have to consider for future mini-campaigns...
really like all the little scenic items. they add to the table.
ReplyDeleteare unfriendly locals really a problem these days? 😁
Thanks Stew and the do dress the table in a nice way, rather than purely 'functional' terrain etc. Unfriendly locals? Well I couldn't possibly comment in case any read my Blog;)!
DeleteExcellent battle report, Steve 👍🏼👍🏼👍🏼, I really like the photo+text story telling. Nice one! Many thanks.
ReplyDeleteThanks Martin:)! I'm glad you like the photo + text approach to the AAR write up. I found it to be the easiest way to convey the action, without it getting too wordy and hard to follow.
Delete