After our break for Operation Market-Garden, it was time to return to the 18thC and our narrative campaign. The English troops have been forced to withdraw once again by the French and have chosen to make a last stand on a long ridge controlling the road to Bristol. Further retreat is simply not an option. The French, with their lines of communication increasing by the day, need to defeat the English in open battle, so that they can take control of Bristol. Nothing else will suffice.
Table Set Up
Once again the scenario was taken from the excellent 'Scenarios for All Ages' by Grant & Asquith. Broadly speaking the French have an almost 2:1 advantage over the English, but the terrain favours the defenders. The English have deployed along the rdige, expecting an attack from across the road. However the French have a sneaky plan to attack them in the flank, via a night march. As dawn breaks, the French right flank have mistaken a village for the one they are meant to attack. The French left flank is in the right place, but is late arriving on the battlefield and so is somewhat behind from where they should be.
 |
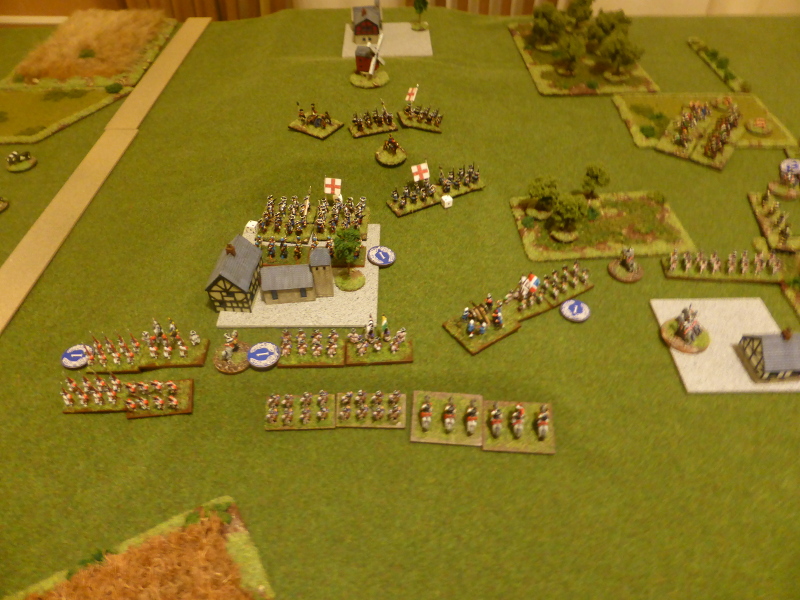
| An overview of the table (3 1/2' x 2 1/2'), with the English on the ridge to the right middle of the 'photo, with the French on the left hand edge. |
 |
| The French right flank deployed for action, but against the wrong village. |
 |
| The English on the ridge, suddenly see the French appear on their flank as the early morning mist lifts. |
 |
| The French right flank, although in the wrong position, are in the English rear. |
 |
| The view from the French right flank. |
Turn 1
The French press forward on both flanks, whilst the English suddenly try to re-align their troops to face an unexpected direction of attack.
 |
| An overview at the end of Turn 1. |
 |
| The French cavalry lead their right flank forward. |
 |
| English troops move in the village to take up new defensive positions. |
 |
| The French left flank push on through the Somerset cornfields. |
Turn 2
The French continue their advance and deploy their medium gun on the left flank, which opens fire on the village. Their shooting is good and they inflict a hit on the English infantry. In response, the English send more infantry towards the village, whilst their cavalry and light infantry move to meet the threat from the French right flank.
 |
| An overview at the end of Turn 2. |
 |
| The French right flank continues to advance, whilst the English troops make the best use of the wooded terrain to form a defensive position. |
 |
| The English face towards the French right flank. |
 |
| The French light infantry advance towards the village, whilst the French left flank struggles forward. |
Turn 3
Again, both sides manouevre to try and gain a favourable and advantageous position over their enemies. The shooting that there is misses, as most guns and all of the infantry are out of range.
 |
| An overview at the end of Turn 3. |
 |
| The French flanks begin to converge on the village. |
 |
| The English left flank moves its light infantry into the woods, whilst the cavalry form a reserve, waiting to see where the French will strike their first blow. |
Turn 4
The French left flank suddenly bursts into life, as a double move allows them to close in on the village. The English respond and reinforce the village as best they can, but the French are in a good position. Despite all this manouevring, both sides shooting is ineffective.
 |
| An overview at the end of Turn 4. |
 |
| The French right flank pushes its cavalry through the woods as the infantry advance towards the village, that is held by the English light infantry. |
 |
| The English have been able to reinforce the village, but the mass of French troops is closing in. |
 |
| A view from the English artillery position, protected by infantry. |
 |
| The English light infantry have been outflanked by the French cavalry. |
Turn 5
The French manage to close in on the village on the ridge and begun to envelop it. However the English defenders cause hits on the advancing French troops, but take none in return. The French right flanks cavalry put pressure on the English left flank, forcing them to move back, whilst the French infantry move into the village unapposed.
 |
| An overview at the end of Turn 5. |
 |
| A view of the French left flank as they close in on the village. |
 |
| The view from the French right flank. |
 |
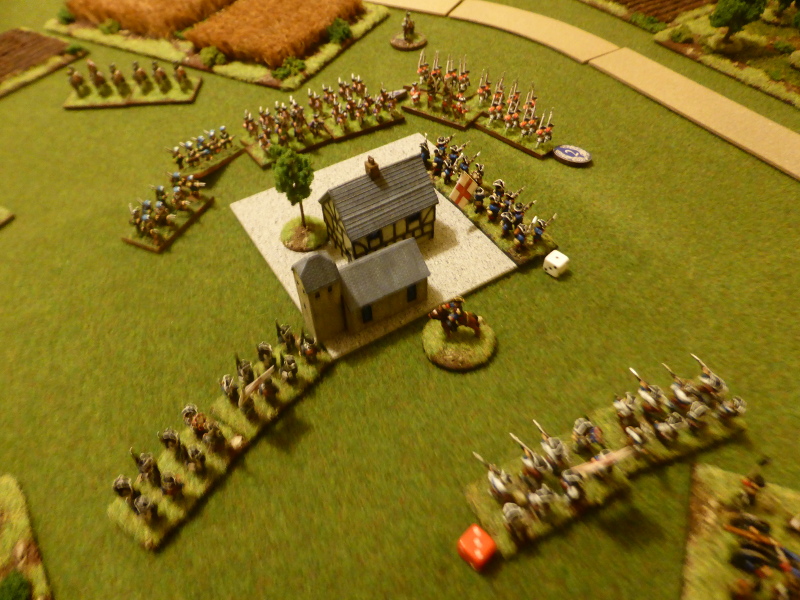
| The English defenders cause hits on the French infantry, but are under a lot of pressure from the massed French troops. |
 |
| The English light infantry and the Taunton Tartars hold the woods to try and slow the French advance. |
Turn 6
The French left flank, supported by their light infantry, close in on the village and their weight of fire forces an English infantry unit to retreat, with four hits. The English hold on the village is looking somewhat tenuous. The French cavalry on their right flank try and force their way past the defending English, only for them to be shot at by the English light infantry, who cause two hits on the French dragoons.
 |
| An overview at the end of Turn 6. |
 |
| A unit of English infantry having been forced to retreat, leaves the village almost at the mercy of the French. |
 |
| The French infantry poised to take the village, which is now defended by a sole English infantry unit. |
 |
| The French dragoons are shot at by the English light infantry in the woods as the English cavalry defends their flank. |
Turn 7
With the village ripe for the taking, the French left flank fails its command roll, meaning they cannot advance! The French light infantry take up the attack and move into the village, as the English infantry withdraw to its edge. The French pressure forces the English infantry to begin a slow withdrawl, but on the English left flank, the French cavalry take more hits from the English light infantry.
 |
| An overview at the end of Turn 7. |
 |
| The French cavalry being shot at by the English light infantry. |
 |
| The English begin to withdraw, but the French are unable to take advantage of this, other than their light infantry. |
 |
| The English cavalry form into two lines, ready to receive or make a charge. |
Turn 8
Unbelievably the French left flank again faills its command roll, which is aiding the English defense no end. The French advance as best they can else where, but the English are managing to form a good defensive line across the ridge. Both sides exchange shots, but fail to cause any retreats etc.
 |
| An overview at the end of Turn 8. |
 |
| The French poised to reinforce the village, but are unable to do so, whilst the English are. |
 |
| The French right flank continues to advance and to exert some pressure on the English positions. |
 |
| The English left flank is putting up an active defense. |
 |
| The English trade shots with the French light infantry in the village. |
Turn 9
Miracle of miracles, the French left flank again fails to advance and so can only look on in disbelief. The French light infantry shame them by causing an English infantry unit to retreat, having taken four hits. This causes the English to further withdraw to form another defensive position. On the French right flank, the infantry advance and charge the English light infantry, who evade. The Taunton Tartars see a chance to charge the French dragoons, who they manage to cause to retreat off the table! Luckily the Taunton Tartars fail their roll to pursue, otherwise they would have gone as well.
 |
| An overview at the end of Turn 9. |
 |
| The French troops in retreat whilst the Taunton Tartars look on. |
 |
| With the French left wing stubbornly refusing to move, the French right wing continues to try and put pressure on the English positions. |
 |
| The new English defensive line, now that the French light infantry anre in control of the village. |
 |
| The English left flank are in a good position to hold any French advances. |
End of Game
At this point we took stock of positions of both sides. The English had managed to form another good defensive line, which would take the French left flank, at least two Turns to reach ,as they would have to advance through or around the village. The English left flank also had the advantage of the wooded terrain which would make any advance by the French right flank problematic. Also the English could perform a fighting withdrawl along the ridge to yet another village, which would naturally provide a good defensive position.
So with all of the above, we agreed that the French had missed an opportunity to defeat the English in the field and so now needed to consolidate their postions in Somerset as well as securing their lines of communication. From there they might be able to advance towards Bristol at a later date, subject to seeing how Bonnie Prince Charlie had fared against the English on the Borders.
Post Game Thoughts
Well a highly entertaining game and one with a rather unexpected result. So as always, some post game thoughts:
- I can safely say that the English didn't win the game, rather the French lost it. They were in the perfect position to push the English out of the village, from where it would have been rather hard for the English not to have been constantly on the back foot. A case of snatching defeat from the jaws of vicotry. 'C'est la guerre' as the French say.
- Yet again the scenario provided an interesting and challenging game for both sides. These scenarios tend to work well for 18th & 19thC games, but less so for more modern ones. Definitely worth getting a copy IMHO.
- Once again artillery failed to have much impact on the game in a direct sense. Post game we talked about this and it came down to the fact that a lot of the time, the artillery was either having to move or shooting at long range and on occasion, both. However it did have the effect of pushing the French left flank towards the village, rather than pusing along to try and turn the English flank, due to the threat that it posed. We both know how devastating artillery can be at close range when it gibes a whiff or grapeshot.
- Frankly I love these rules. They are elegant and have simple, yet subtle, mechanics that allow one to focus on the game, rather than the rules. Add in us playing with a good dose of common sense you you have pretty much gaming heaven.
- I know a lot of gamers aren't that keen on 18thC linear warfare, but I find they do provide really challenging and interesting games. They are also colourful and provide a great visual spectacle. I'm glad that Keith Flint first introduced me to this period as it has become on of my favourites to game.
- Both sides light infantry had a big effect on the game, largely due to the lack of French line infantry advacning when they were most needed. I do enjoy fielding them and am also tempted to model up some dismounted dragoons at some point.
- It was nice to have my new terrain on the table for the first time. Much of my stuff comes from my days of 28mm skirmish games, so hasn't been that useful. Now having terrain specifically for 10mm makes setting up games so much easier.
- This was the first time that I have been able to field a whole brigade of my own painted units, which was rather nice. To come out with a 'win' was an added bonus.
- The narrative campaign has been great fun, but now the action moves North of the border. I hope to be able to paint up some SYW British from Pendraken for this, but I'm not sure how much time I will have due to some family visits over the next few weeks.
Our campaign will be on hold for a month or so, as Dave is away for a few weeks and then the aforementioned family visits will most likely put pay to any gaming until some time in November. Hopefully I will get in some solo games and also painting, especially as we are now well into Autumn and I naturally paint more between now and late Spring. So until next time...


Great report, thank you
ReplyDeleteYou're welcome Will:).
DeleteExcellent, Steve!
ReplyDeleteThe French inability to activate cost them the battle, no doubt. Were these simply unlucky activation rolls or were the French commanders really that Dithering?
HoW is great set of rules and as you say, elegant in design. My favorite rules for this period.
Having your own troops to command on the table is a nice bonus.
Thanks Jonathan:).
DeleteThe French (Dave) just had a stream of unlucky die rolls, combined with his General being on the right flank to start, then he couldn't get to the left flank in time to save the battle.
I've dug out my SYW British, so hopefully I can get a Brigade ready for the next bash on the Scottish borders...
An interesting scenario from the point of view that the French start with that advantage of arriving on the English flank and the English having to respond. Today, that advantage was countered by poor French Command die rolls, but had they succeeded and no reason why they shouldn’t have, other than bad luck on the day, the scenario generally looks a tough one for the English.
ReplyDeleteI think the interest of 18th Century linear warfare probably comes from the fact that (providing the rules do their job), the fighting style is so different from other black powder periods, you do get ‘period feel’ from the armies, without resorting to contrived rules.
The French do have an advantage, but with the use of the terrain and the abiltity of defence in depth, I think the English have a chance. Had their shooting been better earlier on, then it might have put the French on the back foot.
DeleteI think there is an elegance to the look of linear warfare, with the infantry (generally) in the centre and the cavalry on the flank. No worrying about forming square, various French methods of attack etc that you find with Nappies.
And all on a 3.5 x 3.5' table! A very nice piece of work.
ReplyDeleteThanks Keith. Being able to play on a 3 1'2' x 2 1/2' table does keep the old back happy...
DeleteEven smaller than I thought! This is true 21st century gaming.
DeleteSadly we don't have the space of our cousins over the pond, so needs must and all that. However as and when time allows, a 4' x 4' table is the equivalent of an 8' x 8' one, allowing some rather large games should one want to.
DeleteI enjoyed reading your battle report.
ReplyDeleteTake care
Andy
Glad you enjoyed it Andy.
Delete