Background Fluff
- The Hanoverians, with their Lines of Communication somewhat stretched and exposed at the Cumberland Gap, are heading back towards the main force.
- The Jacobites and French, although bloodied after the Cumberland Gap, are still a force to be reckoned with and have stolen a march on the Hanoverians and are determined to sever their LoC.
- In the Clyde river valley, both sides are heading towards an important bridge that will allow the Hanoverians to haul their artillery across a small river.
- However both sides are unaware of each other due to early morning mist. As this lifts, the game commences...
- The objective is to be in control of both sides of the bridge or to have destroyed the enemies ability to fight..
1 x HQ (Dependable)
1 x Standard Infantry
1 x Militia (Inferior)
1 x Light Gun (Standard)
1 x Light Gun (Inferior)
1 x Light Infantry (Standard & Independent)
1 x HQ (Dithering)
1 x Standard Infantry
3 x Militia (Inferior)
1 x Light Gun (Standard)
1 x Dragoons (Standard & Independent)
Jacobites OOB
1 x HQ (Dependable)
4 x Highlanders
French & Lowland Scots OOB
1 x HQ (Dithering)
2 x Standard French Infantry
2 x Lowland Scots (Inferior)
1 x Light Gun (Inferior)
1 x Light Infantry (Standard & Independent)
Deployment
Both sides randomly roll to see where their forces appear along their respective roads. All forces start the game in column of march.
Sadly I failed to make any notes of what transpired during the game, but hopefully the captioned pictures will suffice to give a feeling of how the game played out.
 |
| Like ships passing in the night, both sides are blissfully unaware of each other, or for that matter, where the bridge is! |
 |
| Keith and Dave in jocular mood and obviously confident that they will win prior to the start of the game. |
 |
| The French and Lowland Division are in the NW corner, with the Highlanders in the NE one. The 'weaker' Hanoverian troops are in the SW corner with the nominally 'stronger' troops by the road leading to the bridge. |
 |
| As the mist lifts both sides quickly deploy into line. |
 |
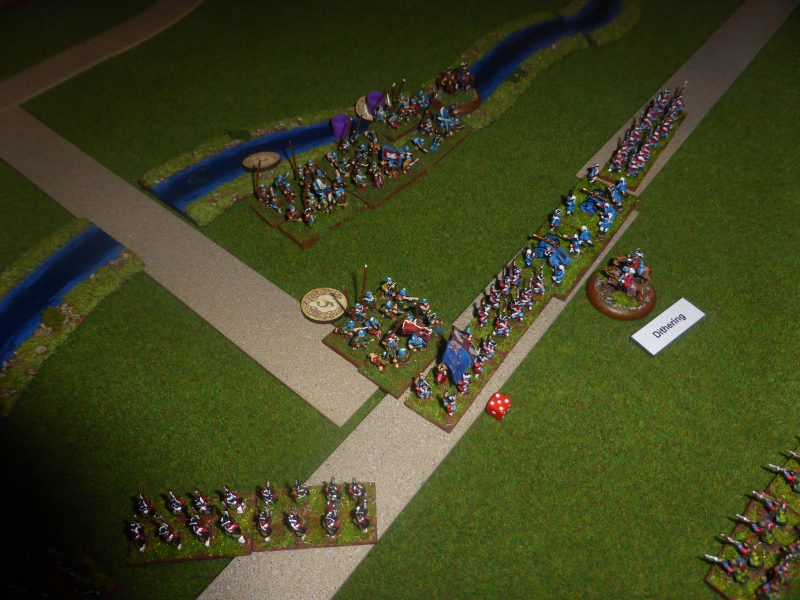
| The Hanoverians form a thin red line whilst the French and Lowland Scots come on in supported 'attack columns'. Only the Light troops fail to advance, which will become a theme for most of the game. |
 |
| The Highlanders face a potentially formidable gun line. |
 |
| As both sides close, battle is joined as shots ring out all along the line. |
 |
| The Hanoverian shooting causes 3 hits apiece on the French and Lowland Scot front line... |
 |
| ... whilst the Highlanders take less hits, but at least hits have been scored. The Hanoverian Light troops push forward to act as a Forlorn Hope to hopefully slow down the Highlanders. |
 |
| The action really hots up all across the front lines. |
 |
| The French and Lowland Scots casualties mount up, leaving them unable to effectively fight back against the Hanoverians. On the right flank a unit moves back to offer a refused flank as protection in case the Highlanders break through. |
 |
| As the Highlanders cross the Clyde, they make short shrift of the Forlorn Hope, but as the crash into the next line of troops... |
 |
| ... Mutually Assured Destruction takes place. |
 |
| The French and Lowland Scots cannot prosecute their attacks whilst the Highlanders attack fragments. |
 |
| The Hanoverian line holds firm. |
 |
| Mutually Assured Destruction Part 2 as the Highlanders break through in the centre... |
 |
| ... but become isolated and unable to shoot any more. |
 |
| With the Highlanders a spent force, the French and Lowland Scots start to withdraw... |
 |
| ... persued by the Hanoverians. |
 |
| With the Highlanders spent and isolated... |
 |
| ... one unit heads South towards the salubrious delights of Derby! |
At this point we called it a day as the French and Jacobites were in no position to continue the fight.
Post Game Thoughts
Well as always it was an enjoyable game with Dave and Keith. Sadly it was a bit one sided but we learnt a lot from the game, which was useful as we were still playtesting the rules for the '45. Some points from the game can be found below:
- For the Jacobites to have a reasonable chance, they need to outnumber the Hanoverian troops. The scenario called for equal forces, but frankly this didn't work in this game. How much they need to outnumber them is hard to say.
- The Highlanders really need to be supported by other line troops so that their shock value can be used to its best ability. In our game, once they had charged in, they wereeffectively a spent force as they could no longer fire.
- I think that the Hanoverians had too many artillery units. This was a hangover from the first game. Even reducing one to Inferior didn't balance things out much. A whiff of grapeshot at close range is always going to hurt. I think early on all the Hanoverian artillery should be Inferior.
- The Hanoverian Left Flank, by winning the first Fire initiative and getting some good die rolls in, were able to stop the French and Lowland Scots dead in their tracks and from which they were never able to fully recover. It could so easily have been the other way round.
- Keith's die rolling to get his Light troops into support didn't help his cause. Four '1s' in a row had us all suprised and a few Anglo-Saxon expletives naturally ushered forth. When it did get into action in Turn 5, it managed to cause 2 hits with its first volley. Sadly too late to affect the outcome of the battle.
- Ditto being unable to bring his sole artillery unit closer meant that it was quite ineffective for most of the game.
- Converting scenarios to this period is quite tricky, as we found out in this game. Most call for a mix of Line, Light Infantry, Light & Heavy Cavalry and Artillery. During 'The '45', there is a distinct lack of cavalry of all types which I think makes it harder to get a good scenario balance with the forces available. A regular Seven Years War or Napoleonic game in contrast readily fits in as all of the forces are there. Nevertheless, the scenarios are still useful starting point for a game and I will continue to reference them in the future.
We now have a break for a week or so due to work commitments, but next up might be a 'proper' SYW game, possibly British vs French...
Good post Steve, it's always a tough outing for the Scots espically if they don't get numbers in the right place.
ReplyDeleteCheers
Stu