Friday, 13 March 2015

Dawn attack - Campaign Game 3

For the third game in our campaign, Dave and I decided that the 'Dawn Attack' scenario fitted the bill. The scenario was played straight from the book, with no house tweaks or anything. The game was played over a week ago and despite some notes, my recollection is a bit vague. However I will do my best to give you a feel of how the game played out.

Deployment
Dave arrayed his forces in his deployment zone, screened somewhat by a marsh and hedge, with a wood in the centre to try and disrupt my troops as much as possible. As per the scenario I moved two of his units (see the end for thoughts on this), choosing his Companions and one unit of cavalry. I 'broke' the cavalry up to try and slow down their formation into a group that would most likely hinder my advance. As Dave only had to hold on for 14 Turns for a win, anything I could do disrupt him would help my cause.

Turn 1 Welsh - 9LPs Irish - 6 (1) LPs
The Welsh advance got off to a classic with:
Steve: "Watch me blunder in the first Turn."

Well suprise, suprise that is exactly what I did! Complete Muppet. It did cause much hilarity but once the laughter died down, the blundered unit advanced forward which was what I wanted to do in the first place. Elswhere the Welsh advanced whilst the Irish tried to form groups.

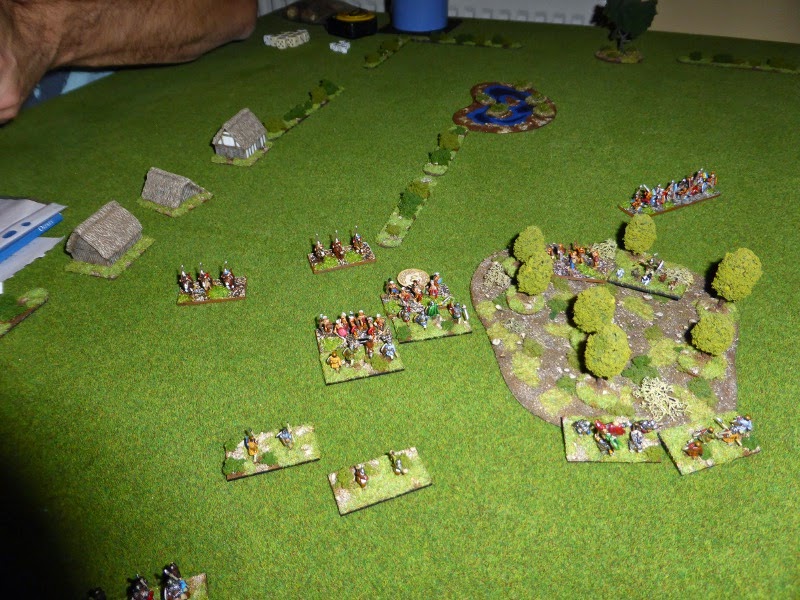
Both sides deployed ready for a merry-go-round chase around the central wood.
The Irish after I had moved two units.
The Blunder...
... and the Muppet that rolled it.


Turn 2 Welsh - 9 LPs Irish - 6 (2) LPs
General movement by both sides, with the Welsh moving cavalry and skirmish units forward, whilst the Monks just knelt and prayed. The Irish formed up as best they could.

The Welsh wheel around the wood whilst the Irish try and form up to get away as quickly as they can.


Turn 3 Welsh - 9 LPs Irish - 6 (3) LPs
Basically a repeat of Turn 2

The Irish have been able to form up and make good use of the wood to keep away from the Welsh.


Turn 4 Welsh - 9 LPs Irish - 6 (4) LPs
The Welsh line starts to break up due to failed Bravery rolls, especially with the cavalry stalled in front of a major part of the Welsh battleline. The Irish deploy a screening force by the hedge whilst they try and manouevre round the wood.

The battlelines of both sides fragment.


Turn 5 Welsh - 9 Irish LPs - 6 (5) LPs
The Welsh manage to move enough units into range of the Irish, triggering an uncontrolled charge. This is enough to stall the planned withdrawl of the Irish, allowing the Welsh to bring their advantage in units and Leadership die to bear.

Battle is joined at last.
The Welsh win, pushing the Irish back.


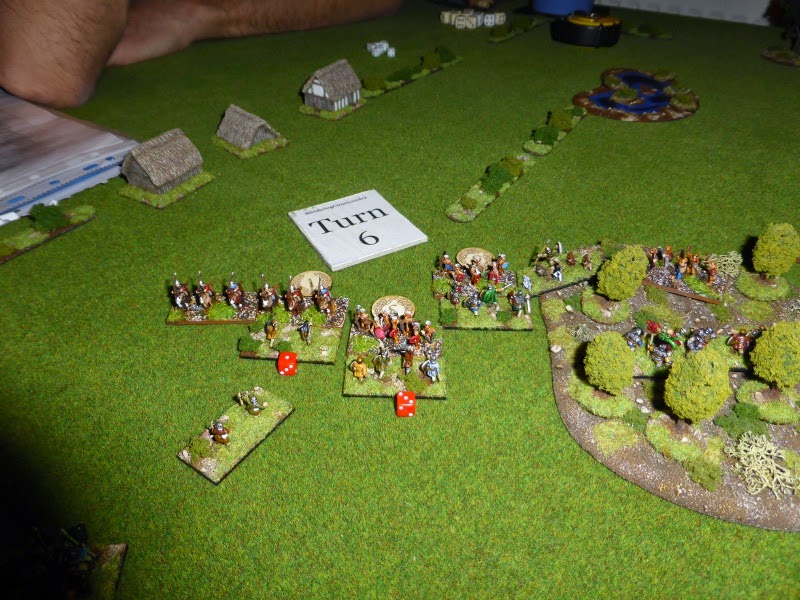
Turn 6 Welsh - 9 LPs Irish - 6 LPs
Both sides are irresistibly drawn into the battle, which is what the Welsh wanted.

More units move into combat, but a major part of the Welsh warband is stuck behined their cavalry.
The mixed melee is clearly evident.
Units move into the woods but are unable to see each other. The Irish Companions and support start to make a dangerous flanking move...


Turn 7 Welsh - 9 LPs Irish - 6 LPs
The Welsh cavalry finally manage to charge, but it is still hard to bring units to bear where they are needed. The first losses happen, with the Irish losing 2 units to the Welsh 1, all being skirmish units.

The Monks have advanced but 3 units of the Welsh left flank simply cannot find a way into the melee.
Battle rages in the woods, but the Welsh are able to use their extra Leadership points to their advantage.


Turn 8 Welsh - 8 LPs Irish - 4 LPs
The loss of 2 units really hurts the Irish cause, as the Welsh now have a 2:1 advantage in Leadership points, allowing them to dominate the combat.

Despite still not being able get 3 units into combat, the Welsh certinaly have the upper hand.


Turn 9 Welsh - 8 LPs Irish - 4 LPs
The Welsh pressure finally tells as the Irish lose a Warrior and Cavalry unit. This much surely spell the beginning of the end for the Irish...

The Irish are under pressure all across the battle lines.


Turns 10-11 Welsh - 8 LPs Irish - 2 LPs
The Irish manage to hang on in Turn 10, but in Turn 11 they lose more units, causing them to automatically break.

The Irish under severe pressure on the left of the woods...
... that proves too much in Turn 11, handing the game to the Welsh.


Post Game Thoughts
As always another entertaining game of Dux Bellorum. So as usual some post-game thoughts:
  • This was always going to be a hard game for the Irish, but especially off the back of two successive losses and the advantages that that had given the Welsh.
  • Dave's tactics were spot on in trying to avoid combat as long as possible. However some failed Bravery rolls put pay to his plans early on, allowing the Welsh to force the Irish into combat.
  • We thought that the ability of the Agressor to swap two pairs of units a bit harsh, so we reduced this to just two units. However, this really hampered Dave, so in future games I may ditch this (but see below re: LPs).
  • One thing that has really stood out in this mini-campaign is the advantage that having 3 extra LPs has given the Welsh. At the start I didn't think this would be such a game changer. How wrong could I be. Originally I was going to take 'Stampede', but Dave chose this along with 'Wardogs'. This only left my with my unit of 'Monks', so I chose these plus another point of leadership just to see how it played. Well, it really handed the Welsh a massive advantage, which only became obvious having played so many games. This may be due to the fact that we played with 32 points plus 5 points of Strategies & Tactics, just for the fun of having plenty of choices. However this is something to bear in mind for future games.
Well, for our final game we have settled upon the 'Bard's Tale' for a suitably fitting and bloody climax to the campaign. Both sides will only have 32 points and no S&Ts, so I imagine it will be a fast and brutal game, which should be great fun. Now I just have to paint up a Bard figure in time for next week.


Post game thought

Tuesday, 3 March 2015

Dux Bellorum Blunders Table

During our current campaign, Dave suggested we try using the Blitzkreig Commander II blunder table, rather than the 'lose 1 point of cohesion' suggestion from the rulebook. Now I love this blunder table as it can really add spice to a game. Ask my friend and regular gaming chum Craig, who has a tendency to explore all the options of this table! So I thought I'd give it a go and after a few tries, I came up with the following table.

When a Blunder occurs, roll 2 D6 and refer to the table below for the result:
 
2 -  Roll 1 D3 and the Bravery of the unit or group is reduced by this amount for the next turn.
3 - The Bravery of the unit or group is reduced by 1 for this turn and next turn.
4 - The unit or group makes one half base width move directly towards its own baseline.
5 - The unit nearest to the enemy loses 1 point of cohesion. If there are several unit that qualify, randomly roll to see which one it is. The loss of the point of cohesion may lead to the loss of the unit.
6 - The unit or group makes 1 half base width move directly towards the nearest enemy unit. If this brings a Warrior unit to within 1 base width of the enemy, they must charge into contact as if using the uncontrolled charge rule.
7 - The Companions unit makes 1 base width move directly towards their own baseline.
8 - The unit or group makes 1 base width move directly towards the nearest enemy unit. If this brings a Warrior unit to within 1 base width of the enemy, they must charge into contact as if using the uncontrolled charge rule.
9 - The unit nearest to the enemy loses 2 points of cohesion. If there are several unit that qualify, randomly roll to see which one it is. The loss of the 2 points of cohesion may lead to the loss of the unit.
10 - The unit or group makes 1 base width move directly towards their own baseline.
11 - The Companions unit Bravery is reduced by 2 for this turn and the next turn.
12 - Roll 1 D3 and the Bravery of the unit or group is reduced by this amount for the rest of the game.

It is up to the player whether to include a whole group in the result of the blunder, or just one unit. The former may seem a bit harsh whilst the latter may break up the group as a result of movement or loss. Just play what feels right for you. After all it is only a game.

So there you have it. I hope the above may be of interest to you. In the last game my Monks blundered, rolling a 5 which led to the loss of a unit of skirmishers as they already had lost 1 point of cohesion. As a result my left flank was exposed, but it caused much hilarity for both myself and for Dave.

If you have any thoughts, comments or suggestions on the above, I'd love to hear them.

Sunday, 1 March 2015

River Battle - Campaign Game 2

For the second game of our Dux Bellorum campaign, Dave and I decided upon the 'River Battle scenario from the rulebook, details of which can be found below:

Scenario - River Battle
  • Details as per the scenario on p58.
  • Deployment as per p18.
  • The River was not classed as deep, thus allowing for a more fluid battle.
For this game Dave decided, rather reluctantly, to drop the Killer Sheep and Wardogs, opting wisely to spend his 4 S&T points on an extra 2 points of Leadership. Having seen the effects in previous games, this almost gave the Irish parity with the Welsh. 
 
Deployment

Both sides deployed for battle.
The Irish have their skirmishers in the woods on their right flank, with a large cavalry force on their left.
The Welsh have skirmishers on both flanks and the Monks in the centre for divine intervention.

 
Turn 1 Irish - 8 LPs Welsh - 9 LPs
The Irish were the Agressors and got off to a good start, with all units moving bar the cavalry, which Dave had declared as his strategic reserve. Obviously they thought that being in reserve meant that they shouldn't move! For the Welsh the pattern was similar, except that the Monks remained praying at the foot of the wonderous cross.

The Irish skirmishers push on through the woods, to try and turn the Welsh left flank. In response the Welsh sent a lone skirmishers unit to try and slow them down.


Turn 2 Irish - 8 LPs Welsh - 9 LPs
In essence a repeat of Turn 1, with the Irish cavalry and Welsh Monks refusing to move, leaving both of us cursing said units.

The Irish line holds its shape, whilst the Welsh one breaks up to deal with the developing threat to its left flank.
The Irish horse in the background are not playing ball, whilst the Irish skirmishers are really disrupting the Welsh line, just by their presence.


Turn 3 Irish - 8 LPs Welsh - 9 LPs
Things really hotted up in this turn. The Irish horse had obviously been lulling the Welsh into a false sense of security, as they rolled a double 1, promptly charging right across the river into the Welsh horse. Shooting by the skirmishers was ineffective on both sides. However a mass of uncontrolled charges erupted from both lines, the result of which was the loss of 2 Irish Noble units with the Welsh having sustained lots of hits, but no losses.

The Irish horse charge home.
Battle is suddenly joined.
Leadership points are carefully placed.
The Welsh sustain lots of hits, but crucially are in a position to turn the Irish left flank.


Turn 4 Irish - 6 LPs Welsh - 9 LPs
The battle continues to rage, with the Irish turning in on the Welsh left flank, but critcally the Welsh have turned the Irish left flank, with the Irish losing another unit.

The centre generally holds, bit both flanks are being threatened.
The Welsh left flank manages to hold, but the Irish one has been turned. The Irish horse have been unable to destroy their Welsh counterparts and are now threated to the flank and rear by Welsh foot units.


Turn 5 Irish - 5 LPs Welsh - 9 LPs
The battle reached its bloody climax, with boths sides taking significant losses. The Welsh Monks kick things off with a blunder, resulting in the loss of a skirmish unit on the left flank. In the cavalry clash, both sides lose a unit of horse. The slow attrition that the Welsh have suffered in previous turns finally tells, with them losing 3 units to the Irish 1. 

This put both sides on a break test, which the Irish failed and the Welsh managed to pass.

The bloody end...
...with the Welsh just managing to hang on.


Post Game Thoughts 
Once again another great game, that could have gone either way at the end, even with the possibility of both sides routing off the table. So as always a few post game thoughts:
  • Not having the river classed as deep made for a much more enjoyable game. It allowed both sides freedom of manouevre, but still restricted the horse units.
  • Not having a hill made the game more fluid, as neither of us were fixated upon one piece of terrain.
  • Leadership points are proving to be the most useful thing as far as Strategy and Tactics are concerned. Once you start to get behind on these, it is very hard to come back in the game as the opponent can dominate the combat area.
  • Lose a flank and you lose the game. A simplistic view but the loss of the flank tends to be critical, unless you can realign quickly.
  • Again I had one turn, Turn 3,  of some very lucky die rolls, leading to the loss of 2 Irish Noble units. Dave on the other hand had poor die rolls in his cavalry charge in the same Turn. If I had lost my cavalry, his horse could have rampaged into the Welsh rear, which would have greatly affected the outcome of the game. On such little things do games turn upon.
So with another Welsh win, the next game will be 'Dawn Attack', which should favour my Welsh as not only will I have more points to play with, but the Irish will only have 1 leadership point on Turn 1, 2 on Turn 2 etc. Dave will also only have 3 S&T to play with, so has decided to call upon his wardogs again.

Things are moving nicely towards a natural finish for this campaign, after which we are most likely to move onto Black Powder in some form or other.

Tuesday, 24 February 2015

Modern Skirmish Gaming

After an enforced break caused by the usual clashes of work or family commitments, my regular gaming partner Craig and I were finally able to meet up for a game. We decided upon a game set in his fictional African country of N'Bote using the recently published free rules from Spectre Miniatures. I had played the Beta rules before and since then they have undergone quite a re-write according to Craig. They were fun to play first time round but lacked a certain something as I won the game easily without really having to do anything. So I approached the game with an open mind. As usual Craig had set up a lovely table with plenty of cover, but as I took the camera out the batteries died on me. Fortunately Craig has put up an AAR on his Blog, so you can see how the game unfolded there.

So how did I find the game? Well it was very easy to pick up again and had certainly improved over the last game. As usual we made a few mistakes with the rules, which in retrospect favoured my Militia forces. This did not take anything away from the game which had a certain cinematic feel about it, but with plenty of challenges for both sides in how best to use their troops. Actually having a printed rulebook to hand rather than a pdf. on a tablet etc made a huge difference as we were both able to read the rules at the same time as we went along. We both felt that the lack of spotting rules needed to be addressed, but some house rules should easily work to fix this. All-in-all a nice little ruleset that gives a fun and action packed game without constant reference to tables or the need to different die etc. I'd highly recommend that you download the free rules from the Spectre Miniatures website and have a look for your selves.

Post game Craig and I had our usual chat and one topic that cropped up was the current number of rulesets that deal with modern skirmish wargaming, mainly set in Iraq and Afghanistan. Now neither of these settings appeal to me, probably because the conflicts are too current for my taste and in game terms I don't find the scenarios that interesting. We both tried 'Ambush Alley' a few years ago and despite the rules being beautifully presented, they were awful to play and the scenarios varied in quality to say the least.

I've heard of 'Skirmish Sangin' by RadioDishDash, but as mentioned the setting doesn't float my boat. I invested in 'No End In Sight' by Nordic Weasel Games late last year as they seemed an interesting set of rules but importantly come with a very well thought out campaign system. Currently I enjoy playing linked narrative campaigns, either solo or as with Craig's N'Bote one, dipping in and out as time permits. I believe Craig is using this system for his campaign, but stand to be corrected.

I must be honest and find current African conflicts a little too close to home, given that I have a Nigerian wife, have lived in Nigeria and the current Boko Haram attacks have been rather too close for comfort at times to my in-laws. However I find Craig's setting to be one that I'm comfortable with and more convential as it were, without suicide bombers and IEDs, so something that would have happened in the '80s and '90s. Now these conflicts were brutal at times, make no mistake about it, but for me they are a period and setting that I'm comfortable to game. So much so that earlier in the year I bought some SAS and British Regulars from Empress Miniatures with the aim of joining in with the N'Bote campaign. I'm extremely tempted to buy some Militia as well but in all honesty I know that I simply won't have time to paint them.

I have yet to have a game of No End In Sight or have a proper read through of the rules, but from a quick glance they do look rather good. Of course the proof of the pudding will be in the eating. Either way, it is nice to have found what look like two good, if rather different rules sets for Modern skirmish wargames, not something I had been expecting to play this year to be honest. But then unexpected 'finds' such as this are one of the pleasures of this hobby of ours.

Friday, 13 February 2015

Annals Battle - Campaign Game 1

Dave Fielder and I have been playing some trial games of Dux Bellorum of late, as we awaited the arrival of his rulebook. Fortunately this arrived at the weekend, finally allowing Dave to tweak his warband to suit his playing style and also to get to grips with the nuances of the rules etc. So after a slight delay caused by Amazon free delivery, we were in a position to start our narrative campaign.

To make things easy and to fit in with the start of the campaign, we went for a straightforward Annals battle as per the rulebook. Both sides had 32 points to choose their warbands from plus up to 5 points of Strategies & Tactics. We diced to see who would be the Agressor, with my Welsh winning this and so Dave as Repellor chose the terrain, which can be seen below.

The three pieces were the hill, woods and small village. The fields etc are purely for decoration; afterall we all like to play on a nice table don't we?


Warbands
In the end both our warbands were very similar in style and feel, with details below:

Irish
1 x Companions
3 x Noble Warriors
3 x Ordinary Warriors
2 x Ordinary Riders
2 x Sling Skimishers
1 x Wardogs
1 x Stampede

Welsh
1 x Companions
2 x Noble Warriors
4 x Ordinary Warriors
1 x ordinary Riders
1 x Bow Skirmishers
1 x Javelin Skirmishers
1 x Monks
1 x +1 Leadership Point

The Irish deployed for battle, with skirmish units on both flanks and the cavalry on the left flank.
The Welsh in a similar deployment, with the Monks in the centre to make sure they were in 'range' as much as possible for their leadership points and the cavalry on the right flank.


Turn 1 Irish - 6 LPs Welsh - 9 LPs
Both sides managed to advance all of their units, with the Irish skirmishers on the elft flank rolling a double 1, thus allowing them to advance into the village.


The skirmishers on both flanks advance as quickly as possible to try and gain any advantage of cover offered by the village and woods.


Turn 2 Irish - 6 LPs Welsh - 9 LPs
The 'Killer' sheep failed their command roll, thus disrupting the Irish left flanks slightly. For the Welsh the Monks failed, which had the potential to disrupt their advance as well. All other units were keen to come to the 'party'.

Both battle lines start to fragment.


Turn 3 Irish - 6 LPs Welsh - 9 LPs
Once again the Monks faith in the divine rightousness of their cause failed them as they stayed rooted to the spot and prayed for deliverance from the Heathen Irish. Everyone else was happy to move towards each other.

The battle lines draw ever closer, with Irish skirmishers on the edge of the village and Welsh skirmishers in the woods.

The Monks possibly wisely praying hard for Divine assistance...

 
Turn 4 Irish - 6 LPs Welsh - 9 LPs
Combat was finally joined as the 'Killer' sheep lured the Welsh Nobles into an uncontrolled charge, seeing the demise of the sheep and once again another 2 points of cohesion lost as the Nobles gathered themselves together after their little 'dalliance'. The Irish skirmishers in the village decided to advance out of it, only to be charged by the Welsh riders who made short work of them. On the Irish right flank, the skirmishers got a double 1 and advanced through the weekds to threaten the Welsh rear. Fortunately a unit of Welsh warriors managed to engage them ,but failed to destroy them due to poor die rolling.


Battle finally joined across the board.

The Welsh battle line is badly disjointed, unlike the Irish one...

Turn 5 Irish - 5 LPs Welsh - 9 LPs
Right across the board combat was joined, mainly due to a rash of uncontrolled charges, but nearly all the combats were drawn. However the Irish lost the skirmishers on their right flank, causing another Leadership point to be lost.


Both sides battlelines are by now badly fragmented, with the Welsh in a worse postion but with more leadership pointes to play with.

The battles on the flank could be decisive for the game, plus could the lone unit of Welsh warriors on the hill hold out against the Irish Nobles and their support unit? If they lost, the Welsh right flank would be very exposed...

Turn 6 Irish 4 - LPs Welsh 9 - LPs 
The Welsh still had their pool of leadership points intact, which started to make a difference, as they could place them where it mattered most, whilst the Irish had to husband theirs. In combat, the Irish lost a cavalry unit, whilst the Welsh lost a unit of Warriors and skirmishers.


Somehow the Welsh warriors still held on on the hill, helping to protect the Welsh right flank. Elswhere things were tooing and froing across the board.

Turn 7 Irish 3 - LPs Welsh 7 - LPs 
The Welsh right flank saw the most action, with the Welsh warriors finally succumbing on the hill, but not before the Irish had lost their final cavalry unit and their wardogs.


The Monks prayers appeared to have paid off as things appeared to be going well for the Welsh...


Turn 8 Irish 1 - LP Welsh  - 6LPs
The Irish lost another ordinary warrior unit which put them on a break test, which they passed with ease. However they had no Leadership points left for the next Turn plus they were starting to be outnumbered where it mattered.

Turn 9 Irish 0 - LPs Welsh 6 - LPs
In the end the difference in Leadership points finally told, as the Irish lost two more units and then automatically borke as they had reached 75% losses.

With only two units left, the Irish unsuprisingly broke and took to the hills.

Post Game Thoughts
In the end an absolutely cracking game! With Dave having the rulebook in advance his warband was much more balanced and fitted his gaming style perfectly. We both thought it would finish around Turns 5 or 6, given our previous games, but we were both suprised it lasted as long as it did. We lost track of time as it was such an absorbing game, only being brought back to our senses as my Son came down to inform me it was time for bed! So as always some post game musings:
  • Warrior warbands are great fun to play as their 'uncontrolled charge' means that battle is joined quickly. 
  • Dave wisely used his skirmishers, wardogs and sheep to try and break up my battle lines, which they did. However the Irish skirmishers advancing out of the village unsupported probably cost him his left flank in the end.
  • Stampede is a favourite S&T of both of us, is fun to play and my 'killer' sheep just look great on the table. Dave is now off to try and track down some 10mm geese so that he can have his 'Wild Geese' unit to go up against my sheep.
  • Wardogs are very, very useful as they act like skirmishers but pack quite a punch. A unit definitely to be aware of in the future.
  • Monks are damned useful with their extra 2 LPs for units within 5 base widths. The only downside is that they have a Bravery of 6 and only move 1 base width per Turn. Great for the Repellor, potentially a dead weight for the Agressor. 
  • Skirmishers a perfect for attacking units in the flank or rear, if you can get them round far enough that is. Backed up by some cavalry and they are even more useful
  • I had not spotted that units charging into the flank or rear get an extra two die to roll in attack!!! I knew about units fighting to their flank or rear losing two die to their rolls. So given the point about skirmishers above, attacking a lone unit in the flank or rear makes them potentially very dangerous indeed. Skirmishing cavalry could be even more of a threat but I need to read up on these more as I haven't used them.
So depending upon family commitments over half-term, our next game will be next week. In campaign terms the Irish have only 4 points to spend on S&T, whilst the Welsh have the full 5 points. So the Irish will be at a bit of a disadvantage, but how much remains to be seen. In the mean time lets hope Dave finds his geese and he is also on the lookout for a Celtic cross for a unit of Irish Monks...

Sunday, 8 February 2015

Dux Bellorum Campaign Game 2 - The Battle on the Via Julian

The following is an account of the second battle in my solo Dux Bellorum campaign game.  
The Keynsham Chronicle
Many brave warriors fell at Bassa's Ford, their shields splintered, their armour rent and their ash shafts broken. Our Noble Tiern Cynwyl Cadarn vowed to avenge them and stood firm on the Via Julian, steadfast in his resolve to halt the pagan Hrothgar and send him and his men to back the whence they came or to hell, whichever they would prefer...
 
OOB
Welsh
1 x Companions
1 x Nobles Warriors
2 x Ordinary (foot) Warriors
1 x Ordinary (mounted) Warriors
2 x Bow Skirmishers
1 x Monks

Saxons
1 x Companions
4 x Noble Warriors
2 x Ordinary Warriors
1 x Bow Skirmishers
1 x Javelin Skirmishers
1 x Wardogs

Scenario 11 - The Roman Road
Agressor
Agressor 33 pts plus one free Strategy & Tactics up to 3 pts.
Agressor deploys on the road up to the half way point. The objective is to get as many units off the opposite board edge as possible. One unit of skirmishers may deploy off the road up to the half way point.

Repellor
Repellor 21 pts plus one free Strategy & Tactics up to 3 pts.
Repellor deploys up to 6" in from his board edge. One unit may be deployed in ambush in either the village or behind the ford.

Deployment

The Saxons advance down the road towards the Welsh warband deployed blocking the road.
With so few troops, the Welsh deployed with skirmishers on both flanks, with the Companions in reserve. The Monks would add much need spiritual resolve and leadership points where required.
The Saxons had their skirmishers in front with the wardogs on the left flank.
"Away Shep!" Jan Nokes and his dogs ready for battle.
The Welsh placed a mounted unit of Ordinary Warriors in an ambush position behind the ford.


Turn 1 Saxons - 6 LP Welsh - 8 LP
The Saxons got off to what seemed to be a bad start as their wardogs blundered, but the Gods were obviously with them as they retreated back towards their table edge, to be in a perfect position to possibly counter the Welsh ambush unit. The rest of the Saxons advanced as best they could, determined to brush aside the Welsh roadblock.

The Welsh for their part moved forward to engage the Saxons as quickly as possible, except the Companions who failed their roll, leaving their line badly fragmented. 

Both sides advance as quickly as they can.
'Shep' doesn't want to play ball, but the Welsh riders are out of charge range so advance into the long grass instead.


Turn 2 Saxons - 6LP Welsh 8 - LP
The Saxon skirmishers deployed to the flanks and Shep and Co decided to come back and play ball with the others. The Saxons in the centre deployed into a battle line with a small reserve kept to the rear.

On the Saxon left flank the Welsh cavalry rolled a Double 1 and so moved to attack the Saxon skirmishers, only to be charged by Saxon warriors in turn who were also charged by Welsh warriors. This proved to be a costly mistake as although the Saxon skirmishers were destroyed, so were the Welsh riders. However the Saxons took 3 hitys and were pushed back by the Welsh who followed up.

On the Saxon right flank the Welsh charged the Saxon skirmishers who had advanced too far and were destroyed, but at least they caused 1 hit on the Welsh unit. However the road was open to a determined advance by the Saxons...

Battle is joined on both flanks.
Both sides clash on the flanks...
... with losses on both sides. The Saxon left flank doesn't have much to stop its advance, talk less of the centre.


Turn 3 Saxons - 4LP Welsh - 8LP
With both warbands so close to each other, their were lots of uncontrolled charges with some advances by skirmishers from both sides.

Battle is fully joined, although the Saxons still have a good reserve force in the centre.
Despite being outnumbered, the Welsh bravely attack...
... seeing the Saxon left flank unit destroyed and pushing back the Saxon right flank.. However the Saxon reserve is yet to be commited.


Turn 4 Saxons - 3LP Welsh - 7LP
With the Saxons now on only 3LPs, would this hamper their attacks or their ability to soak up hits? The Welsh archers manage to score a hit on the Saxon Companions, causing them to use their sole LP to soak up the hit. With both sides engaged in combat, there was some movement as other units joined the fray.

'Shep' and the Saxon reserve join the battle on their left flank.
'Shep' sees off the Welsh skirmishers and the Welsh warriors on the Saxon left flank are pushed back. In the centre the Welsh manage to push back the Saxons, whilst on the right flank the Welsh destroy a unit of Saxons and nearly a unit of Nobles.


Turn 5 Saxons - 3LP Welsh - 5LP
Only 'Shep' is able to move as all other combats stay locked. A potentially crucial turn as the Welsh are close to their breakpoint.

No finesse in trying to move round the road block, the Saxons are simply happy to try and smash their way through.
The Saxon left flank is open as they finish off a unit of Welsh warriors, putting the Welsh on a break test. The Welsh Companions in turn destroy a Saxon unit, but the Saxons are still some way off their breaktest.
With the breakpoint reached, the Monks promptly fail their Bravery roll and flee the table, putting the Welsh at 75% losses and therefore automatically breaking. Given the Welsh had so few units left on the table and would be unable to prevent the Saxons leaving the table, the Welsh would have conceded the game anyway.

Conclusions
Well to be honest I was suprised that the Welsh managed to hold out for as long as they did, given they were so outnumbered.So as always a few post game thoughts:
  • Using the 'Hail Caesar' blunder table  is fun and adds more uncertainty to the game.
  • Monks are very useful for the Repellor with their 2 LPs as they have to move very little and so their low Bravery roll isn't really an issue.
  • Wardogs are fun but due to the blunder I didn't get to use them as much as I'd hoped. However as with my 'Sheep', 'Shep' & Co are great fun to have on the table.
  • Moving the Welsh riders too soon into battle cost them in the first turn of combat. I didn't think that they would be counter charged by the Saxons warriors. I know next time to be more careful before commiting them to combat.
  • The game could have had a very different outcome if the Welsh had managed to finish off the Saxon Nobles on the Saxon right flank. This would have allowed them to turn into the centre and potentially roll up the whole Saxon line.
Next Game 
Depsite the Welsh losses, I decided that the Saxons won a close run victory, so in the next game which will be 'Cattle Raid', the Welsh will have 30LPs and the Saxons 34LPs. Due to the nature of the scenario, the Welsh cavalry might come in useful to head off the Saxons and the cattle they are trying to steal. I've plenty of time to ponder things before the next game though.