Sunday, 30 April 2023

Napoleonics

Whilst my gaming and painting mojo has been severely lacking of late, at least I have still been enjoying the hobby by reading books, which I have always loved. With rather poor weather to put it mildly for the past two months, I have been racking up the pages read each day. Come the afternoon however,  I like to spend an hour or so watching tv as a bit of 'me time' before SWMBO returns from work. Nothing in particular and much depends upon what takes my fancy that day.

So a few days ago I was watching Youtube (hedonist I know!) and browsing through the Little Wars TV and alighted upon a few of their Napoleonic episodes, which piqued my interest. This coincided with a few fellow Bloggers putting up some Nappies posts, so I dug out a few books to browse and my interest in this period was re-kindled. Rather nice to have a bit of a 'spark' again after a rather fallow spell.

Now the only downside of Nappies from my perspective, aside from which rules to use, the column vs line debates, the uniform police etc, is really which Armies to go and which campaign? In contrast the Seven Years War is so easy in comparison. The LWTV chaps have a nice little piece on starting out which I found rather helpful as a guide, but it got me no further forward, but 'tis early days still. 

So whilst pondering whether to go for 1813-1815 Prussians (lots of interesting uniforms and troops types) or the Peninsula War (somewhat done to death this side of the pond but again lots of choice) I decided to actually get my butt in gear in play a game whilst this played out in my subconscious. I chose  a simple scenario that Norm Smith had put together to kick things off to get me back into the swing of things with Shadow of the Eagles, the excellent rules from my good friend Keith Flint. The game was set up last night and in a quiet moment this morning I actually got to roll some dice, which was great!


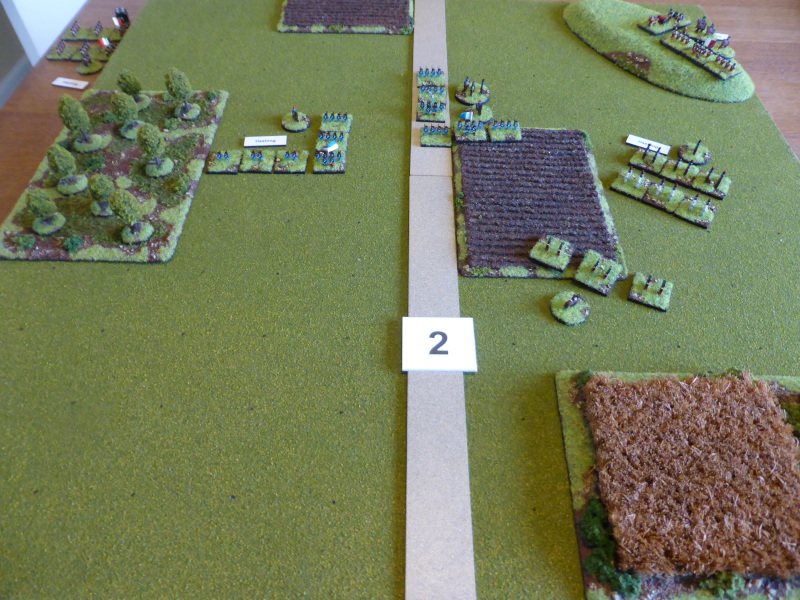
The Prussians are defending a small village with the French preparing to attack.

The Prussians line the edge of the village, which should prove to be a good defensive position.

Artillery cover the road and troops line the hedges.

The French come on in Column of Attack with a skirmish screen out in front.

The Skirmish Screen closes.

Firing erupts across the front.

Things are fairly equal on the right flank.

The same on the left flank.

Things quickly change and the French begin to suffer.

The French continue to suffer from Prussian firing, but dish out some punishment back.

A French unit routs and the commander is killed in the process.

The French right is on a parlous state, due to some excellent Prussian musketry.

It's all up for the French as...

...another unit Routs.

The Prussians pulled back from the hedge to help recover some hits and to avoid French fire.


Post Game Thoughts
It was great to get a quick little game in to get to grips with the rules and the period again after so long. All-in-all it probably took less than an hour to play. A few thoughts on the game:
  • This is a perfect little tester scenario that Norm has created, with not too many nor types of unit, which speeded things up.
  • I thing the new skirmish rules are a big improvement on what is in the book. I want to try a Light Battalion in the next game to see how they play compared to Skirmish Screens. The only thing I wasn't sure about was when shooting at the Skirmish Screen, whether those hits count towards the unit as a whole. I re-reading of the book will probably provide the answer I need.
  • The BUA proved to help the defenders due to the -1 to hit, which certainly helped. 
  • Both sides had above average shooting, with the Prussians edging it allowing them to get the upper hand. Even the Inferior Landwehr got the better of the French!
  • Both sides made good use of Morale Saves to reduce hits, with honours pretty even.

What next? Well a few more games to get the basics sorted is the plan, alongside adding in a few more unit types and maybe an all Cavalry action to try charges etc. Then of course there is the question of do I add to the lead mountain with two new forces or just carry on with my MDF figures? Certainly the latter for the moment given my other projects, but I can see some purchases in the future, once I can decide upon a campaign and force to fight the French.


Wednesday, 26 April 2023

Blogger Issues

For some reason unkown to Man, Blogger has been doing some weird things of late. Specifically random replies to my posts appearing in my Spam folder, whether from myself or not, years after they have been 'posted'. Today was the best yet in a comment from myself counting as Spam and from 6 years ago! I kid you not.

So apologies to those of you have have been kind enough to reply in the past and maybe have been a tad miffed that I did not comment on your replies. I most certainly would have but Blogger in its infinite wisdom decided not to publish, until some random date and time way after the event.

Another issue that is new to me is that some of my comments on other Blogs are going straight to the Spam folder. I know I have this issue with a few regular Followers on my Blog, despite repeated efforts to say they are not Spam, but it's a first for me as far as I know. So given this is not isolated to myself and my Blog, maybe it is worth checking your Spam folder under the Comments section?

Tuesday, 25 April 2023

Warning Order #62

The latest issue of the ever excellent Warning Order magazine is now available for downloading. I always enjoy perusing what Matt has to say and being of a similar age, sometimes it is quite a trip down memory lane. 

Last issue Matt asked for some feedback on playing BKCIV games and how others go about it. I contacted him and gave him my thoughts and how I approach things etc. Fortunately for me he found this interesting and useful and, as a result, published it in this edition!

Right, off to have more of a gander on what else is in this issue.

Friday, 14 April 2023

Fall Rot - France 1940

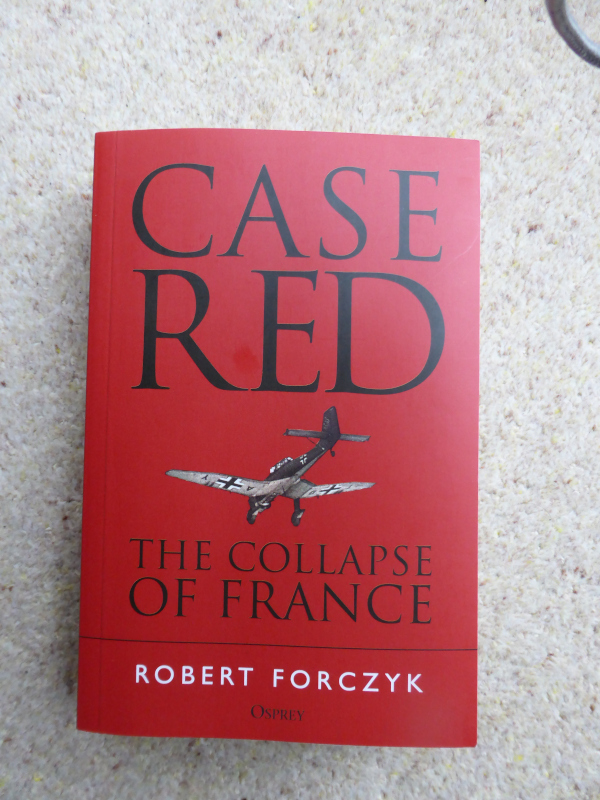
Progress on my France 1940 campaign has come to a halt of late, due to focussing on the planned HEIC game for the CWD. Sadly I can't multi-task! However all is not lost on this front as I recently received a nice Amazon voucher as a 'thankyou' for the volunteer work I do and after som epondering of what to buy, remembered the following book:


I really enjoyed his 'Case White' book on the Polish campaign and after reading the contents and reviews of 'Case Red', was happy to see that it covered (naturally) the post Dunkirk phase of the campaign, but also other parts that are not often covered. I place the order and within a few days I received my copy and have been reading it ever since!

Some Thoughts
In short if you are interested in the French campaign, you really should buy this book! I've learnt an awful lot already and still have not finished. A few points that I think are interesting:
  • It covers the inter-war period of all sides involved in the campaign, which provides a really good background for what follows.
  • Whilst not in much detail, it does cover what happened in Holland and Belgium, with the latter getting more pages. It does highlight that the Belgium 'collapse' really did unhinge the French and British positions, maybe more so than the breakthrough at Sedan.
  • This is the only book I've read so far that does explain in great detail what happened to the French Airforce and why they had a limited effect upon the campaign.
  • Logistics for all sides are shown to have had a big impact on how the campaign was conducted, especially before Fall Rot kicked off. Again not something that gets the coverage it deserves.
  • The French are given more credit than they normally receive, but it does not shy away from highlighting their deficencies in C&C. Whilst they had good troops, tanks etc and on the face of it a good strategy, their ability to actually implement this was severely hampered by logistical issues. I certainly have a great appreciation of the French efforts now that before.
BKCII French Force
I've had a core French force based up for BKCII for more years than I care to remember! Now I want to resurrect this 'project' and need to dig out the box and see exactly what I have and what I might need to add to. The following GHQ models page has some really useful info that is easy to convert to OOB for BKCII. When I get round to this I've no idea given current commitments for the CWD and the start of the French campaign I've got planned. However I do know I will probably require at least a Company of infantry and some tanks, so hopefully something will appear off the painting table in due course.

Kos & Leros 1943
At the same time I bought the Osprey book on this little invasion as it's something I want to game in the next year or two, but like so many things, so many ideas, so little time!


So until next time, TTFN.


It Was Just My ImagiNations (Running Away With Me)

As mentioned previously, I have been tempted down the path of some forces for use in 18thC India, pitting the HEIC against the French and various local rulers etc. It certainly is a fascinating period to game, although many of the battles can hardly be called that until towards the end of the 1790's. Still plenty on offer for modest games, which suits me down to the ground.

CWD & India 18thC
With the above in mind, I popped a mail to Dave mooting the possibility of doing 'something' set in India for the Cotswold wargames Day and using Honours of War for the rules. Dave was on board from the off and since then we have been toying with ideas for forces, tweaks to the rules etc. It has certainly been lots of fun and has taken up most of my gaming time of late, so I thought I'd give a bit of an update of the state of play as it stands.

HEIC OOB c1750's
My force will nominally be based upon the HEIC and their local Allies, which currently equates to:

2 x British Line infantry (Superior)
2 x HEIC Troops (Standard)
4 x HEIC Sepoys (Standard)
4 x Irregular Light Infantry (Inferior)
4 x Irregular Light Cavalry (Inferior)
3 x Artillery (Standard)
2 x Allied Artillery (Inferior)
2 x Zumbarak (Inferior Artillery)

This is all very much a work in progress at present, with some playtesting required to make sure things work out as planned. So the below image is off most of the core force, bar some elephants, camels and heavy artillery. I want to make sure I have everything based and finished before I start painting. I still have a few more units to go, but at least I have everything to hand that I need, famous last words!

That's a lot of miniatures to paint, but will help focus my efforts.


ImagiNations in General
Over the past few years, I have really embraced the whole concept of ImagiNations for a multitude of reasons. I love the ability to create some background 'fluff' for your force, but anchored in a plausible historical context. Then of course there is the fun of getting together figures that you like to create your force, as well as naming them, uniforms colours and flags etc. It would be remiss of me not to admit the attraction of less units to buy, paint and store, with say a core 18thC force being able to fight in America, Europe and India.

So whilst working my way through the HEIC force, I thought that the figures I'm using for the Allies, which are Pendraken 16thC Ottomans, could very easily with a few additions make a nice little force for some games set in Europe. This is something for the future but has certainly make me ponder on what else I might need to flesh them out so to speak.

Russia in the ACW
When I have my evening meal I like to listen to the radio and certainly Radio 4 has some great programmes on from 4.00pm onwards. Whilst listening to one of those, they mentioned a Russian 'colony' in northern California, namely Fort Ross and they briefly said that what might have happened if it hadn't been sold before the 1849 gold rush? This immediately pricked my ears up and I thought what a great setting for some 'what if?' games leading up to and during the ACW. Naturally this led to possible British involvement from Canada and possible German intervention based upon say and independent colony like Fort Ross. 

From such small acorns do mighty oaks grow and all that, so I've parked this for the moment to come back to in the future, but I can see plenty of opportunities here. Such is the attraction of ImagiNations!

Sunday, 26 March 2023

WRG Rules 1925 - 1950

Wargames Research Group wargames rules form a huge part of our hobby's history, whether you like the rules or not. As far as I know we never played them as kids and fortunately for me I'd left figure wargaming come the 1980's and so missed out on the apparently dreadful and incomprehensible offerings from that decade. I even tried the latest iteration of DBA some years ago and honestly the 'Barkerese' writing put me off from the start, despite the rules looking promising. 

I know some people still play the rules, especially DBA, and I've seen Blog posts where the Infantry & Armour 1925-1950 rules are in action and seeming to offer not too bad games. My good friend Keith Flint had even been tinkering with the rules and so when he invited me over for a game to test them out with his '39 Polish Campaign troops, it was too good an opportunity to pass up to see what they were like. He kindly sent over a draft copy in advance and answered a few queries I had, so I felt reasonably prepared for the game.


The rules in question. Like many publications from this era, somewhat Spartan in their production values when compared to todays offerings.


Scenario
Keith chose the scenario based upon one from one of the wargames magazines, which was set during the Napoleonic era, but transported to 1939 for our game. In essence the Germans are an advanced force tasked with clearing the woods so that the main Panzer force can follow on behind in relative safety.


Germans OOB - Elements of a Panzer Recce Battalion
Company HQ
1 x Combat Engineer platoon (trucks) + 75mm IG + MMG
1 x Kradschutzen platoon + 37mm ATG + MMG
2 x AFV recce sections each 1 x 234 6rad, 1 x 221
Mortar support (dct), 6 x 8cm mortars + MFO in 223
 
Panzer company to enter table move 7 or later. Should only have to drive along roads already cleared of enemy.
 
Poles OOB – Elements of a Cavalry Brigade
1 x Cavalry platoon + 37mm ATG + MMG
Recce section, 2 x Wz.29
Recce section x 2, each 1 x rifle group, 1 x rifle/lmg group
Tank platoon (3 x Ft-17)
Artillery support (gen) 4 x 75mm guns + AFO radio
2 mined road blocks
 
Deployment
Poles can deploy anywhere up to 4 feet from the eastern baseline, except the Ft-17s which arrive on turn 1 via the eastern road in column on a roll of 4+. If they fail, add one to the roll on each subsequent turn.
The Germans enter the table via either of the western roads on turn 1. Germans take first turn.

The Game
I took on the role of the brave Polish defenders, which is always fun for me, but sadly didn't have any of their wonderful tankettes to play with. I took a few photos during the game but not too many as we were somewhat engrossed in the action as well as talking about the rules, what worked, what might need tweaking etc.


An overview of the table from the Polish side.

A view from the German side.

Some of Keith's wonderful Polish figures and vehicles. It's been ages since I last played with these and I must say he does have a really lovely collection.

As the Germans advance up the road, a combination of artillery, armoured cars and anti-tank guns makes short work of the German AFV's. A good start for the Poles!

The burning Litko markers do look good, but not a view that will be appearing on the next Deutsche Wochenshau newsreel!

The German infantry take their time to progress either side of the road, wary of any potential Polish troops waiting in ambush.

The Polish armoured cars turn their attention to the other road and the German armoured cars advancing along it.

About midway through the game and a view from the German side.

The Germans are strung out along the road as they cautiously approach the ford, knowing the battle is raging to their left on the other side of the woods.

Poland's strategic reserve arrives...

Dismounted kradschutzetruppen push through the woods.

A Hs 123 (wonderful model and plane) arrives over the battlefield to provide the Germans with much needed support. Sadly the Polish airforce never quite made it.

German mortars begin to take a toll on the Polish Ft-17's.


End of Game
Time was against me and I had to leave befre we reached a conclusion, but the Polish certainly had caused many more casualties than they had taken, with the German troops still some distance away from being able to clear the road blocks to allow the German panzers to move forward.

Post Game Thoughts
As always it was great to see Keith again, to catch up and to have a FtF game after so long! I must say I do enjoy playing the Polish Campaign and I suppose I really should try and get my own figures at least based and primed, given that I now have enough painted Germans for them to fight. Just another thing to add to the list! So a few thoughts from the game etc:
  • Initially I thought that the Poles would have a really tough time stopping the Germans. The early artillery strikes on the German column that KO'd their AFV's made it a tough ask for the German left flank, which never really got going after that.
  • As Keith pointed out he had doubled the movement rates in his 'update' to the rules, but even so it took a long time for the infantry to get into action. I doubt the Poles would have had much to worry about if the original rates were used, as the German advance would have been glacial!
  • Using say BKC I think we would have reached a conclusion or at least come close to one after 8 Turns, which is what we managed to play. As with any rules, you need to get quite a few games under you belt to know what will make for a 'good scenario'. There was nothing wrong with this one for sure, but their is undoubtedly a learning curve to be had with these rules.
  • I must say I was pleasantly surprised at how well the rules played and hats off to Keith for making them much more accessible. He kindly loaned me a copy of the original rules and even after playing a game, I still struggled to understand and follow the rules as written
  • It's been many years since I've played 1:1 WWII rules, but these did feel as good as any I've played in the past. They certainly gave a game that felt right and plausible in the action and its outcomes. I certainly am looking forward to trying these rules again and may even give them a go using my 10mm figures.


And In Other News
Well Spring is upon us and even though the weather has been very hit and miss, I've been spending more time outdoors in the garden, but sadly not out on the bike nor on local walks. Hopefully the weather will steelt down soon so I can do the latter.

I have been in quite a good painting groove of late, working on my mid-19thC ImagiNations German force, which has been a real pleasure. I need to finish some Light Infantry and Artillery and then I will have enough for some Rebels & Patriots type or BPII. In a window in the weather I did manage to prime up a load of WWII German stuff and need to crack on with these too for my France 1940 Campaign. 

This Campaign hasn't kicked off yet as I simply haven't found a suitable time to actually get everything set up due to the usual demands of family life. I'm not sure when this might finally get onto the table but soon all being well.

Dave and I are putting on another game the Cotswold Wargames Day and this will be set in India during the middle of the 18thC. Still early days but forces are being worked upon and figure ranges being consulted. I need to find my existing 18thC box of figures to see what I have and what I need to order. I'm certainly looking forward to starting this project as it will be rather different from the norm and certainly exotic and colourful!

TTFN.


Thursday, 9 March 2023

OHW Scenario 13 - Escape

I've had this scenario prepared for quite sometime now, but just didn't feel in the mood to play it, given I was devoting most of my time to the France 1940 Campaign. However the weather put pay to any priming of troops for the campaign and with the weather set poor for at least a week, it seemed a good opportunity to get some games in.

We had about 2" of snow overnight which was not bad, but not too far away they had 6" - 8" on the tops of the Mendips. Far too cold for priming unfortunately.


Blue OOB
3 x Line Infantry
1 x Light Infantry
2 x Cavalry

Red OOB
3 x Line Infantry
2 x Light Infantry
1 x Artillery

Scenario Objectives
The Blue Force is returning after raiding Red territory, but is faced by a Red blocking force on the road. Blue is unaware the other Red units are close by.
Blue Force to exit 3 Units off the table.
Blue Force can only exit via the road at the Southern table edge.

The Game
As is my usual practice I got everything set up the night before so that I could make a leisurely start once the morning chores were out of the way. I had no fixed Turn limit in mind, but a maximum of 8 Turns felt right. I'll let the captioned photos tell the story of the game.

An overview of the baord, with the lone Red Light Infantry blocking the road.

Another Red Light Infantry unit would be able to arrive on Turn 6.

The Red flanking force to arrive on Turn 2, but with a Dithering commander. Fortunately I attached the CO before rolling for commander quality.

The other Red flanking force to arrive on Turn 4, but with a Dashing commander.

The Blue right flank had a Dashing commander, whilst the Centre was Dependable, but with the CO would count as Dashing.

The Blue left flank composed of their Cavalry and with a Dashing commander too.

The end of Turn 1. The Blue force didn't move too quickly, despite having Dashing commanders all round. The Red Light Infantry held their position.

The Blue Cavalry acting as flank protection whilst the Centre moved down the road.

On the right the Blue Light Infantry moved to screen the woods as they advanced.

The end of Turn 2. The Blue force moved more swiftly this Turn, forcing the Red Light Infantry to move towards the Cavalry to try and block a quick and easy escape route. The Red flank force appeared over the hill, but its shooting failed to hit its mark.

The Red Light Infantry feeling like King Cnut trying to stem the tide.

The Blue troops in the Centre get a surprise as shots whizz over and around them.

The end of Turn 3. The Blue Force deploys one Line Infantry unit to meet the threat to its flank, whilst all other units push forward as quickly as they can. The Red Light Infantry wisely retreat back to the road, trading space for time.

The Red Light Infantry hope they can hang on long enough for reinforcements to arrive.

The Blue Line Infantry unit take incoming fire but managed to rally a hit off to maintain reasonable combat effectiveness.

The end of Turn 4. The Blue Force continues to push forward to try and close with the Red Light Infantry blocking their escape route. As Red reinforcements arrive, the Blue Line Infantry in the Centre begin a fighting withdrawal.

Enemies to the right of me...

... enemies to the left.

Neither side can gain a decisive advantage, despite some good shooting.

Can the Red Line Infantry march quickly enough to prevent the Blue Force from escaping?

The end of Turn 5. The Blue Force closed in for what it hoped would be the kill on the Red Light Infantry, whilst the Blue Line Infantry continued their fighting withdrawal as the Red troops pushed forwad to help the beleagured unit on the road. 

Some how the Red Light Infantry just held on.

The Blue Line Infantry continue to hold back the Red Line Infantry.

Turn 6 and Der Hexenkessel. As the Blue Cavalry charges the Red Light Infantry, who manage to turn to face, the Red Light Infantry arrive to surprise the Blue Force. The fighting is confused with no real space for manouevre for the Blue Force as the Red Force closes in.

Can the Blue Cavalry sweep away the Red Light Infantry>

The Red Light Infantry appear in the flank of the Blue Line Infantry as Blue Light Infantry move to cover the Red Line Infantry who are advancing in Line.

The end of Turn 6. The Blue Cavalry make short work of the Red Light Infantry, opening up an avenue of retreat at last. The Red Infantry cannot quite get enough hits to force the Blue troops to rout, although one Blue Line Infantry unit does have to retreat to reform.

The Blue Line Infantry from the Centre that have been delaying the Red Force finally have to retreat to reform.

The road is now open, but can Blue take advantage of it?

The Red Light Infantry just fail to cause the Blue Line Infantry to fall back to reform.

The Red Force still pushing on hoping to stop the Blue Force.

End of Game
A close run thing but on Turn 7 Blue managed to extracate 3 units from the tightening noose and thereby gain victory, but most likely a Pyrrhic one at that.

Post Game Thoughts
Well that pretty much came down to the wire, something that I didn't expect around Turn 3, when I thought it was going to be a walk in the park for the Blue Force. How wrong one can be! It was great to get Honours of War onto the table after so long and as alway sit provided a very enjoyable game. As always some post-game thoughts in no particular order:
  • The random allocation of commander quality worked well and I prefer this to knowing in advance what they will be like. This also greatly adds to the fun of solo play.
  • As both sides had an above average amount of Dashing commanders, their faster movement on Admirable or Inspiring command rolls certainly helped the game move along at a fair old lick and neither side was too slow compared to the other. If say Blue had lots of Dithering and red Dashing, then it would have been a very different game.
  • The 2' x 2' table was a perfect size for HoW with its smaller movement compared to BPII. I deliberately wanted this more steady movement as I felt the generous movements rates of BPII would have unbalanced the game.
  • Once again the 3 base units helped give just enough space on the small table for some movement and manoeuvering.
  • Limiting the exit for the Blue Force to the road only gave the Red Force a fighting chance. If it had been anywhere along the Southern edge, then the Red Cavalry could have escaped very easily and likewise enough of the Blue Infantry. 
  • I could have had the Red Light Infantry move back early on to the road edge, but I wanted them to try and keep the Blue Force 'bottled up' for the Red flanking force that arrived on Turn 2 to have a chance to start making its presence felt. I think this approach worked well but could have been better if the Red shooting had been more effective at the start.
  • The Blue Cavalry could have charged the Red Light Infantry early on and would probably have either forced them to flee back of routed them in close combat. Either way they might have been able to clear the road sooner for the Blue Force.

This has been one of the better scenarios I've played, possibly due to the above that gave a good and balanced game. I think there is plenty of replay value in it to see how things might unfold taking the points above into account.

I don't have any other games planned just yet, but most likely another OHW scenario might make it to the table or a generic bigger scale one, depending upon time and motivation. I hope to get some more painting in, but this is most likely going to be on my mid-19thC ImagiNations troops given my priming issues due to the weather.

TTFN.