Monday 25 April 2022

The Battle for Madling, October 1753

In early April I was contacted by Chris Gregg to see if I fancied taking part in one of his big games that he puts on throughout the year. I had met Chris en passant as it were at the Cotswold Wargaming Day, but we'd never had the chance for a proper chat. I had always admired Chris' games on his Blog so lept at the chance to take part. 

Ken, who was organising the game for the weekend, sent through some lovely background info, to allow me to get an idea of the scenario, the background to the campaign etc. Just what one needed in advance of a game.

So a lovely Spring day dawned and armed with Chris' excellent directions, I set off into the heart of the Cotswolds. I eventually arrived after driving up hill and down dale and through some very narrow roads to a most enchanting village and to Chris and Jane's house. I was met by Chris who showed me around and after meeting the other gamers, I popped outside to drink in the most stunning views from their garden. Jane is a keen gardner too, so frankly I could have sat there all day chatting with her, but my presence was needed in the games room!

Scenario Background
The Elector's army has made some recent territorial games at the expense of the Grand Duchy, but this has been harder than expected, with the Ducal army stopping the Electoral one before Tamsweg. An attack by the Ducal forces, supported by neighbouring States that had also suffered from the Electors territorial ambitions, was expected soon. 

A light screening force of Electoral troops was stationed to the East of the Stronbach river, their task being to prevent the enemy forces outflanking the Electoral positions to the West of the Stronbach. An attack in strength by the Ducal forces could not realistically be resisted with the troops on the ground, but reinforcements were nearby but might take 4-10 hours to mobilise when called upon.

Day One
The Electoral troops had been pushed back from their intial positions and were now trying to defend their objectives, praying for swift arrival of the reinforcements. Crucially the Electoral troops were still just holding on around Madling, Lunzen and Kaindorf, which the Ducal troops would need to seize to allow them to prosecute further attacks against the Electoral troops to the West of the Stronbach and beyond.

The Game
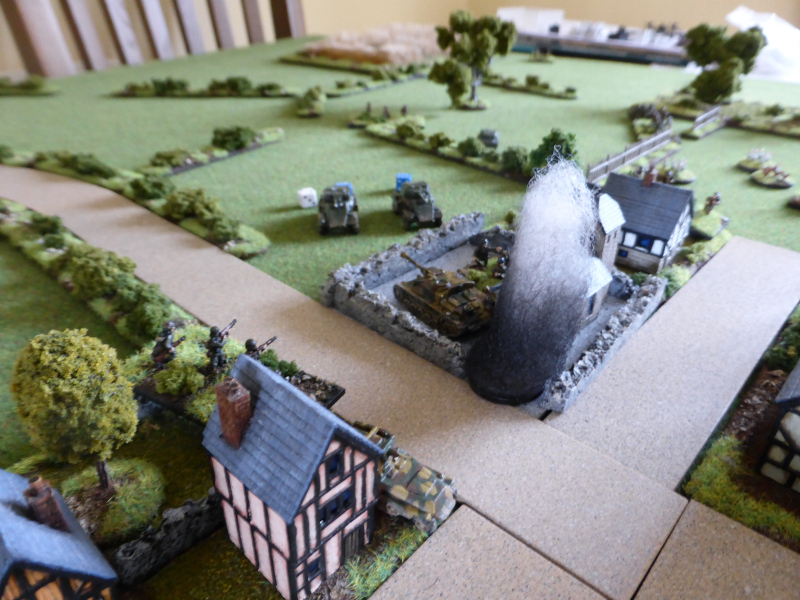
So the above is a broad guide to the game setting and how the table was set for Day Two, when the main forces for both sides would be arriving. I took some photos throughout the day, in no particular order, but I will annotate where applicable to try and give you an idea of what is happening. If nothing else just enjoy the eye candy!

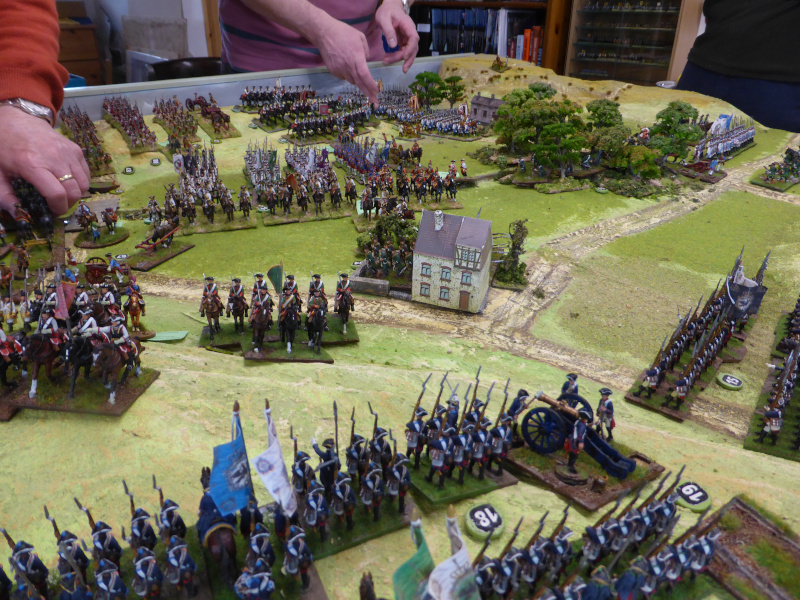
An overview of the table, with the Elector's troops nearest the camera. Madling is to the top of the photo, near the corner of the table. Kainsdorf is to the middle left of the photo. Both of these are the main areas that we (I was part of the Elector's force) decided to hold in force.

At this point reinforcements had started to arrive for the Elector and not a moment too soon, given that massed columns of Ducal and Allied infantry were coming into view.

Ducal forces arrive en masse.

A thin line of Electoral troops hold the ridgeline as Ducal troops move towards them.

Combat is joined. This ridge would be hotly contested throughout, but thankfully the Electoral troops held firm.

My command to the right of Kainsdorf, keeps its cavalry behind the ridge and an infantry brigade marches through Kainsdorf and towards the centre of the battlefield, where the main Ducal forces are massing.

The Ducal force pushed forward.

Madling is to the bottom right of the photo and with the munber of Ducal troops arriving, it looks like it will be a hard task to defend it.

On my flank, with infantry now arriving in support, the light infantry and cavalry advance down the slope and towards the Ducal left flank, to threaten it and also to allow space for the infantry to deploy.

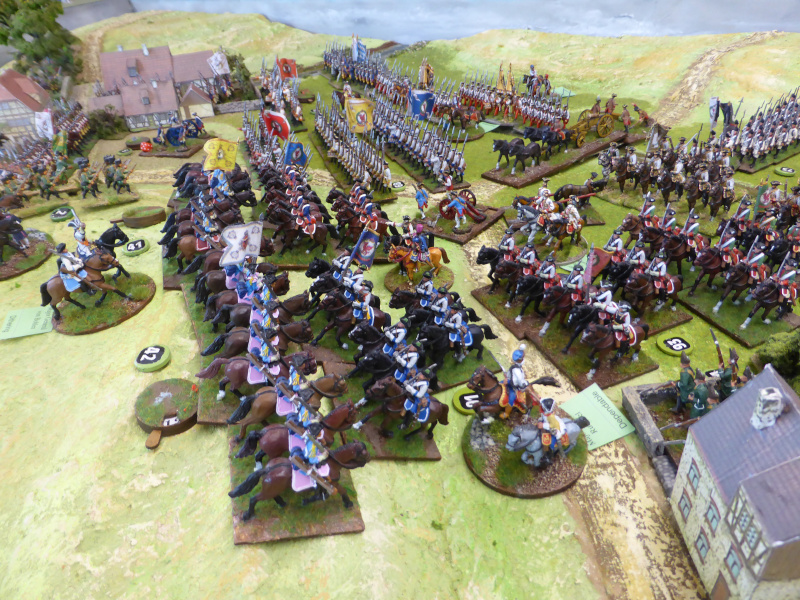
What a splendid sight! A massed cavalry charge for the fore as infantry advance in the background.

Much needed Electoral reinforcements begin to arrive and move towards the important ridgeline.

Electoral troops have occupied Madling and are manfully holding on. The thin line of Electoral troops on the ridgeline to the right look rather vulnerable, given the mass of Ducal troops advancing towards them.

As the cavalry clash, the light infantry do not like the look of the serried ranks of Ducal troops arrayed against them.

The commanders. To the left, Steve who was the Electoral C-in-C; in the centre, Keith Flint, author of HoW and a good friend; to the right, Paul the Ducal C-in-C and just in shot, Chris, host and umpire.

The Electoral positions look somewhat better now that the reinforcements have arrived and deployed.

The Ducal left flank, in front of my position, somewhat hampered by the wood and the impassable hill on the right.

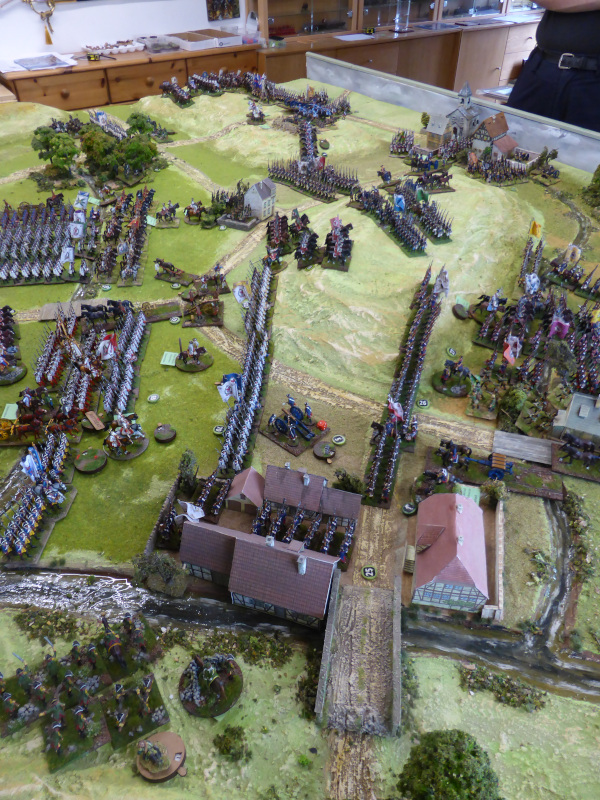
Battle rages across the ridgeline, as both sides try to deploy their troops in the constricted space.

A view from the Electoral centre.  Masses of Ducal troops can be seen coming on in the distance.

Madling and its environs are being hotly contested.

The Electoral line still looks thin, but the Ducal troops are struggling to find space to deploy.

Electoral light infantry have crossed the Stronbach by the bridge and are giving irritating flanking fire to the Ducal troops.

A view from Madling towards Kainsdorf.

A quick photo of the view from Chris and Jane's garden, which frankly doesn't do justice to it, as it was simply wonderful. We had a nice lunch break at this point, having a great chat and putting the World to rights!

The Electoral troops begin to push forward in the centre and now have a doubleline and reserves, so their position is looking much stronger.

An advance right across the front by the Electoral troops, as they begin to push back the Ducal forces.

On my flank the light infantry somehow survive two turns of shooting and survive and, to add insult to injury, with artillery support the rout the line infantry to their front. The cavalry have moved up in support.

Madling and the centre appear to be safe now.

Cavalry and infantry clash near to the small farm by the woods


End of the Game
With the afternoon drawing on, it was obvious that the Electoral troops had held their positions and had begun to force the Ducal forces back. So the game was called and Ken had plenty to mull over for the narrative of the game.

Post Game Thoughts
It was so good to have a FtF game again after so long. We all agreed that this is part and parcel of what makes wargaming so a wonderful hobby. Sharing the experience with like minded gamers was great. Whilst solo gaming is fine, you do miss the camaraderie and the banter that goes with it, of which there was much of the latter!

Playing a 'big game' is a rare treat and in such a wonderful setting too. The figures on display were simply stunning, which I doubt you will get from the photos, so you'll just have to take my word for it. 28mm certainly does make for a spectacualr looking game, ditto the SYW and Linear Warfare in general. Many a moment I just stopped and enjoyed look at all the troops on show, it really was a wonderful sight.

Chris is putting on a few more games this year, of which I hope to attend one, subject to Covid and family matters of course. Although I cannot make both days, being able to attend one is certainly a privelege and one that I look forward to later in the year.

So until next time, keep healthy and stay safe.

Saturday 23 April 2022

Operation Cygent - Post Campaign Thoughts

With the recent and successful attack on Pemba, giving the British the objective of the campaign, I thought I'd do a bit of a wash up on how the campaign finished and then some thoughts on the campaign in general.

The mist continued to linger over the campaign area, as both sides took stock of their respective situations. See the map below for more details:

An overview of the campaign map and the general dispositions for both sides.

The British are firmly in control of Pemba (3), with no immediate threat that can be seen. A depleted 'A' Coy and 'A' Sqdn, with 2nd Recce, are holding the approaches to the bridge to Pemba. The German Volkstuurm and 2nd FJ Kompanie lack any offensive capability in reality. The Nebelwerfer (2) has no FAO left to call it in and the Heavy Panzer Kompanie are too far away to pose any imminent threat to the British positions.

'D' Coy and 'D' Sqdn, although depleted in strength, have plenty of armoured support in the form of Churchills and Cromwells. The FJ Kompanies around them have no armour to support them, no any heavy weapons with which to maintain any prospect of offensive action.


Post Campaign Thoughts
In no particular order:
  • The Warplan 5/5 map was perfect for my needs, with the basic terrain descriptions for each square enough to allow me to figure out some basic positions for forces etc, without having to go into too much detail. The simple map movement worked fine too and was easy to remember. I will certainly be using these maps again for my games and campaigns.
  • Next time I might try and find a map with a bit more varied terrain, rather than lots of open grazing land. Of course I can always tweak the terrain descriptions to suit, but it is easier to use those given.
  • The simple Recce spotting rules worked OK, if not always that effective due to poor dice rolls! Something that I might work up in a bit more detail, but will ponder this and other issues in due course.
  • The Random Deployment entrance points worked fine for the Germans, along with the Hidden Counters and Blinds, giving a nice Fog of War to the game, which is just perfect for solo play. It was always fun to see what was 'under' each counter when it was revealed, wither voluntarily of as a result of Recce spotting.
  • I deliberately kept the initial German forces that were available 'light weight', to reflect the hasty nature of the German response. As the Campaign Turns progressed, 'heavier materiel' became available, such as the Panzers and Heavy Panzers. Not knowing what had actually been drawn added a nice level of friction to the campaign. all-in-all I'm pretty happy with how this worked.
  • The Weather Chart was great and this is something that I will certainly be using in future games where appropriate. It added another level to the campaign and the games, as the case of the Mist showed. Its effects were not too dramatic but enough to be noticeable, which was good.
  • The basic starting OOB were good, but I wished I had typed them up and printed them out to make it easier to keep track of the losses suffered by both sides. This is certainly much easier to do that various bits of paper here and there. Lesson learnt.
  • The mixed German units were fun to have in the Campaign, even though not all of them got to see action. How often do you actually field Volkstuurm or out of date Panzers in a game? Certainly a first for me and something I hope to do in the future.
  • Borrowing some ideas from battlegroup Panzer Grenadier worked well, but these really need to be worked up into a more formal set of house rules for future games. This will be done in the cold light of day, once the Campaign is out of my hair so to speak.
  • The 'House Hosing' felt right and like the above, this needs some thought and firming up for future games.
  • I'm really happy how the Campaign played out from a solo perspective. Nominally I was the British commander, but the items outlined above made it really fun and unpredictable throughout. I would change hats so to speak when it was the German's Campaign Turn and think what would be the most logical approach for them and also ignoring the God's eye view that I had of the table.
  • I did find it hard to maintain momentum as the Campaign progressed, as some of the fun went out of it as I felt I needed to keep putting updates on the Blog. The break did me good but it was hard to pick up where I had finished off and at what stage was the Campaign. 
  • I felt the Campaign as a whole, being inspired by Operation Market-Garden, worked really well. Having a grounding in a historical campaign and/or action, helped figure out the whole narrative. So for example the weather and its effects upon Air Support, the fragmented nature of the German units and reinforcements etc. Going forward I will try and do something similar for future campaigns. Of course the historical research part of it is fun too.
  • Be flexible and take the KISS approach to the Campaign. Afterall you want it to be fun and frankly you cannot cover every conceivable situation that might arise. Things what would be the most probable outcome of any situation, given the local and overall situation and then go with that. It seemed to work OK in this campaign.

It seems funny to think that it is all over now and that it's time to move onto to something else. What that might be I'm not sure. I want to try and get some painting in for a campaign I have planned for the Autumn, alongside some smaller games of something or other. We'll have to wait and see what might grab my attention.

I have a FtF game tomorrow with a friend and some acquaintences from the Cotwswold Wargaming Day, using 28mm figures on a large table and some SYW type Imagi-Nations using the ever excellent Honours of War rules. This should be fun and I'm looking forward to it and keeping my fingers crossed my back holds up!

So until next time, stay safe and keep healthy!

Friday 22 April 2022

Operation Cygnet - Day Three - Assault On Pemba

At the same time as the recent action, Volkstuurm Vorwarts!, was taking place, the main British attack went in with the aim of securing Pemba, the objective of the campaign. Both sides had taken losses in the build up to this, but the British certainly had the numerical and materiel superiority. However the Germans were in Pemba and taking a BUA without artillery or air support would be challenge for sure.

German Kampfgruppe OOB
1 x CO (CV 8)
2 x HQ (CV 8)
1 x FAO (CV 7)
2 x Heer Infantry (one unit with 3 hits)
1 x 81mm Mortar (with 2 hits)
1 x Stug III
1 x 105mm Artillery Support Unit
1 x Nebelwerfer

British OOB
1 x CO (CV 9)
1 x Churchill Crocodile
1 x Churchill SBG
'B' Coy
1 x HQ (CV 8)
2 x Infantry
'B' Sqdn
1 x HQ (CV 8)
2 x Shermans
'C' Coy
1 x HQ (CV 8)
3 x Infantry
'C' Sqdn
1 x HQ (CV 8)
3 x Shermans
1 x Firefly
3rd Recce
1 x HQ (CV 8)
1 x Infantry
1 x 3" Mortar
1 x 6 pdr ATG + Tow
2 x Humber Armoured Cars

Scenario
Quite simply to take Pemba as quickly and with minimal casualties as possible for the British. For the Germans, to hold on as long as possible and to inflict maximum casualties on the British.

Mist  -1CV & 50cm Visibilty

An overview of the table, with the British entering via the Southern and Easter table edges. The Germans are in Pemba itself.

A close up of Pemba, with infantry to the fore and the FAO in the building at the entrance to Pemba, in the attic to gain the best view of the British attack.

The second line of defence, with the Stug III and Infantry Gun covering the road.

The 105mm artillery piece deployed in a direct fire role (note I had to use a 75mm ATG as my 105mm is not even based. Oh the shame!).

'B' Coy & 'B' Sqdn on the left flank.

'C' Sqdn on the right flank.

'C' Coy on the right flank.

3rd Recce ready to enter to try and quickly unhinge the German defences in Pemba by attacking from the rear.


The Game
The British plan was to use the left flank to help pin the Germans in Pemba, whilst the right flank formed the main attack, with the 3rd Recce coming in from the rear.

The end of Turn 1. A poor start for the British attack, with only 'B' Coy moving forward to the next fence line. The rest of the main force simply stayed put. At least the 3rd Recce arrived on the flank. In reply the German FAO called in the Nebelwerfers onto 'B' Sqdn, who got away quite lightly with only one Sherman suppressed. All the other German units remained hidden from view.

'C' Sqdn get a little welcome barrage from the 'Moaning Minnies'.

3rd Recce arrive and push forward to the first hedgerow.

The end of Turn 2. 'B' Sqdn moved up to support 'B' Coy, with the latter being hit by mortar fire, called in by the Germans in the house to their front. 'C' Coy and 'C' Sqdn finally moved off, but still not quite as quickly as the CO would like. Luckily for the British the German FAO failed to get through to his Nebelwerfers this turn.

'B' Coy are suppressed by well aimed mortar fire, but at least armoured support has begun to arrive.

'C' Sqdn pushes forward.

The end of Turn 3. Their was no movement on the British left flank, as 'B' Coy was suppressed and 'B' Sqdn failed to move. 'C' Sqdn moved forward, aided by the CO, and  'C' Coy moved into the woods with the aim of attacking Pemba from the East. 3rd Recce managed to push forward to another hedgeline and closed in on the German positions in Pemba. At least the much needed Churchill AVRE's arrived.

The German FAO got through to his Nebelwerfers, which hit 'B' Coy with devastating effect, KO'ing one infantry unit and suppressing the other, which was then forced to retreat by more well directed mortar fire. The British left flank was now in quite a precarious position, with no real infantry support left and only two tanks in play.

'B' Coy have taken a pasting from the 'Moaning Minnies'.

'C' Sqdn advance as the AVRE's arrive and not a moment too soon.

'C' Coy move through the woods, out of sight of the Germans.

3rd Recce close up with the German positions and have not been spotted yet.

The end of Turn 4. With 'B' Coy effectively hors de combat, 'B' Sqdn begun shooting into the houses to try and suppress any defenders (see post game thoughts), but came under fire from the 105mm Artillery. Failing to suppress the Shermans the 105mm Artillery was then KO's by the 'B' Sqdn Shermans. 'C' Sqdn likewise speculatively shot to suppress the leading buildings, whilst 'C' Coy continued to move through the woods. As they did this the Churchill AVRE's roared forward and reached the edge of Pemba. With all the attention fixed to the front, 3rd Recce closed in on the back of the Church and the Stug III located there. Certainly a good Turn for the British.

With the German FAO and Infantry units suppressed as a result of the Shermans shooting, there was little that could be done in offensive terms. However the German CO spotted the 3rd Recce Armoured Cars to the rear and ordered the Stug III to about face, but it was suppressed by some accuarte shooting from the Armoured Cars.

'B' Sqdn begin to hose down the houses with MG and 75mm fire.

'C' Sqdn did the same, allowing the Churchill AVRE's to close to within effective range of Pemba.

The Churchills prepare for action.

3rd Recce dpeloy for action.

The Armoured Cars begin a firefight with the Stug III.

'C' Coy in the woods.

The end of Turn 5. The Churchill AVRE's make short work of the German Infantry to their front and also destroy another building. 'B' Sqdn and 'C' Sqdn's fail their command rolls, but at least 'C' Coy moves quickly from the woods and into the outskirts of Pemba. 3rd Recce continues to duel with the Stug III, but neither side gains an advantage.

Things were getting serious for the Germans and the FAO managed to call in his Nebelwefers onto 'C' Sqdn, suppressing one Sherman and causing hits on another and the HQ unit. The mortar finished off the last infantry unit in 'B' Coy and the infantry retreat to the next defensive line to try and hold out for as long as possible. The Stug III hit the 3rd Recce Armoured Cars but failed to KO them, but was itself KO'd by Opportunity Fire in return.

'B' Sqdn fail to move or fire.

'C' Sqdn come under fire from the 'Moaning Minnies'.

The Churchill AVRE's make short work of the buildings and their defenders in front of them.

The Stug III brews up.

'C' Coy enters Pemba as the burning buildings cover their advance.

The 3rd Recce Armoured Cars happy to survice their encounter with the Stug III.

The end of Turn 6. The Churchill AVRE's continue to burn and blow up buildings on the outskirts of Pemba, KO'ing the German FAO as a result. 'B' Sqdn pushed forward and attacked the German mortar in Pemba, as 'C' Sqdn also moved up in support of the AVRE's. 'C' Coy moved further into Pemba, overunning an HQ unit and closing in the German CO. With the situation now completely hopeless, the remaining Germans surrendered.

'B' Sqdn attacks the German mortar that had contributed to the demise of 'B' Coy.

'C' sqdn moves forward.

The Churchill AVRE's continue to wreak death and destruction.

'C' Coy begin to occupy Pemba.

The German defenders have little option other than to surrender.

End of Game
In the end, the defeat came about more quickly than expected, with the AVRE's being the real game changer. So victory to the British!

Casualties
British - 2 x Infantry and 1 x Sherman all but done for.
German - 1 x Stug III,1 x Infantry, 1 x 105mm Artillery, 1 x FAO, 1 x HQ and 1 x Mortar all but done for.

Post Game Thoughts
Well that was an interesting game and one in which the British could have taken more casualties than they did, had the German Nebelwerfer been a tad more effective on the die rolls. The game changer was the AVRE's, which were sorely needed in the absence of Artillery or Air Support. Also taking BUA's really requires a lot of infantry, of which the British was somewhat short of, due to campaign losses and the Nebelwerfer and Mortar fire. Anyway, enough waffle and onto some post-game thoughts:

  • Nebelwerfers are nasty! There was only one in this game, but with 8D6 and a 30cm diameter template, they can inflict a lot of damage. This can be seen in how quickly 'B' Coy were rendered hors de combat, with supporting mortar fire. Frankly the Shermans got away quite lightly given the amount of dice rolled against them. If the Dice Gods had favoured the Germans more, then it could have been quite a different game.
  • Hosing down the houses. Well that's the phrase I came up with to try and replicate the suppressive fire that the British used that I've so often read about, when attacking bocage, woods and BUA's etc, even if they didn't have any view of the enemy. This wokred OK for me in the game and felt right, but others might disagree, as it's not normally something you can do in BKC. My trial required a 6+ to hit, then there was the building save, with any unsaved hits ending in suppression only. A work in progess but something I want to work up for future use.
  • The British got off to a slow start, with the Mist -1CV causing trouble once again. The speedy advance by the AVRE's and the flanking attack by the 3rd Recce won the game for them.
  • The Germans faced an uphill battle from the start, given that they had som few units with which to play with. Had they not taken so many losses in the previous battle for the bridge, then the British might have had to wait for clear skies to allow for Air Support to help take Pemba. As it was their Nebelwerfers helped keep them in the game with the British losses slowly mounting from early on.
  • The British certainly missed having some Artillery Support, whether it be HE or Smoke to cover their advance.
  • Taking BUA's is a tough ask. With limited Line of Sight and the terrain favouring the Defender, then you require at least a 3:1 advantage in Infantry, plus a materiel advantage too, such as the AVRE's.

So there we have it, a British victory in the campaign! I will do an update soon of the final map positions, thoughts on what units were left and where, as well as some general thoughts on the campaign.

Until then, stay safe and keep healthy.