Thursday 30 June 2022

Waterloo Warm Up Games - Part 2 - Seize The Ridge

As planned, another warm up game was played out today and something a little larger and sort of Waterloo'esque, with the British defending a ridge with some cover and the French trying to evict them from it. Again I kept everything pretty simple, with the French classed as Regular all round, but the British Superior for Firing.

I'll let the photos tell the story with appropriate annotations as before. So without further ado:


A torrential down pour just before the French launched their attack, which was rahter appropriate given the setting.

A broad overview of the table.

French Horse Artillery ready to support the French Company columns.

The British arrayed along the ridge behind the crest line, except for the Foot Artillery and the Light Battalions to the fore. The Light Battalion on the left was armed with rifles.

French Heavy Cavalry ready to move on in support of the Infantry.

The French move off and the Horse Artillery deploy astride the road.

The British Foot Artillery draw first blood and bounce through also catches some Heavy Cavalry, much to their surprise.

The Rifles make the most of their longer range as the French close with them.

As the French advance, the Light Battalions fall back slightly to be closer to the ridgeline.

The Rifles continue to take their toll on the French columns.

The shooting is less effective on the French right flank.

As the French close, they form one unit into Line, whilst the others remain in Company Columns.

However the British shooting is rather effective, leaving two units Weakened.

The Heavy Cavalry begin to move up in the hope of exploiting any gaps created in the British lines.

As the attacks stalls in front of the British line, one Company Column attempts to outflank the British position... 

...with the Heavy Cavalry continuing to move up in support.

The Horse artillery limber up to move closer as the Line Infantry is blocking their targets on the ridge.

French Company Columns assault the British Line on the left flank...

...only to be driven back...

...with heavy losses, including the Brigade Commander (double 6).

The French lose a Line Infantry unit on the right flank.

The Horse Artillery deploy close to the British line to try and shoot the French Line Infantry onto the British positions.

The French try again on the left flank.

Desperate times call for desperate measure as the French Heavy Cavalry charge the Light Battalion, that manage to form square in time...

...leading to the French Heavy Cavalry being heavily defeated.

The French are not in a good state at this point.

The French Heavy Cavalry are close to breaking too.

The British Cavalry charge the French Company Column that fails to form square...

...leading to them losing and having to retreat...

... and causing the French Heavy Cavalry to break, but the British Cavalry fail to follow up.

The end of the Battle as the French centre breaks.

The left wing begins to collapse and break...

...as does the right.


Post Game Thoughts
Well that was fun and full of action! In the end it was a lot easier for the British than I thought it would be. Some thoughts on why this was the case and other points in general:

  • The British being classed as Superior for Firing with the +1 that made to the die roll was quite a big difference between the sides. A lot of the time they were hitting on a 3+ and for most of the game made average of slightly above die rolls.
  • The Light Battalions rule which Keith has toyed with on the Forum worked well and certainly felt right compared to the rules as written. Having one unit equipped with Rifles also was telling with their extra 6cm range. It may not seem much but one round of unapposed shooting can make a small but important difference.
  • The French horse Artillery being more mobile in support of the Line Infantry was good and felt right.
  • It was nice remembering to try and use the Cavalry in a Napleonic rather than a SYW style. Certainly forcing the British Light Infantry to form square was good, but the French were unable to capitalise on it, unlike the British that managed to catch the French before they could form square.
  • The cover that the hedgerow provided was again a small but important advantage to the British artillery that helped keep them in the game. The British Infantry lining the hedge and the ridge never got into the game, but I imagine that the cover would have been important to them too.
  • The rules flowed well and with the previous games and re-reading the rules, I rarely had recourse to use the book. I still need to write up my aide memoire as mentioned before though.

Next up will be another game, but adding in more detail in terms of troop and command quality, once I have my labels sorted out. So until then stay safe and keep healthy!

Wednesday 29 June 2022

Cold War Gone Hot - Reference Material

Recently on the Pendraken Forum, Richard of  The Land of Counterpane Blog joined up and put up some useful links to posts on how to get going with Cold War Commander. One of these mentioned the ever excellent Micromark lists by Mark Bevis. I had completely forgotten that I had ordered some for the Cold War way back when and so promptly dug them out of the folder in which they've lain for seom 10 years or more. Just what I needed to get my OOB sorted!

Having looked through the lists again, it tipped me down the route of 'classic' 1985 Cold War forces, of British versus the Warsaw Pact, but most likely Soviet given that I have the lists. I'm sure with a slight tweak of MBT's and AFV's, the force could easily become Polish or East German Warsaw Pact. 

The above has also cemented in my mind that I will go down the 6mm route for my games. Why?: a couple of reasons really. Namely:
  • Availability of equipment in 6mm pure and simple. From my brief perusing of the H&R website they have pretty much everything I need, which cannot be said for 10mm.
  • Cost. Looking at what I would want to field for a game, in 10mm it would be prohibitively expensive compared to 6mm. For the cost of just the MBT's in 10mm I can pretty much field a Mechanised and Armoured Brigade in 6mm. 
  • The look of the game. Modern tanks are big and when you want to field a squadron or two, they look too big when on the table compared to their 6mm equivalents. Just imagine 6 Tiger II's and you get my drift.

My British lists.

The equivalent Soviets lists.

The postman delivered my recently ordered copy of CWCII. A brief flick through today and all I can say is that I'm very happy that I did take the plunge. A lot more refined and developed thanks to all the work done since BKCII & IV and visually very nice to look at too. The binding seems to be a lot more robust than of late, which is good of course. There are only 3 lists in the book: US, British and Soviet with everything else being freely available online. The lists are a lot more detailed than before, so I'm looking forward to getting my head around these. Ditto the rule changes and tweaks which again from a first look through look to be good and well thought out.

A rulebook that is well worth getting if you fancy some 'Moderns' gaming.


Also landing on the door mat was Hackett's book. Again a quick flick through this morning and all I can say is that I'm really, really looking forward to reading this. It looks packed full of info, narrative and ideas and you can see why 1985 has become the default timeframe for Cold War Gone Hot Games. 

An original copy that I picked up for an absolute bargain price!


So enough of the 1985 Cold War mindset, time to travel back to 1815 and the prospect of facing Old Boney!


Waterloo Warm Up Games - Part 1

In less than two weeks Keith Flint will be hosting a bathtubbed Waterloo at his local community centre where he can stage larger games than is normal in our average British house. As I will be taking on the part of his Grace, the Duke of Wellington (aka The Sepoy General), I thought it wise to get some games in beforehand to reaquaint myself with the rules. A few really simple tests were played yesterday to get the mechanics broadly off pat, so now felt the right time for something more akin to a game, but nothing too big or fancy.

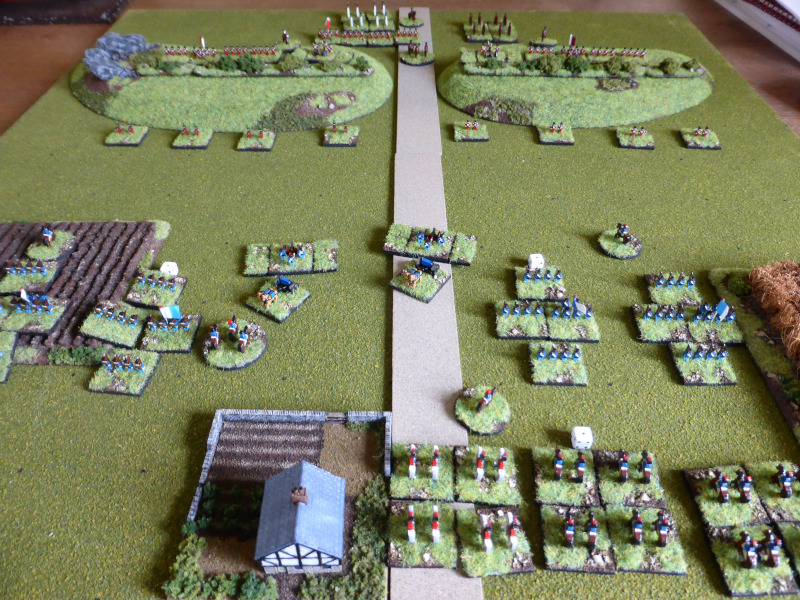
To this end I pulled out my 2' x 2' board, a few items of terrain and relatively even and 'vanilla' forces. Again the aim is to get the basics nailed down before adding in various bits of 'chrome'. In essence the Red force (British) are defending a village and hill, with the Blue force (French) trying to evict them. Whilst the British will be in line, the French will be using Order Mixed or Company Columns, to see how this plays out. The British have a Light Battalion in skirmish order and the French will be using skirmish screens.

Nothing too fancy on the AAR front, just some annotated photos of the game.

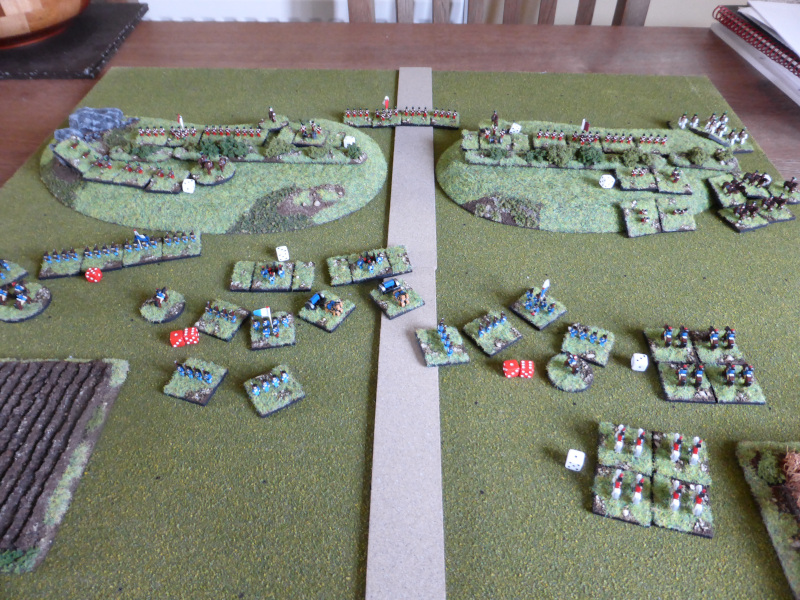
An overview of the table, with the French just arriving.

Their horse artillery will move and support the attack on the village to add much needed firepower.

Cavalry on the right wing.

The French quickly move forward using the additional speed of being in Company Column.

The cavalry have clashed, with no clear winner and both sides had to withdraw.

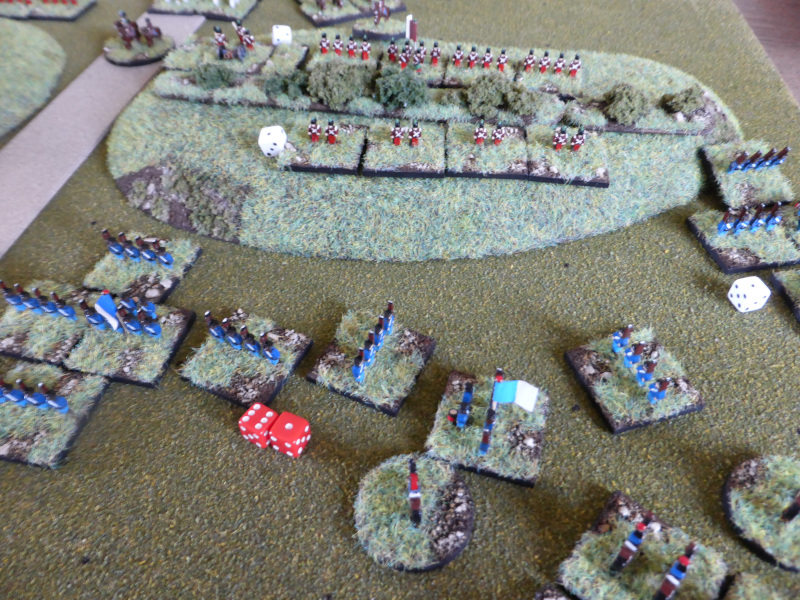
The attacks go in by the farm and in the centre, with the British Light Battalion having withdrawn through their Line Infantry. One French infantry unit has formed into line to add extra firepower whilst one is still in company column ready to assault the British line.

As the French shoot at the village, they lose their C-in-C to enemy musketry.

More cavalry attacks, this time with the French gaining the upper hand.

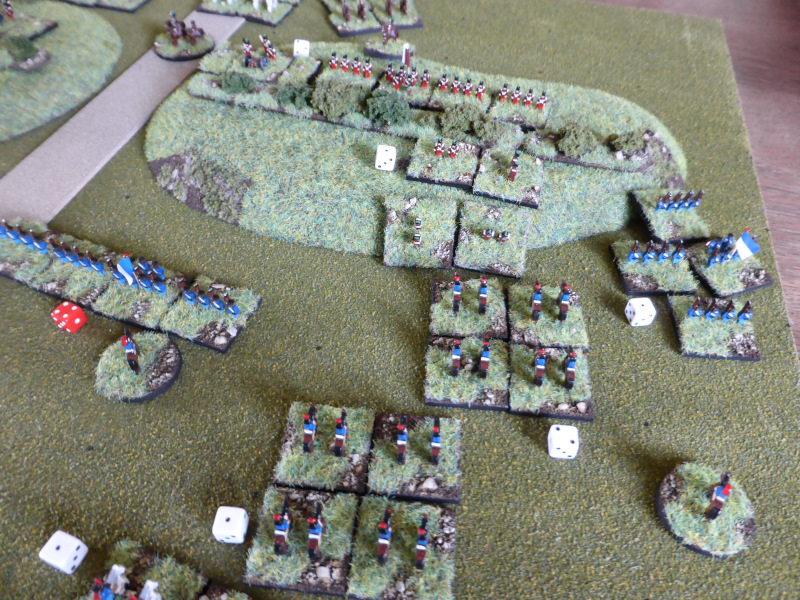
Both sides are accruing hits in the centre and it is precarious for both infantry units in and by the village.

The French horse artillery add much needed forepower to try and shoot the infantry into the village.

Neither side can quite gain the upper hand. The Light Battalion has formed into skirmish order again to try and support the Line Infantry to their front.

The British have lost a cavalry unit but the French have had to pull back to let their units recover.

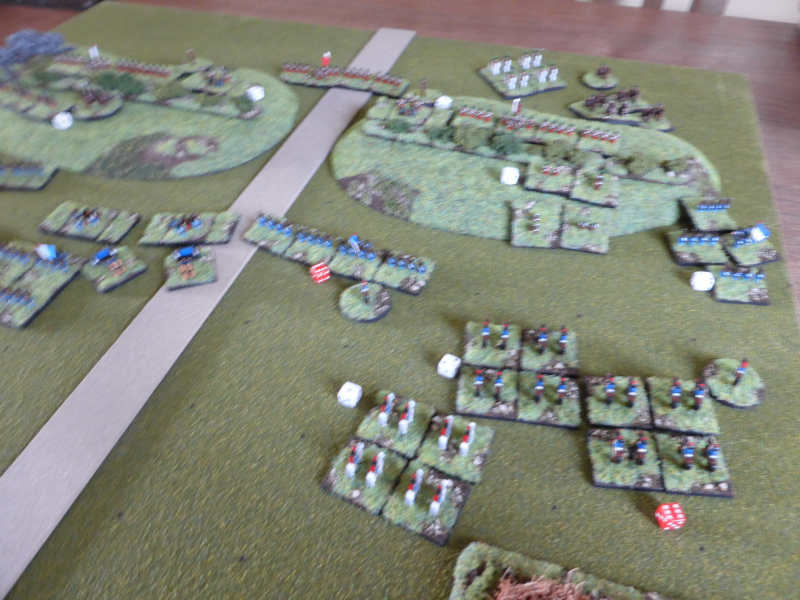
And it's all over! Suddenly the British break, but it could have easily have gone the other way.

The British flee the village but the French are almost routing too.

Ditto in the centre.
 
Post Game Thoughts
Well I was happy with how that played, as it gave a good mix of challenges for both sides and allowed my to try a mix of the rules too. A few quick thoughts:

  • Even though this was only a 2' x 2' table, it didn't feel that small. So easy to set up I really should use this option more often.
  • I need to learn how to use Napoleonic cavalry to be honest, as I still see them on the flank as per the SYW. Time to refer to Nosworthy's excellent book.
  • Using the Company Columns worked well, especially when one unit formed into line to add more firepower, ready for the other units to assault the British line. More work needs to be done on this, but it is coming together nicely.
  • I need to make my own aide memoire of little points that are not on the QRS to aid and speed up play. This should all fit on an A4 sheet and I can't see why it wouldn't.

Next up is a slightly bigger game, but still on the 2' x 2' table, but more on that in another post. 

So until next time, stay safe and keep healthy.