Showing posts with label KR-16. Show all posts

Saturday, 1 October 2016

Blast-Tastic 2016

In the seeming blink of an eye it was time once again for the 3rd Blast-Tastic Show. How time flies by. Last year I offered to put on a demo game of Angel Barracks free KR-16 rules, yet despite having had a whole year to prepare, I was painting right until the final evening! Some things never change and it would seem I need a deadline to focus my mind. So an early start saw me arrive at the venue with plenty of time to spare, to allow for a leisurely set up and for a chance to walk the show. I'll come on to how the show went later, but first some pictures of some of the demo games on offer. Apologies to games that I missed or ones that I have incorrectly labelled. Not all games were clearly marked and I must admit I was one of them!


I believe this was set in 1979 Britain and used 'Beyond the Gates of Antares' ruleset.
Lovely scenery but as one of the club members commented, "Not much room left for gaming".
A game of 'Infinity'?
'Martian Empires' which was my favourite table. Sadly not many people seemed interested in playing the game.
A nice steampunk/Victorian sci-fi walker.
Triceratops artillery haulage which I thought a nice touch.
More Imperial armoured units, this time anti-grav or hover units by the smoke emminating from underneath.
Some form of flying unit.
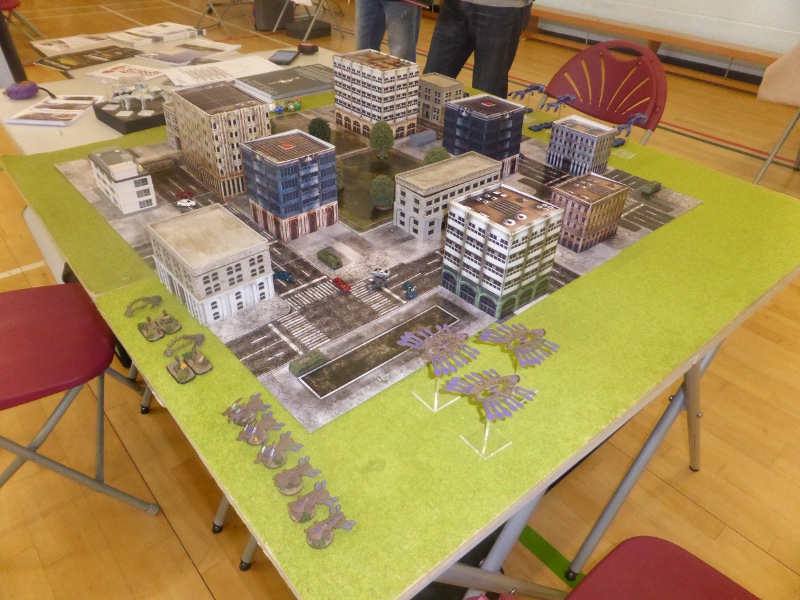
'Dropzone Commander' with their lovely printed card buildings.

The game seemed to be quite popular with the punters.
Not sure at all on what ruleset was being used.
No idea on the background fluff either.
A ovely looking game based upon the 'X-Com' computer game.
Apparently those who play computer games found this one interesting.
'Horizon Wars' by the author Robey Jenkins.
A good mix of display and a chance to play the game.
My 'KR-16' offering on a 2'x2' table
Robby the Robot who was the objective of the game.
Buildings by Angel Barracks and quickly painted by yours truly.


So how did the show go? Well to be honest a bit of a mixed bag. Some points below may help explain things:

  • It was very, very quiet, 50% down on last year in terms of footfall. As a result the atmosphere was quiet and the traders looked like they had hardly any trade at all.
  • Some 6 traders or demo games cancelled at the last minute for a variety of reasons.
  • I thought this year there was a good mix of games. Just a shame that there were not enough punters through the doors to have a look at them.
  • The X-Wing competition was interesting to look at but definitely not my kind of game. 
  • I had some good chats with a few of the punters, particulary Stu of Dust, Tears & Dice Blog  fame and another chap whom I'm sorry to say I didn't catch his name. A common theme was downsizing to a few rulesets that you really enjoy playing and playing games on smaller tables, typically 4' x 4' or smaller. Winning is nice but having a good game is what counts most of all.
  • I had a couple of good games of KR-16, with Stu as mentioned above and another chap called Craig. Both times the Crimson Alliance managed to get Robby the Robot off the table despite the best efforts of my newly painted RDF Force.
  • I had positive feedback on 6mm skirmish gaming and the KR-16 rules themselves, so hopefully that may lead to some more orders for Michael at Angel Barracks.

So there you have it. As it stands I think this will definitely be the last Blast-Tastic in its current format. Hats off to Michael and Same for putting on the show and for all their hard work and effort. I enjoyed myself and hope that it will continue on some for or other in the future.

Saturday, 24 January 2015

KR-16 Campaign Game 4

With honours fairly even after the two previous campaign games, the action moved on to a mission to gain or destroy some important scientific data contained in one of the vehicles.

Scenario Details
A scientific convoy has broken down and RDF and JI troops are en-route.
The convoy is in the middle of the table with RDF and JI forces coming on at opposite sides.
The convoy is in the process of repairing the damage.

Each turn after the 2nd, roll a D6:

3rd turn 6 = convoy is ready
4th turn 5 and 6 = convoy is ready
5th turn 4, 5 and 6 = convoy is ready
Etc…

The JI want to get whatever research is in there and sell it to get funds for their war effort.
The RDF want to get the scientists to Mariposa and safety.

JI Minor Victory
Destroy or disable all the convoy vehicles. (6 vehicles, civilian damage chart)
(Blow to the RDF and the so called ‘defence’ force.)

JI Major Victory
Steal the research data and make off their table edge with it.
(Sell to the highest bidder, BPI maybe?)
Takes 1 complete turn to search the lab to get the data.

RDF Minor Victory
Keep at least 50% of the civvies alive.
(Just doing their job.)

RDF Major Victory
Escort the lab off the table with data intact.
(Doing their job and advancing science.)


The convoy will obey any command if an infantry figure is placed in base to base contact with a vehicle.
That infantry figure is controlling that vehicle.
(Otherwise the vehicles only move on a 3+ toward the side edge)

So the RDF could put a figure in each vehicle and the vehicles will automatically move each turn.

Turn 1 - Junker Initiative
Despite the Junkers winning initiative, the RDF made the first real moves as both Pathfinder Rangers moved towards the stricken convoy. However only 1 squad of troops managed to deploy. The Junkers appeared to be put off by this show of force, only managing to really move a GMG Bullfrog into position, although it did managed to destroy one vehicle.

Turn 2 - Junker Initiative
The Junkers this time made good use of going first, managing to destroy a further two vehicles plus deploying their squads of infantry into great psotions ready for the next turn. Things were getting tough for the RDF with so many vehicles already destroyed. To try and rescue the situation they layed down smoke to try and block line-of-sight for the Junkers.

Turn 3 - RDF Initiative
Just when they needed to go first, the RDf failed! The Junkers lost no opportunity in seizing the advantage, with a rocket armed squad advancing forward and destroying the main objective vehicle. With no chance of gaining even a minor victory, the RDF withdrew, living up to their sobriquet of 'Run, Don't Fight'.

Post Game Thoughts
For once the Junkers shooting really was very effective as every round of shooting saw a vehicle destroyed. Things would have been very different if the RDF had just managed to get some activations in earlier to lay down smoke and close with the vehicles. Being unable to gave the upper hand to the Junkers, with devastating results. In campaign turns the RDF is looking rather ineffective against the Junker Insurgency.

We both agreed that not having RDF MS1 Pathmaster with its ability to allow the RDF to re-roll one failed activation per turn really hurt the RDF. Despite its points cost it really is a crucial piece of kit for the RDF. I expect that I will be seing it a lot more in future games...


Off Air - KR-16 Campaign Game 3

After the last game at Anshan, we decided that a nice little scenario would be based around Steve Chang and his radio station. Mr Chang having been less than complimentary about the Junker Insurgents recently, needed a visit to remind him to keep his thoughts to himself. That was the Junkers point of view. The RDF naturally were rather happy with his broadcasts and wanted to keep him on air. So the scene was set for a little showdown chez Chang.

Scenario details

Junker Major victory - enter the shack and spend one turn there having a quiet talk with Mr Chang.
Junker Minor victory - to destroy the radio aerial.

RDF Minor victory - Take out 50% of the Junker Insurgents.
RDF Major Victory - Prevent the radio aerial and Steve Chang from being harmed or damaged.

The forces involved were made up from units that had not taken part in the previous game. This made it rather interesting as both sides had to cobble together units for the action. The Junker had a Rocket Bullfrog and GMG Bullfrog with a full squad with sniper and an understrentgh squad with no special weapons. The RDF had a Pathfinder Ranger and a squad, the latter deployed in cover at the radio station.

Turn 1 - RDF Initiative
The RDF got off to a bad start as they failed to activate their Pathfinder Ranger. The troops dug-in went onto react fire as there were no targets in range. The Junkers managed to activate both vehicles, hitting the aerial but only scratching the paintwork.

Turn 2 - Junker Initiative
It was the Junkers turn to have some bad luck as both vehicles failed to activate, leaving them at the mercy of the Pathfinder Ranger, which succeeded in immobilising the Rocket Bullfrog. The Junkers task just got that much harder...

Turn 3 - Junkers Initiative
Despite gaining the initiative, the remaining Bullfrog failed to hit the aerial, only for it to be blown up by fire from the Pathfinder Ranger. Any chance of gaining a victory had disappeared so the accompanying infantry melted away, leaving the RDF with a Major Victory.

Post Game Thoughts
Once again a game that could have gone either way early on. If the Pathfinder had managed to lay smoke in Turn 1, the Junkers would have had to move to try and get line-of-sight to the aerial, rather than sitting back and hoping to get a lucky hit on the aerial. They are very vulnerable to the RDF AFVs, so try to keep in cover for as long as possible. 

As the scenario was over so quickly, we replayed it several times, with the Junkers managing to destroy the aerial with their very first shot! Why they couldn't do that in the game!!! As we are running a narrative campaign, frankly it didn't matter as we had fun as always, which is what it should be about at the end of the day.

Saturday, 20 December 2014

Action at Anshan - KR-16 Campaign Game 2

With the Junker Insurgents suffering rather heavy casualties in the first campaign game, the Regional Defence Force felt emboldened to move into the Junkers heartland of Anshan. The following scenario is based upon this move by the RDF.

Scenario
The RDF have been contacted by Steve Chang about a Junker Civilian whose has information regarding the whereabouts of some JI weapons caches. Not all Junkers are fans of the JI, so the RDF must head to Anshan to get the Junker civilian out so that he can pass on his information. If they do gain this information, it could be a massive blow to the Junker insurgency...

RDF Major Victory
Extract the informant off the table via their starting edge.
RDF Minor Victory
Find the informant but leave the table with the data contained on a storage device.

JI Major Victory
Recover the informant and take him off their table edge.
JI Minor Victory
Prevent the RDF from achieving their victory conditions.

Junker Insurgent Forces - 550 pts (+/- 20 pts)
As this would be a game in a built up area, requiring searching of houses, I went with the following mainly infantry based force:

2 x Rocket Squads
2 x Sniper Squads
1 x Sniper Team
1 x Power Armour Unit
2 x Bullfrog pick-up trucks

Turn 1 - JI Initiative
From the off a Bullfrog loaded with Junkers raced off towards the central building in Anshan, where it deployed its troops ready to start searching the building the following turn. Another infantry squad moved off as well as the sniper team, but other units were rather reluctant to join in the 'seek and destroy' mission. 

For the RDF, their Pathfinders failed to move, forcing the infantry to leave them and deploy toward the Anshan outskirts.

Junker civilians move uneasily in Anshan as both sides start to deploy for their respective missions.
Turn 2 - JI Initiative
The Junkers Insurgents continued to move into Anshan, deploying quickly to start searching the houses. The RDF moved their Pathfinders forward, firing into Anshan, suppressing one JI squad.

Turn 3 - JI Initiative
With the JI nicely deployed for their searches, they found the informant in the second house, before the RDF had had time to even enter Anshan. With a hidden JI squad amongst the civilians using them as human shields to cover the search mission, there was little the RDF could do to prevent the JI from silencing the informant. With little prospect of gaining any victory points without risking taking significant casualties, the RDF wisely decided to withdraw from Anshan.

The civilian population cover the JI as they search the houses of Anshan.
Aftermath
Well a susprisingly quick and bloodless game after the previous bloodbath for the Junker Insurgents. So a few thoughts as always on the game:

  • The speed with which the JI were able to reach Anshan in their Bullfrogs helped them get the jump on the RDF.
  • Gaining the initiative each turn helped the JI, especially with this sort of scenario.
  • Finding the informant in the second house turned the game massively in the Junkers favour. The RDF simply did not have time to get into the game.
  • Having a Junker Insurgent squad hidden amongst one of the three civilian groups really helped them. The RDF could not be sure if and when they might be ambushed. Given this is part of a campaign, losses can become crucial very early on, as we saw in the first game.
  • The civilians being able to move anywhere each turn meant that the RDF could not get any clear lines of sight to the JI, thus allowing them to search in relative safety.
  • Michael was suprised at my infantry heavy force, expecting me to take a rocket Bullfrog along to threaten his Pathfinders. This is the fun part of a campaign, finding out what your opponent is bringing to the table. It makes you really think about your force and one that suits the scenario.
Despite it being a very quick game, it was fun to play and the campaign is starting to get a nice momentum and feel to it. The Junker Insurgents now have a very nice additional 100 points to spend on replacements or new units as they see fit. After game 1 this is most welcome.

As for the next scenario, we bounced around a few ideas, but have to wait for Michael to firm them up into something more concrete. Work and the Xmas period will mean that the next chapter of the campaign will have to wait until the New Year in all probability. This will give me time to paint up some more units as well as have a think on how to spend my VPs.

Saturday, 6 December 2014

KR-16 Junkers Insurgents Campaign Force

So after the first game in our campaign, how are things looking for the Junker Insurgents? Well my starting force was as follows, which came to a total of 1085 points. We had a starting total of 1100 points, so this was close enough for me given the troops at my disposal.

4 x Squads with Sergeant, Rocket Launcher and 3 Freedom Fighters - 400 points
4 x Squads with Sergeant, Sniper and 3 x Freedom Fighters - 436 points
3 x Bullfrogs - 90 points
1 x Bullfrog with Rocket Pod - 67 points
1 x Bullfrog with GMG (a Steve J Autos conversion) - 59 points
1 x Junker Power Armour (a Steve J Autos walker unit conversion) - 33 points

As you can see, a fairly infantry heavy force with some speedy Bullfrogs which are very useful for certain scenarios, plus a bit of mobile firepower in the form of the Bullfrog conversions and Junker Power Armour.

Campaign Turn 1
I started off with a force of 349 points out of a possible 350. Losses were rather high to say the least, losing:

1 x Sergeant - 22 points
2 x Rocket Launchers - 42 points
6 x Rifles - 114 points
1 x damaged Bullfrog Rocket launcher (34 points to replace)

Total Losses: 212 points

I gained 45 Victory Points for damage done to the RDF force. So after the first game, I have the following points at my disposal to replace losses:

Total: 45 points

So after the first game I'm down a total of 167 points, which is quite a lot. Fortunately my large number of troops at the start of the campaign, gives me some cushion to absorb losses, but not for long if this rate of attrition continues. So I will await the next scenario before deciding upon how to spend my points on replacements, but I think the repair of the Bullfrog Rocket Launcher will be fairly high on the list...


Ambush Alley - Campaign Turn 1

Michael of Angel Barracks and I have been planning on trying a mini-campaign to test out some campaign ideas for his excellent KR-16 rules. After a few games over the past month or so, we have finally reached a point where we are ready to give them a run out.  So a few nights ago we got together to kick things off.

Background 
The RDF are on a routine patrol, checking out an area as there have been reports of Junker Insurgent activity. The Junker Insurgents have planned an ambush for the RDF and are laying in wait... 

Scenario
The RDF set up in their deployment zone. The Junker Insurgents can set up hidden or as Junker Civilians. If hidden, please mark on the map prior to the game and only reveal when you try to command them and they pass their roll. So if you have a JI unit hidden and you tell them to aimed fire and they fail, they stay hidden. If they pass then you reveal them and they aim fire. For civilians, then use the normal JC rules.

Points Each side has 350.
 
Junker Major Victory
Kill over half the RDF troop total including at least 1 officer.
Junker Minor Victory
Destroy all RDF vehicles and at least 1 officer.
 
RDF Major Victory
Lose no more than 50% of the troop total, and kill more than 50% of the JI troop total or cause them to retreat.
RDF Minor Victory
Get at least 50% of the RDF troop total off the far table edge

Junker Insurgents Force
2 x Squads with rocket launchers
1 x Sniper team
1 x Bullfrog with rocket system
1 x Junker Power Armour unit 

Deployment
I set up my forces with an infantry squad either side of the 'road', with the aim of catching the RDF troops and/or vehicles in crossfire as they passed by. The sniper team was deployed at the end of the road to give the maximum amount of time to fire on their targets. The Power Armour unit was deployed along with one of the infantry squads, whilst the Bullfrog was kept hidden behind some woods, with the aim of attacking the RDF in the rear.

Turns 1 - 2 RDF Initiative
The RDF completely fail to activate their units, earning the sobriquet of "Run, Don't Fight".

The RDF IFVs at their jump off points.
 
Turn 3 RDF Initiative
One Pathfinder IFV arrives on the table, but the Junkers keep their powder dry

Turn 4 RDF Initiative
The remaining Pathfinder arrives, drawing alongside its stablemate. The Junkers attempt to spring their ambush, but the Bullfrog fails to activate and one infantry squad opens fire at point blank range, only for the Pathfinder to make its save.

Turn 5 RDF Initiative
One Pathfinder moves forward and opens fire, but to no effect. The RDF Major attempts to lead his troops into an assault on the Junkers, but fails to activate. In response, the Junkers reveal their other infantry squad and their combined fire damages one vehicles aiming system and destroys another. The Bullfrog appears in the rear, but only manages to shake up the crew in Major's vehicle.

The Junkers Insurgents ambush in full swing, with the RDF taking fire from all sides.

Turn 6 RDF Initiative
The RDF once again win the initiative phase, which is becoming crucial. The RDF Major deploys from his damaged vehicle and immediately assaults the Junkers, but both sides completely miss each other. The Junkers continue to target the vehicles, hitting the running gear on one which slows it down, with the other becoming completely immobilised. Vehicle fire results in one Junker squad becoming shaken. At the end of the turn, the earlier assault is resolved, with two Junkers dead to one RDF.

The Pathfinder vehicles continue to take hits, but the RDF manage to deploy and assault the Junker Insurgents in the field.

Turn 7 RDF Initiative
The RDF continue their close combat assault, killing another two Junkers, whilst the remaining RDF squad is still stuck in its vehicle. The Bullfrog destroys the remaining Pathfinder weapon, but the Junker squad completely misses with its shots, which could prove costly.

The RDF assaults are taking their toll on the Junkers, but with their Pathfinder IFVs sustaining damage, the battle could go either way...

Turn 8 Junker Initiative
With a chance to really inflict damage on the RDF, the Bullfrog fails its activation roll, which proves costly, as the other RDF squad immediately deploys from its vehicle. Fortunately  they miss the Junkers squad that they are firing at, who throw molotov cocktails at them, resulting in them becoming shaken. The Junkers deploy their sniper team and power armour unit, whio all hits their tragets, only for them to make their saves. The RDF Major leads his troops in the assault that sees then end of one Junker squad. This is important as it gets them close to one of their victory conditions.

The battle swings decisively in favour of the RDF. With the loss off one squad, the Junkers position looks bleak. The RDF Major leads his squad to attack the Bullfrog pick-up truck, with spectacular results. Even the appearance of the Junker Power Armour unit cannot tirn the tide.

Turn 9 Junker Initiative
With the loss one one Junker squad, it is important that they start inflicting casualties on the RDF. The Junkers start off well, with their molotovs killing two RDF infantrymen, but the pwer armour unit fails to activate, just when in a position to really inflict damage on the RDF. In response the RDF Major leads his unit to attack the Bullfrog and immediately destroys its rocket pod. The Junkers continue to take losses, but continue to fight in the hope of gaining a minor victory. Once again the sniper team hit, but only shake their target.

Turns 10 - 13 Junker Initiative
Despite having the upper hand at the start of the turns, they fail to do any damage to the RDF units, but are slowly whittled down until it is only the sniper team left. With all chance of even a minor victory gone, the sniper team leave the table in the hands of the battered but victorious RDF.

Battered, bloody but unbowed, the RDF are in control of the battlefield.
 
Aftermath
At one point the Junkers were in a good position to do real damage to the RDF. However some crucial saves on the RDF part combined with equally crucial misses or failed activation rolls by the Junkers, cost the Junkers the game.

In the end the Junkers sustained 10 infantry losses, the power armour unit out of action and the Bullfrog damaged. Only the sniper team survived unscathed. In the post game rolls, the Junkers suffered extremely badly; out of 11 rolls, they failed 9 of them, losing 1 sergeant, 2 rocket launchers and 6 infantry.

Campaign Implications
With so many losses, this was about as bad a start to a campaign as can be imagined. Fortunately they have plenty of reserves, but need a good win in the next game. The RDF suffered minor losses in comparison and were able to replace virtually all of their troops. The next game is likely to be based in a main Junker settlement with the RDF trying to hunt down the insurgents.

Post Game Thoughts 
Campaign wise the game was a bloody start, but so far all seems to be working out ok in terms of the system used. I learnt the the RDF are lethal in close combat, so will try to avoid this at all costs. At one point the game descended into a grenade/molotov cocktail throwing contest, so post game we agreed to limit the amount of these that any squad could carry, which made sense to us. Ditto vehicles which will be limited to how much smoke they can lay down in a game.


Our next game should be in a couple of weeks, so am looking forward to this already, plus it will give me time to finish off some extra units. Hopefully home advantage for the Junkers should work in my favour.

Saturday, 2 August 2014

Action at Anvil Gate

Of late Michael of Angel barracks has been coming over on a Monday evening for a game of KR-16, a chance for both of us to get a game in despite the demands of work and family. A nightmare journey, due to the ever present it seems roadworks in Bristol, saw Michael arrive late, but a black coffee courtesy of SWMBO saw him restored to health. After the usual chat about all things gaming, we were ready getdown to business.

The scenario saw my BPI troops pitted against Michael's RDF, with the aim to locate an informant hidden in Anvil Gate, who wanted to reveal secrets of the BPI drilling operations nearby to the RDF. The aim was for me to capture him for a major win, or kill him for a minor one. For the RDF it was to extract him back across their table edge.

The game kicked off with both sides making a stuttering start towards the Anvil Gate compund. By Turn Two I'd managed to get a squad inside ready to start the search, with the rest of my forces strung out, trying to catch up under the cover of a smoke screen. My initial search failed to locate the informant in two buildings, so by then another squad had arrived and the two squads fanned out to increase the search area.

At this point Michael's RDF troops started to arrive in the compound, and the scene was set for a shoot out in and amongst the habitation pods of Anvil Gate. Lady Luck was with Michael at this point as his first turn of searching saw him locate the informant, which was rather awkward, as most of my forces had still not made it to the compound, but neither had Michael's.

The action now changed rather dramatically, with my troops trying to take out the informants squad, who were naturally trying to withdraw from the compound under covering fire from their comrades. The RDF troops started taking casualties straight away, but were still able to exit the compund. Outside, by Ramjack AFVs started taking hits from the RDF Pathfinder Rangers and Archer IFVs, limiting my ability to move and shoot. My Walker unit gave as good as it got, inflicting hits on the Pathfinder Archer, damaging its targeting system.

The RDF troops started to withdraw from Anvil Gate as best they could, but were taking heavy casualties, despite the use of smoke to cover their retreat. Both sides AFVs and IFVs were severely damaged, but my Ramjacks lived up to their name, ramming all but one of the RDF IFVs, causing them enough damage to render them inoperable. So far my BPI troops had not sustained a single casualty.

As the action left Anvil Gate, it was touch and go as to whether the RDf would be able to extract the informant safely off their table edge. With all their vehicles destroyed, they were forced to rely upon shank's pony as their only means of escape. In the end, the crucial initiative roll favoured the RDf, who were able to leave the table safely, but at a heavy cost to their forces. Both sides had lost all of their vehicles, but the RDf had lost around half of their troops compared to no losses for the BPI. A Phyrric victory if there ever was one!

Well it was certainly an entertaining game, full of action and cinematic moments and went right down to the wire. What more could you ask for? Sadly we did not have time to take photos, as the light was not good and frankly we were too caught up in the game. Our aim in the future is to try and have some form of mini-campaign, so that you really have to husband your forces, rather than blow the all in one game. We're not sure how we're going to do it, but it could be lots of fun if we get it right.

Saturday, 5 July 2014

KR-16 Scenery

Following on from the recent  KR-16 game with Michael of Angel Barracks, it was clear that I really needed to make some specific 6mm scenery to fight over, given that I now had two painted forces. Of late the wonderful Summer weather, work and family commitments and a holiday have meant that I've not had the time, nor the inclation, to do much gaming related stuff.

However, a break in the weather and some free time allowed me to get into the garage today  and start knocking up some terrain items to fight over. Having been inspired by Michael's efforts over the past few years, I've been collecting bits'n'bobs for when I would be able to start making my own scenery. So with the workbench cleared and my stuff to hand, I set about making a start on a few pieces, which can be seen below. They are very much works-in-progress, but hopefully you will get an idea of the thinking behind each one.

As a bit of general background, my terrain will be based on one of the more fertile areas of Komotenmelodie, purely because my terrain board and general scenery is green. Simples. To start with I'm making some Junker settlements with a very eclectic mix of stuff, befitting their name. Alongside this will be some generic pieces that can be used anywhere. Later on I will make a BPI and RDF base as time and inspiration allows. 

The captions will give a bit more detail on each piece and how it was made, hopefully making it easier to follow . 


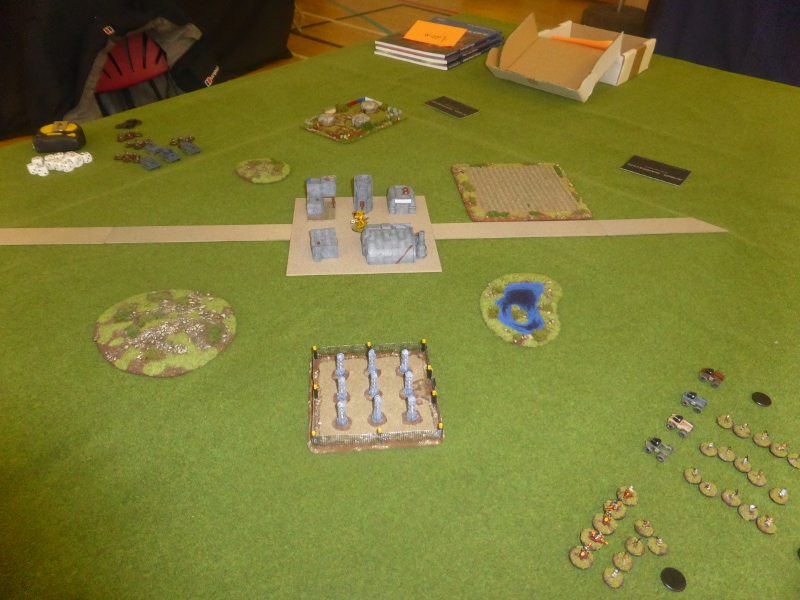
A 'power station', Junker yurt settlement and 'power substation'.

The 'power station' is 3" x 5", the settlement 6" x 4" and the 'substation' 6" x 6".

The yurts are made from some plastic endcaps with masking tape covering. The 'walls' of the settlement are a mix of metal sheeting, concrete road blocks, wire fencing, stone wall and logs. The entrance gate has barbed wire coiled over the top. Any gaps will be filled by foliage etc to give the compound a lived in feel.

The bases are scrap bits of hardboard with the edges sanded down to help them blend into the gaming table.

The aim is for the compound to look like it has been constructed from salvaged items.

The 'power station' is a piece of electrical equipment that has had a few items added to it to give it more detail and the look of a generating plant.

The walls are 1.0mm ABS sheet, scored and marked to look like metal panels. When painted they will have a weathered look and probably some form of warning on them or posters etc.

The 'power substation' was inspired by Michael finding some plasterbaord rawlplugs that looked like some form of wind turbine. Not having any to hand, these suggested old fashioned ceramic power transformers and as such may be painted in a similar vein.

The wire mesh is some left over brass etchingscut to size that I've had for years, awaiting an opportunity to use them. The corners have been reinforced with styrene rod and a 'gate' added by sticking some ABS strips to suggest hinge points. As with the 'power station', the fence is likely to have some form of warning signs applied to it.

So there you have it. A start has been made and the aim tomorrow is to add grit etc to relevant areas so that I can start priming and painting the three pieces. If time permits i will take some more in-progress shots, if not then the completed pieces..