Saturday, 29 August 2020

Operation Sealion - Assault on the GHQ Green Line

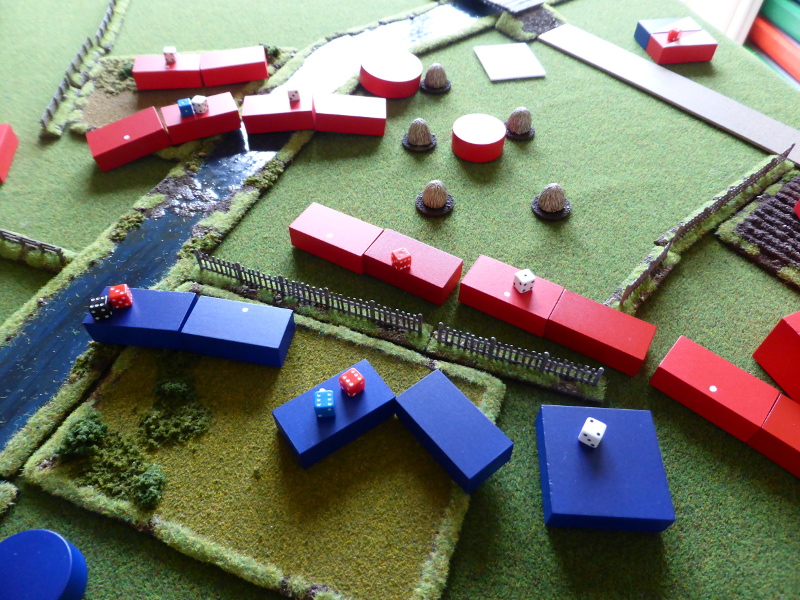
I don't know when I first became aware of or interested in 'Operation Sealion'. I suppose it must have started in the mid 1970's with the superb 'World at War' tv series combined with some Airfix magazine articles on British pillboxes disguised as ice cream parlours, summer houses etc. Fast forwarding several decades and various Blog and forum posts on the operation must have rekindled my interest, certainly enough for my to buy Kenneth Macksey's superb 'Invasion' book, a fictional account of the German invasion in 1940. In fact I gamed one of the 'scenarios'  before, but as a one off game.

With my planned WWII PBEM campaign stalled for the time being, I began to think of what period I would like to run a solo narrative campaign in. For some reason 'Operation Sealion' sprang to mind. Along side the Macksey book I had some Airfix articles by Terry wise that were informative, along side Wikipedia of course. With plenty of options to choose from, I plumped for an attack on the GHQ Green Line, which was designed to protect Bristol. This would be a diversionary attack and would give me plenty of scope to be creative, plus having the added advantage of fighting on 'local terrain'.

So the past few days I have been making notes and planning a broad outline of the scenarios to be used, the forces involved etc. Whilst details are easy to come by for the main German invasion forces and the British defensive units in the South East, for those further afield there is little concrete information. Not a problem as I will go with plausible options and ones that will fit my narrative and the local area etc.

Rules wise I will be using BKCII, with various house rules and rules from BKCIV. I'm so used to version II that I stick with it because I know it so well. One change I will be making is allowing more command units than normal. I've always found it strange to have one command unit in control of say 6 infantry units and some support weapons. Going forward I will have one command unit controlling 3 infantry units and one or two support units, so in effect giving them command of a Company. I think this will better reflect historical command and control and give a better game.

I have been busy painting up field defences and basing up extras units that have been in the 'painting queue' for far too long. I still need to finish off some supporting armour but won't need these for the first and possibly second games. The background fluff is all worked out and just needs a bit of organising, so in a sense the hard work is already done. Ditto the first scenario. Hopefully I will be able to kick things off in the next day or so and am really looking forward to setting things in motion.


Never Mind The Billhooks

Over the past few years I have given up on buying wargames magazines as, being a 10mm gamer and in my mid-50's, I find there has been little of interest in them to justify the subscription costs. However the latest Wargames Illustrated issue piqued my interest due to it coming with a free set of rules, aimed at wargaming the War of the Roses. This is more up my street than a pack of 28mm Perry Miniatures that, although being lovely, do not tempt me to part with my hard earned shekels.


I had heard about the rules via Facebook and various forum rumblings, but a couple of reviews on You Do Not Know The North Blog and Norm's Blog persuaded me to go and buy a copy. In short I'm glad I did.

The rules cover some 24 pages in a self contained booklet and remind me very much of 'Lion Rampant', but with some nice tweaks and obviously period specific rules. The author also lays out his stall in a small article within the magazine which is nice. There are also some articles on the WotR within the magazine as one would expect and for a relative novice such as myself found them really rather useful.

I think anyone who has played 'Lion Rampant' will feel very much at home with these rules and they  follow what I would call a fairly standard format of units being hit on say a 4+, save on a 5+ etc. So nothing left field which is a good thing in my opinion. Afterall if it ain't broke, don't fix it! The card driven sequence looks to be fun and there are some nice 'events' to spice things up and fit the period. They also look to be solo friendly, which given the current global situation, is a good thing. 

The author prefers individually based figures for removal but freely admits that large bases with multiple figures still work as long as you record casualties. Table size for 10mm would happily work on a 3' x 2' table, but a 2' x 2' based upon experience would work just as well. For myself the question is whether to go with one large base of figures for that dioramam look or, more likely, several bases so that I can use them for other rulesets, such a Neil Thomas' Ancients & Medieval.

These rules while being simple are certainly not simplistic and I can see them becoming a popular set for club games or with friends at home. They are begging to be played as a campaign and with the map in the magazine, I can see some action between the Talbot's and Berkley's forming the basis for a nice little narrative in this part of the World.

So all-in-all a worthwhile buy and certainly a magazine to keep for future reference. I can see the rules being tweaked for periods before and after the WotR and, as the author mentions, Game of Thrones. If you can, buy the magazine or pdf and i don't think you will be disappointed.

Friday, 21 August 2020

Balkans 1941

With our planned campaign paused and some newly painted armour for it, I decided to have a game of BKCII to give the new toys a run out on the table. I was torn between France 1940, Operation Sealion or Greece 1941 and in the end plumped for the latter as it was viable encounter between the British and Italians.

OOB
Both sides had an Infantry Battalion with mixed armour support. The British had Matilda II's, A10's and Vickers MkIV's, the Italians M11'39's, M13/40's and L3/35's. So broadly an even match up but the British did have a small infantry advantage.

Scenario
Quite a simple meeting type encounter, with the British trying to exit the table and the Italians trying to stop them.

Terrain
Set in a fertile Littoral Zone, boarded by mountains on one side and the sea on the other. 
 

An overview of the table, with the British entering from the left, the Italians the right and top.

The Italain left and centre.

The Italian right and flanking force.

The British right.

The British left.

Turn 1
A random die roll saw the British getting to move first, their plan being to cross as quickly as possible over the bridge whilst throwing a flanking force via the ford. The Vickers MkIV's moved swiftly to cross the bridge and took up defensive positions, as the rest of the left flank moved up. The right flank with the Matilda II's failed to arrive.

The Italians plan was to secure the buildings by the bridge and operate a mobile defence. The right flank with the L3/35's and M11/39's pushed towards the buildings but the centre and left failed to appear.

The end of Turn 1.

The British left flank moves forward.

The Italian right flank responds.

The flanking force of L3/35's and AB-41 arrives.

Turn 2
The advance gaurd of the Vickers MkIV's held their positions as the British left flank slowly advanced, with the A-10's making for the bridge. The right flank and Matilda II's arrived, but at a snail's pace as one would expect of Infantry tanks.

The Italian Infantry in the centre arrived, but the 13/40's on the left flank still failed to appear. The flanking force of L3/35's and the M11/39's with their supporting infantry pushed on and reached the edge of the houses by the railroad.

End of Turn 2.

The British right flank arrives.

The slow advance on the British left.

The infantry in the Italian centre push on.

The Italians reach the buildings and begin to occupy them.

Turn 3
With the A10's engaging the Italian M11/39's and knocking one out, the Vickers MkIV's moved over the railway line to try and turn the Italian flank. The Matilda II's and infantry on the right flank continued their steady progress, crossing over the river by the ford.

The M13/40's on the Italian left flank finally arrived, but the infantry in the centre failed to move. As the L3/35's on the flank consolidated their position, the right flank blundered, leading to an infantry unit assaulting the British recce armoured car and knocking it out.

The end of Turn 3.

The British right flank, led by the Matilda II's.

Both sides are engaged in and around the buidlings by the river and railway line.

Despite the loss of an M11/39, the Italian position looks good.

Turn 4
The British left flank moved over and around the bridge to secure the crossing as well as occupying one of the buildings. The Vickers MkIV's moved over the hill on their mission to turn the flank, whilst the right flank carried on its sedate progress albeit aided by the CO.

The Italian M13/40's seeing an opportunity, moved forward an engaged the Vickers MkIV's and Matilda II's, knocking out one of the Vickers. As the infantry advanced in the centre to support the right flank, the right flank with combined arms knocked out an infantry unit and suppressed the A10's on the bridge.

The end of Turn 4.

With targets to their front, the Matilda II's could do with getting a move on.

The action hots up by the bridge, with the Italians having the upper hand.

The M13/40's engage the Vickers light tanks.

The Italian armour helps gain the upper hand.

Turn 5
With gunfire to their front, the Matilda II's and their supporting infantry moved forward and engaged the enemy. The Vickers MkIV's taking advantage of this, retreated form their exposed position without a scratch, despite enenmy fire. On the left flank the firefight continued unabated in the town, but with little effect.

Responding to the appearance of the Matilda II's on their flank, the M13/40's moved and pumped repeated fire into the infantry tanks, managing to suppress tow on the lumbering beasts. On the right flank by the buildings, combined fire saw two more British infantry units knocked out, along with the a10's on the bridge.

The end of Turn 5.

Despite losing a tank to opportunity fire, the M13/40's gave a good account of themselves, suppressing all of the Matilda II's.

The A10's burn by the bridge.

The Italians in control of the buildings by the bridge.


End of Game
At this point I had called the game and gave the Italians a win. Not because of the position of things at the end of Turn 5, but because of several 'phone call interruptions from our home insurance company, after we had found some water leakage under our floor boards. These calls meant I had lost track of things and so it was easier to call it a day rather than plow on with further interruptions

Post Game Thoughts
Aside from the above calls, it wasn't a bad game and it was nice to have some new toys on the table, which I had been meaning to paint for several years. So as always some thought son the game:
  • For a quickly put together game it was OK, but it did all feel a bit rushed. Normally I would set things up the night before and then in the cold light of day, tweak a few things here and there. I didn't have this luxury and it showed.
  • Related to the above I think I had a bit too much terrain, but it's hard to tell due to the premature end of things. 
  • I missed the game being part of a campaign, which has been the main focus of my gaming this year. The actions had no consequences and this felt somewhat unsatifying compared to the narrative a campaign generates.
  • I think I had too much armour on the table, with the infantry largely relegated to a supporting roll. I didn't mind this too much as I wanted to 'blood' my new toys.
  • Not having off board artillery or air support seemed strange, as normally I would have one or the other, sometimes both. I had planned too but the rushed nature of things meant they got left by the wayside.
  • Recce. Even with the new rules in BKCIV, I never feel Recce real works that well. I find I use them in the first few Turns to help get things moving with the CV bonuses if they can get through, but after that I tend to forget about them. I'm not sure what the answer is. Maybe in certain scenarios they are of more use, but I rarely find this the case.
  • One thing the game did do was spur me on to paint up some of those odds'n'sods that I have been meaning to do for years, so that I can have a good core of units with which to game and then add to these as and when required.
Aside from getting things painted, I'm not sure what I want to game next. My friend Keith is developing some Napoleonic rules which I've been meaning to give a run out, which will be a nice diversion from painting WWII kit. As always plenty of options to choose from, so until next time...

Operation Democracy - a BKC PBEM Campaign

After a brief pause to do other things post our last PBEM campaign, my mind turned to the idea of doing something similar but set in WWII. I was particularly inspired by Jon Bleasdale's Operation Nostalgia and the Dodecanese Campaign, as both are nice and self contained. So with the setting sorted it was then the 'simple task' of getting everything sorted for the chaps to play. Or so I thought...

The background info, fluff and OOB etc were quite easy to do, using the Battle of Leros as a guide. The island of Sodor was simply a matter of going through the Warplan maps and coming up with a look I liked and one that had a good mix of terrain and objectives for both sides.

The island of Sodor.

So far so good. I had come up with broad guides to movement rates for infantry, AFV's as well as objectives for both sides. Sorting out naval and air support was more difficult, but again I had a broad outline of how it would work. With things in place I passed on the info to Dave and Keith who, once again, were happy to take part in my campaign. 
 
Then things hit the rails so to speak. An 18th or 19thC campaign is relatively speaking easy for the umpire and the players to sort out. Moving things into the 'modern' era transpired to be much more of a difficult undertaking. Truth be told I was having doubts even before Dave and Keith highlighted their busy schedules meant that they would have to delay the start of things. Looking at it after a few days away I realised that I would need to revisit my original ideas as in their current form they didn't really work.

Fortunately I have some campaign books in my library and also Warning Order has plenty of campaign info, so both will be consulted to try and resolve the issues that need to be 'fixed'. Maybe even using a board game would resolve things nicely? Broadly speaking and in no particular order they are:
  • Air Support. How to plan and deal with bombing raids on the map before they reach the table top.
  • Naval Support. As above.
  • Air Reconnaisance. How to factor this into map moves and intel to both sides.
  • Map Movement. This looks like it will involve a lot more detail for both sides, compared with simply moving a Battalion or Brigade as before. For example is the Company the smallest manouevre unit? Probably so but even at this level the command orders would have to be pretty detailed, maybe to the point that the fun has gone from the thing.
  • Off Table Artillery. Easy to do on the wargames table but how far should they be able to shoot when on the map? 
  • Defensive Positions. How long might it take to create trenches or strong points in campaign turns?
So as you can see plenty of things for me to mull over and hopefully sort out. I'm not going to rush it and will do some research before seeing whether it is viable in its current planned form. In the mean time it has inspired me to get back to the painting table to try and finish off the odd unit here and there that I have been meaning to do for several years now, so it's not all bad. Until next time...


Friday, 31 July 2020

Warning Order #54

To aid passing the time whilst still in lockdown, with any chance of face-to-face gaming a way off for the foreseeable future, the latest issue of the ever excellent Warning Order 'magazine' by Matt Irsik is available to download.

As always a nice mix of articles, reviews, AAR's etc, with a lot devoted to BKCIV this issue. So I hope you enjoy it and Matt always appreciates any feedback, so he feels he is not doing this for nothing. Drop him a line if you can.


Monday, 27 July 2020

Hills and Rocky Terrain

When I first got back into wargaming some 15 odd years ago, it was mainly in 28mm and very much skirmish based games, such as Mordheim and Rules of Engagement. the terrain I made for these games very much reflected the needs of the game itself, but also the look, being more on the realistic side. Whilst I loved the look, often the terrain didn't always work from a practical point of view, such as being unable to get some troops where you wanted due to some lovely bushes getting in the way. Not insurmountable by any means but it always used to frustrate me a tad if I'm honest.

Fast forward 10 years or so and my gaming had moved on, with the rules changing to BKCII, Honours of War etc and 10mm being the chosen figure size. My terrain whilst still useful in some respects, didn't really work for the type of games I was playing, so I slowly started to sell off my old stuff and make new ones that were more in keeping with the new games and figures.

Hills were pretty much the last to be tackled, as my 'old' hills were shaped nicely but the problem was figure bases and vehicles sliding down the slopes, despite numerous efforts to prevent this. Also they were really too big for my games. So with plenty of time on my hands due to early retirement and the Covid-19 lockdown, I finally set myself the task of making new ones.

Base wise I used a mix of 2mm MDF, covered with foam and then sculpted or, more recently, 1/2" MDF, due to a lack of foam at home (I used to use off cuts from work). These were then covered in grit and rocks as required, painted and then flocked, in the same manner as my other terrain and figure bases. The results can be seen below and are certainly much more game friendly.
a

Four new hills with some detail, but fairly plain to add game play.

By chance they can be combined to make larger hilly areas if required. the gaps can be left or some flock or lichen added to hide the joins. I simply don't have the space or real need for single large hills.

A Pendraken tank to give an idea of the size of the hill.

 Three 40mm x 20mm bases lined up, again to give an idea of scale.

Rocky terrain that may or may not be impassable to certain troops types, largely dependent upon the needs of the scenario.

Again a tank to give an idea of size.

Gandalf summoning who knows what on his 40mm x 20mm base.

I've enjoyed making these new hills and rocky terrain and may add more in the future. Most of the time is waiting for the glue or paint to dry, but in warm and sunny weather, I could make and finish one in a day, all being well. However I don't rush things as I like to take my time and get things right to my own satisfaction.

All of these pieces will hopefully see action soon in either a planned new campaign, or some one off games. I still need to decide which. I really should get back to figure painting but the Muse is not upon me at present, so this will have to wait. So until next time...

Thursday, 23 July 2020

Post PBEM Campaign Thoughts

Having just finished my first PBEM campaign, I thought I'd take a few moments to reflect upon how it went, what worked, what could have been improved etc. So in no particular order:

The KISS Principle. I know it sounds pretty obvious, but don't go too large or too complicated. Keep it a manageable size so that you and the other players can feel in control of things. I found that 3 Divisions per side worked well, with each Division of 3 Brigades. The Divisions are large enough to allow for detachments to be made, if required.

Be Flexible. You will not be able to cover every conceivable situation that might occur. Have some good basic guidelines, such as road versus off road movement,  how far Divisions can 'see' in terms of map squares. When  a situation occurs that is not covered, simply work out what would be the most reasonable outcome, bearing in mind the orders from either player, the terrain involved etc.

Map Area Size. With the WarPlan maps I was kindly given by a fellow Blogger, 3 maps x 3 maps worked well, with each map having 25 squares. This enabled plenty of room for pre-contact manouevering, but not too much that both players would get bored before the real action started. I found that by Campaign Turn 3, both sides had started to 'see' the other, but still not have a complete picture of overall dispositions.

Fog of War. Directly linked to the above, both players enjoyed this aspect and found it a nice challenge, although obviously daunting at times. Where were the enemy? From my perspective, it was fascinating seeing the action unfold before my eyes.

Help The Players. Fog of War is all well and good, but you don't want to be blundering about clueless as it's no fun for anyone. So I fed snippets of intel to both sides based upon what they might be able to glean from the local populations etc. This helped in 'directing' their broad lines of advance, but not revealing too much inforamtion.

Rules. Make sure you play with a ruleset that you know well and ideally the players do too. You don't want to be learning new rules in the midst of a campaign. Also keep things fairly 'vanilla' and only add 'chrome' where appropriate, such as making one unit 'Stubborn' as I did in this campaign to reflect their determined resistance in one game.

Have Fun. It sounds obvious but make it fun for the players but also you as the umpire and player on the table.

Orders. Possibly one of the most important things to consider is how you handle information out to the players and the orders you receive in return and how you execute them. Clarity both ways works well and avoids those Captain Nolan moments, but should they occur, than can be fun.

Common Sense. Another blindingly obvious statement, but I often found myself looking at the campaign map and the orders from both sides, thinking what makes the most sense? I then went with the one that did make the most sense, sometimes reflecting upon it overnight.

Play Both Sides Equally Fairly. Yet again another obvious point but I would set up the game up as best I could based upon both sides orders. I would then play the game from either table edge, so I felt I was playing that side each game Turn. It is too easy just to sit in one place but that movement really helped me play each side fairly.

Post Game Campaign Movement. So after each game, I would look at what had happened to either side, then think what would be the most likely lin of retreat or advance, given orders received, the terrain being moved over, the general Campaign situation. Mulling things overnight often helped clarify things.
 
Time. I was surpised at how long it took to make the maps moves, relay, receive and implement orders then play the game. Broadly each Campaign Turn took about a week to complete. Because of this the whole KISS principle really helps in keeping the whole thing manageable.

It's Fun! It certainly was and a very different experience for all involved. I particularly enjoyed implementing both sides orders when the game hit the table. The campaign also through up many 'scenarios' that i would not normally play, which was a pleasure and often a challenge, but a good one.


Different Periods. My campaign was set mid-19thC and I felt worked well for this period. There is no reason why it could transfer to say a SYW setting or WWII, with some tweaks here and there. In fact I am mulling over an idea of a WWII campaign and how to fit in the aerial and communication aspects of this conflict.

I hope the above might have been of use and I found it useful to reflect upon how the whole campaign played out. Hopefully I will get another one up and running soon, but I don't want it to become onerous for anyone involved.

Monday, 20 July 2020

The War of the Rhabarberian Succession - Turn 6 Miracle on the Marne?

With the Campaign Turn 6 map moves already made, it was a fairly simple task to transfer the battle area to the table top. Once again the terrain was very open, with a few woods and some fenced fields. The river was fordable for most of its course due to a period of dry weather. Not the best defensive terrain it must be said but the Ruthenian troops would have to make the most of it. Both sides had units that started the game with one hit, to reflect the action they had just been and the damage taken.

As before, information and 'photos of the table were sent to both players who then fed back to me their plans of attack or defence. It was then up to me to try and implement them to the best of my ability.

Ruthenian Orders
Overall: the combined army will defend the line of the river, using it as an obstacle between them and the enemy. This is the occasion to hold at all costs and drive off the enemy with a very bloody nose.

1. 6th Division. 2 battalions will defend the bridge from the river bank left and right of the bridge. One artillery unit will be deployed on the road near the farm with a direct line of fire to the bridge. 1 battalion will occupy the farm, with the other artillery battery supporting it to its right. The final battalion will form a reserve behind the farm. The 1st Cavalry will form on the road in front of the wood, ready to commit themselves to a reckless charge whenever the situation becomes desperate.

2. 2nd Division must lose no time in fording the river to form on the right of 6th Division. 1 brigade will link with 6th Division and line the bank of the river. The other brigade will form behind the right of the other brigade, to guard the right flank of the army, particularly against any enemy units crossing the wooden bridge.
Prusskian Orders


Deployment
With both sides having cleary set their stalls out, it was an easy job to deploy the various Division & Regiments.

An overview of the table, with the Ruthenians in Blue and the Prusskians Red.

The Ruthenian 2nd Division in the process of trying to ford the river.

The Ruthenian 6th Division deployed ready to meet any attacks over the bridge.

The Prusskian 5th Division & 6th Cavalry Regiment.

The Prusskian 3rd Division & 4th Cavalry Regiment.


Turn 1
The Ruthenians started the game and the 2nd Division were only able to make one move even in march column. One unit already deployed in line prepared to cover their withdrawl. The 6th Division failed to receive orders whilst the 1st Regiment held their position, awaiting developments.

The Prusskian 5th Division was only able to make one move onto the table and stayed in march column, whilst the supporting 6th Regiment failed to appear. Both the 3rd Division & 4th Regiment made two moves onto the table and followed their orders as much as possible.

The end of Turn 1.

The Prusskian troops begin to arrive and their intentions are clear.

Turn 2
The Ruthenian 2nd Division made three moves and formed a good defensive line as per their orders, but a lack of artillery might hinder their efforts. Once again the 6th Division failed to receive any orders, but the 1st Regiment moved across the rear to try and support the 2nd Divisions right flank.

As the Prusskian 6th Regiment arrived, the 5th Division moved towards the river and deployed into where line where possible. The 3rd Division managed to make one move due to being in march column, whilst the 4th Regiment carried on pushing forward with flank protection. 

The end of Turn 2.

The Ruthenian 2nd Division form a good defensive line.

The static 6th Division can only watch on as the enemy arrive.

The Prusskian 5th Division begin to form up for the attack.

The 3rd Division are somewhat tardy and could do with getting a move on to help pin the enemy left flank.

Turn 3
The Ruthenian 6th Division suddenly burst into life and redployed to meet the expected line of attack from the Prusskians. Their artillery opened fire at long range but failed to hit. The 2nd Division held their line and opened fire on the Prusskian Light Infantry, causing two hits and Disorder. The 1st Regiment continued to edge forward to cover the flank.

The Prusskian 5th Division pushed forward as the 6th Regiment moved over the wooden bridge to cover their flank. Fire burst out along the line causing Hits and Disorder (note that the Stubborn unit from the previous games made a load of Morale Saves to avoid having to take a Break Test). Again the 3rd Division failed its order but chose to deploy from march column into line as the artillery continued forward, covered by the 4th Regiment.

The end of the Ruthenian Turn 3.

The end of Prusskian Turn 3.

The 2nd Division begin to engage the enemy.

The 6th Division has formed up along the river, but is still covering the bridge.

The 5th Division is pressing the enemy whilst the 6th Regiment moves across the bridge.

The 3rd Division are not really playing ball at present.

Turn 4
With the obvious threat to the 2nd Divisions position, the 6th Division failed to send its reserve unit to support them. However the 1st Regiment moved up to try and restrict the ability of the enemy cavalry to deploy into the open space behind the Ruthenian lines. Shooting across the front was rather ineffective, with only one hit caused but some counter battery fire caused one hit and Disorder on the Prusskian 5th Divisions artillery.

The Prusskian 3rd Division finally moved forward and their artillery carried on limbered. Shooting at the Ruthenian 6th Division by the bridge, they caused Hits & Disorder, but the 6th Division units made many good morale saves to avoid going Shaken or having to take Break Tests. The 4th Regiment moved across the Prusskian rear to support the 6th Regiment.

The 5th Division Blundered but at least moved forward and their shooting caused Hits, Disorder & one unit becoming Shaken. Again the Ruthenians made many good morale saves to avoid having to take Break Tests.

The 6th Regiment seeing an opportunity charged the Ruthenian 1st Regiment who counter charged. In the ensuing melee one Ruthenian Squadron broke whilst a Prusskian one retreated Shaken.

The end of Ruthenian Turn 4.

The Prusskian cavalry charge is met by a counter charge.

Both sides retreat but the Prusskians are in a stronger position.

The end of Prusskian Turn 4.

The Ruthenian 2nd Division are really in the thick of it.

The 6th Division come under fire.

The Prusskian attack from their left flank is developing nicely.

The 3rd Division finally get going and pin the enemy left flank.

Turn 5
The 6th Division managed to send a reserve Battalion to support the pressed 2nd Division, whilst across the whole front they held firm and fired upon the enemy. The shooting was pretty ineffective but at least one unit became Shaken and an artillery unit was finished by Counter Battery fire.

The 6th Regiment pushed on but was unable to charge the enemy 1st Regiment, whilst the 4th Regiment moved up in support. The 5th Division made a small advance and their shooting took its toll, causing more Hits which led to one Ruthenian unit breaking.

The 3rd Division pushed forward as their artillery started to deploy, with their shooting causing hits, with one unit ruthenina unit passing their Break Test. Again lots of good morale saves prevented the situation from being far worse than it was.

The end of Ruthenian Turn 5.

Counter Battery fire sees the loss of an artillery unit.

The end of Prusskian Turn 5.

The cavalry really are in danger of breaking into the Ruthenian rear.

A Ruthenian unit breaks.

The Ruthenian 2nd Division is coming under severe pressure...

... as is the 6th Division.

The Prusskian 5th Division and combined cavalry are pressuring the Ruthenian right flank.

The 3rd Division push forward to pressure the Ruthenian right flank.


Turn 6
With little room for manoeuvre, the Ruthenian troops largely help their positions. The remaining squadron of the 1st Regt retired to be closer to supporting troops and the 'reserve' unit moved to support the 2nd Division that was under severe pressure. Shooting actoss the front saw another artillery unit destroyed, but for once some good Prusskian morale save prevented a rash of break tests.

With the withdrawl of the Ruthenian 1st Regt, the Prusskian 4th & 6th Regt's advanced into the enemy reat, threatening their lines of communication and waiting for possible stragglers etc. There was little movement other than dressing lines to try to bring more units guns to bear. Shooting led to the loss of another Ruthenian unit and an artillery unit Disrupted.  However three infantry units were shaken and the Stubborn unit had used its 'free' auto break test.

The end of the Ruthenian Turn 6.

The Prusskian artillery loses another battery of guns.

The end of the Prusskian Turn 6.

The 4th & 6th Regt's get behind the Ruthenian line.

The 4th Regt has many targets of opportunity.

The Ruthenian 6th Division is under a lot of pressure.

One infantry battalion breaks.

The 5th Division very much in control on the Prusskian left flank.

I fear the Ruthenian flank is about to be turned.

Another view of the 5th Division commanding position.

The 3rd Divisions grand battery finally in position.

The 3rd Division almost ready to start crossing the bridge.

Turn 7
All the Ruthenians could do was to withdraw parts of the 2nd Division to try and protect the right flank. The 1st Regt moved to try and protect the artillery from any Prusskian cavalry attacks. What little shooting there was caused Hits & Disorder, but at least another artillery unit was destroyed.

In a strong position the Prusskian forces broadly held their positions and opened fire, leading to two units breaking and one being forced back, leaving the Ruthenian right flank in tatters. Seeing an opportunity the 4th Regt manoeuvered around the woods and charged into the lone 1st Regt squadron, who borke after failing a break test. They were then able to make a sweeping advance into the artillery by the river, breaking one battery and then retiring to reform. A rather successful action one might say.

The end of Ruthenian Turn 7.

The 2nd Division begins to withdraw.

Another Prusskian artillery unit broken.

The 6th Regt charges in...

... breaking the enemy cavalry and...

... then charging into the artillery...

... which is easily destroyed...

... and finally retiring to reform.

The end of Prusskian Turn 7.

The 5th Division about to turn the Ruthenian right flank.

The 6th Regt poised to exploit as the 5th Division advance.

The 'Stubborn' unit finally breaks.

Another unit is forced back by a break test.

The 4th Regt in control of the Ruthenian rear.

A unit breaks at the bridge, leaving it largely undefended.

The 3rd Division face little opposition by the bridge.

A final view of the battlefield.


End of Game
With their positions completely untenable, the Ruthenian troops surrendered after a staunch defensive action and were granted the Honours of War, quitting the battle field with drums playing, flags flying and their heads held high. With this loss the Ruthenians left Rhabarbernland to the Prusskians, who would 'guard it' whilst Crown Prince Ruprecht continued to look for his chin.
 
Post Game Thoughts
It was always going to be a tough ask for the Ruthenian forces, given they were outnumbered, especially in artillery and cavalry. However they held on a lot longer than I thought they would and gave a good account of themselves. So as always a few thoughts on the game:
  • Really the game was over at the end of Turn 6, but I thought I'd play one more Turn just to see what would have happened. I'm glad I did as it clearly showed (to me at least) a clear and decisive Prusskian victory.
  • Morale Saves really kept the Ruthenians in the game, as early on they could have easily lost quite a few units in opening moves, which would have spelt an early end to the battle.
  • Both sides artillery was pretty ineffective, often due to the above. However rifle fire accounted for most of the Prusskian artillery losses, which I haven't really seen before. Something to bear in mind for future games. 
  • Despite being outnumbered by Prusskian infantry and artillery, it was really the Prusskian cavalry that were a constant threat. As seen in this and previous games, once in the enemy rear cavalry can be devastatingly effective.
  • I must say that yet again Black Powder II, with the Glory Hallelujah! supplement,gave a very nice game that gave plenty of action throughout. You can add 'chrome' if you want, but I feel using 'vanilla units' makes game play much easier and allows one to concentrate on the game. A case of 'less is more'.
So there we have it, the campaign has finished and the Prusskians are victorious! I must say it has been great fun and could not have happened without the great support and co-operation of Dave & Keith, who have been fantastic thoughtout. I will post some thoughts on the campaign as a whole in another post, but suffice to say I already have another campaign in mind. A clue can be found over on  Jon Bleasdale's excellent  Blog. Until next time...