Wednesday, 11 August 2021

A Divided Enemy - Scenario 1

This scenario is taken straight from the SotE rulebook and is a great starter scenario, given its relatively small forces and some simple terrain to add into the mix. I used the OOB as given, but realised I should have given the French centre Foot Artillery rather than Horse. Mea culpa! I rolled for the ratings of the commanders using the Wars & Campaigns guides as well as tweaking the ratings for the troops. The results can be seen below:

Austrian OOB (North of the stream)
1 x Brigadier General - Inspiring
2 x Light Cavalry
1 x Horse Artillery
1 x Light Infantry - Independent 

Austrian OOB (By the hill)
1 x C-in-C

1 x Brigadier General - Inept
2 x Line Infantry
1 x Foot Artillery

1 x Brigadier General
2 x Heavy Cavalry

French OOB
1 x C-in-C - inspiring

Right Wing
1 x Brigadier General 
2 x Light Cavalry

Centre
1 x Brigadier General
2 x Line Infantry
1 x Line Infantry - Inferior
1 x Foot Battery - Superior

Left Wing
1 x Brigadier General
1 x Light Infantry - Superior
2 x Light Infantry
1 x Horse Artillery - Superior

Scenario
The Austrians are moving back towards the village from different directions with the aim of uniting their forces. They are surprised to see a French force to their front, whose aim is to try and occupy the village and defeat the Austrians in detail before they can unite.

Pre-Game Bombardment
The Austrian Foot Artillery deployed on the hill opened up before proceedings got under way and managed to cause two hits on the French Centre, which were shared across two Line Infantry units.

Initiative rolls
Note that the French won the Initiative rolls in each Turn for the duration of the game.


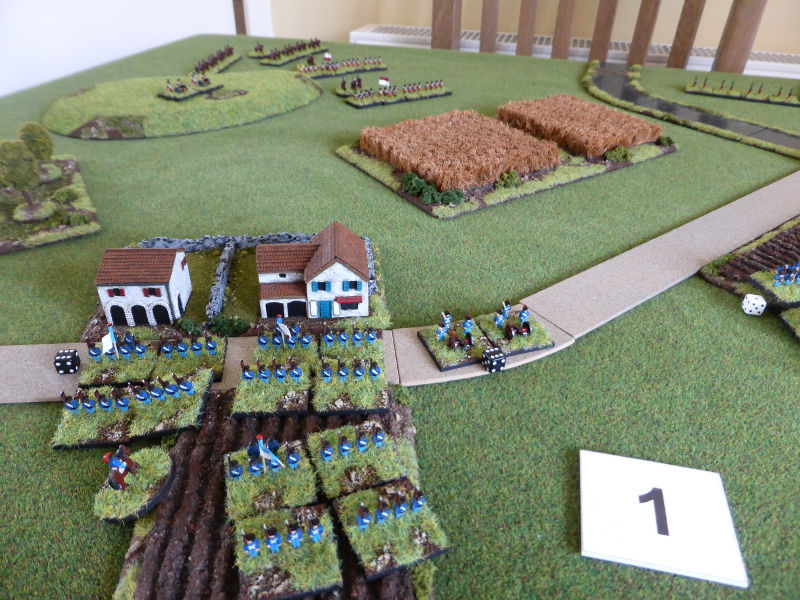
An overview of the table, with the French at the bottom.

The French Light Infantry with the Superior unit to the left (black die).

The French Centre with the Inferior Line Infantry unit to the rear (yellow die). The French Light Cavalry are to the right.

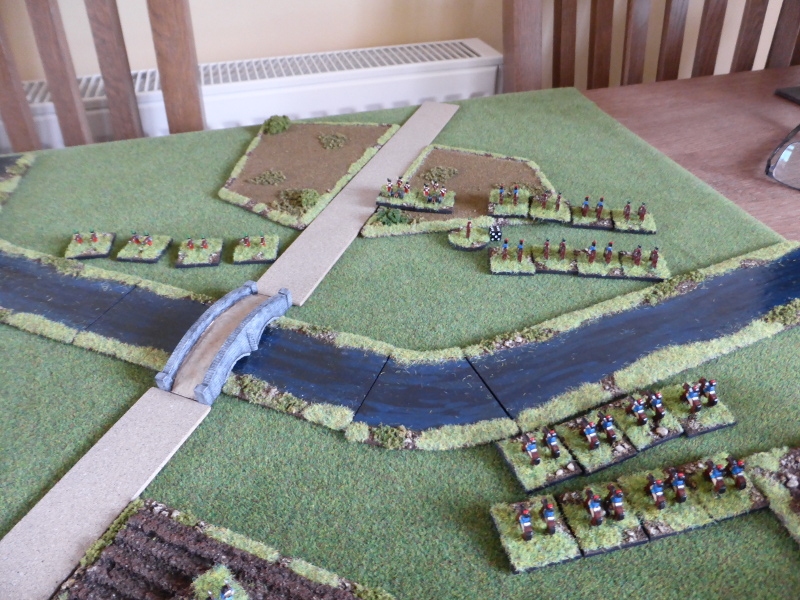
The Austrian Light infantry and Light Cavalry.

The Austrian Line infantry and Heavy Cavalry.

The French Left Wing pushed towards the edge of the village, with the Horse Artillery still limbered. The Centre pushed forward towards the bridge with the aim of securing its environs whilst on the Right Wing the cavalry moved towards the stream to cover the flank.

The Austrians North of the stream moved forward, but not fast enough to secure the bridge. The Heavy Cavalry moved off from behind the hill and onto the flank with the aim of uniting with the Light Cavalry around the bridge. The Inept Brigadier General failed to get his command moving, leaving them stuck in position, which was hardly an ideal start to the game. At least the Foot Artillery on the hill carried on their good work, hitting a French Line Infantry unit and causing 2 hits, then grazing fire hit the limbered Horse Artillery behind.

The French Light Infantry ready to secure the village and then move on from there as required. The Horse Artillery as yet to unlimber.

As the French Centre advances, they are hit by Austrian artillery fire. On the Right Wing the French Light cavalry remain in column for ease and speed of manoeuvre.

The Inept Brigadier General lack of command ability causes the Austrian Line Infantry to become strung out, as the Heavy Cavalry move off.

Both sides try to get to the bridge the 'fastest with the mostest'.

The French Left Wing changes formation to skirmish order and occupies the village, with the Horse Artillery unlimbering. The Line Infantry in the Centre also change formation to Line to limit the effects of the Austrian artillery fire. On the Right Wing the Light Cavalry also change into Line and form up along the bank of the stream.

Once again the Inept Austrian Brigadier General fails to command, but at least his units do move without him, which is a bonus. The C-in-C can only look on in despair. Elsewhere the Heavy and Light Cavalry advance and the Light Infantry change into skirmish formation.

The Austrian Foot Artillery have certainly got their eyes in as they manage to leave a French Line Infantry unit Weakened in the Centre, with grazing fire causing two hits on the Inferior Line Infantry unit in the rear. Even with the Brigadier General and C-in-C attached, they fail to Rally the Weakened unit, leaving it in full view of the Austrian artillery. In reply the French Horse Artillery manages just one hit on a Line Infantry unit.

The French Light Infantry occupy the village and the Superior unit moves to the left, with the aim of advancing through the wood to threaten the Austrian position on the hill.

The Line Infantry in the French Centre are suffering from the extremely accurate shooting of the Austrian artillery. At least their commanders haven't been hit yet.

The Austrian Line Infantry are rather hampered by their Inept commander. soon the C-in-C may have to step in and take over command of one or tow units. The Heavy Cavalry slowly move towards the bridge.

The Light Cavalry from both sides eye each other up warily, not wanting to risk an attack across the stream. The Austrian Light Infantry have almost secured the bridge.

The French Light Infantry on the Left Wing move off either side of the village, to support the Centre and to attack the Austrian artillery on the hill. The Centre continues to advance, which is risky with one Line Infantry unit Weakened and close to Routing. The Light Cavalry on the Right Wing pulls back to give a better field of fire to the Horse Artillery in the Centre.

Once again the Inept Austrian Brigadier General failed to command, leaving the C-in-C to move one Line Infantry unit forward, as the Heavy Cavalry continued their slow move forward. The Light Infantry moved into the stream to try and close the range on the French Centre to provide enfilade the Line Infantry. The Light Cavalry pulled back, worried about the French Artillery to their front, but took two hits from Opportunity Fire as they moved.

The French Horse Artillery by the village failed to hit the Austrian Line Infantry, in contrast to the Austrian Artillery who managed to Rout the Weakened French Line Infantry unit in the Centre. As they broke, they ran into the Inferior Line Infantry in the rear, causing them to become Weakened and they only just avoided Routing too. The French C-inC- managed to Rally one hit off but they were still Weakened.

The French Light Infantry try to manoeuvre so as to threaten the Austrian Line Infantry and the Foot Artillery on the hill. 

The French Horse Artillery by the village fail to register any hits once again, as the French Centre takes a pounding.

As the French Line Infantry Routs, they almost take the Inferior Line Infantry with them.

As the French Light Cavalry pull back, they allow the Horse Artillery to inflict damage on the Austrian Light Cavalry as they try to avoid being too close to the guns.

The French Light Infantry on the Left Wing begin to close in on the hill and will soon be in range to open fire on the Austrian Foot Artillery. The Line infantry consolidate in the Centre and also put out Skirmish Screens as the range is closing for musket fire. As the Horse Artillery pivots to support the Centre, the Light Cavalry once again move up to the stream, screening the guns at the same time.

Unbelievably the Austrian Brigadier General is once again rather Inept and fails to command, but the Line Infantry also put out Skirmish Screens for the same reasons as the French. As the Light Infantry crosses the stream, the Heavy Cavalry moves almost parallel with the Austrian front line and the Light Cavalry once again moves back towards the stream.

For once the Austrian Artillery is rather poor in its shooting where as the French manage to Weaken an Austrian Line Infantry unit, but this is Rallied back to a normal state at the end of the Turn.

The French light Infantry begin to press.

Both side throw out Skirmish Screens as they close with each other. The French Inferior Line is still Weakened.

The Light Cavalry of both sides begin a Mexican Stand Off.

The French Light Infantry on the Left Wing formed an extended Skirmish Line as they approached to the hill, supporting the Line Infantry in the Centre as they too advanced. The Inferior Line Infantry moved towards the village to try and put as much distance between them and the Austrian artillery as possible. The Light Cavalry and Horse Artillery maintained their positions.

In a surprise move, the Inept Austrian Brigadier General finally managed to command a unit, leading to a Line Infantry unit pivoting to face towards the approaching French Light Infantry. The Heavy Cavalry continued to move but had little hope of uniting with the light Cavalry across the stream.

What shooting there was managed to Weaken Line Infantry units from both sides who in the Rally phase, managed to remove their Weakened status. The French Light Infantry opened fire on the Foot Artillery on the hill, causing one hit.

The Austrian Foot Artillery are in danger of being overrun, despite the Austrian Line Infantry unit in the rear turning to face the French.

The skirmish Screens open fire at each other, with the Austrian Light Infantry across the river still enfilading the French Line Infantry.

The Inferior French Line Infantry unit seeks safety.

The stand off continues.

As expected, the Superior French Light Infantry unit on the Left Wing charged into the deployed Austrian Foot Artillery who failed to turn to face them and so were overrun and destroyed! Combined shooting from the Horse Artillery and the other Light Infantry unit saw the front Austrian Line Infantry unit, which had pulled back, become Weakened. 

Desperate times called for desperate measures and the Austrian Heavy Cavalry commander (von Bredow?) spurred his horse forward and led his Heavy Cavalry into a death ride towards the leading French Line Infantry unit. Supporting fire from French guns cause hits on the Heavy Cavalry, who carried on regardless, whilst the Austrian Light Infantry's enfilade fire led to the French Line Infantry unit becoming Weakened, which retreated back from the charge but not far enough and were caught by the Heavy Cavalry. Routed by the charge, they fell back through the Inferior French Line Infantry, who took a hit and were then caught by the Austrian Heavy Cavalry as they pursued. This led to the Inferior Line Infantry Routing too! In a blink of an eye the French Centre had ceased to exist.

The Austrian Foot Artillery is overrun as the Austrian line Infantry is Weakened by combined fire.

The Austrian Heavy Cavalry crash into the French Line Infantry, routing them and then...

... contact the Inferior French Line Infantry unit as they pursue, also Routing them. The French commanders look on in disbelief!


End of the Game
With the dramatic change in fortunes for the Austrians after the loss of their Foot Artillery, with the French Centre gone and the Austrian Heavy Cavalry ready to run riot in the French rear, I called the game for the Austrians.

Post Game Thoughts
Well after that incredible finale I had to go and catch my breath as I was somewhat exhausted by it all! what a way to finish a game and snatch victory from the jaws of defeat! It's one of those moments in a game that will linger long in the memory and for all the right reasons. So to try and sum it up, as usual my post game musings:

  • The Inept Austrian Brigadier General was a real handicap for most of the game and limited what the Austrians could do. Theirs was a tough ask to being with but he only made it more difficult. Oh the joys of playing the Austrians!
  • The Austrian artillery played a great game, from the pre-game bombardment onwards. In contrast the French artillery didn't get going until mid game onwards, which was probably lucky for the Austrians.
  • The stream led to the Light Cavalry from both sides doing little other than canter about the battlefield. Not wanting to risk a charge across it and attack a defended bank was the reason. Maybe the Austrian Light Infantry could have provided support, but the French artillery was good reason not to.
  • The French Light Infantry I think I could have used better, supporting the Centre rather than going around the flank. Their extra manoeuvrability and fire power would have been useful to press the attack in the Centre. One unit on the flank would have sufficed.
  • The Austrian Heavy Cavalry's charge was made in desperation and came off despite the odds. I still can't believe it turned the game as it did, but the Die Gods were certainly on their side!
  • Both sides Generals survived a lot of fire and came out unscathed. they also played their part in this game, being very useful in the Rally phases. I did get one part wrong but have learnt this and will remember for future games.
  • Both sides did use Skirmish Screens as they closed which was good and certainly added another dimension to the game.
  • I'm sure I could have used the Reserves rule to get the Austrian Heavy Cavalry moving forward more quickly and maybe the Light Infantry and Light Cavalry too. I need to re-read this section to make sure.

Well I think that pretty much covers everything. I hope you enjoyed the AAR and I certainly enjoyed the game and am enjoying these rules too. I do need to paint up many more of my MDF figures and probably need to order some more cavalry, but in the meantime I will be digging out my wooden blocks so that I can play some bigger games. I feel pretty confident with the rules now and this is only after three games, which I think speaks volumes of the rules and the approach Keith has taken.

I'm not sure when my next game will be and what period, but I'm hankering after some 'Ancients' gaming, but also want to put on a bigger Napoleonics game and maybe even play it as a mini-campaign. Plenty to think about, so until next time, stay safe and keep healthy.


Sunday, 8 August 2021

The Battle of Scheidewegdorf

With the weather still being unseasonably cool and rather wet (ie torrential rain) it was perfect weather both  for ducks and for myself to get in another game of SotE. After the last game I had re-read the rulebook and everything was much clearer, so I decided to add in some cavalry and artillery just to see how they played compared to HoW and the SYW, which I'm much more au fait with.

I left the terrain pretty much as was, but added in another road and a house, both really for aesthetic reasons, with the latter having no effect on the game as it wasn't to be classed as a BUA. For both sides I once again used the 1809 Wars & Campaigns section as a guide, as well as adding in some Superior troops and Rifles, just to see how they affected the play. The OOB can be seen below:

French 
C-in-C - Inspiring
Brigadier Generals - Capable
3 x Line infantry - Regular
1 x Line - Inferior
1 x Light Infantry - Regular & Independent
1 x Medium Horse Artillery - Superior & Independent
1 x Heavy Cavalry - Regular & Independent

Austrians
C-in-C - Inept
Brigadier Generals - Capable
3 x Line Infantry - Regular
1 x Line Infantry - Inferior
1 x Light Infantry (Rifles) - Superior & Independent
1 x Medium Foot Artillery - Regular & Independent
1 x Heavy Cavalry - Superior & Independent

The scenario was nothing fancy to keep things simple at this stage, with the crossroads acting as the nominal objective for both sides with them advancing to contact from line of march. Hopefully the annotated photos will suffice to give an idea of how the game played out, so without further ado:


An overview of the table, with the French at the bottom and the Austrians at the top.

The French left wing with the yellow die indicating the Inferior troops and the black Superior. I used horses with the artillery to denote that they are Horse Artillery rather than Foot.

The French right with their Cavalry providing some flank support, with the infantry in depth.

The Austrian right with the Foot Artillery on the road to gain a movement bonus.

The strong Austrian left with their Superior Light Infantry and Heavy Cavalry that would hopefully pack a punch.

The French won the Initiative roll and chose to move first. All units were in command and so pushed forward, but the independent Horse Artillery managed a double move and so moved up to the crossroads and unlimbered.

The Austrians similarly pushed forward, with their Foot Artillery staying limbered to try and close the range for canister before unlimbering. The Light Infantry got a double move and adopted a skirmish formation as they pushed forward.

The French Horse Artillery opened up on the inferior Austrian Line, but managed to miss completely. 

The French once again won the Initiative and chose to move first. Their Line Infantry moved forward with two units forming into Line as to maximise their firepower, whilst two stayed in column for ease of manouevre. The Cavalry stayed close by protecting the flank, which was a wise move as the Austrian Cavalry hove into view on the hill.

The Austrians all pushed forward with the Foot Artillery unlimbering but had their line of fire blocked for canister by their infantry! 

The French left wing causes hits on both Austrian Line Infantry units, but takes none in return.

The French Horse Artillery takes a hit from their Austrian counterparts as their canister finds the Inferior Line Infantry to their front.

The Austrian Light Infantry manage to cause two hits on the French Line infantry to their front. the extra range provided by their rifles is very useful.

With the French winning the initiative again, they chose to move forward and advanced to get with range of the Austrians, who did the same. The French Cavalry wary of the Superior Austrian Cavalry to their front chose to hold position guarding the flank. Shooting broke out right across the front, with both sides having units become Weakened (red die).

Both Austrian Line Infantry units have become weakened, with the one of the extreme right close to routing. The French have a Line Infantry unit Weakened too. In the Rally phase both the Brigadier General and the C-in-C attached themselves to the Weakened unit and managed to rally two hits off. The Austrians tried with the Regular Line Infantry and only managed one hit off, leaving them still Weakened.

The Austrian Left wing has had the better of the firefight, with a French Line Infantry unit Weakened. In the Rally phase the French Brigadier General attached himself and was unable to rally off any hits on the Weakend unit.

The French Cavalry have taken a hit from the Austrian Light Infantry who once again use the extra range afforded by their rifles to great effect.

Again the French won the Initiative roll and made a few small moves here and there, but did manage passage of units on the right wing to replace the Weakened unit in the front line with a fresh one.

For the Austrians, their right wing pulled back slightly due to being under pressure of routing, whilst their left wing pushed forward. The Cavalry charged the Austrian cavalry who failed to counter-charge, but a small mercy was the fact that the Austrian Light Infantry failed to hit them with supporting fire.

The result of the cavalry charge. The French lost badly, taking 6 hits in total and retreated back, but the Austrian Cavalry failed to pursue! A fortunate die roll allowed them to rally off tow hits (6 rolled). Things are not looking good for the French Cavalry. 

The French right wing continued to come off worse with the Austrians and the Brigadier General once again failed to rally off any hits from the Weakened unit.

A whiff of grapeshot was enough to finish the Austrian Inferior Line Infantry, who routed off the table. The French certainly have the upper hand on their Right Wing, but who would break first, given that both sides had a Wing under pressure?

For once the Austrians won the Initiative and chose to move first, with their right Wing retreating, their Left Wing managing passage of units and the Cavalry charging. The French could do little on their Right Wing other than stand and take the fire, whilst over on their Left Wing, they moved forward to keep contact with the Austrian Right Wing. They did move their Inferior Line Infantry into a position to form a reserve in case their cavalry broke, as seemed likely.

The French Cavalry are destroyed, but the Austrians are Weakened in the process. (In fact I got this wrong and the French should have rolled to retreat, taking one hit and then see if the Austrians pursued).

Disaster for the French, as their Right Wing sees a Line Infantry unit rout, weakening and already Weakened unit in the process!

Fire from the French Light Infantry sees the demise of the Austrian Right Wing Line infantry, leaving a huge gap for the French to exploit.

The French won the initiative and chose to move first. Their Left Wing moved as best they could to support their Right, with the Reserve moving forward given that the Austrian Cavalry threatened their LoC. On their Right Wing, the remaining Line infantry unit formed square to try and protect themselves from the cavalry, but naturally putting themselves at risk from musket, rifle and artillery fire. The Austrians had little to move, other than realign their Cavalry and move the Light Infantry forward to shoot at the square.

The Austrian Cavalry poised to exploit and opportunities if French Infantry retreat.

The French Line Infantry in square unsurprisingly break, but the supporting Horse Artillery nearly routs the Austrian Line, who are severely Weakened.

The French Left Wing move forward but are unable to assist their Right Wing to any meaningful extent.

The French Inferior Line form the reserve to protect the LoC.


End of the Game
With both sides bloodied and beaten, I called the game a draw, but the Austrians had the slight edge given that they still had their cavalry in play.

Post Game Thoughts
Well for a second game and with some new units to play with, that went remarkably well, with it already feeling nice and familiar as a game. What more could one ask for? So as always a few post game musings in no particular order:

  • Using the half move or less for units when getting close to the enemy to avoid the Significant Move modifier made a difference when it came to shooting, something which I didn't do in the first game.
  • I really noticed the difference between Superior and Inferior units in terms of staying power as well as shooting and combat modifiers. For the former, the Austrian Light Infantry with rifles were very effective as were their Cavalry. In contrast the Austrian Inferior Line Infantry had little staying power as one would expect. You really have to think how best to husband your resources, especially with a force containing a high percentage of Inferior troops.
  • Rallying did make a difference this game, not only in terms of the die rolls actually working, but also for me to remember where best to position the Generals as the action unfolded.  Passage of Units also helped but not to any great extent, due to some devastating die rolling at critical junctures in the game. As mentioned previously, having a reserve in bigger games will be crucial to aid either sides chances of winning.
  • I forgot to use Skirmish Screens for Line Infantry, something which I really need to learn to remember for future games.
  • I think I need to make some markers to aid game play, as whilst the coloured dice help, they can't cover all aspects of the game. Something to look into and ponder.
  • Both Shooting and Close Combat proved to be rather effective this game, as both sides for the most part rolled well. Also not moving too far as mentioned above helped. 
  • I liked the difference between Horse and Foot Artillery, with the former really giving the feel of a Napoleonic game. Ditto the French Line Infantry forming square due to the presence of the Austrian Cavalry, but at the risk of coming under fire from the Austrian Infantry and Artillery.
  • Having the Old and New Regime restrictions for various armies is a simple but effective mechanism.

Well I think that's probably it for now. For my next game I will be adding in terrain into the equation, to see how that affects things and am not sure whether to go with the starter scenario from the book or for a small historical action. Probably the former to be honest but we will have to wait and see.

To aid my limited knowledge of this period, I have just received a copy of Brent Nosworthy's 'Battle Tactics of Napoleon and his Enemies', which from a quick skim through looks to be excellent reading. A few books to finish first but I hope to be able to start reading it this week. with my wife away for a few days I aim to get another game in soon and who knows, even some FtF gaming as numbers finally continue to fall in our neck of the woods.

So until then stay safe and keep healthy!

Monday, 2 August 2021

The Battle of Burnt Oak - a Shadow of the Eagles trial game

Having read through the SotE rulebook over the past few days, it was time to bung some figures on the table and give things a little run out to see how the core mechanics worked. Nothing too fancy so I could concentrate on nailing the basics, so kept everything small and only used infantry, leaving artillery and cavalry for another time. I loosely based both forces around the 1809 Danube campaign, using the 'War & Campaigns' section as a guide and came up with the following:

Austrians (Red)
1 x Capable Commander
1 x Inferior Line Infantry
2 x Regular Line Infantry
1 x Regular Grenz Light Infantry

French (Blue)
1 x Superior Commander
2 x Regular Line Infantry
1 x Superior Light Infantry

Scenario
Nothing complicated at all, with the basic premise that the Austrians have formed a blocking position by the Burnt Oak and the French have been ordered to break through. The French will have +2 Initiative due to their National Characteristics and their Commander being Superior.


An overview of the table, with the French in the bottom left hand corner.

The French in company columns for speed of advance and ease of manoeuvre, with the light infantry in front as a potential skirmish screen.

The Austrian in line with the Grenzers in front of the weaker inferior line infantry.

The French won the initiative and chose to move first, with the light infantry getting a double move and changing into skirmish order to mask the line infantry's advance, which only moved once. The Austrians pushed their right flank forward one move as the Grenzers held their position to improve their shooting prospects.

The French light infantry in skirmish order.

The French light infantry took 3 hits from shooting and only managed 1 hit on the Grenzers in return. The French commander was too far away to be able to move up and try and rally hits of the light infantry.

The Austrians won the intiative and once again the Grenzers held their positions as the line infantry moved forward to try and make their weight of numbers tell early on. The French light infantry formed back into line and wheeled to the left to support the line infantry moving up to attack the Austrian right.

The French light infantry took a bit of a hammering from the Austrians, becoming weakened in the process, but managed some hits on the Austrians in return. The French commander attached himself to the light infantry in the rally phase but failed to remove any hits, which would have removed their weakened status.

The French won the initiative and chose to move first. The light infantry could not advance being weakened and didn't fancy assaulting the Austrian line, even with the support of their General.

The French line infantry on the left assaulted the Austrian right flank, surviving incoming fire on the process. Unfortunately for them they lost the combat and were forced to retreat, becoming weakened in the process, with the Austrian line infantry just managing to catch them in their pursuit, with the combat being fought in the next Turn. The French light infantry were lucky to survive due to some rather poor Austrian shooting, but managed to weaken the Austrian line infantry to their front. 

The end of the Turn with the French left flank under some pressure as the Austrian line infantry certainly have the upper hand. Both sides centres are not in the best of health and could easily crack in the next Turn.

The French once again won the initiative and the French line infantry on the right charged in against the Austrians Grenzers who held firm, but were weakened as the French closed, who took hits in return. On the French left the Austrians made short of the weakened line infantry who routed, which in turn led to the French light infantry in the centre routing too, leaving the French line infantry on the right flank the only unit still on the table! a close run thing and it could easily have been the Austrians who were fleeing the table.


Post Game Thoughts
Well that was fun, nice and quick and certainly gave me a good little introduction to the core mechanics of the game. I certainly look forward to re-reading the rules in the light of this to see if I went wrong anywhere and to gain a better understanding of the rules themselves. so in no particular order a few thoughts:

  • The French really should have been in line to start with, to potentially weaken the Austrian line before forming company columns and then going in for the assault. Still, it was all about learning so a point to remember for future games. Still they speed and manouevreability of the company columns if very useful, much more so than line, just as it should be.
  • The French being able to win the initiative more often than not due to their National Characteristic and Superior commander felt right.
  • Early on it was obvious that you need to think about where best to position your commanders, not only for their command radius but just as importantly for the use during the rally phase. Not that they managed to rally any hits in this game, but if they had, it might have made a difference for the French and to the outcome.
  • The game was very enjoyable and nothing jarred or felt wrong. The book is very well laid out so it is easy to find the rule you want during the game that may not be on the QRS. A big 'thumbs up' for this.
  • Next game I want to add in some artillery and maybe cavalry, but again will keep it small. Adding in terrain after that so as not to complicate things too much.
  • Skirmishers can make a real difference I'm sure, certainly in terms of providing skirmish screens to mask advances etc. Something I'm not used to for sure so this will be an interesting lesson to learn and certainly one pivotal to the period.
  • I certainly look forward to reading some of my Napoleonic books to gain a better understanding of the period, having played plenty of 18thC and 19thC games, but precious few Napoleonic ones. Hopefully this won't be a case of old dog and new tricks!

I'm certainly looking forward to more games of SotE and certainly some FtF games with my friends in the hopefully not too distant future. The rules have certainly kindled an interest in this period, just as HoW did for the 18thC and Bloody Big Battles did for the 19thC, which is rather nice to be honest. So time to go and do some reading and plan my next game. Until then stay safe and keep healthy!

Sunday, 1 August 2021

The Eagle Has Landed

Back in April of this year, my good friend Keith Flint released his Napoleonic ruleset, 'Shadow of the Eagles'. Normally in its gestation I would have spent many a happy game playtesting these face-to-face with Keith, but for obvious reasons this was not possible due to Covid. Since their release we still haven't been able to meet up, but Keith kindly sent me an authors copy in the post, so that I can get to grips with the final version, in advance of some games, all being well, in the Autumn.

So I will give some initial impressions of the book, but first a few photos of the book and some of the pages therein:


A very nice cover by Chris Collingwood.

As you can see, the book is the same size as BPII, but less thick as it's not padded out with unnecessary verbiage.

The contents page.

James Roach has provided many fine photos of his lovely 28mm armies of the period.

The diagrams to accompany the text are concise and clear.

More artwork by Chris Collingwood.

An example of an 'Army List'.


First Impressions
Well the book is very nicely produced and a pleasure to read, as the font is not too small and the double columns across the page are well laid out. There are plenty of diagrams to accompany the text and references to other pages where relevant. For those familiar with Keith's 'Honours of War' rules, these rules have a nice similarity in concept, but are certainly not HoW with some Napoleonic rules added on. They are very much a standalone set, but reading through I felt comfortable that I would enjoy playing these.

Introduction & Notes to the Rules
Keith sets out his stall early on and again in his notes after the rules themselves. I like this in an author as it allows you to understand why they have done certain things, something which Neil Thomas has been doing for many a year and something I wish more authors of rulesets would do. Whether you agree with them is another matter entirely.

Basics & Pre-Game
As one would expect, a guide to the die etc you will need kicks things off, followed by basing suggestions for the various arms of service. I really like the 4 bases per unit approach and a similar frontage, which works for me. I will have to make a sabot base or go for some more artillery, as these have half the frontage of other units. No big deal and not sure which route I will take yet.

After this the basics of the rules are covered, which all feel right and have a nice familiarity having played many games of HoW. So nothing drastically new to learn here, which as I get older becomes more important to me, as i prefer to concentrate on core rules with similar mechanics, so that I can focus on the game rather than trying to remember different rules during a game, which I find too disruptive.

Playing 'Shadow of the Eagles'
Naturally this is the core part of the rules and I must say I found them very easy to follow and understand, with nothing standing out as confusing or unclear. Where required there are references back to other pages where relevant, which should make searching for things much quicker when playing the game.

There are some very useful examples of play at the end, which having read the rules, just help one understand them. There is also guidance on playing larger games at Corps level and above, for those that like to put on larger, possibly multi-player games. Personally I will be sticking at Division size games for the most part, as that fits in nicely with the time and space for my games these days. However Keith often puts on a 'big game' now and then which would be fun to play.

Wars and Campaigns
Essentially this section could be classed as 'Army Lists' in many books, but here they are more a guide as to how to create an Army for a game, dependent upon the period played. So no points here or proscriptive limits on troops, but enough information to create a plausible force for say the 1809 Danube Campaign. Given the huge difference in say the various French forces for said campaign, this is quite nice as you can fit your force to a specific action or go for a more generic one which feels 'right'. Personally I like this sort of approach but naturally some players may not agree with Keith's approach.

Ancien Regime to Grand Armee
I found this section on the differences in the Napoleonic period compared to the 18thC very informative as I'm a complete Nappies newbie, having only a basic knowledge of the tactics used. For many players this will be well worn territory but I think it nice to have this for players like myself.

Scenarios
There are 3 scenarios that could be called Small, Medium and Large, which are useful to allow the player to get to grips with the rules without trying to refight Waterloo in their first game. This is something I advocate to new players of Blitzkreig Commander. As the rules are dedicated to the late, great and greatly missed, Stuart Asquith, the last scenario is one of his and shows how to play a manageable Corps level game as mentioned earlier.

Bibliography
A selection of books that Keith found useful when developing the rules. Given there must be thousands of books on this period, this I still found interesting, as some of them I might get and some I already have.

QRS
The last page is a double sided QRS that you could cut out if you wanted too, but aside from the heresy of doing this, Keith has put up QRS' on the website set up to support the rules.

Summary
So there you have it. I like what Keith has done in producing a set of rules that are easy to understand and make the whole Napoleonic period approachable for those players such as myself, that are not au fait with it. I'm certainly looking forward to giving these rules a run out in the next day or so and have set up a small board in anticipation of such.

I know some may find the rules on the expensive side, given that they are around the £30 mark, but you have everything you need in one book, with no need to purchase additional supplements etc, that you might need to do for say Black Powder, so worth bearing in mind. 

Keith also has set up a website and forum to actively support the rules, which is well worth checking out. For another review and an excellent one at that, check out Norm's review here on his Blog.

So I hope this may have proved useful to some of you considering these rules, which I can heartily recommend. I look forward to trying some simple games out soon with my mdf figures and working my way up to something more involved in the days and weeks to come.

Until then stay safe and keep healthy!