Life and the recent heatwaves in the UK has meant that my gaming activity has been non-existant for nearly a month now. I have tried to get onto part 2 of my Canadians in Normandy campaign, but the heat in the main has meant that this has not happened. Not only has it been too hot to game, but I would like to get a few more German units finished in an ideal World. With another heat wave predicted towards the end of this week, that might take some time.
So instead I decided on the spur of the moment to look at the next OHW Scenario, using my Commission Figurines forces, and the ever excellent 'Honours of War' rules, given that they are now 10 years old! With another Cotswold Wargames Day coming up in October, it seemed a good opportunity too to give these a whirl and come up with something for the day.
Scenario
The scenario itself is based upon The Battle of Langensalza, 1866, and in true OHW Scenarios tradition, has been heavily simplified, but the essence remains the same.
The Blue Force has been ordered to seize a bridge, that is lightly defended by the Red Force. However a lack of reconnaissance by Blue has not revealed fords either side of the bridge, nor that a substantial Red Force is nearby. This Red Force is preparing to mount a counter-attack to seize both the bridge and the town.
OOB Austrian (Red)
1 x Light Infantry Brigade (2 x Light Infantry)
1 x Infantry Brigade (4 x Line Infantry, 1 x Medium Artillery)
1 x Artillery Brigade (2 x Medium Artillery)
1 x Cavalry Brigade (2 x Cavalry Regiments)
OOB Prussian (Blue)
1 x Infantry Brigade (3 x Line Infantry, 1 x Medium Artillery)
1 x Infantry Brigade (3 x Line Infantry, 1 x Medium Artillery)
1 x Cavalry Brigade (2 x Cavalry Regiments)
Set Up
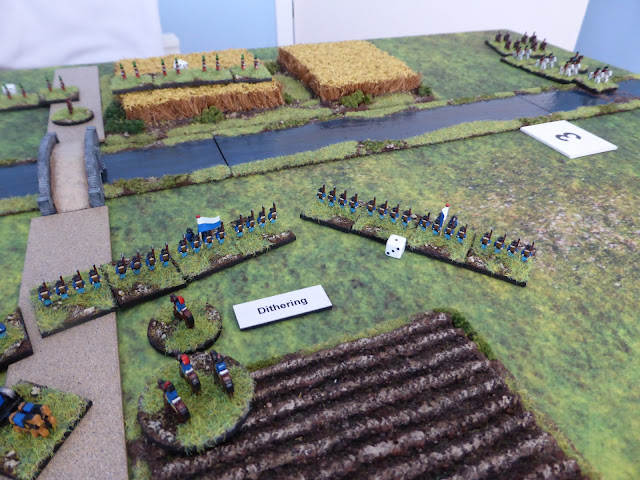
With both sides set up, dice were rolled to see what quality the Commanders were, with Blue having a Dithering Cavalry and Infantry Commander, whilst Red had a Dashing Infantry Commander. Not an ideal start for Blue!
 |
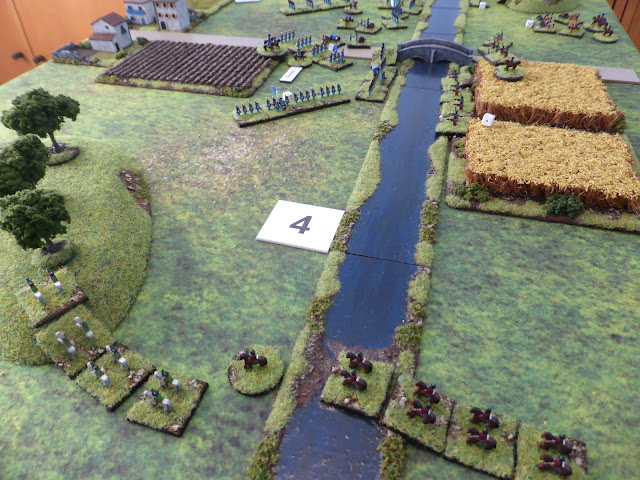
| An overview of the battlefield. Blue start on the left hand table edge, with Red only having the light screening force by the bridge. |
 |
| The Red Light Infantry Battalion. |
 |
| The Red counter-attack force, which would arrive from Turn 3 on a successful command roll. |
 |
| The Blue right flank, with the C-in-C having to stay with the Dithering Commander to try and guarantee they get moving. |
 |
| The Blue centre. |
 |
| The Blue left flank, with the Cavalry Brigade and its Dithering commander. Not expecting to see action until the bridge is taken, this should not be a problem... |
The Game
As always, the annotated photos should give a flavour of how the game played out, so without further ado.
 |
| The Blue right flank and centre got off to a flyer, with Admirable moves by both Brigades. However the Cavalry Brigade rolled Poor and so carried on grazing. The Red Light Infantry Brigade moved back slightly, trading space for time. |
 |
| The Blue centre advances, hoping soon to shake out into Line to bring their numbers to bear. |
 |
| A gratuitous shot! |
 |
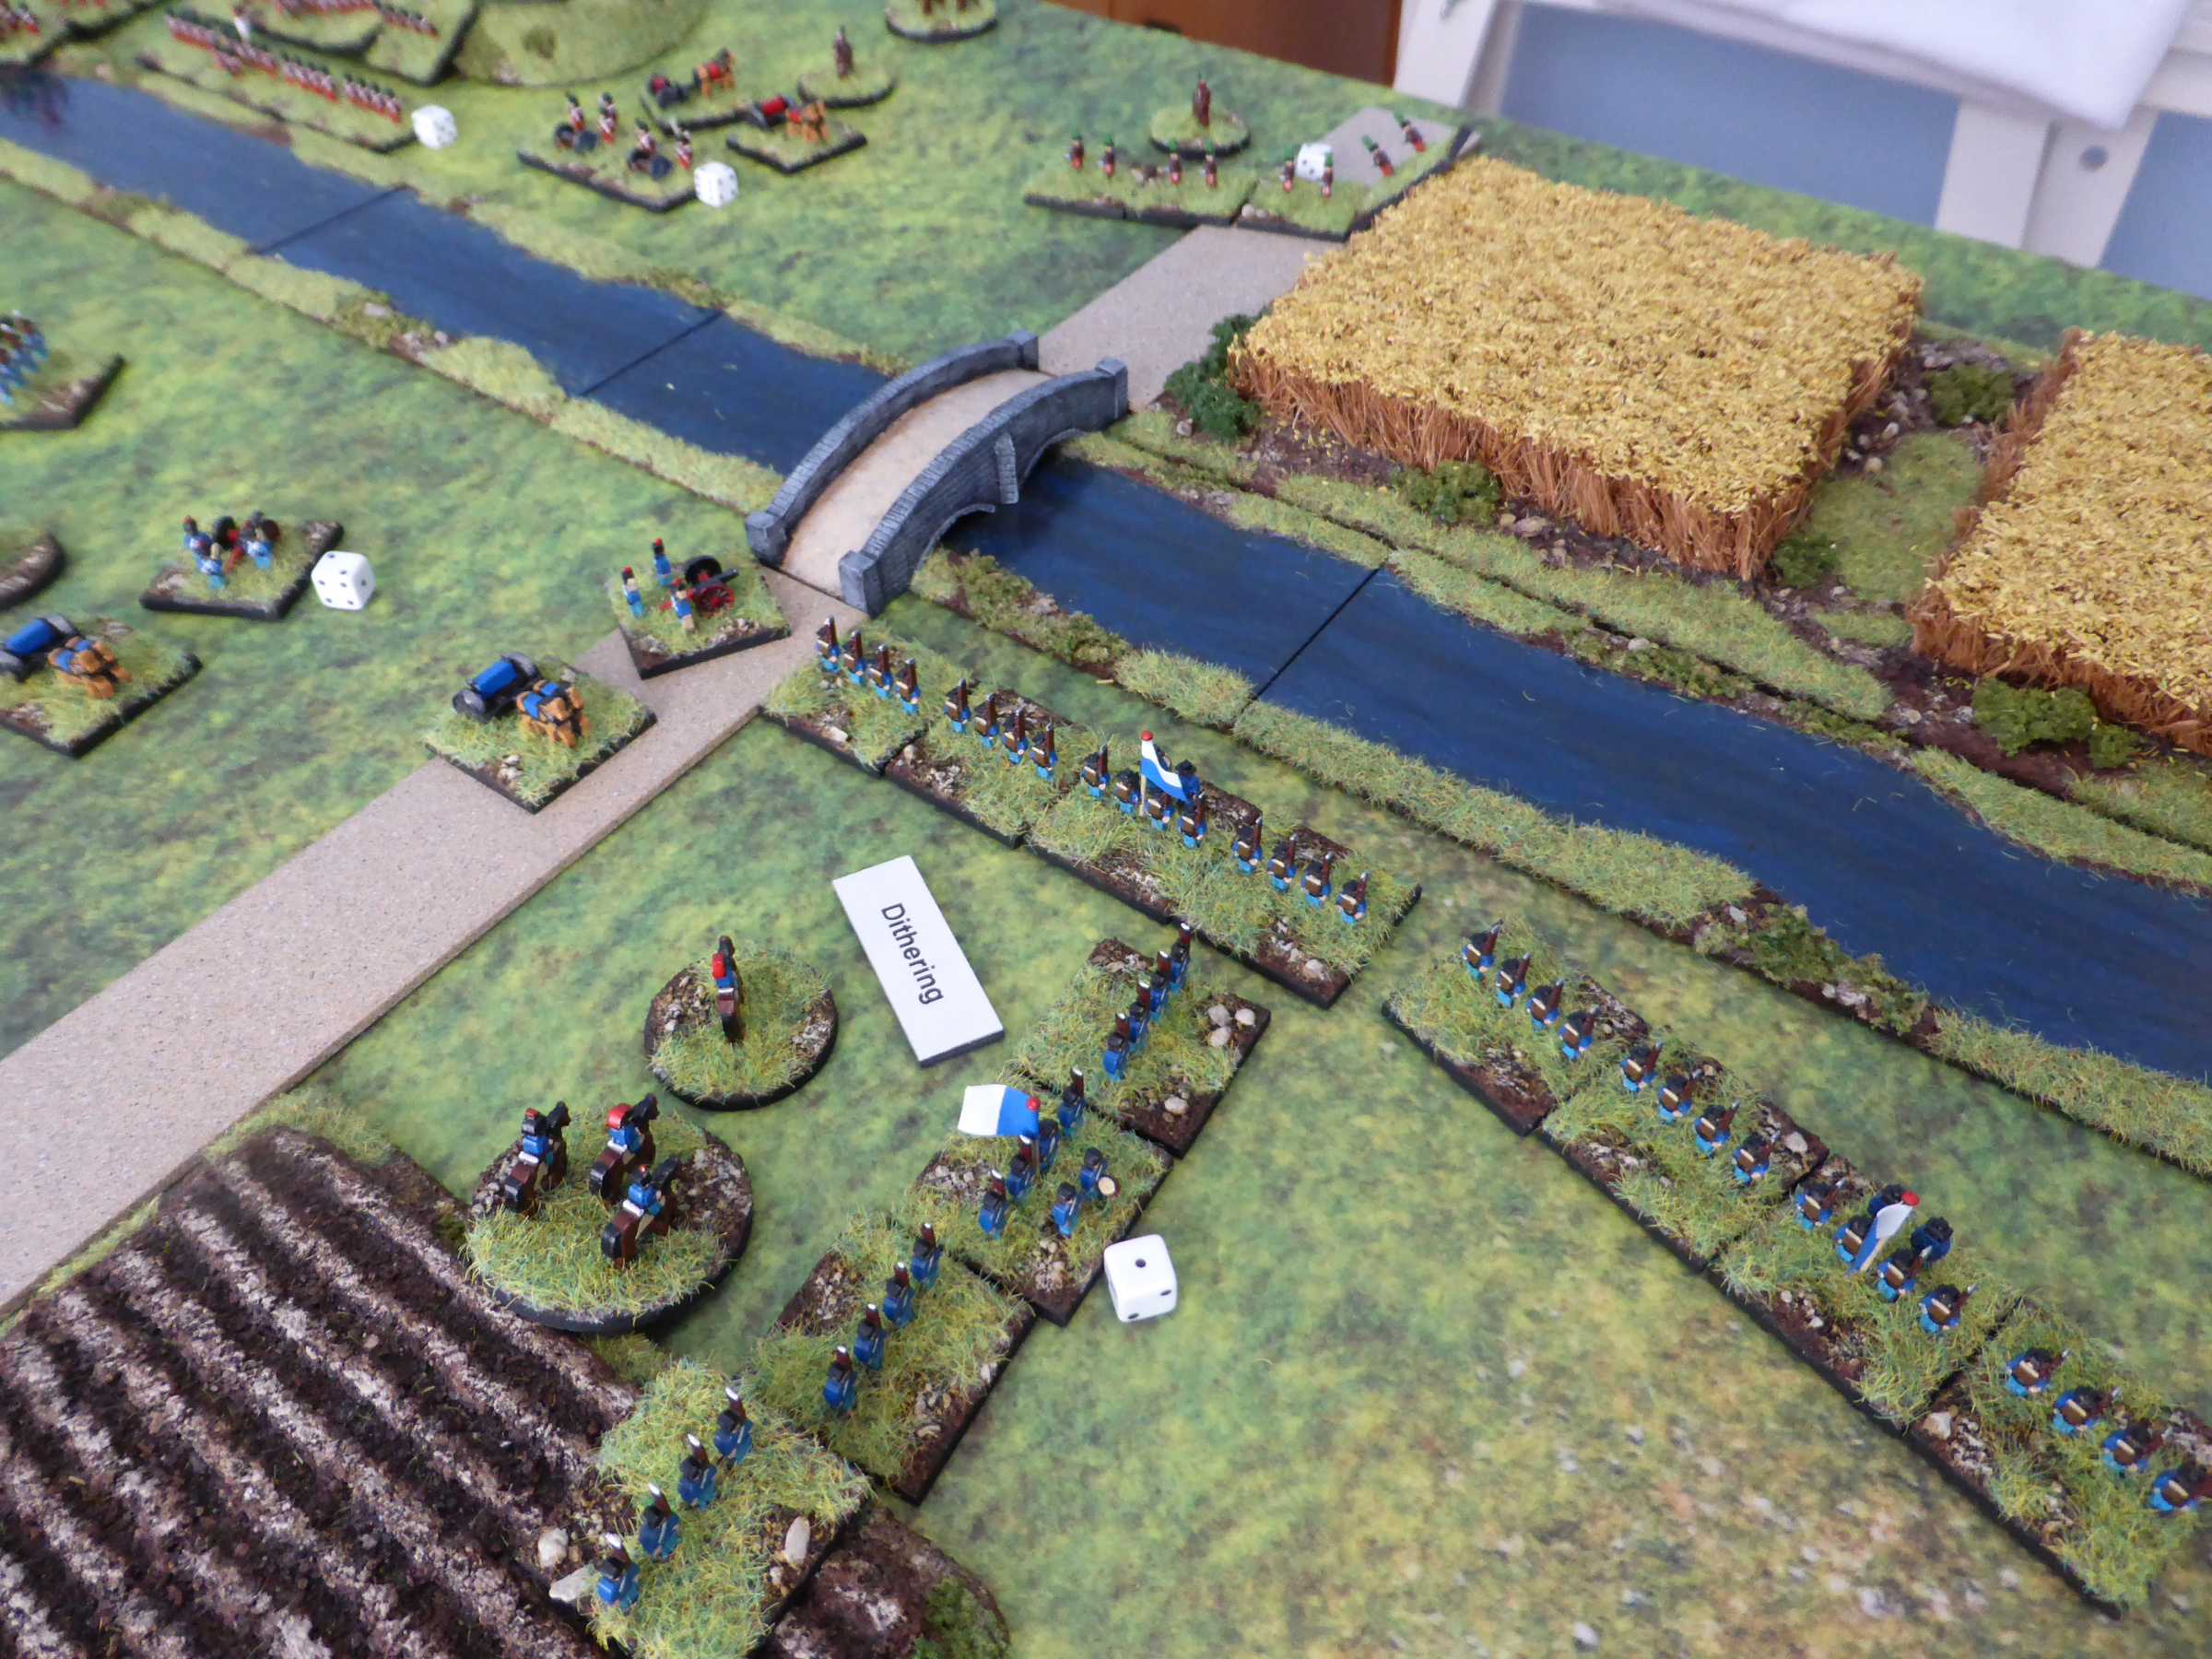
| The end of Turn 2. Unconcerned as firing breaks out by the bridge, the Cavalry Brigade carry on grazing quite happily! Both sides open fire, inflicting some hits, but not causing any problems just yet. |
 |
| The Blue Line Infantry begin to deploy, to try and force the Red Light Infantry back from the bridge. A bit of a traffic jam begins to develop. |
 |
| An acoustic shadow is possibly causing this sang froid from the Blue Cavalry Brigade? |
 |
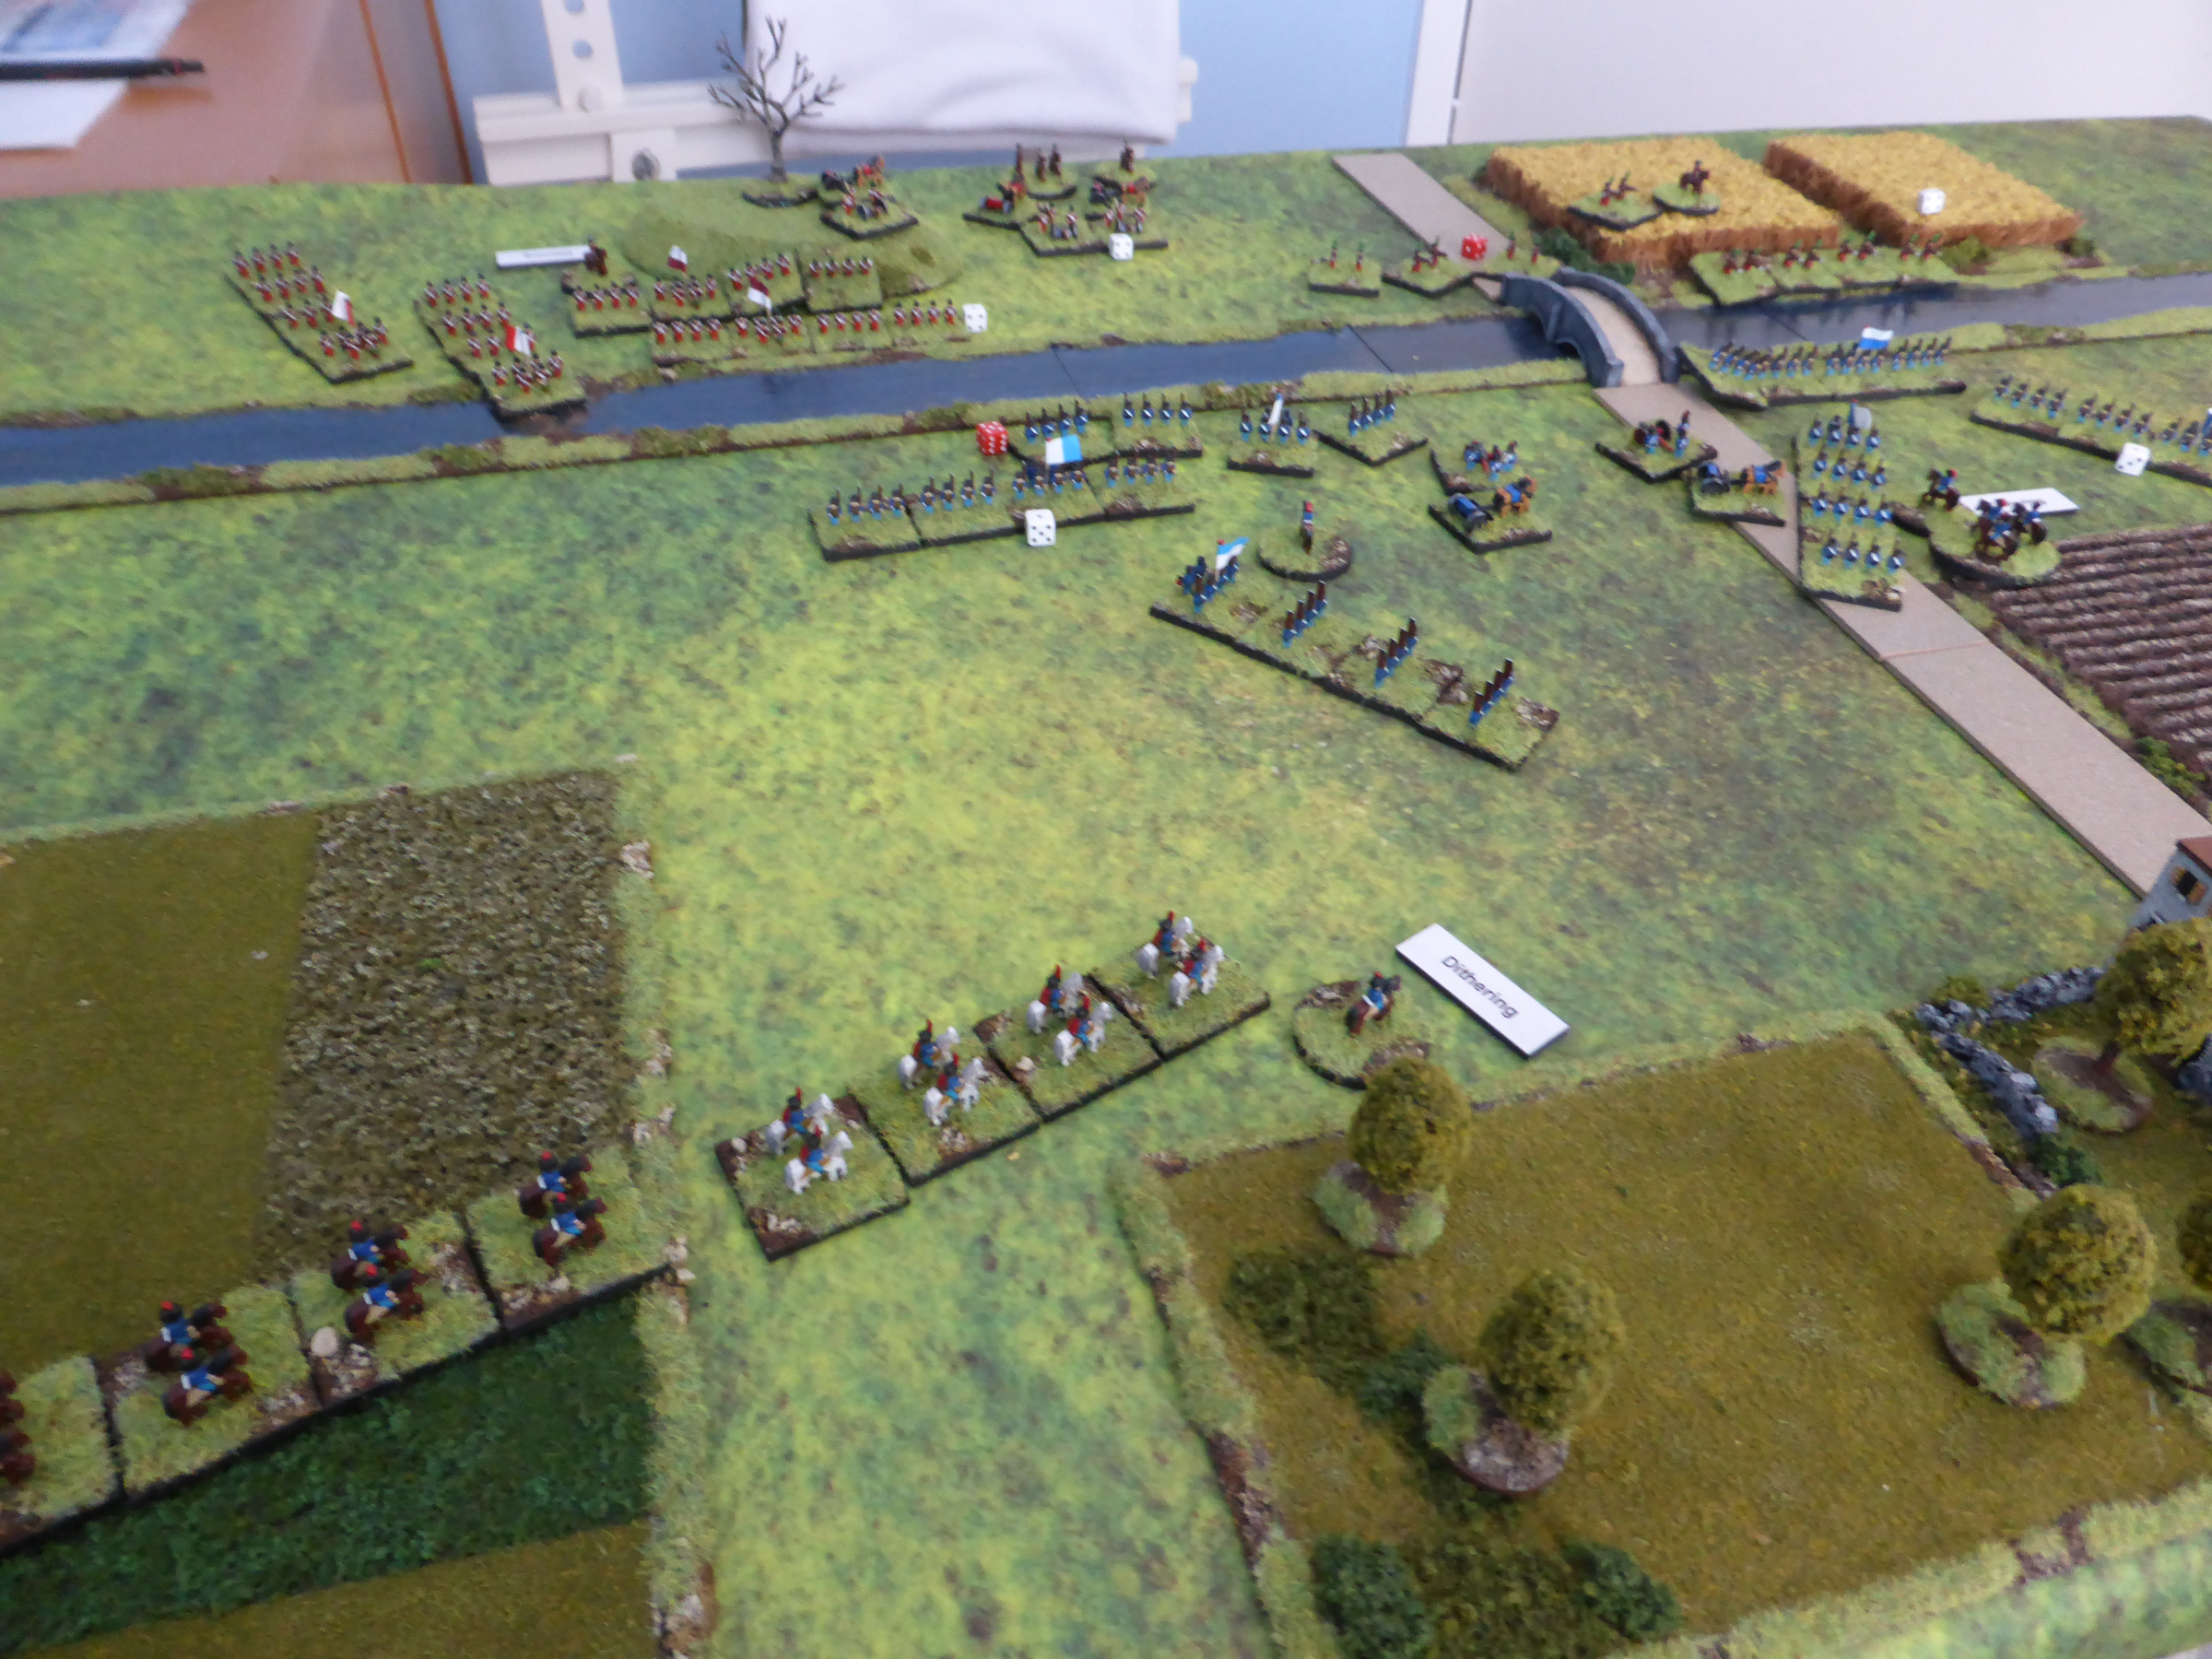
| The action suddenly changes character as the Red counter-attack force suddenly appears, causing the Blue Force a bit of a shock, with only the Centre able to react (Feeble and Poor for the other Brigades!). |
 |
| The Red Cavalry Brigade begins to cross the ford. |
 |
| The Blue right flank refuses its flank just in case. |
 |
| The Red Light Infantry Brigade by the bridge has pulled back out of range of everything other than the artillery. |
 |
| The main Red counter-attack force appears on their right flank, ready to try and cross the ford before Blue can react. |
 |
| The end of Turn 4. Finally the Blue Cavalry Brigade mount up and being the long traverse across their rear to try and counter the threat from the Red Cavalry Brigade. Blue can only react to Reds moves, with both sides causing units to break; Light Infantry for Red and Line Infantry for Blue. |
 |
| The Red Cavalry Brigade are nearly across the ford. |
 |
| The action is all centred on the bridge at present. |
 |
| The first Red loss. |
 |
| And the first Blue. |
 |
| The Blue Cavalry Brigade begin to trot off as the Blue Line Infantry in the centre try to move to their left to seal off any chance of Red crossing at the ford. |
 |
| The end of Turn 5. Blue continue to react to the threat to their flanks from Red, but Red begin to gain the upper hand, crossing the ford on the right flank and KO'ing another Blue Line Infantry unit. |
 |
| The Red Cavalry Brigade now have the opportunity to get into the rear area of the Blue Force. Screened by the hill Blue is not truly aware of where they are. |
 |
| The Red Light Infantry Brigade has pulled back from the bridge, leaving the Blue right flank with no targets, except for their Artillery. |
 |
| More haste would not go amiss for the Blue Cavalry Brigade! |
 |
| As Red cross the ford in numbers, Blue suffers the loss of a crucial Line Infantry unit, leaving them very short on numbers. |
 |
| Both sides Artillery tries to gain the upper hand, with the Red Grand Battery very much in the ascendence at the moment. |
 |
| The end of Turn 6. With Blue's flanks under pressure, they have no choice but to begin to try an retire towards the town. In the process they lose an Artillery unit and have a Line Infantry unit forced back into the town to reform. It's looking grim for Blue... |
 |
| The Red Cavalry Brigade ready to make their presence felt. |
 |
| The Blue right flank begins to try and fall back whilst under fire, with their Cavalry Brigade trying to cover the withdrawal. |
 |
| Blue's left flank has completely gone. |
 |
| Blue Line Infantry forced to retreat to the town to try and Reform. |
 |
| The loss of an Artillery unit is a bitter blow to Blue. |
 |
| The end of Turn 7. The Blue Cavalry Brigade fails to move, thereby blocking the retreat for the Blue Line Infantry! Red excerts maximum pressure, KO'ing another Blue Line Infantry unit, as well as forcing an Artillery unit to retreat to Reform. The Blue Line Infantry in the town have to retreat again as they cannot reform due to the Red Line Infantry being too close. |
 |
| A Mexican stand off, as the Red Cavalry Brigade awaits the right moment to charge. |
 |
| The Blue defensive pocket begins to collapse as organised resistance is all but over. |
 |
| Massed Red Artillery sees the demise of a Blue Line Infantry units as well as the remiaing Artillery forced back into town to try and Reform. |
 |
| A view from the Red right flank. |
 |
| And a view from the centre. |
End of Game
At this point the Blue Force had reached their breakpoint and all chance of organised resistance was over, so they asked for the 'Honours of War', which Red graciously granted.
Post Game Thoughts
Well not only was it great to get a game in after nearly a month, but the scenario proved to be a bit of a cracker, and as always, the 'Honours of War' rules more than delivered. Happy Days! So as always, a few post game thoughts:
- Normally I use the Austrian list for my games, giving nice generic forces and not too powerful either. Using the post-1760 Prussian list worked well and gave just enough difference, but without making one side too strong or weak. This is something I will likely do for future games.
- Sometimes the OHW scenarios don't translate to other rulesets very well, but this one did. Force wise I simply used those from the 'The Clash at Kutzdorf' scenario in the rulebook, as they just looked fun to play and felt a good fit for the scenario.
- The Red Grand Battery proved to be very effective, especially with the Austrian Artillery rated as Superior in the rules. This was just enough to get that extra hit to KO a couple of units, combined with some supporting fire.
- The Blue Force didn't get any luck with their Brigade Commanders abilities, with having two rated as Dithering, which did limit their options at several crucial points in the game. This also meant the the C-in-C was stuck with the right flank, when he could have done with being able to move to those areas most in need. Some players might not like this variance in their games, but for the solo player, I find it really useful and also great fun.
- Being able to set up a game and play it on a 3' x 2' table is so good, as not only is it quick to do, but it naturally takes up less room, is kinder on the back as well! Yet to my eyes, it still had the look and feel of a 'big game'.
What Next?
As mentioned earlier, the weather is looking like it might be too hot once gain for any painting, as I hope to finish some ATG's in advance of the next scenario for the Normandy campaign. So in its place the next OHW scenario looks quite fun, so that will most likely get an airing this week.
As always, thanks for getting this far and any comments are always greatly appreciated:)!
TTFN.


Cracking looking game Steve and a really enjoyable read too.
ReplyDeleteThanks Donnie and glad you enjoyed it:)!
DeleteGreat looking game and enjoyable report. Happy that the set up and rules worked so well for you.
ReplyDeleteThanks Richard and glad you enjoyed the AAR:). The rules I've played fro when Keith first started developing them, so I dare say I'm pretty au fait with them now, which makes them easy to pick up after quite some time away.
DeleteTop report, what a fight and great looking too.
ReplyDeleteMany thanks Will:)!
DeleteReat battle report sir!
ReplyDeleteThanks Michal!
DeleteA pretty lacklustre performance from the Blue army Steve. Still, that’s what solo wargaming is all about - “playing with the hand you’ve been dealt”.
ReplyDeleteYour table looks bigger than 3’ x 2’. To my tired old eyes it looks easily twice as long as it is wide. Figures & terrain looking good, as expected 👏👏
Cheers,
Geoff
The Blue army was very unlikely with their die rolls for command moves to be fair, but sometimes that's the way the cookie crumbles and all that. Fine for a solo game as it does add to the narrative for sure, but with FtF maybe a rictus grin required in the face of the fickle nature of the dice Gods;)!
DeleteThe overall table was 4' x 2', but the actual gaming area was only 3' long, stopping at the end of the river. Maybe the camera angle gave a false perspective?
A most enjoyable read, and all done on a smaller tabletop.
ReplyDeleteThanks Peter:). Always good to be able to get a game in on a coffee table sized area.
DeleteA lovely looking table as always Steve and a great win for the Austrians, which is a welcome, if rare, event!
ReplyDeleteThanks Keith, and yes, nice to see an Austrian win for once, substantially aided buy shocking dice rolls for the Prussians!
DeleteGreat looking game Steve, such a challenge for us this hot weather. I finally managed some painting yesterday as the rain fell in Cumbria 😀
ReplyDeleteThanks Matt and yes the heat has been a challenge on many levels. Predicted 32C on Friday, so definitely no painting then!
DeleteGreat looking game , nice result and the town looks especially nice I thought!
ReplyDeleteBest Iain
Thanks Iain and always nice to see the Austrians get a win. The buildings are by Leven Miniatures, who sadly seem to not be coming back into production:(.
DeleteThanks for the most excellent report. The commanders’ ratings feature certainly adds a dash of the uncertain, perfect for letting a solo game tell a story as the battle unfolds. For a moment I thought Blue might JUST cling on and deny Red the win…but it was not to be. Maaaarvelous stuff 🙂👍🏼👍🏼👍🏼
ReplyDeleteThanks Martin:)! The commanders rating do and in a certain je ne sais quoi to the game, especially if you do it once both forces have been deployed, which is the approach I take. Blue came very close, but the Cavalry blocking the line of retreat certainly didn't help their cause!
DeleteHi Steve. Another great looking game. Particularly like the very clean look of the tabletop. The OHW scenario collection provides near endless possibilities (for almost every period). Well worth the price of the book just to get them.
ReplyDeleteI have not used ‘Honours of War’. How far forward in history do you think they could be reasonably used?
Thanks for the compliment re: the look of the game:). The scenarios are the best part of the book IMHO and definitely worth the price. I've only really used them for the Black Powder period, but have seen them used successfully for WWII.
DeleteAs for period stretch, I have seen them used, with tweaks, for the Napoleonic period and they seem to be OK. Going back they work perfectly well for the War of the Spanish Succession, again with slight tweaks. Hope this helps?
Yes, thanks, very helpful.
DeleteIn my mind, the basic Game Engine could be transported to many horse & musket periods with only minor modifications.
DeleteI think you're right Jon. I did have an idea to try it out with Pike & Shotte, but never get further than the idea!
Deletenice looking table, and per usual. I forget that folks in the UK tend not to have air conditioning, so a heat wave is actually a hard thing to deal with. Glad you were able to play a game and that it worked out to be an enjoyable one. 😁
ReplyDeleteThanks Stew:). Our houses are designed to keep the heat in, so pretty hard to cool down when it gets hot, as it has done a lot this Summer. Another heatwave on the way with 32C a possibility! Another game set up, so hopefully this might get played before the heat arrives...
DeleteIn my parts (and probably Stew's), 32C is no heat wave. It was 31C this afternoon and I was outside cycling. Looks like we may hit 36C later this week.
DeleteFor us Jon, this is really an exceptionally hot spell of weather. I honestly can't remember heatwaves like this, with temperatures rarely getting to 30C in a normal Summer. When on holiday in Europe, the houses are much cooler than here, which makes the heat much easier to bear, plus of course you have AC which makes it possible to get a good nights sleep!
DeleteExcellent tabletop presented in a small place. Great photos too. I, too, am surprised at the footprint of your table. It looks much bigger in photos.
ReplyDeleteOn the attack, two Dithering commanders out of two commands is a tough ask. I may have been tempted to reroll one of them just to provide an opportunity for attacks to develop.
We good to see you back at the table after a month away. Hope the weather allows you to return to the gaming table soon.
Thanks Jon! I think the smaller figures also help make the game look larger than it is. The Dithering commanders, especially the Cavalry Brigade one, just had really poor dice rolls for much of the game. Normally the odd poor roll in a game, but three in a row was a bit of a surprise! For the solo game this certainly added to the narrative for sure. The table is all set but no game until Wednesday at the earliest...
DeleteIngenious set up and looks exceptionally well presented as usual Steve, well done.
ReplyDeleteThanks Chris:)!
DeleteAn exceptionally well presented game as usual Steve, well done. Huge fan of stretching HoW myself , as you know.
ReplyDeleteYour Napoleonic tweaks show how versatile these rules are, ditto going back to the WSS, the '45, AWI etc.
DeleteOHW scenarios …. The gift that keeps on giving :-) that one looks particularly good. I am out in a coffee shop at the moment, so will pull the book when I get home. The thing of differing rules having differing impacts is interesting. I found myself wondering how Black Powder would have behaved here. I suspect the impact of firepower would be greater, but the impact of variable activations, especially with two dithering commanders (say value 7 in BP), would be quite telling ….. might the troops never cross the ford!
ReplyDeleteThey really are great scenarios to provide a good basis for many a game, no matter the rules being used. Some tweaks are required, but that's the same across the board scenario wise. I think with BPII, assuming you use you can't shoot if you move more than once, the outcome would have been broadly similar, as you don't want to rush across the ford, only to be blasted to pieces. On the otherhand with the original rules, you might get lucky and almost win the game in the first Turn!
DeleteLooking like a big game indeed. Obviously a lot of enjoyment there. I should really try another SYW game with HoW - your posts always inspire - thanks.
ReplyDeleteThanks Jim and really nice to hear your find these posts inspiring. I've yet to have a bad game with these rules:).
DeleteA super game and interesting AAR, what's not to like?
ReplyDeleteThanks David! Glad you liked it and I always find myself re-reading your AAR's, given you have so much eye candy on the table to enjoy:).
DeleteYou very nicely used the HoW-rules. I think that it's always fascinating and more interesting if you have Dithering commanders and have to deal with the problems with weak commanders.
ReplyDeleteThanks Andre:)! I do like a splash of Dithering commanders just to shake things up a bit. The next game is all set up to go, now that our heatwave has finished, but no sneak previews on whether there will be any 'chinless wonders' on show;).
Delete