After the previous game with 4 units per side and 4 Turns in which to achieve victory, I decided to tweak things a bit based upon what I felt I had learnt from the game. Namely I needed to increase the Attackers force by about 50%, giving me 6 units against 4. I also changed the units for both sides as can be seen below:
OOB - Attackers
1 x Grenadiers (Superior)
2 x Line Infantry
1 x Light Infantry
1 x Medium Artillery
1 x Light Cavalry
OOB - Defenders
2 x Line Infantry
1 x Medium Artillery
1 x Light Cavalry
The Game
The victory conditions remained the same as last time, so without further ado, let the play begin!
 |
| An overview of the table, with the Attackers on the left once more. The terrain was moved slightly to make it seem as if the defenders had set up there defensive postion at a nautral choke point. |
 |
| The Defenders left flank. |
 |
| And their right flank. |
 |
| The Attackers right flank, with the Grenadiers on the right. |
 |
| The Attackers artillery piece. |
 |
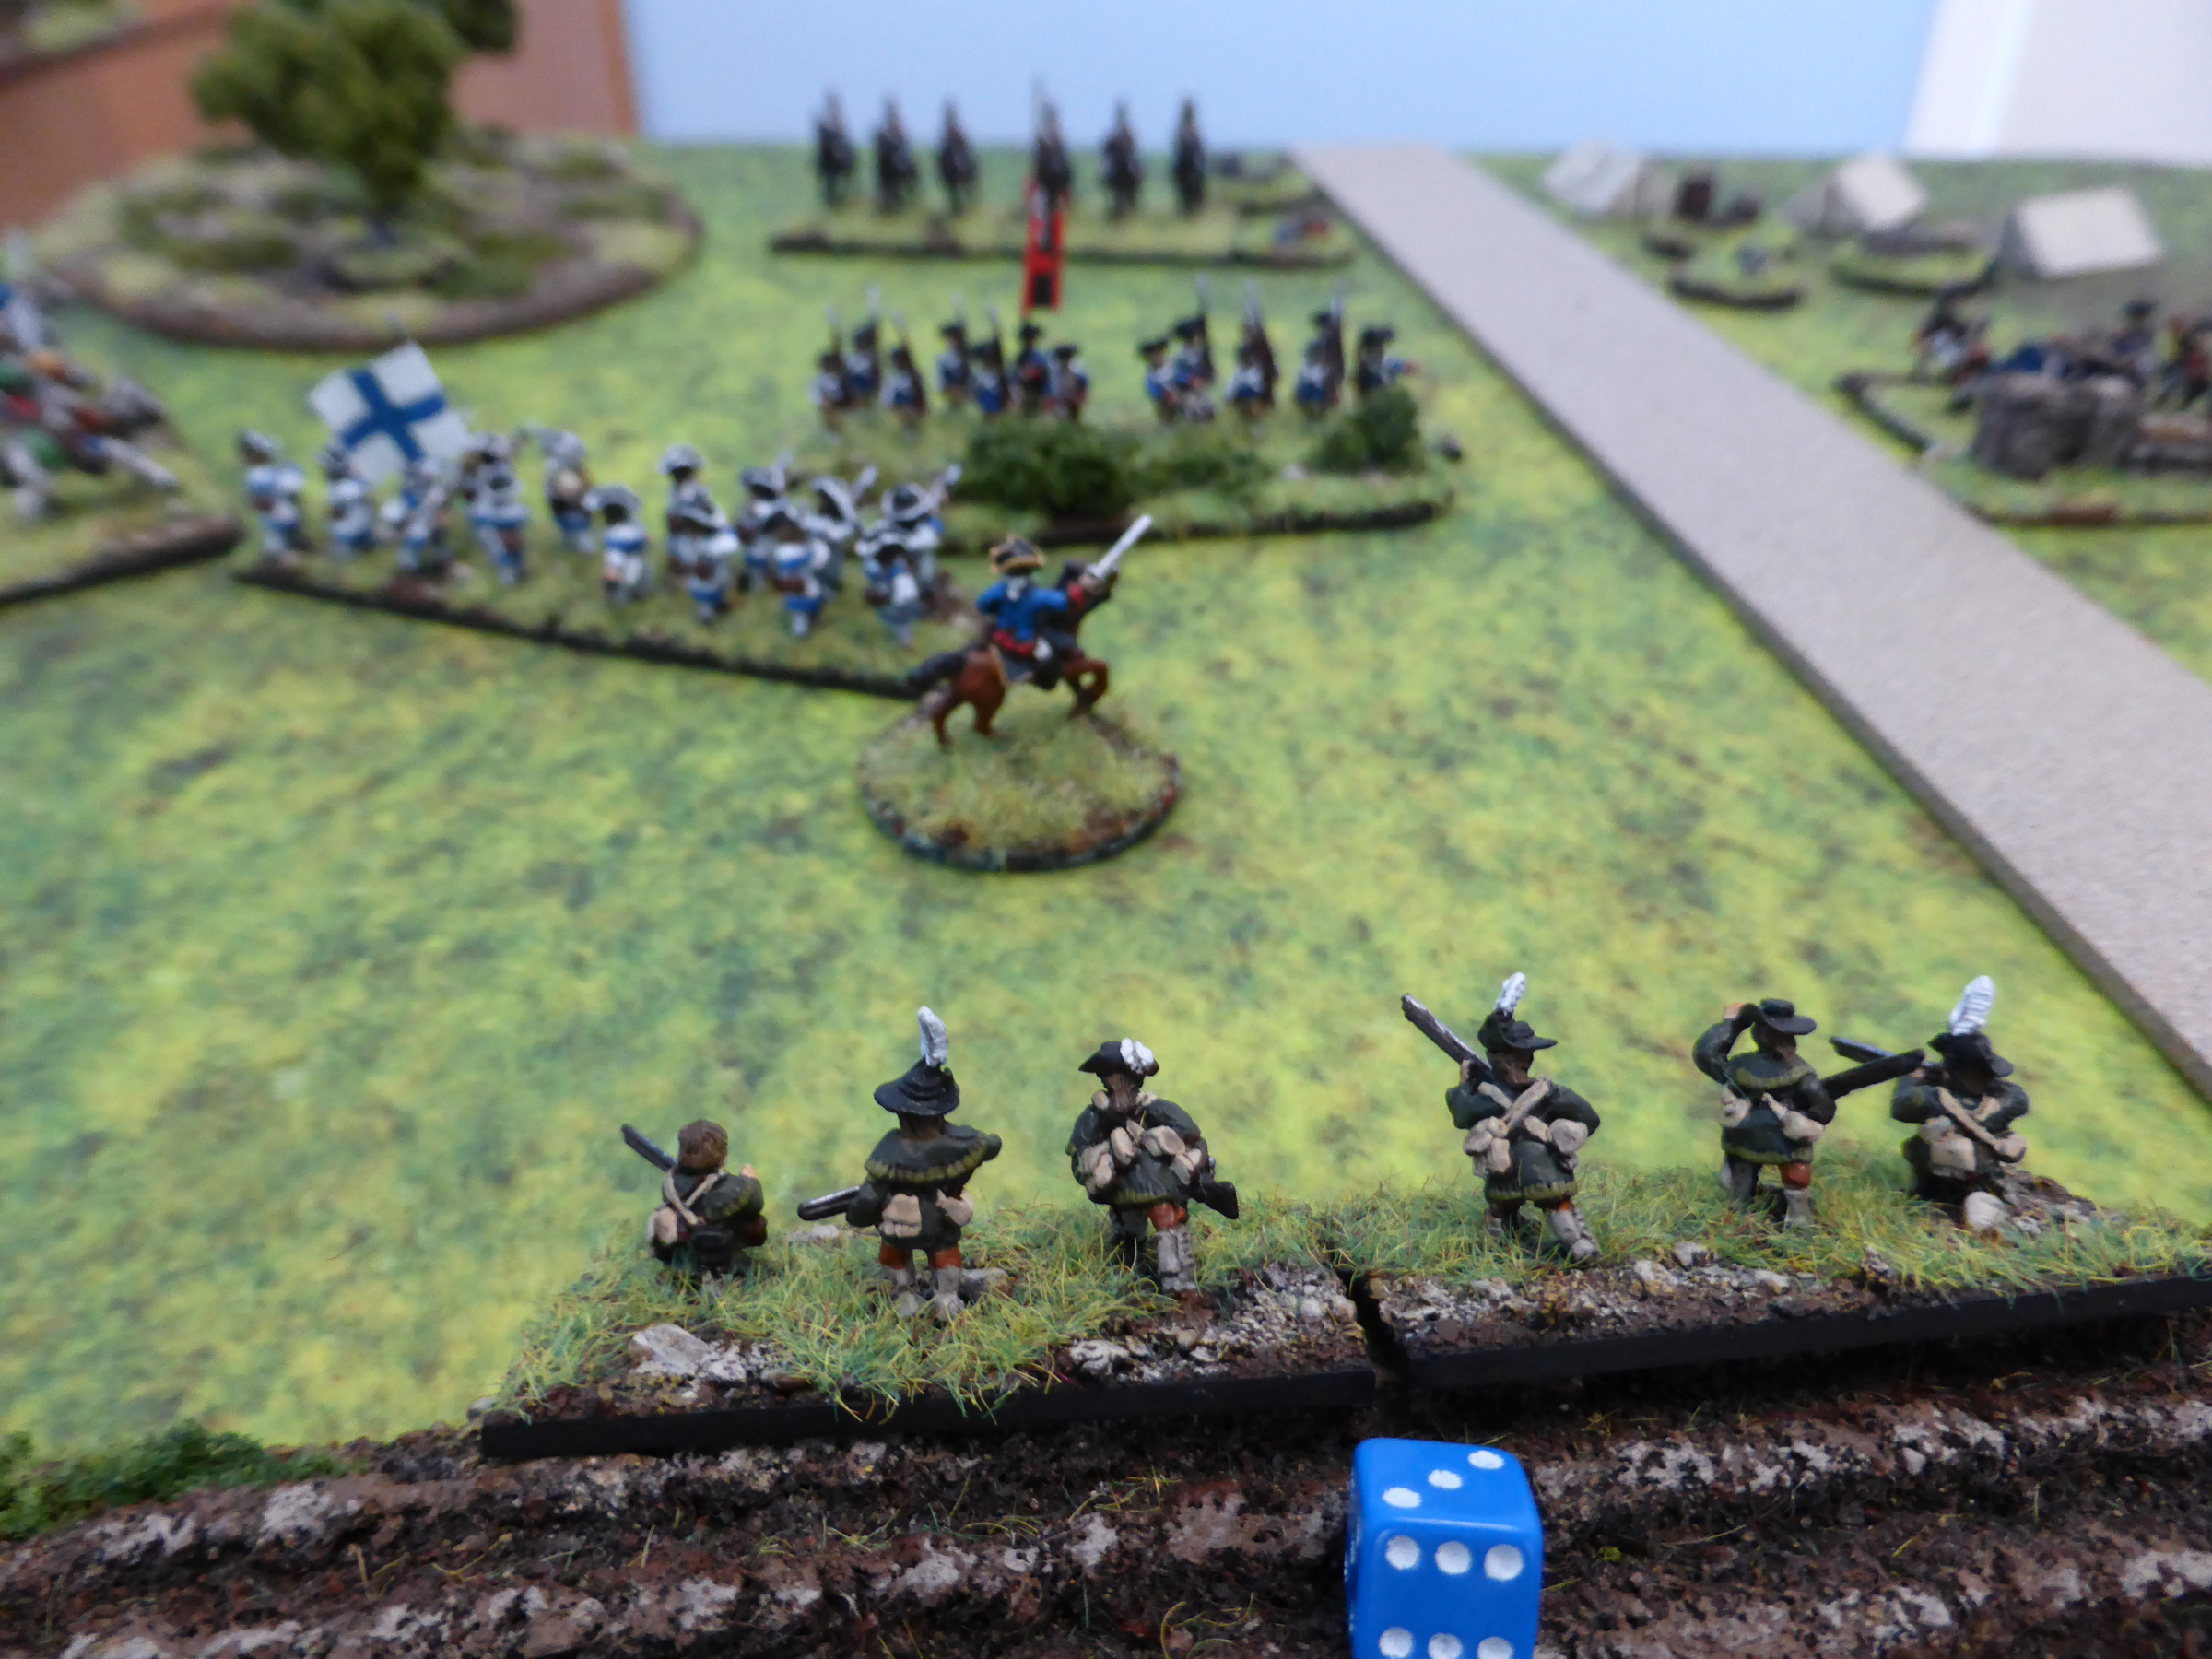
| The Attackers left flank, with the Light Infantry on the right and the Light Cavalry in reserve. |
 |
| At the start of the game, the Attackers Light Cavalry charged, with the Defenders counter-charging. |
 |
| The end of Turn 1. The Attackers left flank got a double move, allowing the Light Cavalry to make its charge. As the left flank closed towards the enemy, the Light Infantry came under crossing fire from the artillery, but survived to make it to shoot at the enemy. All across the front both sides engaged each other, but with no decisive hits occuring. The Attackers cavalry got the best of the melee, forcing the Defenders cavalry back to reform. |
 |
| The Attackers right flank make one move and open fire. |
 |
| The left flank close in and the Light Infantry have taken enough hits to affect their shooting ability. |
 |
| The Attackers cavalry fail to follow up the retreating Defenders cavalry. |
 |
| The Defenders cavalry are trying to reform. |
 |
| The end of Turn 2. As the Defenders cavalry retreated to reform, the Attackers all got a double move, allowing them to really take the attack to the enemy at close quarters. Again shooting erupted across the front, resulting in the Attackers Light Infantry having to retreat to reform. |
 |
| The Attackers right flank gets up close and personal. The unit on the left survived crossing fire from the artillery as they advanced. The Defenders Line Infantry have taken 3 hits and so are in a precarious position. |
 |
| The Light Infantry having moved back to reform. |
 |
| As the Line Infantry hold the attention of the Defenders, the Light Cavalry have moved up to possibly advance past the defensive line. |
 |
| The Attackers canon hasn't really hit anything yet... |
 |
| The end of Turn 3. The Grenadiers rout the Defenders infantry on the right flank, but their supporting infantry have been forced back to reform by canister fire from the artillery and are lucky not to have routed. Pressure is building on the Defenders right flank. |
 |
| The Grenadiers make the first breakthrough. |
 |
| But the Line Infantry have had to retreat to reform. |
 |
| The Defenders right flank is very vulnerable. |
 |
| The Attackers cavalry have moved past the Defenders to threaten the opposing cavalry. |
 |
| The end of Turn 4. As the Grenadiers move to threaten the Defenders artillery in the flank, the Defenders right flank crumbles as both the Line Infantry and Cavalry rout. Victory is complete for the Attackers! |
 |
| Despite getting into a good position to shoot, the Grenadiers miss the artillery. |
 |
| The Line Infantry have moved back to reform, having come under artillery fire again. |
 |
| The Light Infantry have rejoined the fray in time to ensure the demise of the Defenders Line Infantry. |
 |
| The Attackers Cavalry complete the victory by routing the Defenders Cavalry. |
 |
| The gun has no choice but to surrender. |
Post Game Thoughts
Well another small game that I really enjoyed, with this one going down to the wire. Again actual game time was about 45 minutes, but it felt longer and was certainly an engrossing game throughout. Some thoughts from this game after the tweaks I made:
- The Attacker's Artillery really didn't contribute anything to the game. I think I did make one mistake on the deductions to the dice roll for the artillery behind the gabions, but it didn't affect the outcome at all. Whilst having the Artillery felt right, games wise another unit of Infantry would have been a better choice.
- The 6 x 4 worked much better than the previous 4 x 4, allowing the Attacker to have a fighting chance to take the position. In the game 2 Infantry units had to retreat to reform, but having those extra units allowed the attack to continue, which wouldn't have happened in the previous game.
- The Attacker certainly got the jump on the Movement and Fire Initiative rolls, which helped their cause. Both side dice rolling was average, so no wild swings that might have affected the outcome.
- The crossing fire worked well, as whilst it didn't stop the Infantry in its tracks, it did contribute to both units have to fall back and reform later on.
- I didn't use the commanders ability to rally off hits, not their chance of being KO'd if close to a unit that came under fire or attack. Next time I hope to use both to see how that goes.
- I can see these games forming a nice start or finish to a campaign, as here the Attackers would have captured a gun, which could have been woven into the campaign narrative, as either a bonus for the Attacker or a loss for the Defender.
So once again I hope you enjoyed this little action and as always, any comments are greatly appreciated!
TTFN.


Another entertaining little game Steve. It would rare indeed for a commander in any era to attack a defensive position without some kind of numerical advantage, so I think 6:4 is perfectly reasonable and certainly seemed to allow for a better game. Looking forward to the next one!
ReplyDeleteGlad you enjoyed it Keith:). The 6:4 worked much better as a game, giving both sides a decent chance of winning. This game the Dice Gods certainly favoured the Attackers on the Initiative front. Next game will hopefully be some AVBCW action, but not for a week or so, as a very busy week beckons:(.
DeleteAnother good looking game Steve and a very enjoyable read. I think you have got it spot on by altering it to a 6 to 4 game,it seemed to have worked well.
ReplyDeleteThanks Donnie and the 6:4 certainly works well at this level. Fingers crossed more of these games will pop up now and then.
DeleteNicely done Steve and fully agree in most rulesets the attackers need some numerical advantage 👍
ReplyDeleteThanks Matt:). I'm not sure why Barry went with 4 units a side, as the Attacker really does need that numerical advantage. Maybe in his rules the quality overcomes the quantity issue?
DeleteYes, in Beneath Lilly Banners, quality of troops can make quite a difference Steve!
DeleteThanks for confirming the quality issue Keith, which explains a lot:).
DeleteGreat looking game again sir!
ReplyDeleteThanks once again Michal!
DeleteWell, that was much closer than your first 4Play battle. Still, things did seem to go very much in favour of the attackers - would 5:4 units have made it even tighter?
ReplyDeleteI look forward to your next game. Your AVBCW game AAR’s are always interesting.
Cheers,
Geoff
I think 5:4 wouldn't have given the Attackers much of a chance to be honest Geoff. Of course the vagaries of the dice rolls can work both ways, but with HoW, I feel the 6:4 gives both sides a decent chance. If too many units fall back to reform for the Attackers, they will simply not have the time to move back and contest the objective.
DeleteI've dug out a load of primed AVBCW stuff that has set on the bench top for over a week now, as I simply haven't had the time nor motivation to start painting them. Hopefully I can start fleshing out some campaign ideas to help move them along...
Top looking game Steve. The tactic to attack all along the line (a favourite of mine) seems to have worked really well. The defenders being forced to react and unable to weight anywhere.
ReplyDeleteBeautiful figures and terrain!
Regards, James
Thanks James:). Normally I'm quite conservative when attacking, but this forced me to be very agressive, which was quite a nice change and good fun too!
DeleteI agree with James, Steve. Terrain good as ever and lovely looking figures - Pendraken AWI by looks pf them.
ReplyDeleteThanks Chris:)! Yep, the figures are from the superb AWI range.
DeleteSee! More units means more fun. It’s the law of war gaming. Next time try 12 attacking versus 8 defending. lol. 😀😝😝
ReplyDeleteQuantity has its own quality;)! If only I had 12 units per side, then I'd be happy to give the bigger game a go. Maybe I should either paint more, use my MDF figures, or both!
DeleteGreat looking game Steve, some times the smaller games can be just as engaging and yet still pose a tactical challenge for the gaming general.
ReplyDeleteThanks Stu! Yep, this last smaller game certainly gave a better challenge than the previous one, but was just as quick to set up. Hopefully some bigger games next...
DeleteGreat game and much better with the 6/4 ratio I think!
ReplyDeleteBest Iain
Agreed re: the 6:4 ratio!
DeleteThe tweak to the ratios worked well. Great game and report Steve.
ReplyDeleteThanks Richard and the tweak certainly made a positive difference to the game:).
DeleteVery nice small encounter.
ReplyDeleteThanks Andre:)!
Delete