Earlier today I played the first scenario in my planned mini-campaign. Details are as follows.
Sit Rep 17th September 1944
13:00 hrs. 1st Parachute Brigade begins landing to the North West of Arnhem.
13:40 hrs. 2nd Kompanie SS Panzer Grenadier Battalion begins localised attacks on the landing zones.
14:00 hrs. SS-Obersturmbannfuhrer Krafft begins to organise a defence along predicted routes into Arnhem.
15:00 hrs. 3rd Parachute Battalion, 1st Parachute Brigade begins to move towards Arnhem along 'Tiger' route.
Uhtrechtsweg, around Hill Oek
Having disengaged from the attacks on the landing zones, 2nd Kompanie has been ordered forward along the Utrechtsweg, making a reconnaissance in force. Coming towards them are A & B Companies of the 3rd Parachute Battalion...
 |
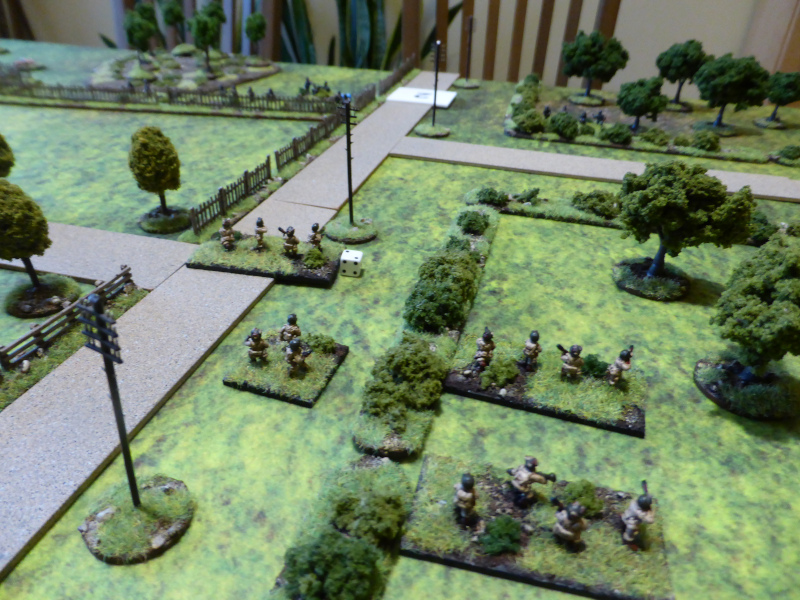
| An overview of the table, with the Germans to the South, the British towards the North. The area is largely wooded with a small hamlet in an open area to the East. |
 |
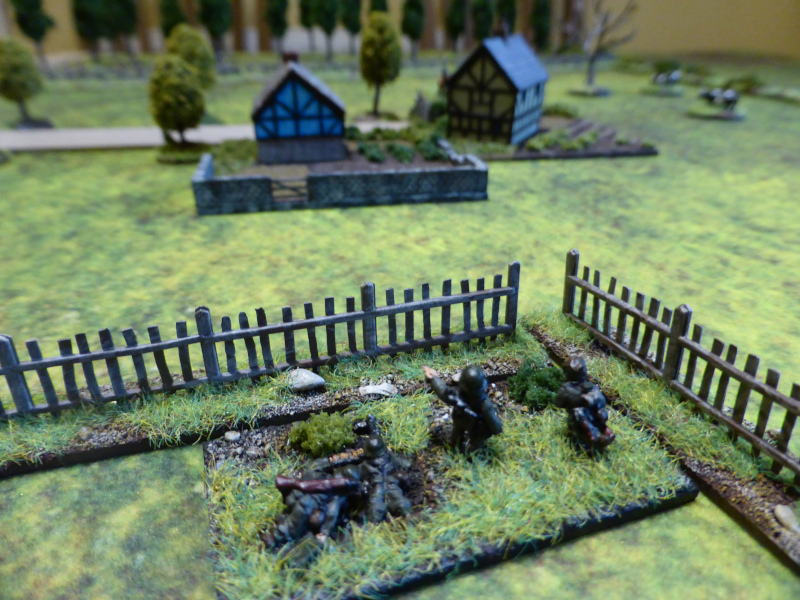
| The hamlet. |
 |
| The Germans deployed either side of the Utrechtsweg, advancing carefully knowing that enemt troops are likely to be nearby. |
 |
| Lt-Col Fitch with A & B Companies, deployed along the road to make best speed possible towards Arnhem bridge. (Note US Paras are standing in for British ones. Oh the shame of it!). |
 |
| The end of Turn 1. The Germans push forward to the fence line and halt as they see British paratroops advancing along the road. Unaware of any enemy, the British push forward as quickly as they can. |
 |
| The Germans deploy ready to ambush the British paratroopers. |
 |
| A Company in the lead with B Company moving into the woods on the left. |
 |
| The end of Turn 2. The Germans fail to activate, but as the British advance, the German MG opens up on the lead Platoon, suppressing it. At the sound of gunfire, A Company move off the road into the woods on their right. |
 |
| The Germans spring the ambush. |
 |
| A Company moves into the woods and out of sight. |
 |
| B Company have managed to send one Platoon forward into the hamlet. |
 |
| At the start of Turn 3, the leading Platoon of A Company is KO'd. |
 |
| The end of Turn 3. After KO'ing a Platoon, the Germans have no further targets and so move a Platoon to their right to cover the hamlet. Shocked by the loss of a Platoon, both Companies fail to activate, but Lt-Col Fitch manages to move A Company forward to the edge of the wood. |
 |
| The German Platoon relocates to cover the hamlet and their right flank. |
 |
| A German Platoon lies in wait as the British A Company reaches the edge of the wood. |
 |
| The end of Turn 4. With no targets again, the German HQ drops smoke from their 50mm Mortar onto the edge of the wood as a precautionary measure. The British manage to get B Company moving towards the hamlet, but they come under MG fire as they cross the open ground. A Company once again require Lt-Col Fitch to get them moving, aggressively crossing the road with one Platoon, which is suppressed as it does so. |
 |
| Despite having lots of firepower, the British Platoon in the hamlet fails to do anything really to the German MG unit. |
 |
| As smoke obscures the view on one Platoon, the other comes under fire as it crosses the road. |
 |
| The rest of B Company moves towards the hamlet. |
 |
| Turn 5 and another British Platoon is KO'd. |
 |
| The end of Turn 5. Having KO'd another A Company Platoon, the German right flank begins to pull back in the face of the British B Company advance. The remaining A Company Platoon engages in a firefight with the Germans to their front, but ineffectual shooting leaves them open to opportunity Fire, leaving them suppressed and close to being KO'd too. |
 |
| The Germans in firm control of the road junction. |
 |
| The remaining A Company Platoon in a parlous state. |
 |
| B Company occupy the hamlet. |
 |
| The Germans begin to pull back to avoid the large amount of firepower coming their way. |
End of the Game
Having done the job of locating the British advance and certainly giving them a very bloody nose, the German 2nd Kompanie decides to withdraw and fall back to positions that are being prepared to their rear. Lt-Col Fitch needs to await his C Company and heavy weapons support, as well as re-organising the remnants of A Company, that has all but ceased to exist.
Post Game Thoughts
Well I don't think that could have gone much worse for the British Paras! The certainly took a real pasting, whilst the Germans got barely a graze. So as always some thoughts on what happened and why:
- When the Paras had a chance to shoot, they simply didn't make it count, in comparison to the Germans who seemed to have above average dice rolls all the time. Even the superior weight of fire of the Paras didn't help them.
- The Germans certainly benefited from having an attached MG unit, which gave them greater range with which to engage the Paras, before they were in range to respond.
- The British HQ's didn't perform well, relying upon the CO to step in and at least get one Company moving forward. This stop-start movement allowed the Germans to focus on one Company each Turn, thus concentrating their fire as required.
- The British need to press forward as quickly as possible, meant they needed to sue the road to start with, thus exposing themselves to German fire early on. In contrast the Germans could play a much more cautious game, which they needed to, given that they had less troops here and could not afford to take heavy losses in this opening engagement.
- The Germans used fire-and-manouevre very well, shooting and suppressing troops, then pulling back out of sight and relocating to a new, unobserved position.
- The use of 2"/50mm Mortar smoke worked well, something that I took from the Pendraken forum. I allow each HQ unit to try and drop smoke once per Turn as an ordered action, with the stats of 1/40. 3"/81mm Mortars can do the same, but again I will limit this to once attempt per Turn, to avoid unrealistic amounts of smoke being used.
- Although this was a rather one-sided action, it did feel historically right and certainly gave me an insight into the challenges faced by the British Paras as they tried to push towards the bridge.
What Next?
Well it certainly looks an uphill task for the British now, given that they have effectively lost one complete Company in the first engagement. The only saving grace is that they will now have access to the MG and 3" Mortar units as well as C Company. The Germans are not yet near their defensive line that is being set up, but yet again the terrain will certainly favour the defence, as they can fall back slowly, fighting as they go. The British on the other hand need to push forward as quickly as possible.
I have a few more units to finish painting, that may or may not be required for the next game, but whilst they are to the fore at present, it makes sense to try and finish them off. At least the Germans have all they need at present.
TTFN.


Great stuff I can't tell the difference with the paras to be honest, looks great, tough ask for the paras! I'm hosting a 28mm bolt action market garden campaign soon so this is all useful stuff!
ReplyDeleteBest Iain caveadsum1471
Thanks Iain! I'm beginning to feel this is too tough an ask for the Paras, but then with the benefit of hindsight, the plan had so many flaws that it was almost bound to fail. The magazine article might be of interest to you, given it's aimed at CoC rules, so easy to port across to BA. I'm certainly looking forward to seeing what you do for the campaign :).
DeleteOh dear....seems quite realistic though, based on my memory of the film and book!
ReplyDeleteOh dear indeed Keith! I can't argue with the outcome as it did feel right, even though one wants the British to push on through etc. At some point I would like to game a 'what if?' version, such as the landings being a lot closer, something that the Americans vetoed, despite flying over supposed 'no-go' flak areas for Operation Varsity!
DeleteWell things aren’t going well for Johnny Fitch.
ReplyDeleteChris/Nundanket
They certainly are not at present Chris!
DeleteThe Germans fought this action very effectively seeming to dominate where it mattered in this encounter. An interesting and enjoyable narrative as well with helpful photos. On to the next phase of battle.
ReplyDeleteThey certainly did Jon and glad the photos helped you follow the action:).
DeleteLooking awesome sir!
ReplyDeleteThanks Michal!
DeleteHi Steve, firstly, the table looks excellent and the battle matt is looking a sound investment. If everything felt right, then it’s probably right. In this particular action, there are probably only two variables that might have had an impact, one the dice (as always), the other the command values, with an option to either shift one of the British commands up or probably a better option to drop one of the German commands down. ….. but then would it feel right :-)
ReplyDeleteThanks Norm and the mat worked really well, once all the terrain was on it, so very happy with the purchase. For the historical take, then it certainly felt right and tweaking things would have felt wrong. Another option would be to replace the 1st Airborne with 6th Airborne, so having very experienced troops on the ground, something that was contemplated IIRC. It still wouldn't overcome the fact that both the 9thSS & 10thSS had been trained to deal with airborne landings. Couple this with closer drop zones, close air support and you have a plausible 'what if?' to game.
DeleteLast night I dug out my copy of Operation Market-Garden, Wolverhampton Military Studies no. 20, for some bedtime reading. Ages since I read it, but a superb read which really looks at the planning of the operation and how flawed it was on so many levels. In a sense it was doomed to fail from the start.
poor British.
ReplyDeleteI am very pleased that you have telephone pools on the table. It's something that I always meant to add to my WWII tables but never got around to it. I think they really add some flavor to the terrain. I know it's a small detail to focus on but it LEAPT at me from the screen. 😁
Poor old British indeed Stew! I agree that the telegraph/telephone poles really do 'pop' on a table and I like to include them in as many WWII games as I can. Glad they worked for you:).
DeleteLovely looking table and battle and an engaging report and photos to match. I look forward to your next instalment Steve. Maybe the British can create some luck.
ReplyDeleteGlad you enjoyed it Richard:)! The next scenario is ready to, with extra figures painted, so all I need to do is set up the table. I might do this tonight or watch the new series of 'Shogun'. Or maybe try and conjure up some luck for the plucky Brits. Decisions, decisions...
DeleteVery nice Steve. You clearly have a lot of trees and bushes - and it appears you probably used most of ‘em in this game.
ReplyDeleteThings didn’t go well for the British, did they ☹️ In reality it wasn’t as f they could sit back and get themselves sorted/reorganised - they had to strike at once, in an effort to catch the Jerries unprepared. As you say, just about everything the Germans did seemed to be successful.
I now need to read your next battle report and see what happened next. Fngers crossed for the Brits.
Cheers,
Geoff
Thanks Geoff! Yep, pretty much all my trees got used in this and the next game too. Lucky that over the years I've added to the collection, which has paid dividends now.
DeleteThe British only have one option for sure and that is to go for broke! As historically, the Germans did enough in this game to slow them down and to cause casualties too.