Dave and I were unexpectedly able to meet up last week for a final game for sometime, probably until late Summer or thereabouts. So as Dave had recently finished some Pendraken AWI figures, we decided to give 'Honours of War' a run out with some tweaks to suit the conflict. In terms of details, please see below for Dave's info he provided in advance of the game:
The Battle of Cooking Pans: An Honours of War AWI Scenario.
"Large doses of sarcasm are required in this event"
Situation:
1781, The continentals are getting a grip and managing to put up a good
show against the King's troops. Von Steuben has drilled the men and
some standard tactics are available to organise the men although not all
the militia are yet turned
into the equivalent of regulars. The British see an opportunity to deal
a blow to this attempt at organising a decent rebellion and have sent a
brigade under Brigadier Farkin Tarquin to deal the blow. The
Continentals are mustering to meet this threat and
defeat it, General George Washing-Line is hatching a cunning plan.
Mission (both forces):
Break the enemy forces i.e. Brigade(s) must have more than half units
"Done for" and forced to retreat from the field. It will be noted that
the British have one brigade and the Continentals, two (2) brigades.
Doing the maths
the British have quite a task ahead of them, but then they do have
Royal Ascent. Cavalry are ignored in the victory conditions, they are
simply there horsing around.
Execution: British forces
are deployed in a single brigade with an aim to get into the
Continentals soonest, use the standard Honours of War SYW statistics.
The Continentals will deploy one brigade up front to absorb the attack
(choose either) with
the other behind in support at the start, use the proposed AWI
Continental statistics (attached). George can go where he wishes.
British go first of course, play the game until you've had enough or a
victory condition has happened or the bar has closed. Continental
terrain may make it hard to move line troops to move around, so live
(or die) with it.
British Forces:
Brigade Tarquin (Dependable but a bit chinny)
Light Bobs - Standard Light infantry
Highlanders - Superior Line Infantry
1st Infantry - Standard Line infantry
2nd Infantry - Standard Line infantry
Light artillery - Standard gunners
Independent Cavalry - Standard Light Dragoons
(deployed 'at will') .. Note that Will is not actually at the battle,
but he is happy for them to go anywhere with the British .. but not in
advance of Brigade Tarquin, that would be Farkin wrong!
Continental Forces (under General George Washing-Line who is rather Dashing):
Brigade Trump (A Dithering fool, focussed entirely on his hair piece)
Virginian Militia - Inferior Line Infantry ... these guys stink
Green Mountain Militia - Inferior Line Infantry ... these guys make Baldrick high class
1st Continentals - Standard Line infantry, they know about soap
Brigade Stallone (Dependable Bostonian with a street brawling reputation)
Riflemen - Standard light infantry armed with rifles ... they come with their own trees
AWI Militia - Inferior Line infantry ... these truly stinketh
2nd Continentals - Standard Line infantry, these guys have used an iron and can do straight lines
Independent Cavalry
- Inferior Light Dragoons ... hidden deployment at start (the cunning
plan). Note location on map with trusty pencil and surprise the British
when they come within ONE cavalry move of them and shout: "BOO" in an
annoying
American accent (which is of course REALLY annoying).
With the details of the scenario sorted, Dave left it up to me to come up with the layout for the game. I broadly used the map for the Battle of Chadd's Ford in the latest issue of Wargames, Soldiers & strategy as a guide, then tweaked it a bit to suit my scenery.
Sadly I have lost the notes I made during the game, which was nearly a week ago. Hopefully my poor ageing brain can remember enough to give a flavour of what happened. So without further ado...
 |
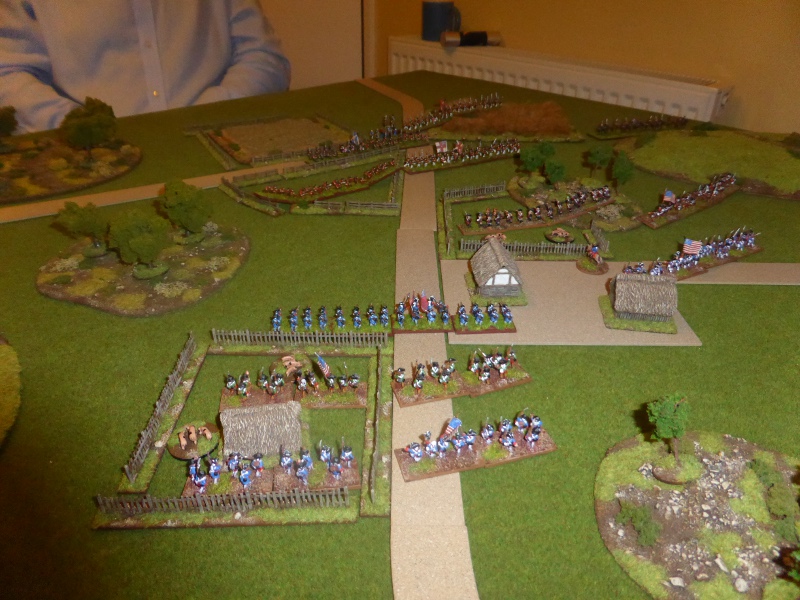
| The British are entering from the top left hand corner, with the Americans partially deployed on the right. |
 |
| Brigade Stallone ready for action, with the riflemen on the left flank. |
 |
| Things got off to a bad start for Farkin Tarquin, as a Poor command roll saw his Brigade unable to advance towards the enemy. So strung out in line of march, they crabbed onto the table, which we blamed on them having some Highlanders. |
 |
| Seeing the indecision of the British, Stallone's Brigade moved sharply forward. |
 |
| Turn 2 saw the British get their act together and start to move towards the pesky rebels. Brigade Trump arrived ably supported by General Washing-Line. |
 |
| The British struggle to form all of their infantry into line, whilst their cavalry move off along the left flank. |
 |
| Stallone's Brigade managed to gain the BUA, which the riflemen occupied, whilst the Militia and Line moved off towards the wood. |
 |
| Dave ponders as Brigade Trump moves swiftly along the road, his hair billowing in the wind and acting as a sail. |
 |
| Turn 3 and both sides start to close, ready for action. |
 |
With a fair wind, Brigade Trump rushed forward and deployed into line, ready to take on the Mexicans British. |
 |
| Brigade Stallone have formed a defence in depth (or so they hope) and are ready to offer a refuse flank if the cavalry push past over the hill. |
 |
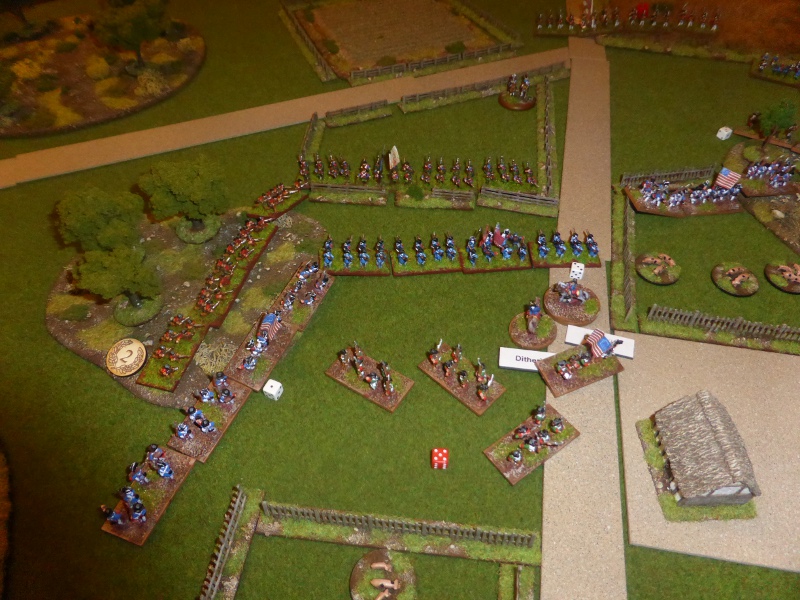
| Turn 4 sees things really kick off, with both sides closing and the game resembling a school football match, with everyone crowded into one area. |
 |
| Brigade Trump push towards the British who are arrayed along the fence line. |
 |
| Brigade Stallone does the same, with the Riflemen facing off across a fence with the British. |
 |
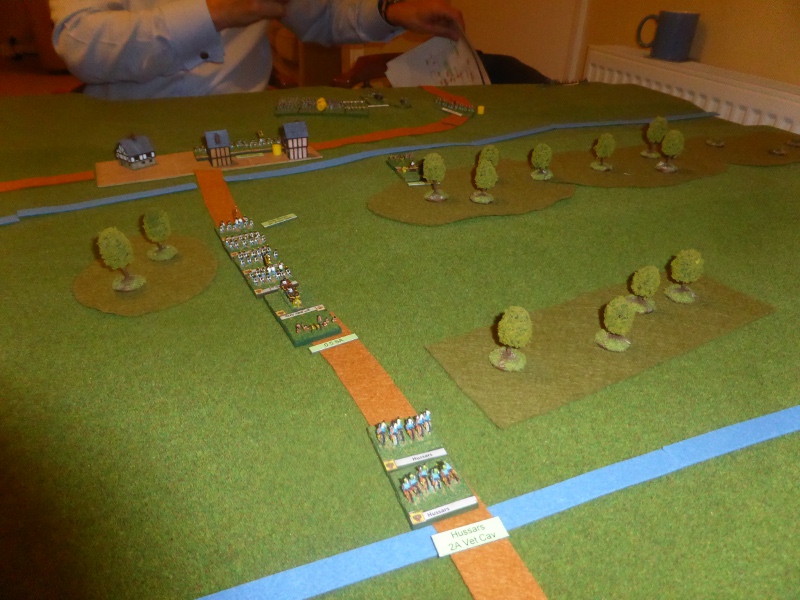
| Turn 5 and movement by the British triggers the suprise arrival of the American cavalry, who then proceed to roll a 'Poor' command, and so crab across the table. They mush have Scottish ancestors. |
 |
| Brigade Trump reacts to the British who have moved off into the wood to try and turn their flank. |
 |
| The fighting rages in and around the wood, with Brigade Stallone wisely leaving a unit back to protect their flank. |
 |
| Brigade Stallone trading blow for blow with the British. |
 |
| Turn 6 and the British suddenly gain the upper hand. |
 |
| One of Trump's Battalions is completely blown away by some devastating fire from the Highlanders. |
 |
| At least Brigade Stallone knocks one British Battalion back... |
 |
| ... but a Battalion of Militia is on the ropes after a charge by the British cavalry, who luckily fail to persue. |
 |
| Turn 7 sees the British very much on top. |
 |
| Brigade Trump, temporarily abandoned by General Washing-Line, rolls a 'Feeble' command and so all of his units have to fall back. |
 |
| In the woods Brigade Stallone try to hang on. |
 |
| The British cavalry advance towards the Militia Battalion, but are unable to charge them. |
 |
| Turn 8 and the Americans succumb to the superiority of the British troops. |
 |
| Despite the late arrival of the American cavalry, Brigade Trump loses another Battalion is therefore broken. |
 |
| The same is true of Brigade Stallone, who reel back somewhat punch drunk, losing a Battalion and seeing the Riflemen pretty much done for, leaving their Brigade all but broken too. |
Post Game Thoughts
Well, the Americans in the end were well and truly beaten. At one point they looked to be in quite a good position, but appearances can be deceptive. Still it was a fun game, with plenty of sarcasm and childish jokes as required by the scenario. So a few points on the game upon reflection:
- After quite a break from Honours of War, it was nice to playing a game with these rules. Once again we found that we rarely needed to use the rulebook, with the QRS sufficing, which in our book is the sign of a good ruleset. We did get a few things wrong, but nothing which materially affected the outcome of the game.
- I did not place my cavalry at all well, so much so that they didn't play any part in the game whatsoever, apart from providing comedy moments due to two 'Poor' command rolls in a row. I would have been better placing them on the right flank, but hindsight is a wonderful thing.
- "Quantity has its own quality" may have worked for Stalin, but it didn't work for the Americans. The Inferior Militia simply were on the backfoot once they started taking hits and unable to rally any off.
- Coupled with the above, the Highlanders won the game for the British with two simply devastating volleys that destroyed two Battalions in as many Turns.
- With Dave away, this game may spur me on to finish a Brigade or two a side for my planned Imagi-Nations forces.
I'm not sure what or when my next game will be. Hopefully BKCII in some form or other, either AVBCW or some WWII, given that my Fallschirmjager have yet to have a run out...