Tuesday, 10 January 2023

OHW Scenario 11 - Surprise Attack

With Xmas and New Year out of the way, it was high time to try and get a game of something or the other in. After some thought I returned to Neil Thomas' scenarios from his excellent One Hour wargames book, which I hadn't played for quite some time. As many will know, they are perfect for relatively quick games when time is not always available for something larger of more involved.

The next scenario in the list was number 11: Surprise Attack, loosely inspired by the Battle of Quatre Bras. As before rather than use the random OOB from the OHW book, I used those contained in his Wargaming 19thC Europe, which work better for me, but more on that later. So the D6 die roll produced the following:

Red OOB (Defender)
5 x Infantry
1 x Light Infantry
2 x Cavalry
2 x Artillery

Blue OOB (Attacker)
4 x Infantry
2 x Light Infantry
2 x Cavalry
2 x Artillery

The Game
The set up was as per the book, but the scenario length was changed to 8 Turns as I would be using BPII rules. The distribution of the Red force and their arrival Turn was based upon those from the book, but again tweaked to fit into the 8 Turn format. 

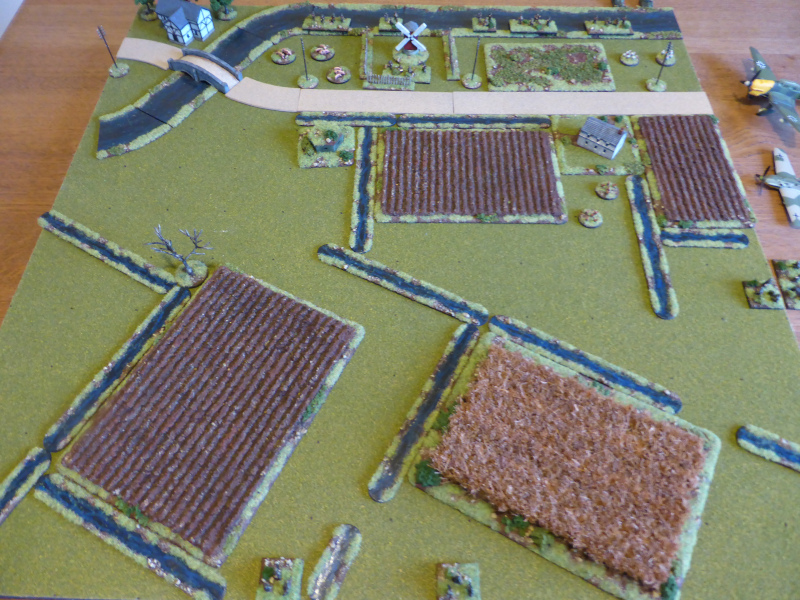
An overview of the table with the Red defenders in place, with their flanks covered by the wood and the pond.

2 x Line Infantry and an Artillery unit formed the blocking force.

1 x Light Infantry, 1 x Line Infantry and an Artillery unit formed the Western force that would arrive on Turn 4.

2 x Cavalry and 2 x Line Infantry formed the Northern force that would arrive on Turn 2.

The Blue right wing consisted of 2 x Line Infantry supported by an Artillery unit and 2 x Cavalry.

The left wing consisted of 2 x Light Infantry, 2 x Line Infantry and a supporting Artillery unit.

The Blue Cavalry pushed towards the pond, whilst the Infantry moved towards the blocking position on the road. Fire from them caused some disruption on the Red Infantry. The Blue Light Infantry failed to arrive. In response the Red force caused some hits and disruption on the Blue Line Infantry and Artillery.

Firing quickly erupts along both lines.

On Turn 2 a fight breaks out as the Red Cavalry charge their Blue counterparts, breaking one Blue Cavalry unit.

The end of Turn 2 (apologies for the bad shot). The Blue Light Infantry arrived and moved through the wood to threaten the Red right flank. Firing caused a Red Line Infantry unit to make a Disorderly Retreat. Both sides took hits and some disorder, with the Blue Artillery going shaken. The Red Cavalry got the better of the first engagement and followed up the retreating Blue unit, but could not catch it to make a sweeping advance.

The Blue right wing failed to make passage of lines and so stalled in the ploughed field.

The Blue left wing and Light Infantry have caused the Red blocking position to break up.

The Blue Light Infantry in the woods.

The Red Northern force arrives and takes up position astride the crossroads, which are the objective.

The victorious Red Cavalry are just out of range to make a sweeping advance into contact.

The end of Turn 3. The Blue Light Infantry fail to move in the woods, but the Line Infantry in the centre make short work of the Red blocking postion, breaking the remaining Line Infantry and Artillery there. The Blue Cavalry retires and a Line Infantry unit moves to the edge of the pond to cover them. The Red Cavalry likewise retires and there is no action from their Infantry, other than to rally off a hit.

The Blue troops break open the blocking position.

The Red Line Infantry rally off a hit to try and prolong their staying power faced by strong forces to their front.

Early on Turn 4 the Red Cavalry makes a desperate charge at the Blue Artillery, which fails to hit them as they close in, which leads to their demise. The Red cavalry then carries on into the Blue Infantry formed in column and makes short work of them too. Satisfied, they retreat to reform.

The end of Turn 4. The Blue forces advance where they can and combined fire sees a Red Line Infantry unit forced to retreat disordered, just as the Red Western Force arrives. Fortunately the Red Cavalry's do-ro-die charge helps stabilise things as they break up the Blue attack in the centre.

The Blue Line Infantry help support the Blue Cavalry, who could only look on helplessly as the enemy rode down their Artillery and Line Infantry.

The Blue centre is looking vulnerable and the Artillery is wary of the Red Cavalry reforming by the burnt oak tree.

The Blue Light Infantry try their best to disrupt the Red Western Force as it arrives.

The view from the Red Western Force postion as they deploy.

The Red Cavalry look on, happy with their work so far.

The end of Turn 5. Things hang in the balance for both sides. The Blue Cavalry makes a desperate charge to tie down the Red Cavalry, which they do, but are forced back to reform and are disordered. As the Blue Line Infantry and Artillery advance, both sides causes hits and disorder on each other.

The Blue Line Infantry have moved across to cover the Artillery from any possible charge by the Red cavalry.

Casualties are building up on both sides.

The Blue Light Infantry cannot quite cause enough problems for the Red force.

At the start of Turn 6, disaster befalls the Blue Line Infantry unit that is covering the Artillery unit, as it is broken by firing and flees the table.

The end of Turn 6. Once again the Cavalry charge each other, with the Red Cavalry coming off worst, having to retreat back disordered. The Blue cavalry has taken a beating too and is in no fit state to pursue. The Blue Infantry have the better of the firefight, breaking a Red Line Infantry unit that retreats off the table.

A Blue Line Infantry unit makes a disorderly retreat to make way for a fresh unit and to preserve itself for later on.

The end of Turn 7. Both sides take and inflict significant casualties on each other, with units shaken and disordered across the front. One Blue Line Infantry unit is once again thrown back shaken and disordered. With things looking desperate, the Red Cavalry once again charges its opponent, but despite a numerical advantage, one Red Cavalry unit is broken, but at least they break the Blue Cavalry too.

The Blue Line Infantry unit forced back by a failed break test.

Mutually Assured Destruction.

Things are getting tight with the Blue units having the slight edge.

On Turn 8, the Red force is in a desperate situation, with most of its Line Infantry close to breaking. Once again the Red Cavalry makes a do-or-die charge into the Blue Artillery's flank, breaking it and then forcing the Blue Line Infantry to retreat disordered.

The end of Turn 8. Red snatches Victory from the jaws of Defeat by a last ditch cavalry charge! Blue had inflicted shaken and disorder more or less across the whole Red frontage, leaving the Red units in a parlous state. Victory for Blue was so close yet so far...

The Blue Line Infantry forced back when they were so close to the objective.

The Cavalry hold position as the Red troops try to reform.

The view from the Red positions. A close run thing for sure!


End of Game
Well what a game! It swung too and from for several Turns and Victory was gained on the last Red command roll, for the Cavalry to make the game winning charge. It was a Victory but a bloody one fir sure, with both sides having take quite heavy losses. Not quite Pyrrhic but too close for comfort.

Post Game Thoughts
It was good to be gaming again and it certainly proved to be entertaining start to the New Year. As always some thoughts on what worked, what didn't etc and in no particular order:
  • These OHW scenarios with relatively small forces make for a great mid-week type game, certainly for when time is at a premium. I reckon this game took about an hour or just over to actually play, but around two when adding in taking notes and photos. Set up is also really quick as there is minimal terrain, which can of course be added to depending upon the period played.
  • 10 units aside for this game is OK, but it felt a little tight on the 2' x 2' board. Maybe this scenario would have been better on a 2' x 3' one, to give a bit more room for manouevre on the flanks. Certainly with the generous BPII movement and shooting, you are right into the action straight away. It would be interesting to replay this at some point, but using Honours of War instead.
  • I took on board Norm Smith's idea for these 2' x 2' games of using 3 bases per unit rather than the normal 4 I use for most games. It certainly works well for games on my 2' x 2' baord and I will continue down this route for future game I'm sure. Thanks Norm!
  • I have to hold my hand up to some schoolboy errors with the rules, namely removing the Shaken status of units at the end of their Turn. Of course this only applies to Disordered, which I completely forgot about! However it did have the unforeseen benefit of making the game carry on until the final Turn for the dramatic ending! If I had plyed it correctly it might have all been over bar the shouting by around Turn4, but we will never know...
  • The Red Cavalry were certainly the stars of the show and kept the Red forces in the game with their two charges into the Blue guns. Upon reflection if the Blue Cavalry had got the upper hand early on, then it might have led to an easy Blue victory. Going forward I think I need to make my own random lists table, reducing the Cavalry and Artillery, as the latter can have a devastating effect in a small game too. Something to think about and work up some ideas in the future.
  • Going first in these small BPII games does confer a slight advantage IMHO, as you tend to get your shots in first, which if you're lucky, can lead to some Disorder or maybe even Shaken status, which impedes the otherside when it's their Turn. The alternating actions by Brigades as per Honours of War might provide a better solution. Again something to ponder once I've got a few more games under my belt.

That's it for now but I hope to get another similar type game in soon. I had planned on starting painting stuff for my planned France 1940 Campaign (more of which in another post) but I put my back out on New Year's Day, so haven't been able to sit comfortable enough to actually paint anything. I'm nearly there so fingers crossed I'll get something done this week.

So until next time, stay safe and keep healthy and hope you avoid the horrible cold that's doing the rounds this neck of the woods.

Wednesday, 28 December 2022

End of Year Review 2022

As another year draws to a close, it's high time I look back and take stock of what has, or has not, happened on the gaming front. Thankfully Covid reached manageable levels, so more or less normal social contact was able to resume. Sod's Law on the first proper outing to see friends I caught the damned virus, which knocked me for 6 and took around 3 weeks to recover. Since then I've naturally been somewhat wary as I don't fancy a 'Second Dose'. Then we had the intense heat of the Summer, which meant that it was simply too hot to do anything, other than try to keep cool.

Aside from the above, I would say the year was a 'game of two halves', with a relatively good Spring and then a 'surge' of activity come late Autumn. In the middle the bout of Covid and weather put pay to all thoughts of gaming activity, other than reading books now and then. Like quite a few gamers I had a complete loss of mojo around the end of October and early November, which thankfully has returned.

With the broad overview of the year, time to dig a little deeper into some detail and so without further ado:

Rules Bought
Live Free or Die by Little Wars TV
Cold War Commander II
Hail Caesar 2nd Edition (pre-order)

Over the past few years I has become very obvious to me that, rather like an old dog, 'new' rules are hard to teach to me. This is not to say that the rules are not good, but that I find I'm much more comfortable playing with a core set of rules, all of which share a very similar C&C structure. This makes it much easier to chop and change between periods, without having to to try to remember which rules are 'in force', thus allowing one to focus on the game at hand, rather than the rulebook.

With this in mind I bought very few rules this year. The LFoD was a purchase more to do with supporting the American Battlefields Trust and gaining a whole load of excellent scenarios to boot, rather than for the rules themselves. These are perfectly fine, but the number of bases required for many scenarios is daunting, so some bath tubbing may be required in the future. Still worth getting for the scenarios alone.

Cold War Commander II was more of a treat and a long term project as back in the day I used to play a lot of games with the original rules. Whilst these were fine they did have issues and the current rules appear to address these plus have brought them into line with the split AT & AP stats as seen from BKCII onwards. The long term plan is to do some 'classic' Cold War Gone Hot games set in Germany circa 1985, using 6mm miniatures, which I feel work better for the bigger battles of this 'period'.

Hail Caesar II I had hoped to be released before Xmas, but it now looks likely to be a Spring 2023 release. I freely admit that I've struggled to get to grips with Ancient & Medieval games, aside from skirmish level action such as those fought with 'Lion Rampant'. None of the rules I've tried have ticked many of the boxes for me. A lot of this is largely down to current solo games and the fact that this 'old dog' is not up to learning any new tricks. So as per the above, the familiarity of the core engine and C&C should hopefully push me towards more games and painting some armies, given that I have a load based and primed already. Time will tell of course!

Wargaming Books Bought
Normandy '44 by James Holland
Brothers in Arms by James Holland
The Art of Warfare in the Middle Ages by Charles Oman (gift)
The Art of Warfare in the 16th Century by Chalres Oman
Duffy's The Army of Maria Theresa
Duffy's The Army of Frederick The Great
Crete, the Battle and the Resistance by Beevor
Russian Against Napoleon by Dominic Lieven (Father's Day gift)
Red Storm Rising by Clancy
Third World War by Hackett
Waterloo by Tim Clayton
Redcoat by Richard Holmes
Blandfords WWI Aircraft Guides
Vanished Kingdoms by Norman Davies
The Burma Campaign by Louis Allen
Osprey Japanese Tanks 1939-45 by S J Zaloga
Bloody Big Battles 1848 Scenario Book by Chris Pringle

As always I tend to buy and be given books as presents throughout the year and this past year is no exception. At first sight a rather eclectic mix, but looking at them they broadly fit into WWII, the SYW, Napoleonic and Cold War, all of which are part of my core periods these days. Not all have been read ( I have a book mountain to go alongside the lead one) but those that have have been superb, namely Waterloo, Vanished Kingdoms and the Burma Campaign. I'm trying to work my way through the aforementioned mountain alongside trying to remeber which ones I have yet to read! It can be hard to keep focus when a cursory glance at the bookshelf or pile will lead to a book being picked up, started and then I'm going down a completely different path! Honestly this is something that I enjoy and is one of the pleasures of owning physical books as it allows one to do this, something that I imagine is much harder to do on a Kindle for example.

Will there be more purchases for next year? Without a shadow of a doubt and I expect them to be along similar lines to the periods outlined above. However you never know and maybe some Medieval titles might appear once I have my grubby mits on HCII. 

Miniatures Bought
WWII AFVs
Late Medieval Infantry
WWI vehicles
19thC ImagiNations additions
WWII Campaign Japanese

Given my already substantial lead pile, I have been quite reserved in my purchase this year, although SWMBO might disagree with me on this! Most have been additions to existing forces to flesh them out or to add bits and pieces for a new campaign etc. The only completely new force are the WWII Japanese, given my sudden interest in the Burma Campaign, that did come rather unexpectedly out of the left field.

I expect next year to move along similar lines, with additions rather than whole new forces or Armies being bought. The only exception might be for the Cold War, but in all honesty I have current projects that I really should focus on. A provisional Cold War list has been drawn up, so you never know...

Miniatures Painted
WWII British AFVs - Shermans, A13 Mk II
WWII German AFVs - Tiger II, Panther, Jagdpanther 
Commission Figurines MDF Figures - Imagi-Nations
Pendraken Afghans for 19thC ImagiNations

Even by my standards, this has been a poor year on the painting front. The hot Summer weather certainly played its part, but at that time of year I paint very little anyway. My painting mojo was low until a mini-surge to get some units finished ready for the game I was playing at the Cotswold Wargames Day. A lack of deadlines, which is not an issue for the solo gamer, certainly played its part to: a forthcoming game certainly focuses the mind for sure. The butterfly nature of my gaming played its part too I'm sure, as I flitted between projects that often only required miniatures I already had painted.

Will next year be any better? I hope so but as others have mentioned in the past, this is a hobby afterall, so I suppose we should not worry too much if things don't get done, but some progress would be nice. Afterall I do enjoy painting when the muse is upon me.

Terrain Made
BUA's

For once a really quiet year on the terrain front! Not much to report as I have pretty much everything I need as it is. I do have a few things I would like to make for next year to go alongside some planned projects, but again nothing major, just some nice bits'n'pieces that will enhance the table rather than being major projects in their own right. 

Projects
BKCII campaign

The start of the year went really well with my Operation Cygnet campaign, loosely based around Operation Market-Garden, which I enjoyed playing, both the campaigns and the games themselves. And then nothing! Ideas came and went but looking back real life issues prevented me from being able to maintain enough focus and momentum to move things forward. I had planned either a campaign based upon the Invasion of Crete or something focussed on the AVBCW, but nothing came of those.

So for next year once again I have plans for another BKCII Campaign, this time based upon the Invasion of France 1940. I would like to do something along the lines of the SYW, as it is nice to have different challenges etc when playing Campaigns. Time will tell but the former is already being planned as I type...

Games Played
Practical Wargaming - 1
BKCII - 9
Live Free or Die - 1
Honours of War - 3
Shadow of the Eagles - 4
Black Powder II - 4
Lion Rampant - 2

Not a bad year of games, but as mentioned above, split roughly into two halves of the year. Roughly two games a month is not bad and probably about as much as I can manage given my role as a full-time parent carer. Most games were solo affairs, but I did have some great FtF games, both home and away, which was nice. You do realise that half the fun of our wonderful hobby is the social aspect of it, especially the in-game banter and the post-game chat on what worked, what didn't etc. One highlight for me was how easy I found it to set up my 2' x 2' games and how much fun could be had playing in this small area, whether at a 'Lion Rampant' skirmish level, or bigger games such as those played with Honours of War or even BKCII. One of the advantages of knowing and being very comfortable with sets of rules is that it is pretty easy to scale them up or down as required to suit the space available.

Next year I can see these 2' x 2' games featuring more often and ideally some linked Campaign games too, as the latter are much more satisfying. I'd like to think that there might be more FtF games, but with the current cost of living crisis, driving to play games might be something we have to think about before doing, due to the cost of fuel. Still one can but hope!
 
Wargames Shows Attended
Colours 2022
Cotswold Wargames Day
Reveille

It was nice to attend most of the shows that I would normally do pre-Covid this year. The highlight was the CWD as it has such a nice atmosphere, a great mix of games and a brilliant bunch of gamers. As always thanks to Keith Flint for organising this and to all the other gamers who make it such a wonderful day out.

Colours this year was a bit hit and miss to be honest. A couple of the games ticked all the boxes for me, but overall the standard and variety was not as good as previous years, not helped by some no-shows on the day itself. I know how much effort is required to put on a game, having done it over a number of years, but from my perspective, I go to game shows to see games, rather than shop. Being a dedicated 10mm gamer there is little there for me that I couldn't order online. I will certainly go next year and hopefully with my friend Keith too, as it's always better walking a show in company rather than on your own.

End of Year Thoughts
Not a bad year for me overall, but it could have been better if I'm honest. As mentioned above, one of the biggest issues for me as a full-time parent carer is actually finding the time and the mental energy to do stuff. Dealing with all the various people I have to on behalf of our son can drain one mentally and emotionally, leaving little left in the tank for gaming in all its shapes and forms.

Whilst I enjoy solo gaming, the only downside is the lack of deadlines to help focus the mind on painting etc, which is one of the advantages when playing FtF games. A case in point was the CWD when I was knocking out about a unit a day. It did feel a bit like work at times but the effort put in was very rewarding at the end.

Blogging has continued to be a pleasure to do and to be part of a wider community across the World. Reading other Bloggers posts at the start of the day is a nice way to kick things off and can often spur me on to paint, game, introduce me to new periods, ideas and books etc. So a big THANKYOU to all of you for your efforts and those that have taken the time to comment on my posts, it is truly appreciated.

Looking Forward to 2023
Well what will the New Year hold for me? I imagine much the same as this year just gone by if I'm honest. I never set targets or plan too much as I know from experience that I will fail to meet them! Having said that, I aim to play more narrative Campaigns as mentioned above and ideally boost the painting numbers somewhat. A dedicated space for the latter would help immeasurably, but as I don't have one the kitchen table will have to suffice until then.

So it just remains for me to wish you all a very Happy New Year and I sincerely hope it brings you all health and happiness!

Tuesday, 27 December 2022

The Longest Day - June 21st 1940

When my parents re-located to North Norfolk many years ago, on the drive to their new house I noticed a couple of pillboxes en route between Brandon Creek and Southery. Quite why they were there was a bit of a mystery, as they didn't seem to be mutually supporting each other, nor guarding anything of significance. The only thing I could think of was that they were covering a crossing over the Great Ouse river along the A10, one of the old major roads in East Anglia.

Then over the years as I read about Operation Sealion, the British did believe that an invasion via East Anglia was a possibility, to the point that they stationed a large part of the defensive force north of London, presumably in case this transpired to be the route the Germans would take. It was thought that the Fens would be ideal tank country for an invader, but anyone who has lived or travelled there would know that any vehicles stands out for many miles, with little or no cover at all. In fact they look like the ducks at fair ground shoots they stand out so much! Alongside this is the fact that any vehicle is forced to stick to the roads and farm tracks, rather like the Allied AFV's during Operation Market-Garden.

Whether these pillboxes were built during the invasion scare or later, I'm not sure. Looking at the terrain, I think they were largely built to cover any potential paratroops landings as they do not really cover the roads, given that they appear to be built only for machine guns and not anti-tanks guns. To get an idea of the terrain they cover, hopefully the following Google Street View image will give you an idea.

From time to time I have pondered on gaming a 'what if?' invasion based around landings in East Anglia. Nothing came of it until a small window of opportunity presented itself just before Xmas. A few days of scribbled maps and ideas, based upon a 2' x 2' board, coalesced into a game played on the Winter's Solstice. I simply transfered the day to the Summer's Solstice for the purposes of the game, setting aside all the logistical issues in relation to this that would have confronted the Germans.

See below for some basics details of the game:

Basic OOB
The Germans have two Fallschirmjager Kompanies (one are Assault Engineers) and one Luftlande Kompanie with integral Heavy Weapons. The British have a re-inforced Company. Both sides have some off-table support (see below).

Scenario Details
A few things specific to this game were:
  • Mist on Turn 1, with 50cm visibility and -1CV.
  • Scheduled smoke bombardment on the pillbox on Turn 2.
  • Pillbox has MG only and a restricted 45 degree arc.
  • The River Ouse embankment counts as linear terrain for shooting and a hill in terms of visibility.
  • The windmill and house count as BUA, so 6+ to hit but no saving throw given that the structures are made of wood.
  • German Air Support can arrive from Turn 3 on a normal command roll from the FAC.
  • British improvised armoured canal boat can arrive from Turn 2. Roll a D3 to see which Turn it arrives.
  • The Fallschirmjager and Luftlande troops arrive at random points along their based edge, using a D6 to determine exactly where.
  • The British Armoured Cars can arrive from Turn 3. Roll a D3 to see which Turn they arrive.
  • The British have the support of one random Hurricane Ground Attack. From Turn 3 it will arrive on a roll of 6+ on a D6, reducing by one each following Turn until it arrives.

The Game
The board was set up the night before and in the cold light of day, a few things tweaked as per my previous post. With everything set it was time to kick-off the action, so without further ado:


An overview of the table. The Germans would arrive via the Southern and Eastern table edges.

The pillbox guarding the bridge over Brandon Creek.

An isolated farmhouse.

A windmill powering the drainage pumps and moving the water into the Great Ouse river.

The bridge across Brandon Creek and the Ship Inn.

The random die rolls placed the FJ in the middle of the table edge, with the Assault Engineers to the left.

The Luftlande troops likewise would arrive roughly in the middle of the table edge. Off table support can be seen above them.

The British troops dug-in along the banks of the Great Ouse, with commanding views across the Fens.

The end of Turn 1. The FJ pushed forward in the early morning mist, but the Assault Engineers were spotted and came under intense fire from the pillbox, suppressing them and causing casualties. The Luftlande troops failed to arrive, no doubt disorientated by the mist. The FJ tried to put down smoke from their mortar by blind the pillbox, but failed to do so.

The Assault Engineers take heavy casualties just as the action opens. Not a good start for them.

The FJ FAC has moved along the ditches, ready to call in Air Support.

The FJ on the right have taken cover in the ditch and started to put fire into the pillbox, but fail to suppress it.

At the start of Turn 2, the scheduled smoke arrives to blind the pillbox.

The end of Turn 2. The Assault Engineers took advantage of the smoke to move forward to the cover of a ditch, as the Luftlande troops arrived. They came under fire from the river bank, suppressing a unit, but return fire suppress the British unit too. With no targets in range nor visible, the Britsh kept their heads down and remained in cover.

The Assualt Engineers close in on the pillbox.

The Luftlande troops arrive.

The British have a good view of the enemy, but they are out of range.

The armoured canal boat arrives at the end of the Turn, ready for action in Turn 3. Their on board mortar will be a welcome boost to the British defence.

At the start of Turn 3, the FAC calls in a Stuka strike on the pillbox, but they fail to hit it.

The end of Turn 3. The Assault Engineers try to move forward to where the rest of their Kompanie is, but their MG is suppressed by fire from the pillbox. The Luftlande troops move into the farmhouse, but one unit is suppressed by fire from the windmill. The FJ reply, suppressing the British unit in the windmill, but their MG is suppressed by mortar fire from the armoured canal boat.

In the British Turn, the pillbox manages to KO the Assault Engineers MG and mortar fire suppresses one of the Assault Engineer units.

The Assault Engineers are having a tough time, taking casualties that means their attack plan is already faltering.

The Luftlande troops take casualties as they occupy the farmhouse.

The mortar support from the armoured canal boat is making a big difference to the British ability to defend their positions.

The British Armoured Cars arrive at the end of the Turn and are another welcome boost for the British.

Once again the FAC calls in Stuka support, but again they fail to hit the pillbox.

The Hurricane arrives shortly after the Stuka departs...

... and its strafing run leads to one Assault Engineer unit KO'd and an HQ and MG unit also suppressed.

The end of Turn 4. The FJ at least manage to put down some smoke from their mortar unit on the pillbox and the Luftlande troops suppress the British in the windmill, but other than that they had few targets. Their attack was not quite going to plan.

The weakened Assault Engineers.

The Luftlander troops are re-inforced by some FJ to try and out flank the pillbox.

The Armoured Cars arrive, but are too hesitant to make any impact on the battle this Turn. The pillbox is taking a steady flow of hits and the MG unit inside is close to being KO'd.

The Luftlande troops concentrate their fire on the windmill, nearly KO'ing the British there.

Yet again the Stuka dives into the attack and finally hits its target, KO'ing the British MG unit inside.

The end of Turn 5. With the pillbox finally silenced, the remaining Assault Engineers move forward to take control of it. The FJ and Luftlande both advance to try and get the attack moving again, but take fire in the process, with one FJ suppressed in the open.

The mortar once again comes to the aid of the British, KO'ing a FJ and Luftlande unit. With the Germans exposed, the other British HQ failed its command roll. A lucky break for the Germans.

The Assault Engineers finally take the pillbox and threaten the Armoured Cars.

The FJ and Luftlande troops manouevre to prosecute the attack.

The view from the British positions by windmill.

At the start of Turn 6, the German FAC calls in the Me-109 for a strafing run along the river bank, which KO's one British unit.

The end of Turn 6. As the Assault Engineers fire on the Armoured cars, suppressing one, the other Germand units push forward towards the river bank, suppressing one British infantry unit there. In a desperate dash, one FJ unit rushes forward and assaults the windmill, which is held by a badly mauled unit and just takes it hand-to-hand combat.

The British commands all failed their command rolls, meaning the Germans would be in a good position next Turn to really press home their attacks. With their losses mounting, the British quickly withdrew over the bridge at Brandon Creek, leaving the Germans in command of the battlefield, but at a heavy cost to themselves.

The Assault Engineers pour fire into the Armoured Cars as the FJ take the windmill.

The FJ and Luftlande surge forward.

The Luftlande close in on the river bank.

The FJ take the windmill.


End of the Game
With the British withdrawing and the Germans consolidating their positions, time to take stock of the losses suffered by both sides:

British - 3 x Infantry, 1 x MG.
Germans - 2 x FJ, 1 x Luftlande, 2 x MG.

Post Game Thoughts
A nice little game there and a perfect sized action to fit in just before Xmas. A game that could easily have gone the way of the British, but for the odd failed die roll here and there. Likewise the Germans could have had a better start and almost steam rollered the British. So some thoughts from the game:

  • For a quickly put together action, albeit one that I've had in the back of my mind for years, I think this played out pretty well and gave some nice challenges for me as the solo player. Being comfortable with BKCII makes it so much easier to construct scenarios, as you sort of get to know what will work, well certainly for the solo games I like to play.
  • The British were hampered from Turn 4 onwards by failed command rolls. One of two successful orders might have inflicted enough losses to blunt the German attack, or even stop it dead in its tracks. With the effective shooting from the pillbox on Turn 1, I thought that the Germans were in for a bit of a beating, but 'twas not to be. 
  • The higher German CV's and Initiative distance reflected quite nicely their better C&C at this stage of the War. 
  • The Stuka attacks were less than effective, but then trying to hit a pillbox must have been a damned hard thing to do, given how small they were. Still one successful attack might have been enough to give the Germans an early edge. 
  • Using the German mortar to drop smoke onto the pillbox felt right, even though it took a few Turns for it to actually happen. Bad die rolls were responsible for this, but it did mean that it wasn't easily available for more normal fire support for the infantry.
  • I know the canal boat is highly speculative, but I wanted to include it for a bit of fun and was an easy way to provide the British with some indirect fire support at a random point in the game.
  • The Hurricane arrived at just the right time and the Die Gods were with the pilot as just enough damage was inflicted on the Germans to hinder their ability to attack.
  • What the game did higlight nicely was how hard it is to make an attack over such billiard table flat terrain. Just think of how the Allies suffered in the Peel Country after Operation Market-Garden and you get a good idea of what fighting in the Fens would have been like.
  • The Germans I played more aggressively than normal, as with limited support, they really needed to push ofrward to take the objective, no matter the losses, which in the end were significant. The last ditch assault on the windmill went in their favour, just, but could easily have turned out quite differently.

This game has re-inforced my desire to play a 1940 campaign, played over similar terrain, to see what might have happened if the British hadn't moved out from their positions on the Dyle at the start of the French Campaign. Something to research and mull over during Winter and which might push me towards finishing enough German infantry for this to be a realistic prospect in 2023. At least I have nearly everything I need for the British, but a few extras would be useful.

Well this is probably the last game of this year. A review of 2022 will be published before the New Year, all being well. I have my notes so just need to add text as it were. So until then, stay safe and keep healthy!


Saturday, 24 December 2022

Merry Xmas!

I just want to wish all of you who have followed my Blog and commented on it over the past year a very Merry Xmas and a Happy New Year! The interaction with fellow Bloggers has been greatly appreciated and will certainly be so in 2023. I hope you all have a wonderful day and maybe Santa will bring you some nice presents.

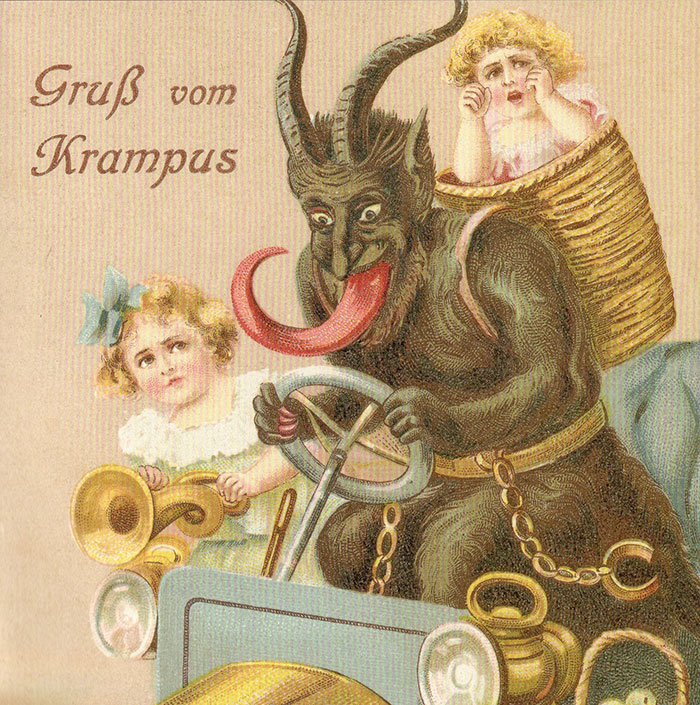
Let's hope you don't get a visit from the following chap! Why anyone would consider this suitable for a Xmas card beats me, but things were certainly different in the 19thC


Monday, 19 December 2022

Creating A BKC Scenario

In the latest Warning Order magazine, Matt Irsik had some post-game musings on the rules themselves and also how they played their games, which made for some interesting reading. He asked for some ideas on how other gamers approached things and I duly sent him my two penn'orth. So as mentioned at the end of that post, I thought I'd jot down how I approach creating a scenario for BKC, but this could equally apply to other rulesets and periods. So in a rough chronological order:

Select A Setting or Period
  • This normally starts with what am I in the mood to play. It might sound bloomin' obvious, but you want to game what grabs you at that particular time.
  • So is it Normandy '44, Sicily '43, Russia '41 or Poland '39? Each have their own merits for sure and sometimes you just fancy some Early War action as opposed Late War.
  • Rather stating the obvious again but what collections do you have to game with? If mainly a Late War tank based force, then this naturally limits your options. 
  • For Solo play all of the above is quite easy to sort out, but with other friends and gamers, you might have to adjust things to suit. 
Select A Scenario
  • Do you want to play a historical action, such as the D-Day landings or Poland '39?
  • Or do you want to play one based upon a Grant & Asquith book for example?
  • To keep things simple depending upon the time you have, then one from the rulebook might fit the bill nicely.
  • Some scenarios might not be applicable, such as an Airborne Landing in Poland '39 or Russian '45. Not impossible of course but worth bearing in mind. I find that if it feels right and plausible, then you get a better game from it.
OOB
  • I tend to do some basic research for both sides at the start once the Period and Scenario have broadly been selected.
  • Decide who will be the Attacker, who the Defender. Depending upon the Period, this might point towards one force rather than the other. So Poland '39 is most likely to see the Germans attacking, but it is not out of the questions to have the boot on the Polish foot for something different.
  • Do you use Points or Historical OOB? I tend to use a mix of both. For solo games I'm not too fussy, but if I've got a friend coming over, I will take more care and attention to try and make sure they have a good game by giving both sides a chance as it were.
  • The Scenario will often dictate the OOB being used. So for example a tank heavy force would not really be suited for a Stalingrad type scenario. I know it's stating the obvious a bit, but still worth bearing in mind.
  • How many players per side will there be? Based upon experience each player should have roughly a Battalion plus Support to play with. If more than that it can be hard to keep track of things and then the game can start to bog down with too many units to co-ordinate. So if each player does have their own Battalion, then roughly speaking they can do their own Turn alongside other players without too many problems surfacing.
Table Size
  • Do you have space for a 6' x 4' table or larger or will that be a push? Maybe 4' x 4' would be more appropriate? Again Scenario selection and the number of players might mean a certain size is required. Naturally this can feed back into the above affecting the Scenario, OOB etc selected.
Table Layout
  • Quite early on I will start sketching out the table layout, based upon all of the above, to help me start firming things up in my mind. If a scenario from a Grant & Asquith book, then the broad details are already there and then just need tweaking to suit the period being played. Again the same is true of a historical action. But if it's a scenario from the rulebook, then you are obviously starting with a blank page. This will take more time and effort but it is a rewarding task in its own right IMHO.
  • On this 'map' I will sketch out rough deployment areas, scheduled attacks, reinforcement arrival points etc. Again for solo play I do not have to worry too much about this and can keep it quite simple. If a friend is coming over then this will be more detailed and accurate so that they can plan there Attack or Defence. 
  • I will take into account major areas of terrain, such as woods, rivers, BUA's etc to make sure that the terrain does not unduly inhibit one side more than the other. Sometimes this will naturally happen if based upon a historical action, but then that's part and parcel of playing it.
Scenario Specifics
  • Are there any specific things that need to be taken into account, such as the weather, night time action, when reserves might arrive?
  • What is the Objective for either side for the game? If using a scenario from the rulebook, then this is easy to sort out. Ditto for a Grant & Asquith type scenario, but some tweaks might be required. For historical actions then this is less easy to figure out, well for me it is. Either side might have different victory conditions, which can make for a fun and challenging game.
  • Player briefings are usually required alongside a map so that again they can plan things in advance and hit the ground running when arriving chez moi.
Pause & Take Stock
  • At this point I normally like to leave things for a day or two to let everything settle down in my mind and to let it wander a bit. Quite often I will have some slightly altered ideas on all of the above and tweak things here and there. A period of reflection is well worth doing if you can as it really does make a difference.
Set Up The Game
  • Normally I try and set the game up at least a day in advance, taking into account all of the above. I will work round and view everything from all sides to try and make sure I haven't made any glaring errors!
  • Then if possible I leave it over night and come back to it fresh in the morning. It is amazing what you pick up when you look at it with fresh eyes the next day. Often I will move the odd thing here and there to remove possible obstacles the might inhibit one side more than the other. Again I will walk round just to give things a final once over.
  • If playing with a friend, I will send over some photos of the layout from their own side, trying to give them an advanced view to help them plan their strategy and tactics.
Time
  • A normal game for me lasts about 2-3 hours when playing solo or with a friend, where we each have roughly a Battalion per side with support. If more people are playing then you might need to allow another hour or so.
  • This excludes of course setting up and taking down the game. Normally the set up will take me a couple of hours as I find it is good not to rush things so that you avoid some glaring terrain placements that might unduly affect the game.
  • Take down is around an hour or so.
A Campaign
  • These days I find campaigns a much more attractive option and a better gaming experience. Naturally this is not an option for everyone but a lot of the above can be carried over from one game to another.
  • I like narrative based games where the outcome of one game naturally suggests one or more options. The alternative of course is to use the Campaign system in the BKCIV rulebook, or one of the many options out there.
  • For the players, having to marshal their forces over the campaign is something that to my mind, really adds another dimension to our games. No last minute Pyrhhic victories in a one off game, but careful consideration and husbanding of ones troops.

Well there you have it. I hope this might have been useful in some shape or form, but I found it interesting to jot these things down from my own point of view.

So until next time, stay safe and keep healthy.

Saturday, 10 December 2022

Warning Order Issue #61

Matt Irsik and the chaps from Wasatch Front Historical Gaming Society have just released the latest version of their magazine, Warning Order #61. As always an interesting read and to my mind just as good as any of the main print wargaming magazines. Of interest to me are their thoughts on playing BKCIV and their recent trial game of Honours of War, both faovurite rulesets of mine. They also touch upon playing the War of the Roses using Hail Caesar!, but this seems to be prior to knowing that the new edition will include this period in the book. Plenty to enjoy on a cold and cloudy Sunday morning that we have forecast tomorrow.

Matt always likes feedback so if you have the chance, let him know your thoughts etc. I plan to on how I approach BKCII/IV and HoW as well.