Sunday, 22 September 2019

The Brexite Campaign - Race to the Rhein

For the next game in our narrative campaign, I once again turned to the ever useful 'Scenarios for all Ages' by Mssrs Grant & Asquith. A brief persual led me to chose Scenario 10: The Important Bridge, as it fitted in nicely in terms of a story of the aftermath of the first battle.

Background Fluff
After failing to halt the advancing French troops, the remnants of the Wessex Militia are in retreat, hoping to beat the French to an important crossing of one of the rheins that criss cross the Somerset landscape. The French are hard on their heels, but have become split up, possibly due to enjoying the local cider. As news of the battle has reached Taunton, Colonel Farrage has dispatched troops to try and gain the bridge before the French. So it is a simple case of who can gain control of the bridge over the rhein...
 
French OOB
Northern Force
3 x Line Infantry
1 x Light Cavalry (Inferior)
1 x Dragoons
1 x Light Artillery

Western Force (Random arrival from start Turn 2)
1 x Light Infantry
3 x Line Infantry
1 x Dragoons
1 x Light Artillery 

British OOB
Eastern Force
4 x Line Infantry
2 x Dragoons
1 x Light Artillery
1 x Medium Artillery

Southern Force (Retreating force from game 1)
1 x Light Infantry (Inferior)
1 x Line Infantry
1 x Militia (Inferior)
1 x Light Cavalry (Inferior)

Table Set up
Below can be seen the table set up. The rhien runs downs the centre of the table, with the bridge in the middle. The water levels are low and so the rhein is also fordable 9" either side of the bridge, but not to artillery.


The hedges mark the table boundary, with North being at the top pf the 'photo.

The remnants of the Wessex Militia from game 1.

Troops from the Taunton garrison.

Rather a lot of French troops awaiting to enter the table.


Turn 1
The British got to move first, with both brigades moving onto the table. The French faired less well, with some units failing to appear; still drinking cider?

The end of Turn 1.

The Wessex Militia advance, led by a unit of Taunton's Tartars, with Light Infantry taking up the rear.

The Taunton Garrison march on as fast as they can.

The French arrival is rather tardy, but they have an awful lot of good troops.


Turn 2
Again, the British won the movement intiative, with the Wessex Militia starting to ford the rhein, to gain protection on its Eastern bank. The French moved a best they could, with their re-inforcements arriving this turn.

The end of Turn 2.

The Wessex Militia cross the rhein, as the Light Infantry cover them.

The piecemeal arrival of the French re-inforcements, led by their Dragoons.

The French line failed to move, thus blocking the other troops.

British Dragoons cover the advance of the Taunton Garrison.


Turn 3
The British again moved first, rolling a '6' that allowed the Taunton Garrison to gain the bridge. The French advance continued, but despite both sides closing on each other, they were out of range of any shooting.

The end of Turn 3.

The Wessex Militia safely across the rhein, with their Light Infantry in the woods by the bridge.

Some of the Taunton Garrison have deployed in and around the bridge.

The French skirt around the woods to avoid fire from the British Light Infantry.

British Dragoons observe the French across the rhein.


Turn 4
The French won the movement initiative and started to cross the rhein and to advance as much as possible. The British Light infantry evade out of the woods onto the bridge as the rest of the Taunton Garrison deploys. Both side artillery is now within range, but both fail to hit.

The end of Turn 4.

The Wessex Militia roll a '1', but this still allows them to change formation, forming up along the bank of the rhein.

The British Light Infantry on the bridge.

The Taunton Garrison control the bridge.


Turn 5
The French continue their advance, with the British reacting where needed. Once again both sides artillery fail to hit anything.

The end of Turn 5.

The French column advances towards the Wessex Militia.

The Taunton Garrison move towards the woods and the fortified manor house.

The British troops in a commanding position by the bridge.


Turn 6
As the French shake out into line, the Taunton Tartars and Dragoons move across to protect the left flank of the Wessex Militia. By the Manor House, the French troops start to move into and around it. Both sides fail to cause any hits with their shooting.

The end of Turn 6.

A view from the French side of their right flank.

An overview of the action around the bridge and manor house.

The view from the Wessex Militia's position.


Turn 7
As the French and British contest the manor house, the Fench right flank makes another quick move, allowing them to move up to the rhein. Both sides trade hits from their shooting.

The end of Turn 7.

The Wessex Militia come under fire and respond in kind. However, they lack any supporting artillery.

The woods and manor house.

A view along the rhein.


Turn 8
As both sides continue to manouevre to gain an advantage, the Wessex Militia are forced back by musket fire.

The end of Turn 8.

The Wessex Militia are sent reeling by musket fire. Being inferior troops, it will be hard to rally off hits for maybe a Turn or two.

Movement around the woods continues, with both sides wary of each other.


Turn 9
The Wessex Militia start to withdraw as they cannot match the French fire superiority. On the British right flank, they start to come under pressure, with the Light Infantry once again evading back into the woods.

The nd of Turn 9.

The Wessex Militia start an orderly withdrawl, covered by their supporting cavalry.

The formidable looking French line.

The French start to cross the rhein in pursuit.

A view from the French side.

Another view of the French forcing the rhein.


Turn 10
The French gain the upper hand, as they press forward on both flanks, with another unit of the Wessex Militia being forced back by musket and artillery fire.

The end of Turn 10.

The Wessex Militia continue to be forced back and are in a poor state.

The French close in on the woods and threaten to turn the British right flank.

The French move across the rhein in force.

A view of the French positions in the manor house and around the wood.


End of Game
With the Wessex Militia hors de combat and the right flank under pressure, the British troops wisely decided to quit the field of battle as their position was untenable, with their retreat covered by their cavalry. Although the French had forced the British troops back, they had failed to deliver a knock out blow. Bloodied but unbowed, the British troops would live to fight another day.
 
Post Game Thoughts
I think that ended up being one of the longest games we had played of Honours of War, with it lasting around 2 1/2 hours. However the time flew by as we were both engrossed in the game and it was quite close until the final turn or two. so as always and in no particular order, some post game thoughts:
  • A lot of the game was spent in manouevering troos to try and gain an advantage, so combat occured only quite late in the game. This might sound dull but it certainly wasn't and gave an interesting challenge for both of use.
  • With the British gaining the bridge early on, the French had no real choice but to try and force a crossing of the rhein. This they were ultimately able to do, mainly due to having a light artillery piece on their right flank, which the Wessex Militia could do nothing about. In campaign terms, the Wessex Militia are out of the picture for the foreseeable future.
  • Both side artillery was largely ineffective for most of the game. This was certainly true around the bridge and manor house, where they couldn't hit a barn door. 
  • The scenario worked well in terms of our narrative campaign, which is developing a character of its own. We have one more game based in Somerset, before we head up to the Scottish borders to see what Bonnie Prince Charlie has been up to.
  • The French and British cavalry had little to do, other than threaten flanks etc, but this felt right. If either side had managed to cause some more casualties earlier on, then they might had had an opportunity to operate on the flanks or in the rear. Maybe next game?
  • I've enjoyed actually playing with some of my own figures (Pendraken's superb AWI range) and this has spurred me on to paint more. I hope I can maintain this momentum. 
  • Our game was played out on a 3 1/2' x 2 1/2' area, which was more than adequate for the forces involved. At this scale, you don't need a large area to have a great game. In fact, I think this smaller games of around 2 brigades a size are perfect for mid-week games.

I have an idea already for our next campaign game, but with it being the 75th anniversary of Operation Market-Garden this week, will be commerating this with a one off game. I need to do a bit of research, but it is more than likely to be based around Hell's Highway. So until next time...

Friday, 13 September 2019

Honours of War, the Brexite campaign 1744 - Game 1

Whilst chatting at the end of the recent Cotswold Wargames Day, Dave and I both agreed that it was time for a change on the wargames front. Honours of War was the first suggestion and Dave mentioned that we hadn't really played the French vs the British. Always up for a challenge, it was time to go and sort out some scenarios etc. When I got home I looked through 'The Wargamers' Annual 2019' that I had won at the CWS and in it was the second part of a fictional French invasion of the United Kindgom in 1744. This immediately piqued my interest and after a quick e-mail to Dave, we agreed make this our campaign.

Background Fluff
After the French loss at the Battle of Dettingen in 1743, Louis XV was a tad miffed. He wanted the British out of Europe, pure and simple. To help him achieve this aim, he approached the 'Young Pretender', Charles Edward Stuart, to raise rebellion in Scotland whilst the French force landed in England to march on London. To this end Louis XV called upon the services of the Irish emigre, Marshal Sachs O'Ffone, to lead the invasion forces. Unfortuantely for the French ill winds in the Channel led to the dispersal of the French fleet, who landed for to the West. Having to change his plan, Marshal Sachs O'Ffone decided to march upon Bristol, from there to then move upon London.

The French fleet had been tracked along the South coast as it was blown off course, allowing the King, George II, to raise the County Militia's. The Wessex Militia was under the command of  one Colonel Farrage, who was known to somewhat of a Francophobe. He had limited forces at his disposal, but gathered those that he could and set off to meet the French along their expected route of march.

Scenario Details
As we hadn't played Honours of War for sometime, I reached for my trusty 'Scenario For All Ages' by Grant & Asquith, to come up with something interesting that would allow us to get a handle on the rules. I chose 'Scenario 22: Making the Best of a Bad Job' which I had played before and which fitted nicely as the first game of our campaign.

The Wessex Militia, re-inforced by some of the Bristol Garrison, are camped near woods by Westonzoyland, awaiting the French forces. However after a night of drinking scrumpy and eating mangol wurzels, they have neglected to post guards and as a result are surprised by the French, who stumble upon them whilst in line-of-march.

British OOB
2 x Brigadiers (both Dependable after random die roll)
2 x Light Infantry (Inferior)
3 x Militia (Inferior)
1 x Line Infantry (Standard)
1 x Dragoons (Standard)
1 x Light Artillery (Standard) 

French OOB
1 x General (Dependable after random die roll)
2 x Brigadiers (both Dependable after random die roll)
2 x Light Infantry (Inferior)
6 x Line (Standard)
2 x Dragoons (Standard)
1 x Hussars (Inferior)

Note: the French lack artillery at the start of the campaign as due to the chaotic nature of the landings, the artillery is stuck somewhere in the rear. It will be available next scenario.

Set Up
The deployment of the troops can be seen below:

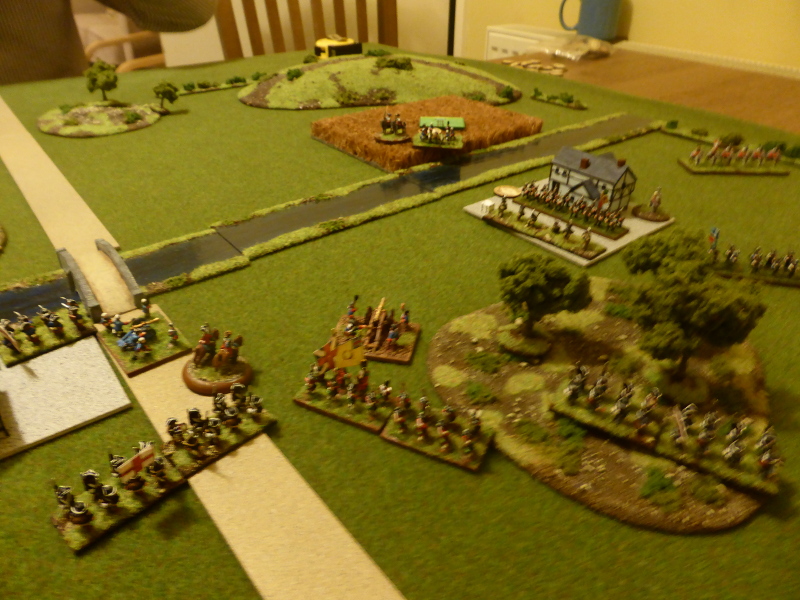
The English are encamped in the South Eastern corner. Their dragoons are off table foraging, but will return once they hear any firing from either side. the French can be seen in line-of-march along the road.

The view from the English camp.

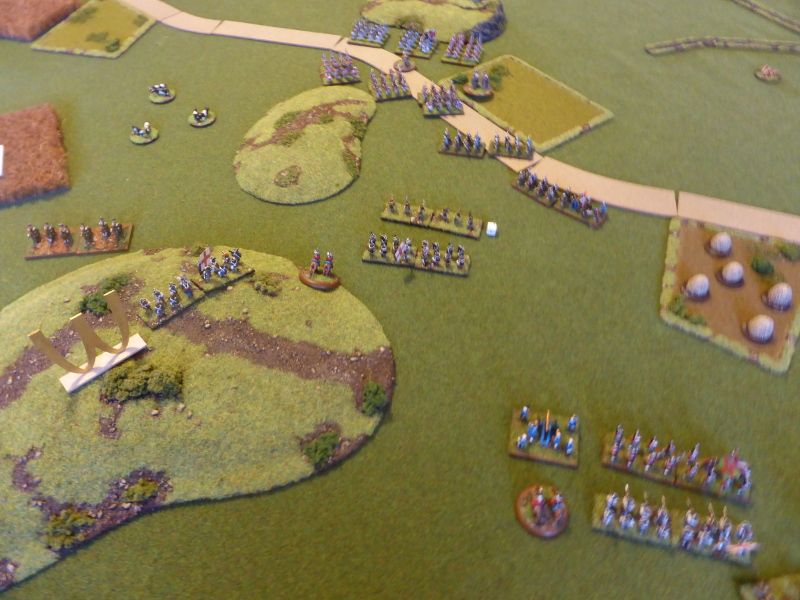
The long line of French troops, strung out along the road.

The golden 'W' marks the boundary of Westonzoyland.


Turn 1
A quiet start as both sides manouevre as best they can. It is worth pointing out from the outset that Dave rolled an inordinate number of 6's for his command rolls, thus allowing his troops to move with alacrity.

The end of Turn 1.

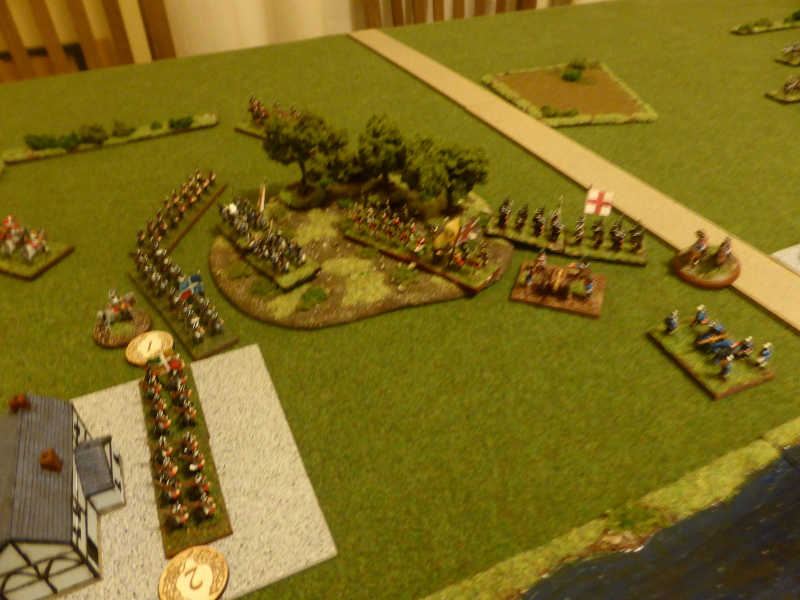
The English shake out into some form of defence.

As the French advance, they send their cavalry out onto either flank, as the infantry advance in the centre.


Turn 2
Similar to Turn 1, with both sides advancing as best they can.

The end of Turn 2.

The English anchor their flank by the golden 'W'.


Turn 3
As the French cavalry move around the English flanks, the infantry in the centre engage each other. Off board, the English Dragoons start to march to the sounds of the guns, but will not arrive until next turn.
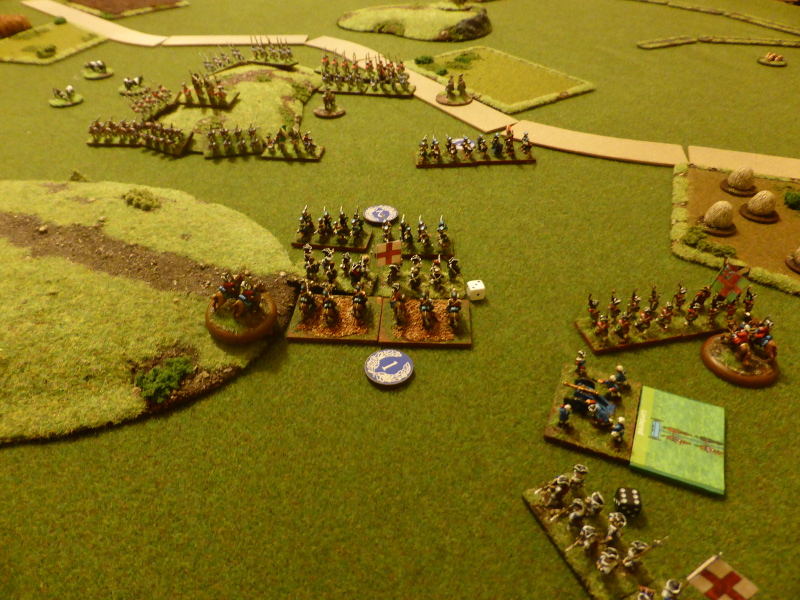
The end of turn 3.

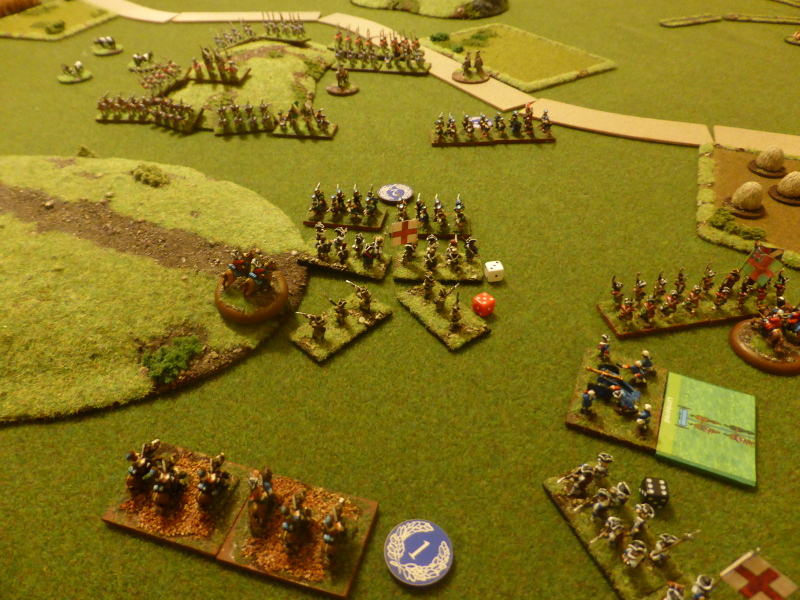
Both sides manouevre to be able to fire at each other.

The English Militia take hits from the French Light Infantry.

The English right flank anchored by the woods, with the French Dragoons in the distance.

The golden 'W; looks on...


Turn 4
With the English held by the French Light Infantry, the cavalry close around the flanks and the Line Infantry push forward to try and support. The English Dragoons appear in the distance but are unable to enter the board yet.

The end of turn 4.

The French Hussars try to turn the English left flank.

The French Line Infantry try to form up so as to advance to the attack.

Both the English Militia and French Light Infantry are taking hits.


Turn 5
The French Hussars manage to turn the English right flank, forcing them to pull back. The French maintain pressure in the centre, which results in one English Militia unit being Done For, which as it retreats, causes another unit to retreat as it has 4 hits. Sadly just when the English Dragoons are needed, they rolled a 1 and therefore remained at the edge of the table.

The end of turn 5.

The English Militia retreat as they are Done For, causing problems as they do so.

The French Hussars in the perfect position in the English rear.

The French lined up ready to attack.


Turn 6
Just as the French are ready to administer the coup de grace, the Line Infantry roll as 1, therefore are unable to advance! However the French Hussars are able to charge to morale hit Militia, that are destroyed, allowing the Hussars to follow up and charge another unit, which are also destroyed. By the woods, the French Dragoons charge the English Light Infantry, which leads to both sides retreating after a couple of rounds of combat.

The end of Turn 6.

The French Hussars destroy an English Militia unit...

... who fall back, inflicting hits on another unit as they do so.

The French Hussars follow up...

... and charge another unit...

... which they also destroy...

... leaving an English Militia unit somewhat isolated and in trouble.

An overview at the end of Turn 6.

The English Militia protect the gun as it limbers up and retreats to fight another day.

As the English retreat, the French Dragoons hold open the road to Bristol.


End of Game
At this point it was obvious that the destruction of the remaining Enlgish units was a foregone conclusion. Thinking in terms of the campaign, the English wisely decided to leave the table to the victorious French. A random die roll showed that the English had managed to get their gun to safety, rather than it falling into French hands. At list it and its crew have lived to fight another day.

Post Game Thoughts
A fun and entertaining game that allowed us to get re-acquainted with the Honours of War rules. We were a little rusty but most things came back to us. If we weren;t sure, we simply decided what would be the likely outcom and went with that. 

As always, a few thoughts on the game;
  • Honours of War once again provided a great game and one that felt right for the linear tactics of the 18thC. they remain my go-to rules for this period and are likely to remain so for the foreseeable future.
  • The scenario worked well and provided the right amount friction without being too difficult for a first game. The English Militia were always going to find this a tough task, but that didn't matter. This was very much the  first game in a narrative campaign and as such worked a treat.
  • Playing a campaign allows us to basically have lots of fun and certainly adds more enjoyment compared to stand alone games. We can add fluff as and when we see fit and the next scenario kind of sorts itself out based upon the outcome of the previous one.
  • It was nice to finally finish off some of my Pendraken AWI troops that are standing in for the English at present. This has spurred me on to try and get more finished in time for the next game.
  • I've decided to tweak some of my terrain to make it a bit smarter, but first I need to concentrate on my figures. I might get some by the next game, but will have to wait and see. 
  • I do enjoy playing games set in the mid-18thC. There is something very appealing about the whole linear warfare period. For our games a 4' x 4' table is more than ample, so it shows that you don't need loads of space to play this period, or others for that matter.

So the first game is out of the way and the French are on the move. I have the rough outline of the next scenario already sorted, but I just need to tweak a few things. All being well part 2 will be next week. So until next time...

Monday, 9 September 2019

Wargames Shows - a personal view

Having been to two very different wargames shows in two weeks and read reviews of both on various Blogs, as well as chatting with traders and attendees, I thought I'd jot down my personal thoughts and experinces. So in no particular order:

  • My job is as a modelmaker for a design company, so I find making stuff very easy. So when I see some of the stunning bespoke boards at shows, I have a good idea of the time, money and commitment required to make them. It therefore irks me slightly at times when I read comments such as 'the games on show were average' etc. I'm not sure what fellow gamers are expecting? Ver Linden style games which look stunning and not much happens, if at all? Even putting on a 'standard' home style game takes a lot of time and effort. I should know as I used to do it for quite a few years.
  • At the recent Cotswold Wargaming Day I made a simple 'Old School' board out of MDF, which I then gave a basic paint finish to. Nothing fancy but materials wise the cost was circa £40 and in terms of hours spent making it, probably 18 hours plus spread over a few weeks. Imagine what some of the visually attractive games cost in terms of materials, hours spent etc. So maybe take time to take this into consideration before 'critiscising' the quality of games?
  • Now I love to see great terrain, but I actually prefer to see games that I feel I could put on at home using a simple gaming cloth and standard (if there is such a thing) buildings, hills etc that are multi-purpose in their use. Sadly I do not, like most gamers, have a dedicated gaming space, so storage is always an issue. 
  • A greater variety in scales would be great to see. I know 28mm is probably the dominant 'scale' of the hobby, but a good mix of scales and table sizes would be refreshing to see. Pendraken try to ensure variety at their Battleground show and the Joy of Six does what it says on the tin, but maybe the organisers could try and get a bit more variety? Now I'm fully aware that you are reliant upon the gamers willing to put on a game, but surely vareity is the spice of our gaming lives?
  • I go to shows primarily to see wargames in action. However at times I feel in the minority as listening to other gamers in queues to get in and talking to the traders, the shows seems to be about buying stuff and there just happens to be some games on show as well. So I find the Cotswold Wargames Show a refreshing change when it is all about the games. Don't get me wrong, I like to have a peruse as I did this year at Colours, but don't forget the games!
  • I just wish all games would have some information on display about the game being played, the rules used etc. Show guides sometimes help in relation to this, but not always. It would be nice to have people to chat to about the game, whilst it was being played, but naturally this epends upon having enough people interested to help out, which is  difficult to achieve I know. Bruce Weigle was on his own at Colours but was doing a sterling job trying to run the game and chat to people. When I helped Michael Leck and Co at Salute, we always had two people playing the game and ideally two on hand to talk to the show attendees. Again hard to achieve but it would make the experience greater IMHO.
  • Skirmish games on small tables, such as 2' x 2', often get denegrated as not being real wargames, but given some of the above, this maybe all that certain gamers have the space and money to play. We are not all retired with the family flown and therefore plenty of gaming space, so spare a thought for those of us who can only game on the kitchen table (if SWMBO permits!).
  • I'll admit to having succumbed to some of the above in my time, so I hope to remember my comments here when looking at games in the future. To err is human and all that.

Hopefully the above may have been of interest to you and as always I look forward to reading any comments, both for and against the above.