Friday, 15 May 2015

The Bard's Tale - Campaign Game 4

After an enforced break, Dave and I were finally able to meet up to complete our mini Dux Bellorum campaign. With the Welsh having been dominant in all the previous games, we felt that a final showdown as per 'The Bard's Tale' fitted the bill nicely. We decided to do away with any advantages that the Welsh had accrued so far, plus neither side taking any Strategies & Tactics. A 'vanilla' game maybe, but we thought it would work out rather nicely.....

Turn 1 Welsh - 6 LPs Irish 6 - LPs
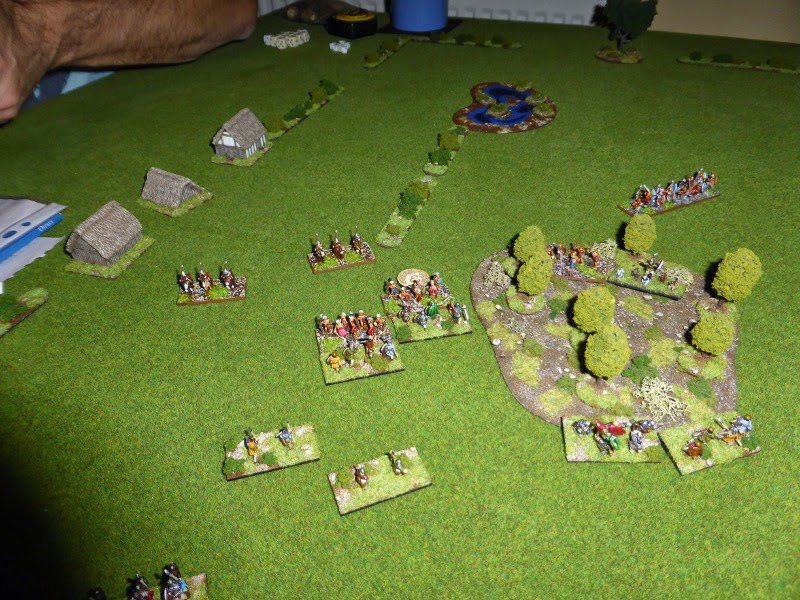
The Welsh were the Agressors for the final game and after both sides had deployed, and more importantly decided which units their Bards were attached to, things got off to a brisk start. The Welsh cavalry advanced to the hill, not expecting the Irish to be within charge range, which they were. Dave had put his Bard with said cavalry, who in the combat lost one point of cohesion, but gained one victory point! I on the other hand had not put my Bard with my cavalry and so gained no points at all.

Both sides deployed for action, with the Welsh having to use an Irish Bard on loan. Oh the shame of it.
Both sides advance, with the Irish cavalry charging home. The Welsh prevailed in the combat but fail to gain any victory points due to poor positioning of the Bard.


Turn 2 Welsh - 6 LPs Irish 5 - LPs
At the start of the turn we experienced a power cut, leading to accusations of cheating on my part with my loaded die and metal table overloading the circuit. I couldn't possibly comment but no die rolling took place until the power had come back on...

Having learnt my lesson, the Welsh placed their Bard with the cavalry, which saw the loss of one Irish cavalry unit, but both sides gained victory points for this. A blunder saw a Welsh unit move forward, but only at half-pace. The Irish skirmishers burst out of the wood, attacking the Welsh skirmishers in the bog, who lost one point of cohesion. Luckily the skirmishers managing to hold on helped to secure the Welsh right flank for the moment.

Fighting takes place on both flanks as the centres come close to uncontrolled charge range.


Turn 3 Welsh - 6 LPs Irish 5 - LPs
In a bid to gain maximum victory points, the cavalry fought each other to complete destruction, whilst in the centre combat was joined.

The Welsh keep a reserve as the centres clash.
Both battle lines fragment, leading to some interesting choices next turn.


Turn 4 Welsh - 5 LPs Irish 4 - LPs
As the battle raged, the Welsh lost two units, leaving the Irish with more Leadership points next Turn. Crucially though the Irish were fast outpacing the Welsh in terms of victory points, with three of their units close to  their cohesion limit.

The Irish left flank is nicely poised to turn into Welsh next turn.
Cohesion points abound across the table, with Dave's victory point die visible in the top right hand corner.


Turn 5 Welsh - 3 LPs Irish 4 - LPs 
A particularly bloody turn put both sides on Break tests, which they both passed with ease.

The losses on both sides are clearly visible.
The Irish Companions are outnumbered, but fighting gamely on for eternal glory...


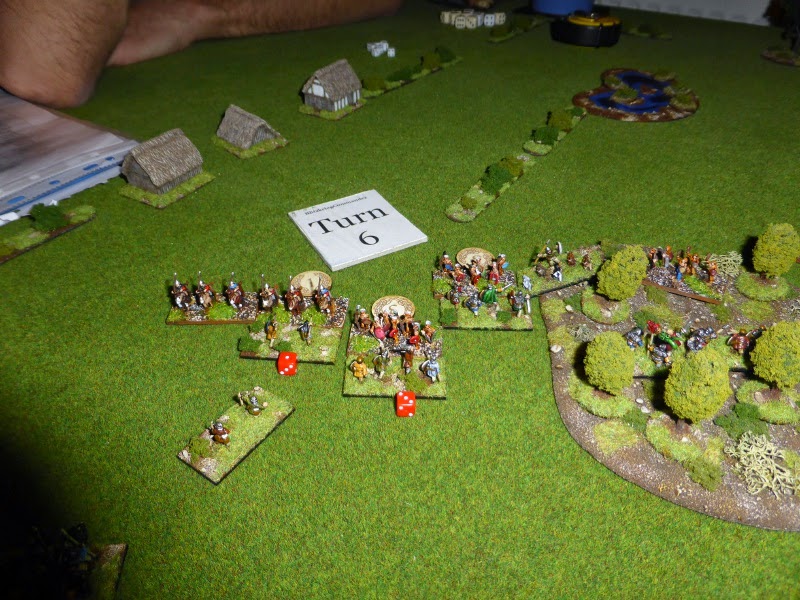
Turn 6 Welsh -  2 LPs Irish 3 - LPs 
The Irish Companions finally succumbed to Welsh numbers, which lead to the automatic rout of their army. Despite losing the battle, they won the game as they comfortably had about a 2:1 advantage in victory points over the Welsh. So it is the Irish that will be immortalised in songs and poems, with the Welsh, well having none to their name.

Post Game Thoughts
Well a cracking game that had a completely different feel to all of the others. As always a few thoughts:
  • This certainly was no 'vanilla' game. If anything it played better without any of the S&Ts of the previous games. We learnt very quickly that the Welsh Monks were game changers, so it was nice to have an even playing field as it were.
  • The Bards add a nice touch to the game. Their positioning took a lot of thought, which added another level to the game. I really must paint mine up as as a Welsh player, using an Irish Bard must surely bring me eternal shame?
  • Both of us generally went for all out attacks, which seemed fitting for this scenario, which made it rather bloody but also great fun.
So the mini-campaign game has been great fun and Dave a great opponent. The games have created their own narrative, which is nice, allowing us to easily choose the next scenario. I would recommend this sort of mini-campaign to anyone out there, as it is much more fun to play than a stand alone game.

So what next? Well we have decided to start with some 'Black Powder' games, kicking things off with some Prussians versus Austrians in the Seven Years War. These will be followed by a 'tour' of various periods of the 18th and 19th Centuries, culminating in the Franco-Prussian War I would imagine. All being well things will get moving next week.

Friday, 8 May 2015

'Black Powder' Kreigspiel

Anytime for wargaming in the past few months has been in very short supply due to the usual factors of work and family life. Finally the planets aligned today, giving me a brief window to get some form of solo game in. I decided to give my Kreigspiel style blocks a run out along with 'Black Powder' as in the next few weeks, if all goes to plan, I will be playing quite a few games with this ruleset.

Scenario Details
I toyed with various scenarios, eventually settling on Scenario 4, 'Encirclement or Breakout' from 'Scenarios For All Ages' by Grant & Asquith. The forces were exactly as per the book, with two blocks forming a unit, with infantry side-by-side and cavalry one behind the other. The single square blocks were horse artillery and the round ones command units. 

The Red forces had advanced deep into Blue territory, expecting to launch an attack on the Blue forces in the bottom left hand corner. However as dawn broke, they realised that they were in danger of being surrounded and cut off. Their objective was therefore to exit off any table edge with 80% of their forces intact. For the Blue forces their objective was to destroy or capture 60% of the Red forces.

Nominally I set this battle circa 1750 somewhere in Europe, with both sides having 'vanilla' forces and a command rating of 8. I've added some comments to the photos to give an idea of how the game played, rather than a detailed AAR as this was very much a trial game.

The table with both sides in their deployment zones. The Red forces had 3 command units, the same as Blue, but Blue had them split with one per force.
Red decided to exit off the way they had 'come on' but all Blue forces moved toward them at great speed (2-3 moves due to good command rolls).
Combat is is joined, with Blue cavalry charging into the Red infantry rear unit, whilst the Red roght flank shoot at the Blue forces sweeping around the wood.
The Blue cavalry win the combat, pushing Red back, but flee having failed a morale test themselves due to a single casualty suffered!
Red carrying on moving as quickly as they can towards their baseline, with their right flank once again taking the attack towards the Blue forces by the woods.
Blue press forward where possible.
Despite the pressure, Red manage to extract a large part of their forces (the blocks in the bottow left hand corner).
Blue closes in for the kill, hoping to inflict severe casualties to give them victory...
...but despite destroying one unit, the other flees off the table, resulting in a draw.

Post Game Thoughts
Well it was great to be playing a game again after such a long break. It's been sometime since I played 'Black Powder', but below are some thoughts on the game, the blocks and the rules:

  • The Kreigspiel style blocks work for me visually. I know they won't be to everyones taste, which is understandable, but I like them. In fact I'm considering investing in some Lego blocks of different colours and shapes to give me more 'detail' to the units for future games.
  • They also allow for a very simple Fog-of-War to be replicated on the tabletop. As each block is the same size, your opponent won't know whether they are facing Cuirassier cavalry or Prussian Landwehr, until the unit can be spottted or a unit reveals itself due to its movement rate. This is something that I will be exploring in future games when I have an opponent.
  • The 'Black Powder' rules are pretty easy to pick up and are a nice toolbox for those that want to add variety and detail to their units. I'm still a complete novice, so am looking forward to exploring the options and period details in future games. Ditto 'Pike & Shotte'.
  • The only downside with 'Black Power' I would say is the extremely generous movement rates. This has been commented on by many other gamers, and I will look at the suggestions that address these issues in a 'Hail Napoleon' article in a past issue of WS&S.
  • The scenario played suffered a bit from the above 'va va voom' movement as mentioned above. If the red forces had had some good die rolls and the Blue bad, they could have gotten off the table without a shot being fired. Hopefully the above solution will help fix this. 
So all-in-all nice to have given my blocks and the rules a quick run out. I think based upon tonights game I will go with some smaller forces and some simple encounter scenarios, just to allow me to get a more detailed hang of the game mechanics, as well as a feel for certain periods, unit upgrades etc.


Friday, 13 March 2015

Dawn attack - Campaign Game 3

For the third game in our campaign, Dave and I decided that the 'Dawn Attack' scenario fitted the bill. The scenario was played straight from the book, with no house tweaks or anything. The game was played over a week ago and despite some notes, my recollection is a bit vague. However I will do my best to give you a feel of how the game played out.

Deployment
Dave arrayed his forces in his deployment zone, screened somewhat by a marsh and hedge, with a wood in the centre to try and disrupt my troops as much as possible. As per the scenario I moved two of his units (see the end for thoughts on this), choosing his Companions and one unit of cavalry. I 'broke' the cavalry up to try and slow down their formation into a group that would most likely hinder my advance. As Dave only had to hold on for 14 Turns for a win, anything I could do disrupt him would help my cause.

Turn 1 Welsh - 9LPs Irish - 6 (1) LPs
The Welsh advance got off to a classic with:
Steve: "Watch me blunder in the first Turn."

Well suprise, suprise that is exactly what I did! Complete Muppet. It did cause much hilarity but once the laughter died down, the blundered unit advanced forward which was what I wanted to do in the first place. Elswhere the Welsh advanced whilst the Irish tried to form groups.

Both sides deployed ready for a merry-go-round chase around the central wood.
The Irish after I had moved two units.
The Blunder...
... and the Muppet that rolled it.


Turn 2 Welsh - 9 LPs Irish - 6 (2) LPs
General movement by both sides, with the Welsh moving cavalry and skirmish units forward, whilst the Monks just knelt and prayed. The Irish formed up as best they could.

The Welsh wheel around the wood whilst the Irish try and form up to get away as quickly as they can.


Turn 3 Welsh - 9 LPs Irish - 6 (3) LPs
Basically a repeat of Turn 2

The Irish have been able to form up and make good use of the wood to keep away from the Welsh.


Turn 4 Welsh - 9 LPs Irish - 6 (4) LPs
The Welsh line starts to break up due to failed Bravery rolls, especially with the cavalry stalled in front of a major part of the Welsh battleline. The Irish deploy a screening force by the hedge whilst they try and manouevre round the wood.

The battlelines of both sides fragment.


Turn 5 Welsh - 9 Irish LPs - 6 (5) LPs
The Welsh manage to move enough units into range of the Irish, triggering an uncontrolled charge. This is enough to stall the planned withdrawl of the Irish, allowing the Welsh to bring their advantage in units and Leadership die to bear.

Battle is joined at last.
The Welsh win, pushing the Irish back.


Turn 6 Welsh - 9 LPs Irish - 6 LPs
Both sides are irresistibly drawn into the battle, which is what the Welsh wanted.

More units move into combat, but a major part of the Welsh warband is stuck behined their cavalry.
The mixed melee is clearly evident.
Units move into the woods but are unable to see each other. The Irish Companions and support start to make a dangerous flanking move...


Turn 7 Welsh - 9 LPs Irish - 6 LPs
The Welsh cavalry finally manage to charge, but it is still hard to bring units to bear where they are needed. The first losses happen, with the Irish losing 2 units to the Welsh 1, all being skirmish units.

The Monks have advanced but 3 units of the Welsh left flank simply cannot find a way into the melee.
Battle rages in the woods, but the Welsh are able to use their extra Leadership points to their advantage.


Turn 8 Welsh - 8 LPs Irish - 4 LPs
The loss of 2 units really hurts the Irish cause, as the Welsh now have a 2:1 advantage in Leadership points, allowing them to dominate the combat.

Despite still not being able get 3 units into combat, the Welsh certinaly have the upper hand.


Turn 9 Welsh - 8 LPs Irish - 4 LPs
The Welsh pressure finally tells as the Irish lose a Warrior and Cavalry unit. This much surely spell the beginning of the end for the Irish...

The Irish are under pressure all across the battle lines.


Turns 10-11 Welsh - 8 LPs Irish - 2 LPs
The Irish manage to hang on in Turn 10, but in Turn 11 they lose more units, causing them to automatically break.

The Irish under severe pressure on the left of the woods...
... that proves too much in Turn 11, handing the game to the Welsh.


Post Game Thoughts
As always another entertaining game of Dux Bellorum. So as usual some post-game thoughts:
  • This was always going to be a hard game for the Irish, but especially off the back of two successive losses and the advantages that that had given the Welsh.
  • Dave's tactics were spot on in trying to avoid combat as long as possible. However some failed Bravery rolls put pay to his plans early on, allowing the Welsh to force the Irish into combat.
  • We thought that the ability of the Agressor to swap two pairs of units a bit harsh, so we reduced this to just two units. However, this really hampered Dave, so in future games I may ditch this (but see below re: LPs).
  • One thing that has really stood out in this mini-campaign is the advantage that having 3 extra LPs has given the Welsh. At the start I didn't think this would be such a game changer. How wrong could I be. Originally I was going to take 'Stampede', but Dave chose this along with 'Wardogs'. This only left my with my unit of 'Monks', so I chose these plus another point of leadership just to see how it played. Well, it really handed the Welsh a massive advantage, which only became obvious having played so many games. This may be due to the fact that we played with 32 points plus 5 points of Strategies & Tactics, just for the fun of having plenty of choices. However this is something to bear in mind for future games.
Well, for our final game we have settled upon the 'Bard's Tale' for a suitably fitting and bloody climax to the campaign. Both sides will only have 32 points and no S&Ts, so I imagine it will be a fast and brutal game, which should be great fun. Now I just have to paint up a Bard figure in time for next week.


Post game thought

Tuesday, 3 March 2015

Dux Bellorum Blunders Table

During our current campaign, Dave suggested we try using the Blitzkreig Commander II blunder table, rather than the 'lose 1 point of cohesion' suggestion from the rulebook. Now I love this blunder table as it can really add spice to a game. Ask my friend and regular gaming chum Craig, who has a tendency to explore all the options of this table! So I thought I'd give it a go and after a few tries, I came up with the following table.

When a Blunder occurs, roll 2 D6 and refer to the table below for the result:
 
2 -  Roll 1 D3 and the Bravery of the unit or group is reduced by this amount for the next turn.
3 - The Bravery of the unit or group is reduced by 1 for this turn and next turn.
4 - The unit or group makes one half base width move directly towards its own baseline.
5 - The unit nearest to the enemy loses 1 point of cohesion. If there are several unit that qualify, randomly roll to see which one it is. The loss of the point of cohesion may lead to the loss of the unit.
6 - The unit or group makes 1 half base width move directly towards the nearest enemy unit. If this brings a Warrior unit to within 1 base width of the enemy, they must charge into contact as if using the uncontrolled charge rule.
7 - The Companions unit makes 1 base width move directly towards their own baseline.
8 - The unit or group makes 1 base width move directly towards the nearest enemy unit. If this brings a Warrior unit to within 1 base width of the enemy, they must charge into contact as if using the uncontrolled charge rule.
9 - The unit nearest to the enemy loses 2 points of cohesion. If there are several unit that qualify, randomly roll to see which one it is. The loss of the 2 points of cohesion may lead to the loss of the unit.
10 - The unit or group makes 1 base width move directly towards their own baseline.
11 - The Companions unit Bravery is reduced by 2 for this turn and the next turn.
12 - Roll 1 D3 and the Bravery of the unit or group is reduced by this amount for the rest of the game.

It is up to the player whether to include a whole group in the result of the blunder, or just one unit. The former may seem a bit harsh whilst the latter may break up the group as a result of movement or loss. Just play what feels right for you. After all it is only a game.

So there you have it. I hope the above may be of interest to you. In the last game my Monks blundered, rolling a 5 which led to the loss of a unit of skirmishers as they already had lost 1 point of cohesion. As a result my left flank was exposed, but it caused much hilarity for both myself and for Dave.

If you have any thoughts, comments or suggestions on the above, I'd love to hear them.

Sunday, 1 March 2015

River Battle - Campaign Game 2

For the second game of our Dux Bellorum campaign, Dave and I decided upon the 'River Battle scenario from the rulebook, details of which can be found below:

Scenario - River Battle
  • Details as per the scenario on p58.
  • Deployment as per p18.
  • The River was not classed as deep, thus allowing for a more fluid battle.
For this game Dave decided, rather reluctantly, to drop the Killer Sheep and Wardogs, opting wisely to spend his 4 S&T points on an extra 2 points of Leadership. Having seen the effects in previous games, this almost gave the Irish parity with the Welsh. 
 
Deployment

Both sides deployed for battle.
The Irish have their skirmishers in the woods on their right flank, with a large cavalry force on their left.
The Welsh have skirmishers on both flanks and the Monks in the centre for divine intervention.

 
Turn 1 Irish - 8 LPs Welsh - 9 LPs
The Irish were the Agressors and got off to a good start, with all units moving bar the cavalry, which Dave had declared as his strategic reserve. Obviously they thought that being in reserve meant that they shouldn't move! For the Welsh the pattern was similar, except that the Monks remained praying at the foot of the wonderous cross.

The Irish skirmishers push on through the woods, to try and turn the Welsh left flank. In response the Welsh sent a lone skirmishers unit to try and slow them down.


Turn 2 Irish - 8 LPs Welsh - 9 LPs
In essence a repeat of Turn 1, with the Irish cavalry and Welsh Monks refusing to move, leaving both of us cursing said units.

The Irish line holds its shape, whilst the Welsh one breaks up to deal with the developing threat to its left flank.
The Irish horse in the background are not playing ball, whilst the Irish skirmishers are really disrupting the Welsh line, just by their presence.


Turn 3 Irish - 8 LPs Welsh - 9 LPs
Things really hotted up in this turn. The Irish horse had obviously been lulling the Welsh into a false sense of security, as they rolled a double 1, promptly charging right across the river into the Welsh horse. Shooting by the skirmishers was ineffective on both sides. However a mass of uncontrolled charges erupted from both lines, the result of which was the loss of 2 Irish Noble units with the Welsh having sustained lots of hits, but no losses.

The Irish horse charge home.
Battle is suddenly joined.
Leadership points are carefully placed.
The Welsh sustain lots of hits, but crucially are in a position to turn the Irish left flank.


Turn 4 Irish - 6 LPs Welsh - 9 LPs
The battle continues to rage, with the Irish turning in on the Welsh left flank, but critcally the Welsh have turned the Irish left flank, with the Irish losing another unit.

The centre generally holds, bit both flanks are being threatened.
The Welsh left flank manages to hold, but the Irish one has been turned. The Irish horse have been unable to destroy their Welsh counterparts and are now threated to the flank and rear by Welsh foot units.


Turn 5 Irish - 5 LPs Welsh - 9 LPs
The battle reached its bloody climax, with boths sides taking significant losses. The Welsh Monks kick things off with a blunder, resulting in the loss of a skirmish unit on the left flank. In the cavalry clash, both sides lose a unit of horse. The slow attrition that the Welsh have suffered in previous turns finally tells, with them losing 3 units to the Irish 1. 

This put both sides on a break test, which the Irish failed and the Welsh managed to pass.

The bloody end...
...with the Welsh just managing to hang on.


Post Game Thoughts 
Once again another great game, that could have gone either way at the end, even with the possibility of both sides routing off the table. So as always a few post game thoughts:
  • Not having the river classed as deep made for a much more enjoyable game. It allowed both sides freedom of manouevre, but still restricted the horse units.
  • Not having a hill made the game more fluid, as neither of us were fixated upon one piece of terrain.
  • Leadership points are proving to be the most useful thing as far as Strategy and Tactics are concerned. Once you start to get behind on these, it is very hard to come back in the game as the opponent can dominate the combat area.
  • Lose a flank and you lose the game. A simplistic view but the loss of the flank tends to be critical, unless you can realign quickly.
  • Again I had one turn, Turn 3,  of some very lucky die rolls, leading to the loss of 2 Irish Noble units. Dave on the other hand had poor die rolls in his cavalry charge in the same Turn. If I had lost my cavalry, his horse could have rampaged into the Welsh rear, which would have greatly affected the outcome of the game. On such little things do games turn upon.
So with another Welsh win, the next game will be 'Dawn Attack', which should favour my Welsh as not only will I have more points to play with, but the Irish will only have 1 leadership point on Turn 1, 2 on Turn 2 etc. Dave will also only have 3 S&T to play with, so has decided to call upon his wardogs again.

Things are moving nicely towards a natural finish for this campaign, after which we are most likely to move onto Black Powder in some form or other.